How to create Class and Object on Arduino IDE
I want to do OOP (Object Oriented Programming) on Arduino. How to create Class and Object on Arduino IDE (version 1.x and 2.x)? For example, I want to create a class to control LED.
There are two ways to create and use Class on Arduino.
- Create Class by making a library and include it into libraries on Arduino IDE
- Create Class in the same folder with Arduino sketch
The rest of this will show how to create Class in the same folder with Arduino sketch.
Let's assump that we want to create a class, called LED, to do the following works:
- Turn on a LED
- Turn off a LED
- Get the state of the LED
Let's do it step by step:
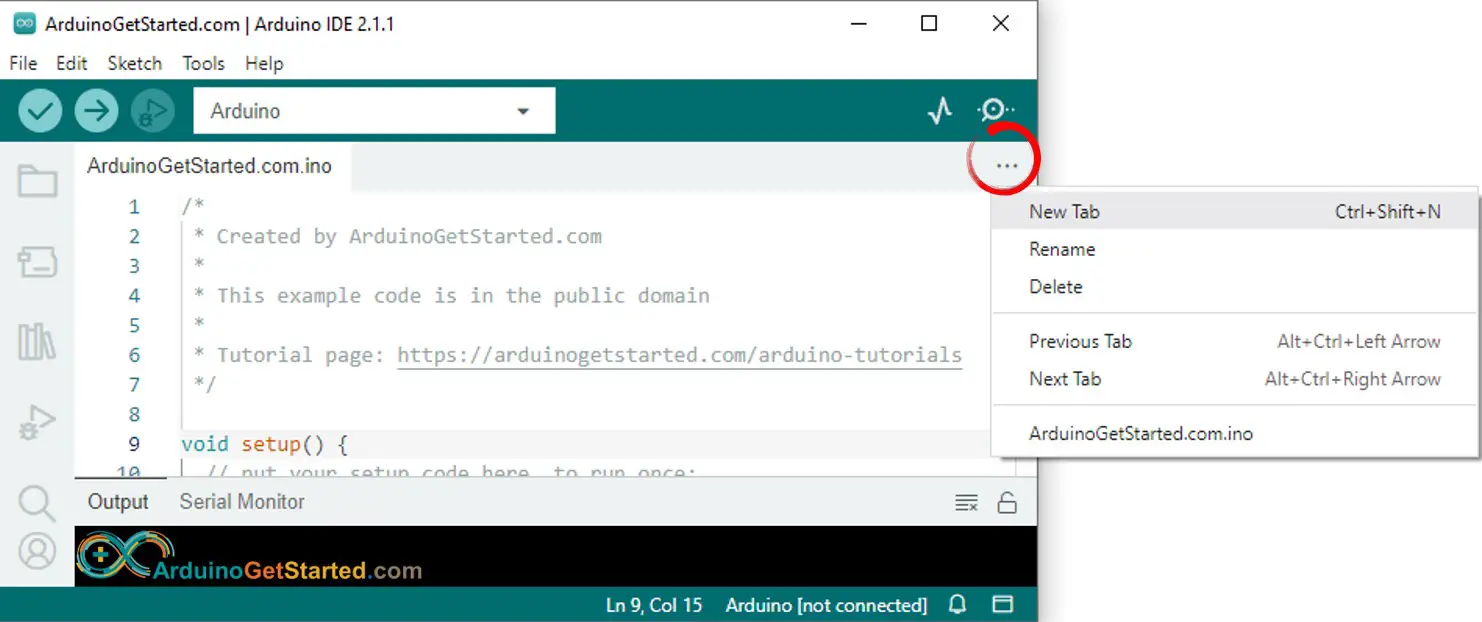
- Either click on the button just below the serial monitor icon and choose "New Tab", or press Ctrl+Shift+N.

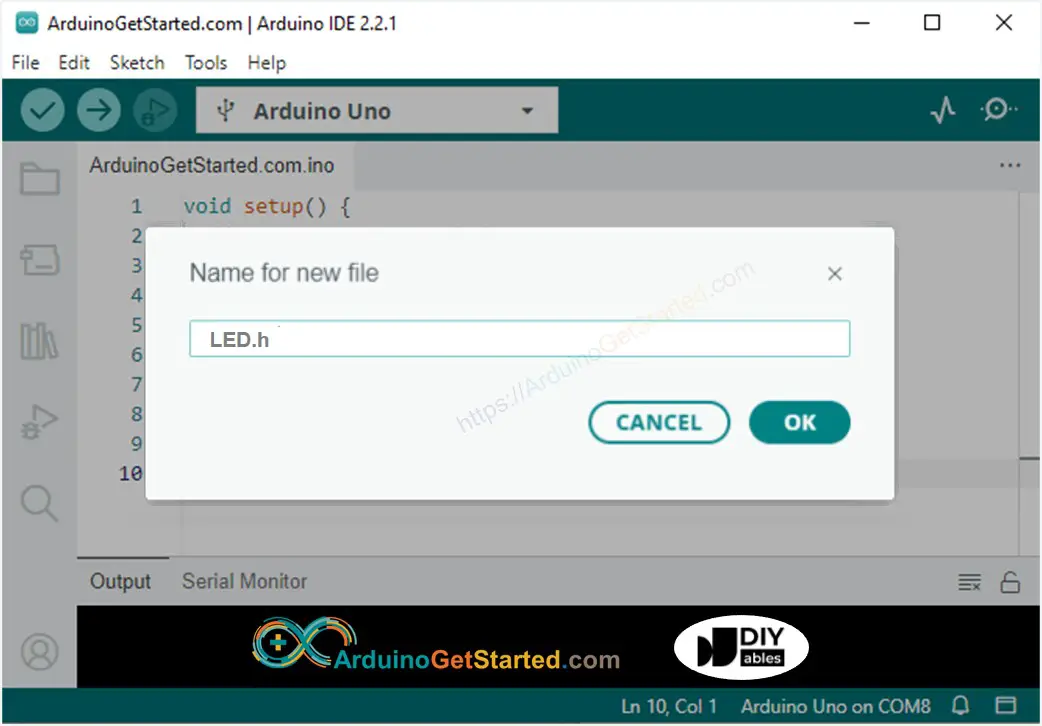
- Give file's name "LED.h" and click "OK" button

- Copy the code and paste it to that file.
- Again, Either click on the button just below the serial monitor icon and choose "New Tab", or use Ctrl+Shift+N.
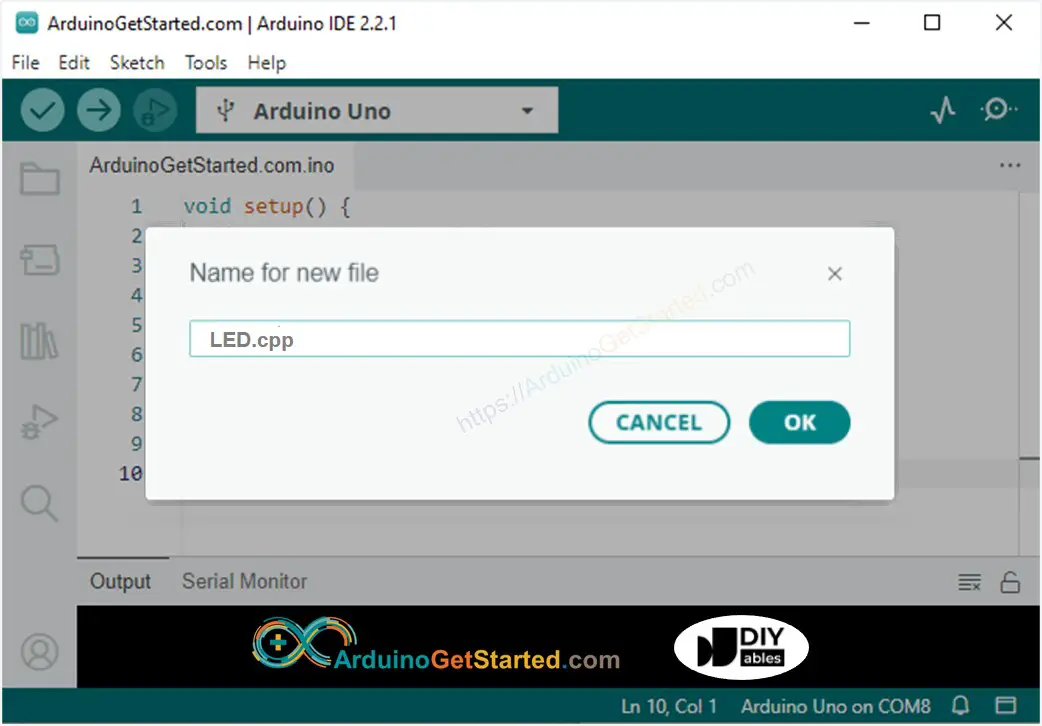
- Give file's name "LED.cpp" and click "OK" button

- Copy the code and paste it to that file.
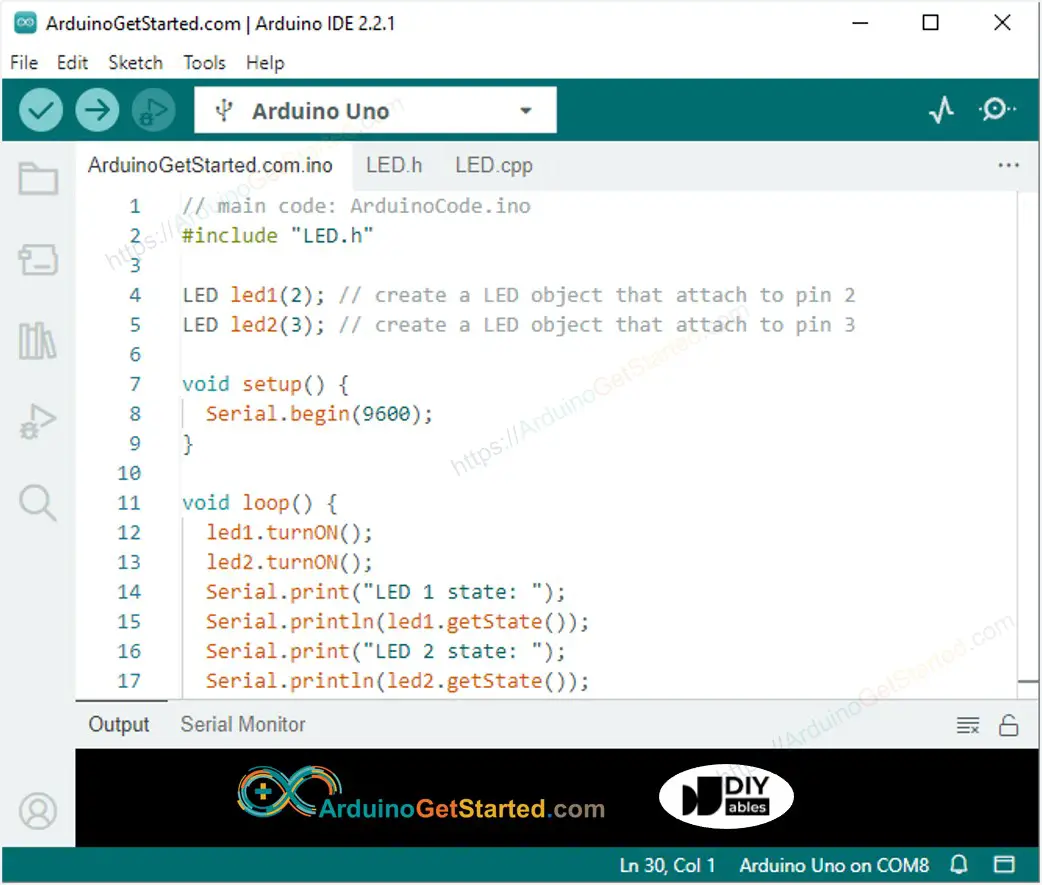
- Navigate to the ArduinoGetStarted.com.ino tab
- Copy the code and paste it to that file.
Now you will see three files in three tab on Arduino IDE:
- LED.h: This is a header file and it contains the class's declaration.
- LED.cpp: This contains the class's definition (also called implementation).
- ArduinoGetStarted.com.ino: This is main code of Arduino project. This file includes header file and creates objects of the class.

※ NOTE THAT:
Because the class files (LED.h and LED.cpp) are stored in the same folder as main sketch (ArduinoGetStarted.com.ino), You need to call #include "LED.h", not #include <LED.h>
Test the class and object by:
- Upload the code to Arduino
- See the result on Serial Monitor
※ NOTE THAT:
The above code is a simple LED class. You can refer to our Arduino - LED library to learn more
See more references:
Buy Arduino
| 1 × Arduino UNO Buy on Amazon | |
| 1 × USB 2.0 cable type A/B Buy on Amazon | |
| 1 × Jumper Wires Buy on Amazon |
Additionally, some links direct to products from our own brand, DIYables .
