Arduino Pull-up Pull-down Resistor
- What is pull-up and pull-down resistor?
- Pull-up Resistor vs Pull-down Resistor?
- Why do we need to use it with Arduino?
- When do we need to use it?
- How to use pull-up and pull-down resistor with Arduino?
What is pull-up and pull-down resistor
A pull-up resistor or a pull-down resistor is used with a digital input pin of Arduino, as well as other micro-controller, to prevent the floating input issue
The terms pull-up and pull-down imply how the resistor is wired (will be presented in the next part).
- For a digital input pin, we should NOT use both pull-up resistor and pull-down resistor. Use one of them only.
- The pull-up or pull-down resistors are used ONLY with digital input pins.
- If we use a pull-up resistor, one side of the resistor is connected to the digital input pin and the other side is connected to VCC ⇒ That is why it is called pull-up
- If we use a pull-down resistor, one side of the resistor is connected to the digital input pin and the other side is connected to GND ⇒ That is why it is called pull-down
Pull-up Resistor vs Pull-down Resistor
The pull-up resistor and pull-down resistor solve the floating input problem. Let's take the button with a pull-up or pull-down resistor for example. The other digital input sensors are the same. They have the following differences:
In wiring:
- The button with a pull-up resistor
- One side of the resistor is connected to the input pin of Arduino, the other side of the resistor MUST be connected to VCC
- One side of the button is connected to the input pin, the other side of the resistor MUST be connected to GND
- The button with a pull-down resistor
- One side of the resistor is connected to the input pin of Arduino, the other side of the resistor MUST be connected to GND
- One side of the button is connected to the input pin, the other side of the resistor MUST be connected to VCC
- Using an external pull-down resistor
- Using an external pull-up resistor
- Using an internal pull-up resistor (recommended)
In programming: the reading state of the input pin when using the pull-up is opposite to the reading state when using the pull-down resistor. The next part will present in more detail.
Why do we need to use it
If we do not use a pull-up resistor or pull-down resistor for a digital input pin, When reading the state of the pin, we will get a random value between 0 (LOW) and 1 (HIGH).
The below table shows the differences if we use and does not use pull-up or pull-down resistor for a button that has one side connecting to a digital input pin of Arduino, the other side is specified on the table
| Input State | when pressed (closed) | when NOT pressed (open) |
|---|---|---|
| WITHOUT pull-up/pull-down, one side of the button to GND | 0 (LOW) | undetermined (randomly between 0 (LOW) and 1 (HIGH) |
| WITHOUT pull-up/pull-down, one side of the button to VCC | 1 (HIGH) | undetermined (randomly between 0 (LOW) and 1 (HIGH) |
| WITH pull-up | 0 (LOW) | 1 (HIGH) |
| WITH pull-down | 1 (HIGH) | 0 (LOW) |
When do we need to use pull-up or pull-down resistor
We need to use the pull-up or pull-down resistor when the sensors attached to the digital input pin does not output voltage level but have only two states: open and closed. The below are examples of sensors that need to use the pull-up or pull-down resistor:
If a sensor outputs voltage and has two logic levels: 0 and 1, we do not need to use the pull-up and pull-down resistor. Below are examples of sensors that do NOT need to use the pull-up or pull-down resistor:
How to use pull-up and pull-down resistor with Arduino
There are three ways to use a pull-up or pull-down resistor with Arduino:
※ NOTE THAT:
Arduino boards used ATmega AVR MCU (e.g Uno, Mega...) do not have the internal pull-down resistor. So, this article does not mention the internal pull-down resistor. The internal pull-down resistor may be available on some Arduino boards that do not use ATmega AVR MCU.
Let's take a button as an example
How to use an external pull-down resistor with Arduino
Wiring diagram
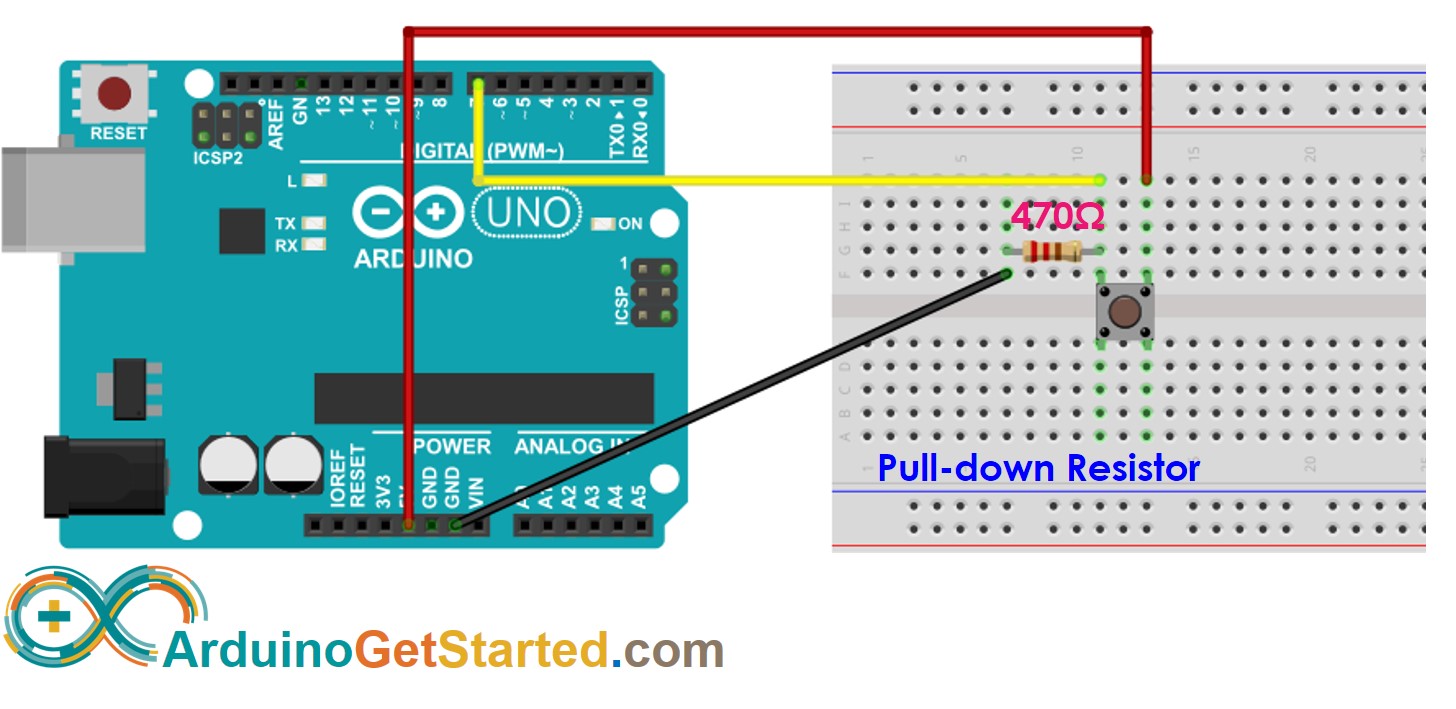
This image is created using Fritzing. Click to enlarge image
Arduino Code
How to use external pull-up resistor with Arduino
Wiring diagram
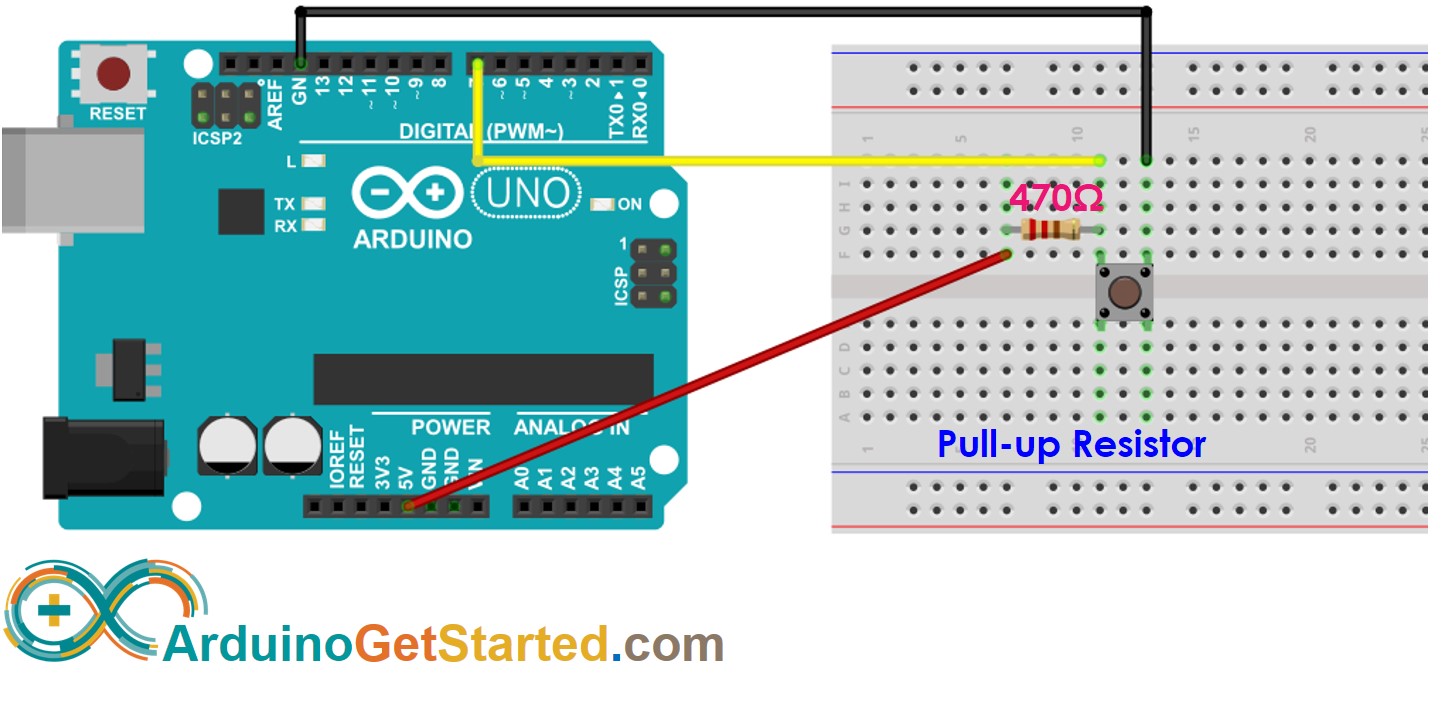
This image is created using Fritzing. Click to enlarge image
Arduino Code
How to use an internal pull-up resistor with Arduino
The internal pull-up resistor is a resister built inside the MCU of Arduino. We just need to enable it to use.
We would recommend you use this way because it simplifies the wiring
Wiring diagram
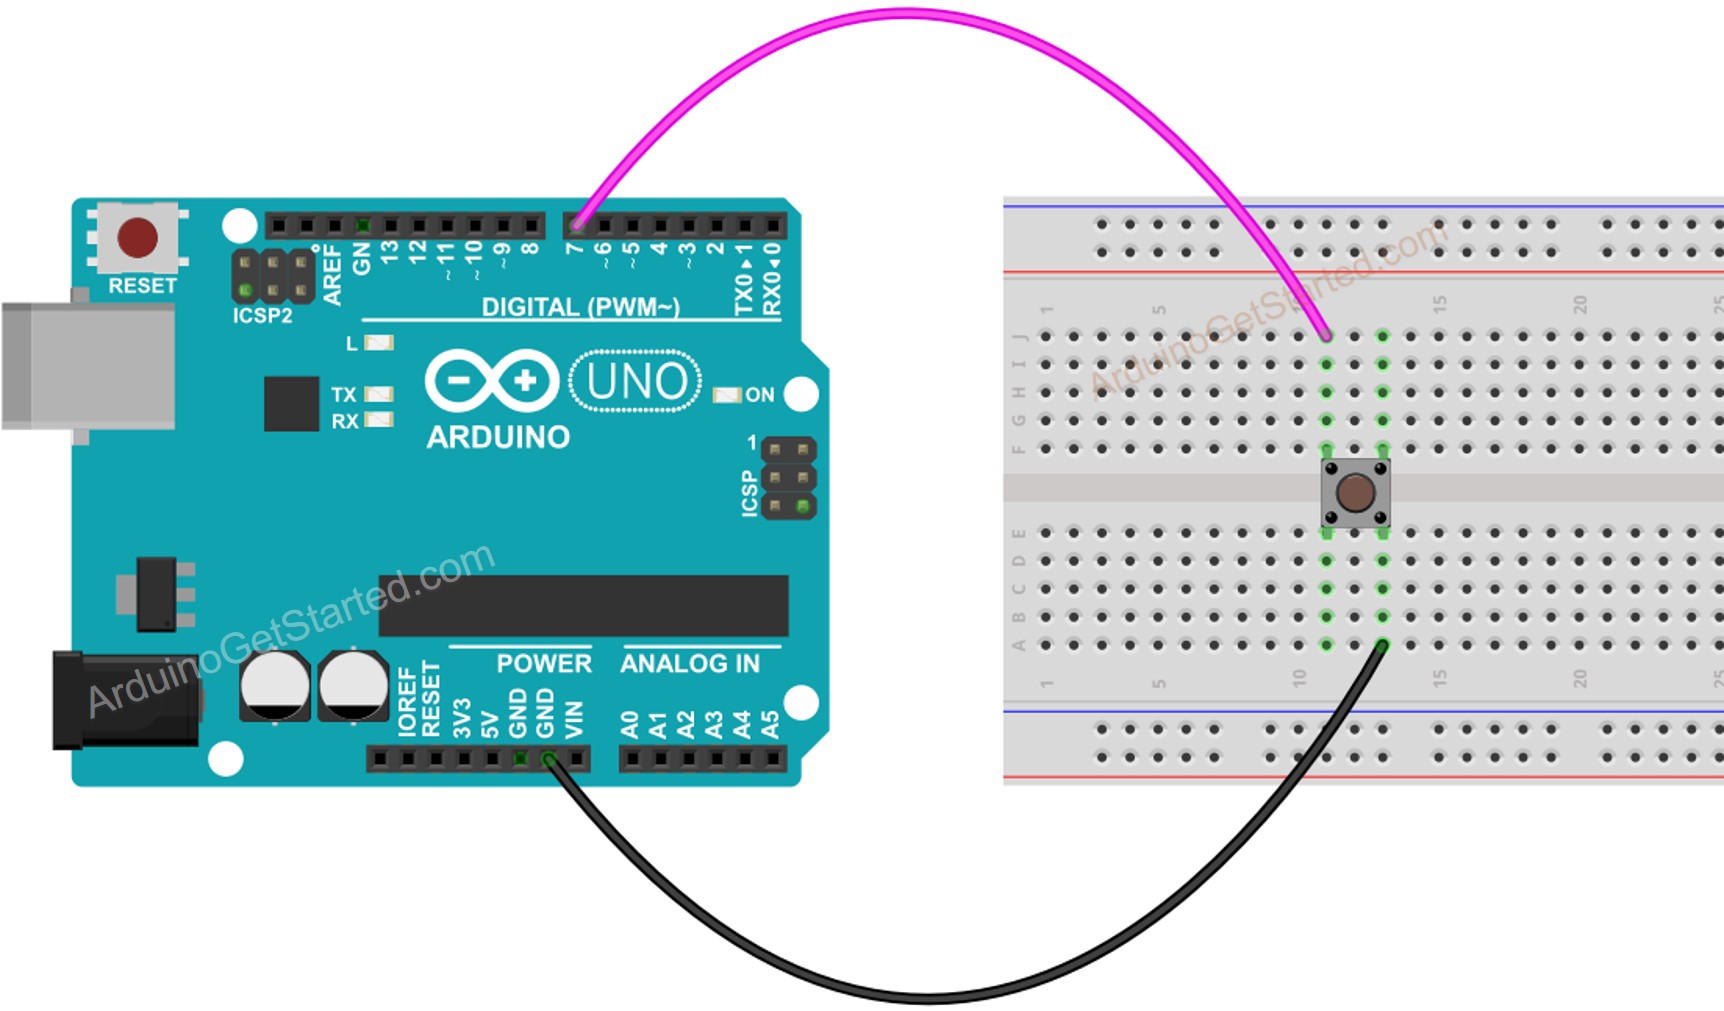
This image is created using Fritzing. Click to enlarge image
Arduino Code
Buy Arduino
| 1 × Arduino UNO Buy on Amazon | |
| 1 × Arduino MEGA Buy on Amazon |
Additionally, some links direct to products from our own brand, DIYables .