Arduino - Door Sensor
The door sensor is widely used in security area, It is used to detect/monitor entrances (such as door, window ...). The door sensor is also known as "entry sensors", "contact sensors", or "window sensors".
Hardware Required
Or you can buy the following kits:
| 1 | × | DIYables STEM V3 Starter Kit (Arduino included) | |
| 1 | × | DIYables Sensor Kit (18 sensors/displays) |
Additionally, some links direct to products from our own brand, DIYables .
About Door Sensor
Pinout
Door sensor includes two components:
- One reed switch with two pins
- One magnet
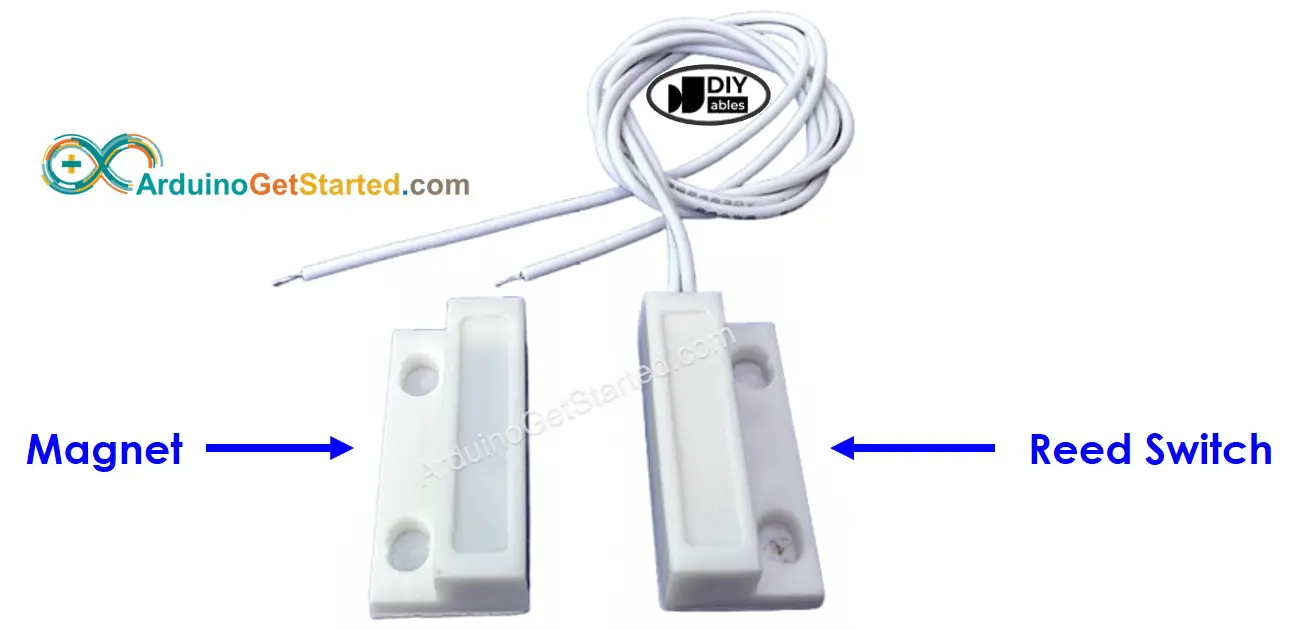
Just like a normal switch/button, we do NOT need to distinguish the two pins of the reed switch.
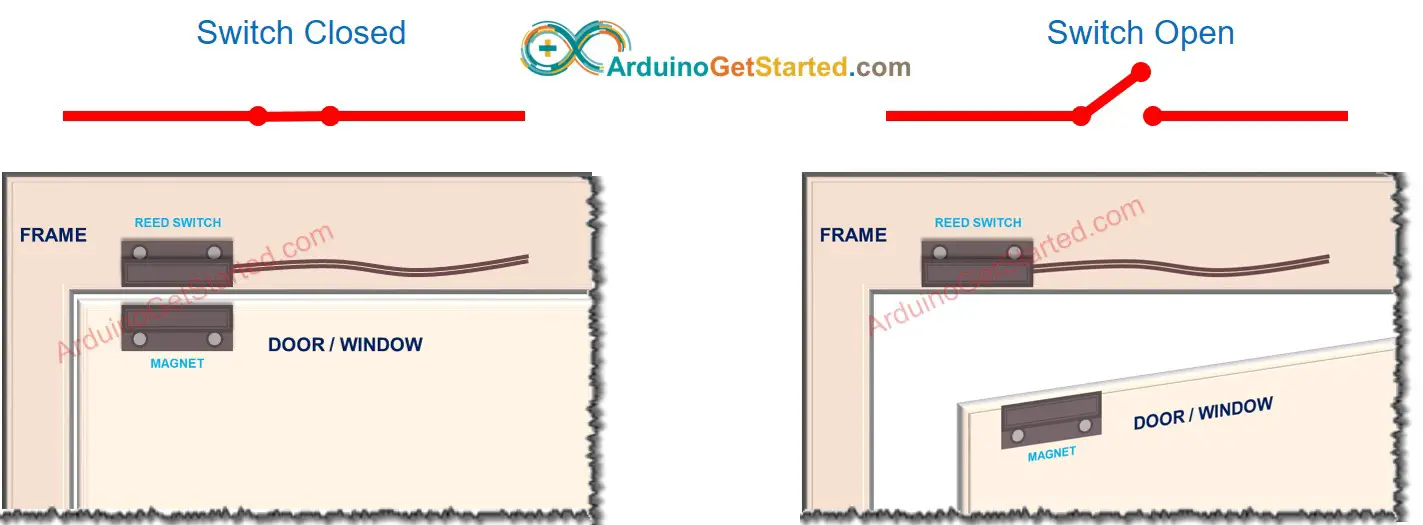
How It Works
The magnet is attached to the door/window (moving part), and the reed switch is attached to the door frame (fixed part). The two components are in contact when the door is closed
- When the magnet is close to the reed switch, the reed switch circuit is closed
- When the magnet is far from the reed switch, the reed switch circuit is open
※ NOTE THAT:
The reed switch itself does NOT output LOW or HIGH on its pins. It is just a closed or open state. Depending on how we connect its pins to Arduino, the value on the pin can be the LOW, HIGH, or floating value (unpredicted value). To avoid the floating value, we MUST use the pull-up or pull-down resistor on the Arduino pin
If we connect a pin of the reed switch to GND, the other pin of the reed switch to Arduino's input pin with a pull-up resistor (internal or external):
- When the magnet is closed to the reed switch, the value in Arduino's input pin is LOW
- When the magnet is far from the reed switch, the value in Arduino's input pin is HIGH
So:
- To check the state of the door, we just check the state of Arduino's input pin:
- If the state is LOW, the door is closed
- If the state is HIGH, the door is open
- To detect the door-opening/door-closing events, we can detect the state change on the Arduino input pin:
- If the state changes from LOW to HIGH, the door-opening event is detected
- If the state changes from HIGH to LOW, the door-closing event is detected
Wiring Diagram
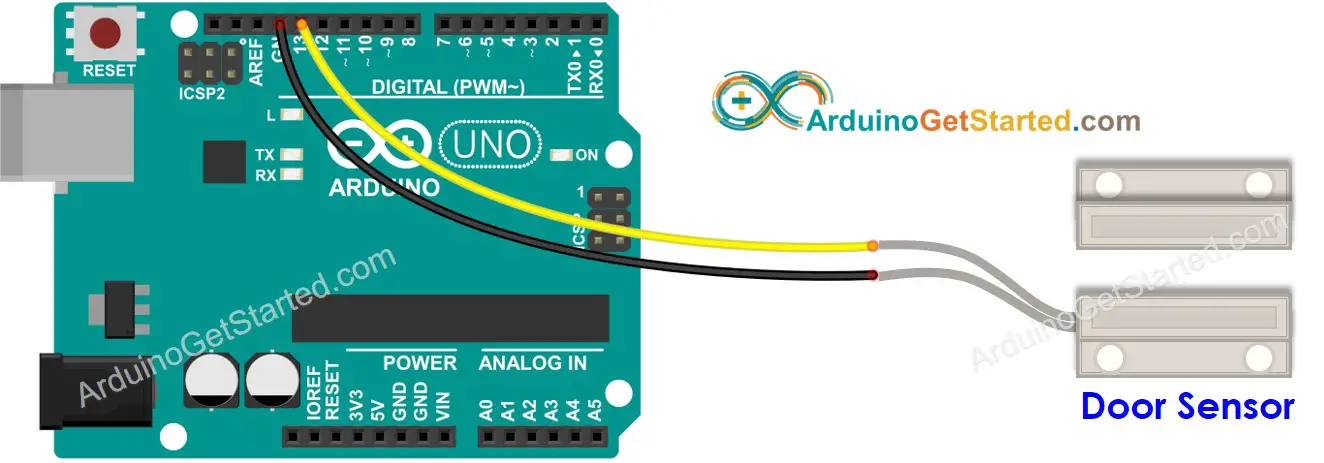
This image is created using Fritzing. Click to enlarge image
How To Program For Door Sensor
- Initializes the Arduino pin to the digital input mode by using pinMode() function. For example, pin 13
- Reads the state of the Arduino pin by using digitalRead() function.
Arduino Code - Check Door Open and Close State
Quick Steps
- Copy the above code and open with Arduino IDE
- Click Upload button on Arduino IDE to upload code to Arduino
- Move the magnet close to the reed switch and them move it far from the reed switch.
- See the result on Serial Monitor.
Arduino Code - Detect Door-opening and Door-closing Events
- Copy the above code and open with Arduino IDE
- Click Upload button on Arduino IDE to upload code to Arduino
- Move the magnet close to the reed switch and them move it far from the reed switch.
- See the result on Serial Monitor.
Video Tutorial
We are considering to make the video tutorials. If you think the video tutorials are essential, please subscribe to our YouTube channel to give us motivation for making the videos.