Arduino - Limit Switch
The limit switch has been using in many application such as motor control, automation. In this tutorial, we will learn how to use the Limit Switch with Arduino.
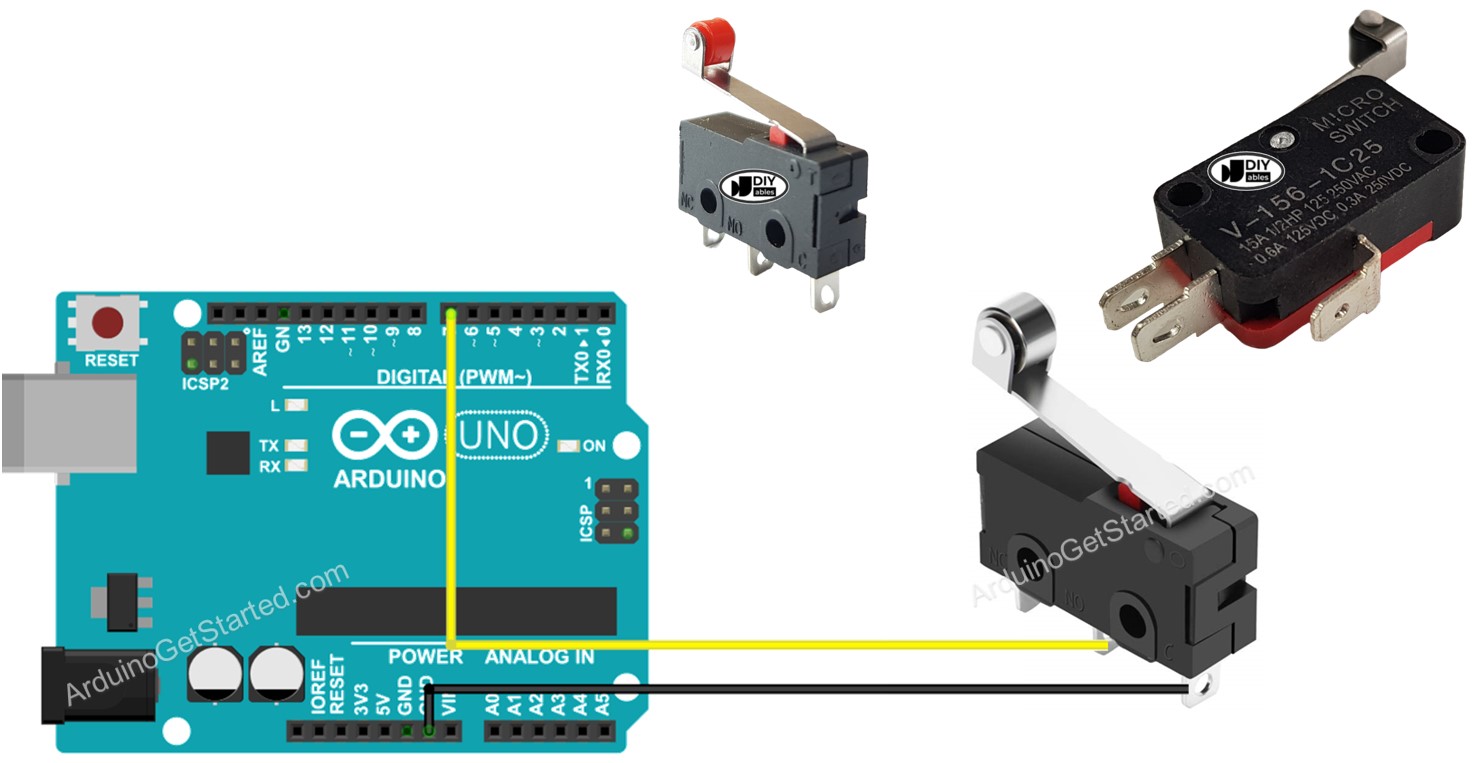
Please do not confuse with the following:
Hardware Required
Or you can buy the following kits:
| 1 | × | DIYables STEM V3 Starter Kit (Arduino included) | |
| 1 | × | DIYables Sensor Kit (18 sensors/displays) |
Additionally, some links direct to products from our own brand, DIYables .
About Limit Switch
It is called Limit Switch because its main functionality is used to detect the moving object reaching a limit.
Pinout
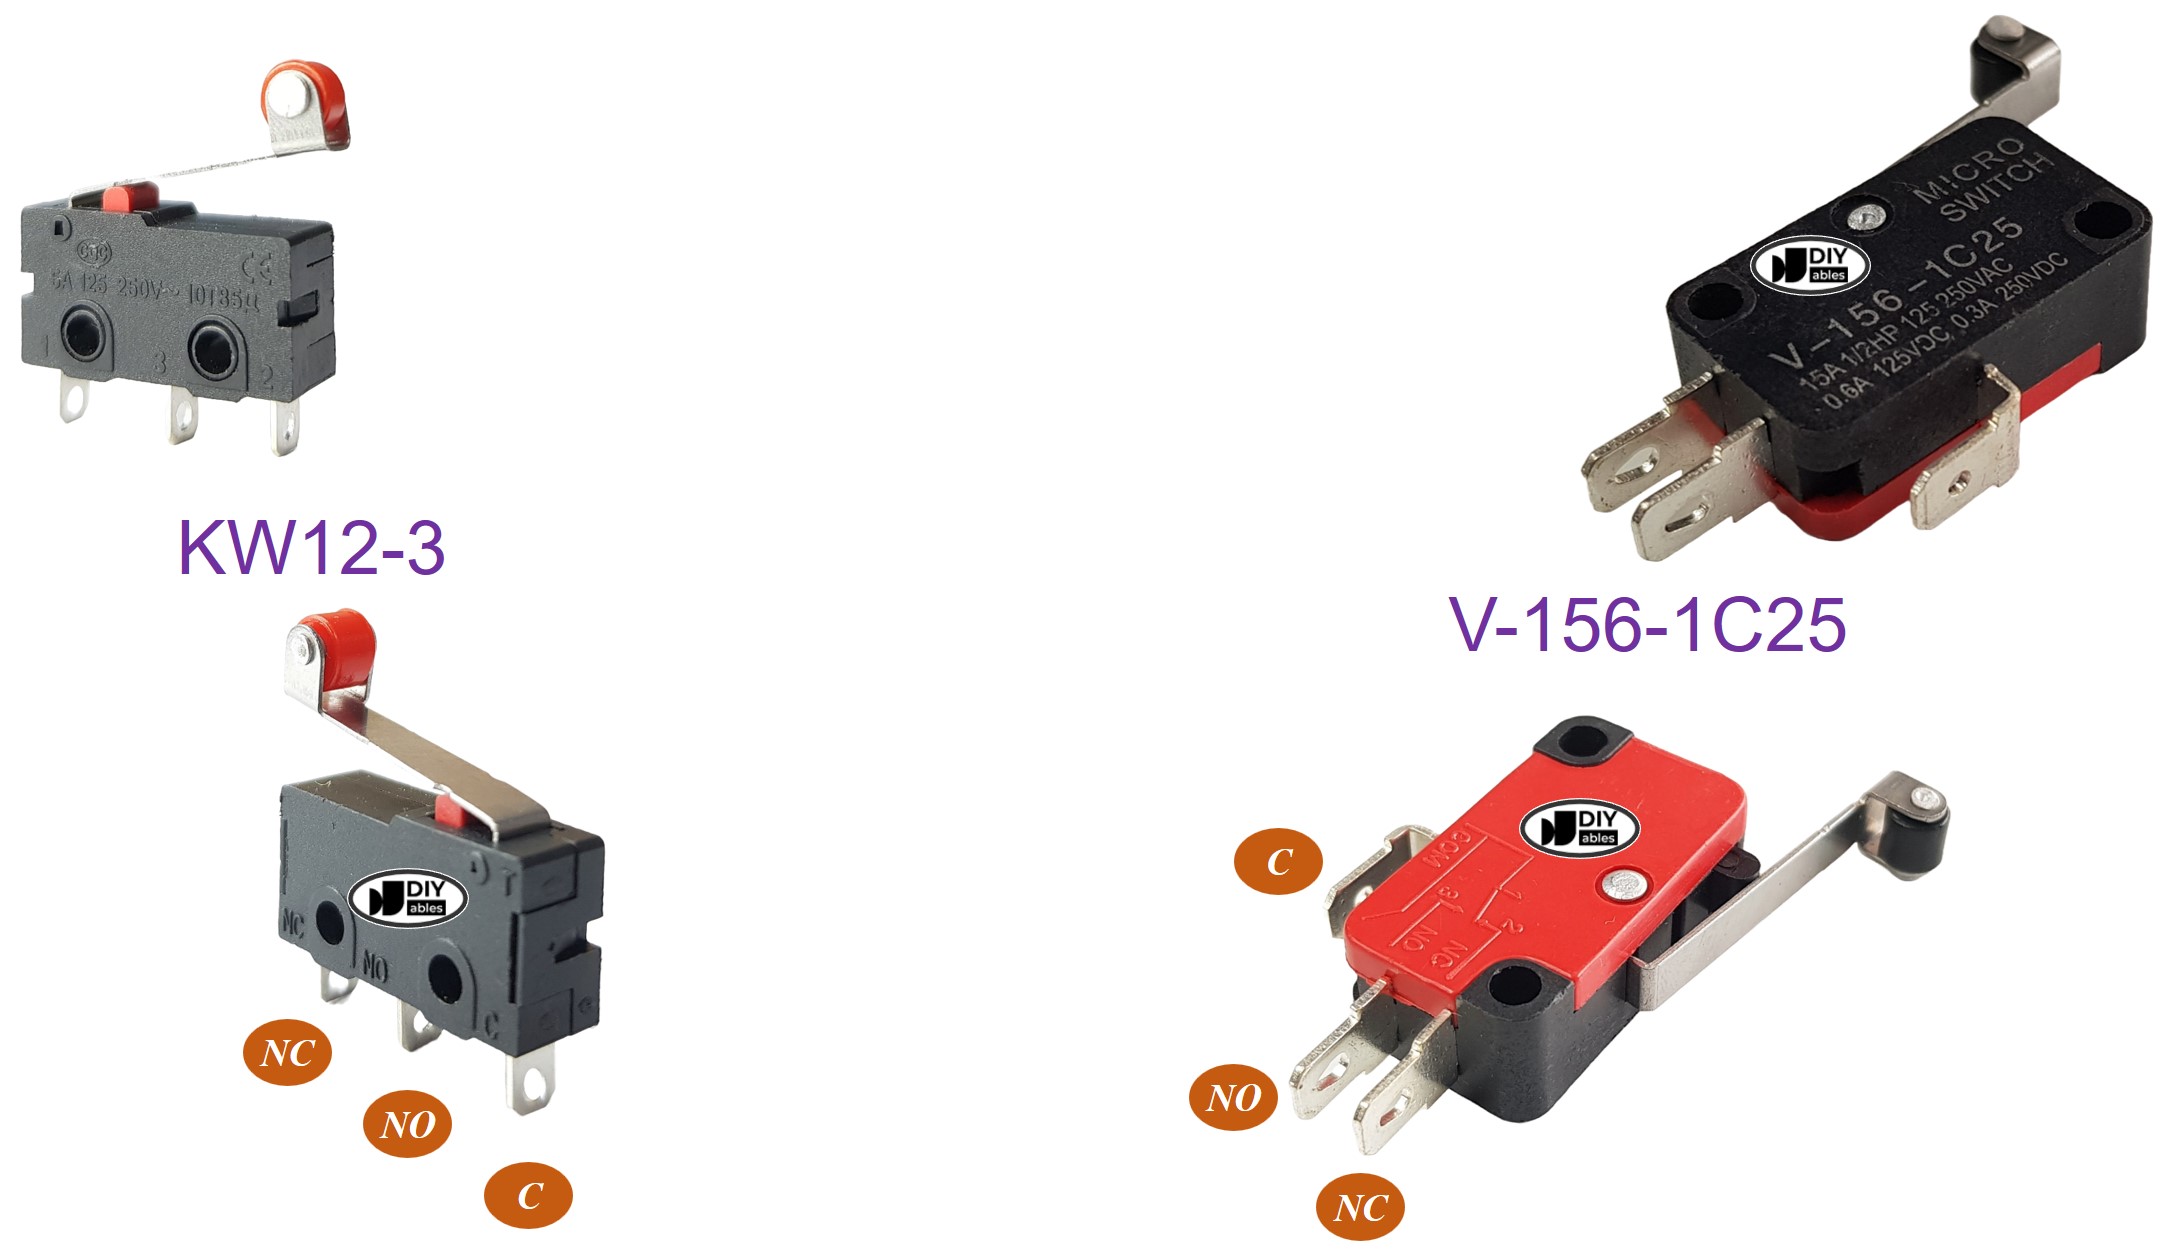
There are various types of limit switches available, but among the most commonly used are the KW12-3 and V-156-1C25. Both of these types have 3 pins:
- C pin: is the common pin. It is used in both normally open mode and normally closed mode
- NO pin: is normally open pin. It is used in the normally open mode
- NC pin: is normally closed pin. It is used in the normally closed mode
How It Works
Although The Limit Switch has 3 pins, a normal application usually uses only two pins: C pin and one of two remaining pins. Accordingly, there are four ways to use limit switch. The below is the wiring table for limit switch and the reading state on Arduino in all four ways:
| C pin | NO pin | NC pin | Arduino Input Pin's State | |
|---|---|---|---|---|
| 1 | GND | Arduino Input Pin (with pull-up) | not connected | HIGH when untouched, LOW when touched |
| 2 | GND | not connected | Arduino Input Pin (with pull-up) | LOW when untouched, HIGH when touched |
| 3 | VCC | Arduino Input Pin (with pull-down) | not connected | LOW when untouched, HIGH when touched |
| 4 | VCC | not connected | Arduino Input Pin (with pull-down) | HIGH when untouched, LOW when touched |
For each way, we can swap GND pin and Arduino Input Pin. Therefore, we have 8 way to connect Arduino to a limit switch.
We only need to choose one of the above four ways. The rest of tutorial will use the first way.
Wiring Diagram
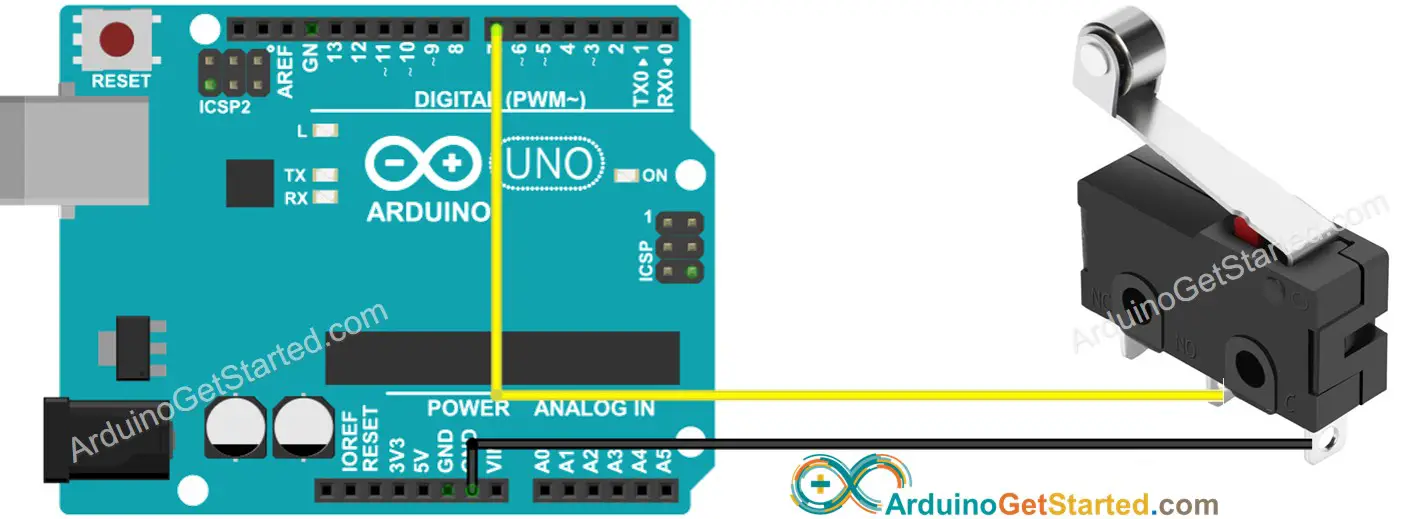
This image is created using Fritzing. Click to enlarge image
To make the wiring connection stable and firm, we recommend using Soldering Iron to solder wires and limit switch's pin together, and then use Heat Shrink Tube to make it safe.
Arduino Code - Limit Switch
Just like a button, a limit switch also needs to be debounced (See more at Why needs debounce for the button/limit switch?). Debouncing make the code complicated. Fortunately, the ezButton library supports the debouncing functionm, The library also uses internal pull-up register. These make easy to us to program
※ NOTE THAT:
There are two wide-used use cases:
- The first: If the switch's state is TOUCHED, do something. If the input state is UNTOUCHED, do another thing in reverse.
- The second: If the switch's state is changed from UNTOUCHED to TOUCHED (or TOUCHED to UNTOUCHED), do something.
Quick Steps
- Do wiring as above wiring diagram
- Connect Arduino to PC via USB cable
- Open Arduino IDE
- Install ezButton library. See How To
- Select the right board and port
- Click Upload button on Arduino IDE to upload code to Arduino
- Touch the Limit Switch and release.
- See the result on Serial Monitor.
Video Tutorial
We are considering to make the video tutorials. If you think the video tutorials are essential, please subscribe to our YouTube channel to give us motivation for making the videos.