How to debounce for multiple buttons
How can I debounce for multiple buttons using millis() function in Arduino? I have trouble managing timestamps. What is the easiest way to do it?
Answer
Debouncing for the button is very important in some applications such as detecting button press, counting... Managing timestamps when debouncing for multiple buttons is not easy for newbies. Fortunately, the ezButton library supports the debouncing function. The timestamp is managed by the library. Therefore, we can use this library to debouncing for multiple buttons without managing timestamps. Further more, you can use an array of buttons to make code clean and short
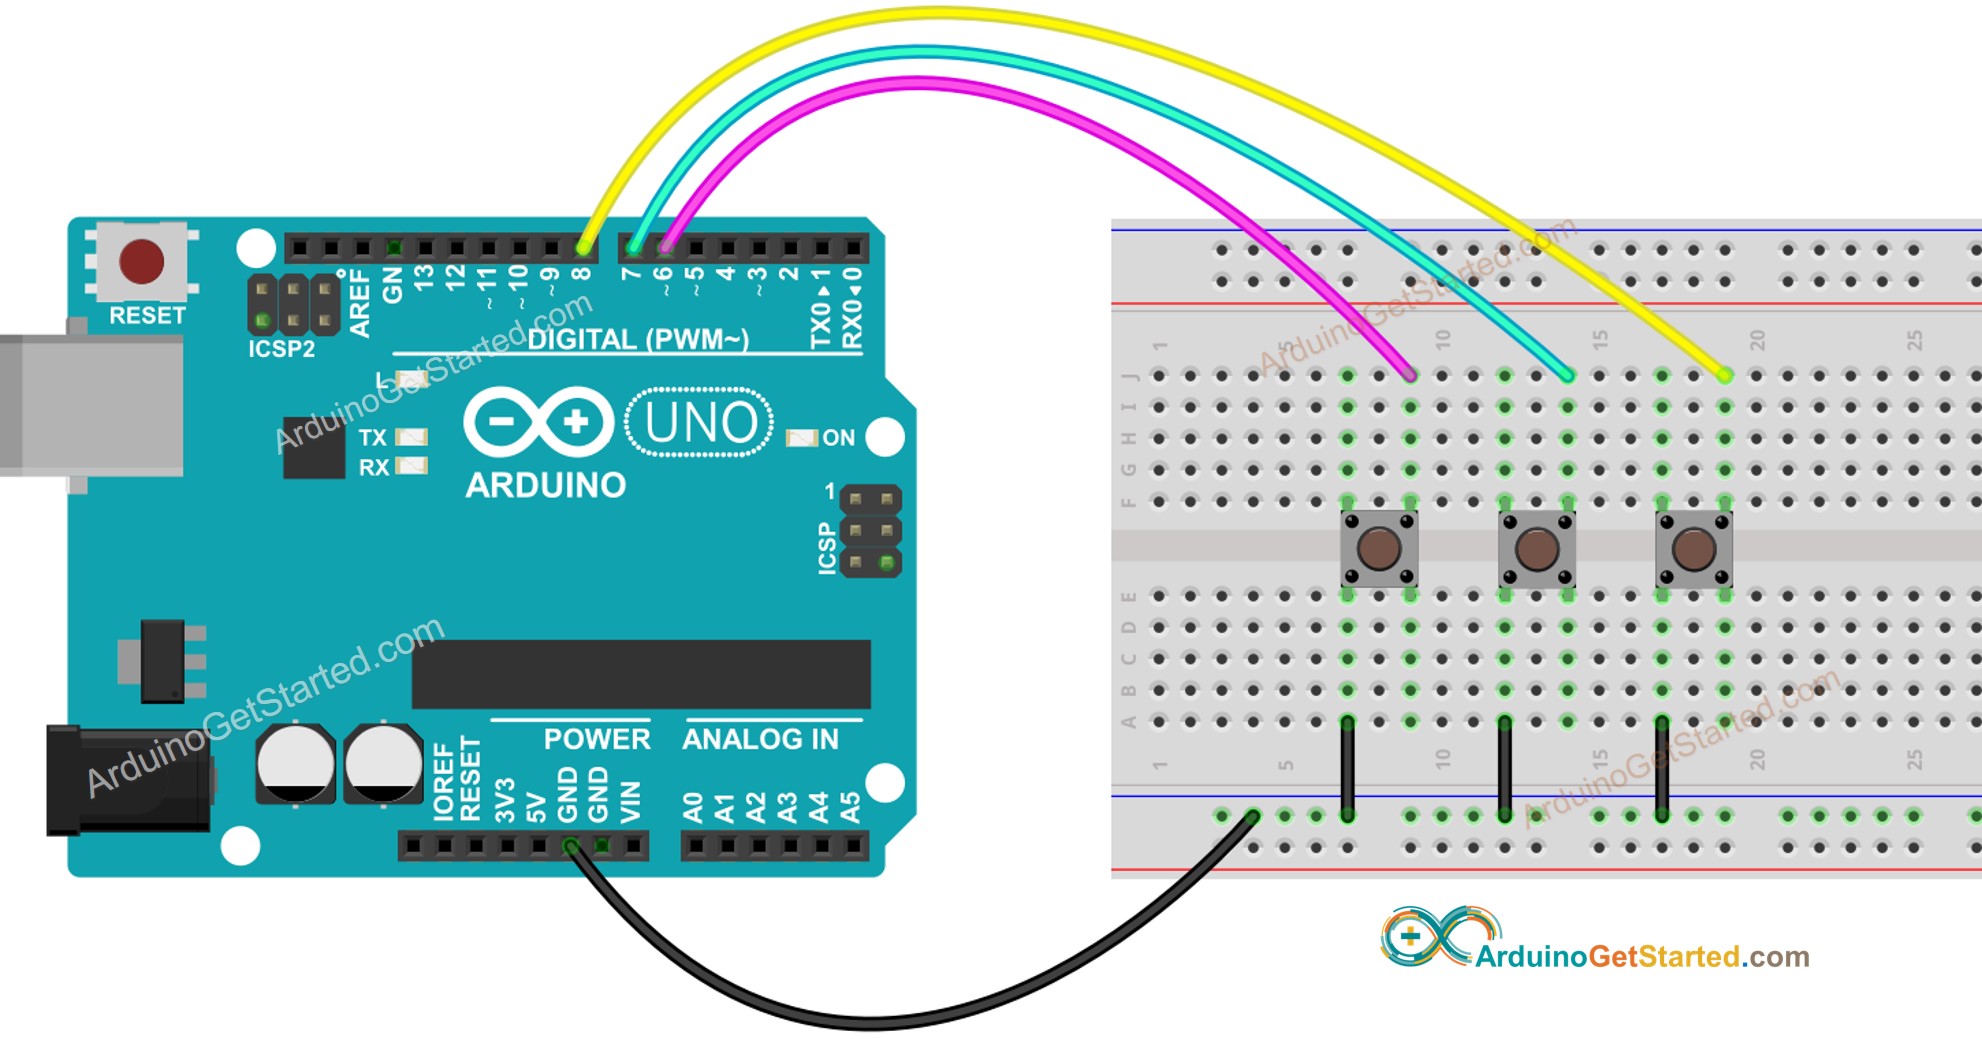
The below example code is for three buttons.
#include <ezButton.h>
ezButton button1(6);
ezButton button2(7);
ezButton button3(8);
void setup() {
Serial.begin(9600);
button1.setDebounceTime(50);
button2.setDebounceTime(50);
button3.setDebounceTime(50);
}
void loop() {
button1.loop();
button2.loop();
button3.loop();
if(button1.isPressed())
Serial.println("The button 1 is pressed");
if(button1.isReleased())
Serial.println("The button 1 is released");
if(button2.isPressed())
Serial.println("The button 2 is pressed");
if(button2.isReleased())
Serial.println("The button 2 is released");
if(button3.isPressed())
Serial.println("The button 3 is pressed");
if(button3.isReleased())
Serial.println("The button 3 is released");
}

This image is created using Fritzing. Click to enlarge image
Disclosure: Some links in this section are Amazon affiliate links. If you make a purchase through these links, we may earn a commission at no extra cost to you.
Additionally, some links direct to products from our own brand,
DIYables .
When you use many buttons, you can use an array of buttons to make code clean and short. The below example code use an array for 5 buttons.
#include <ezButton.h>
const int BUTTON_NUM = 5;
const int BUTTON_1_PIN = 2;
const int BUTTON_2_PIN = 3;
const int BUTTON_3_PIN = 4;
const int BUTTON_4_PIN = 5;
const int BUTTON_5_PIN = 6;
ezButton buttonArray[] = {
ezButton(BUTTON_1_PIN),
ezButton(BUTTON_2_PIN),
ezButton(BUTTON_3_PIN),
ezButton(BUTTON_4_PIN),
ezButton(BUTTON_5_PIN)
};
void setup() {
Serial.begin(9600);
for (byte i = 0; i < BUTTON_NUM; i++) {
buttonArray[i].setDebounceTime(50);
}
}
void loop() {
for (byte i = 0; i < BUTTON_NUM; i++)
buttonArray[i].loop();
for (byte i = 0; i < BUTTON_NUM; i++) {
if (buttonArray[i].isPressed()) {
Serial.print("The button ");
Serial.print(i + 1);
Serial.println(" is pressed");
}
if (buttonArray[i].isReleased()) {
Serial.print("The button ");
Serial.print(i + 1);
Serial.println(" is released");
}
}
}

