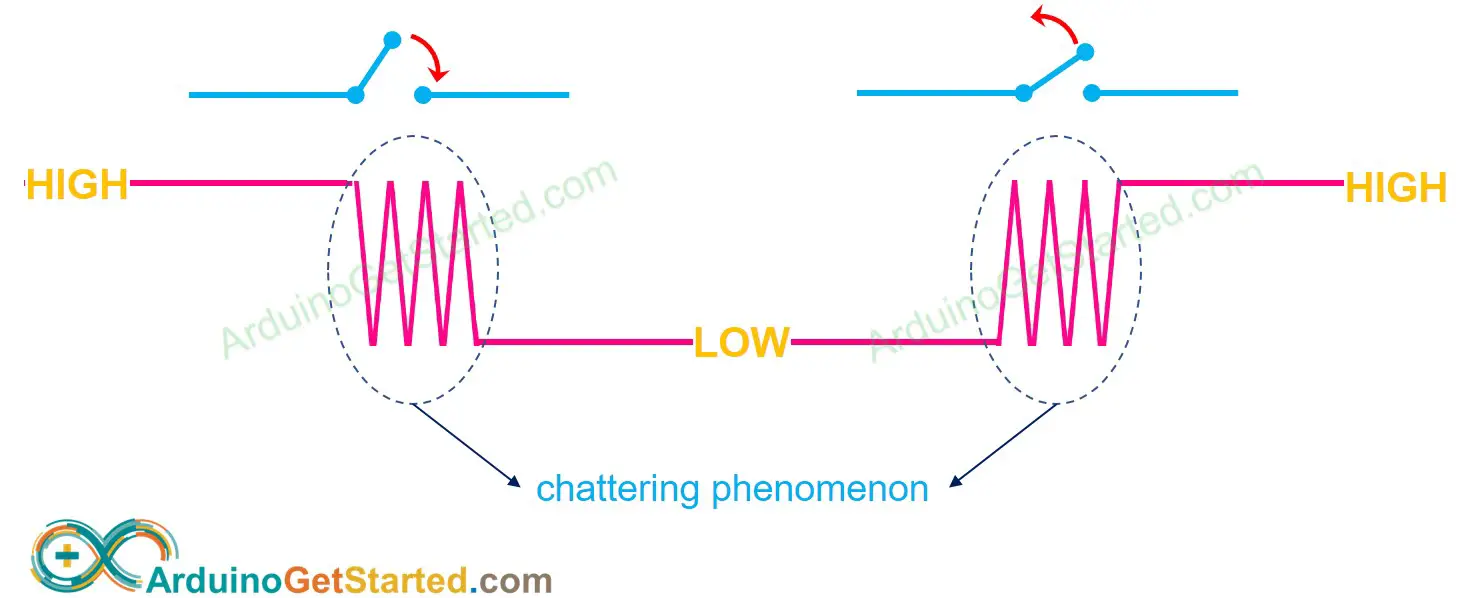
When a button is pressed/released or when a switch is toggled, newbies usually think simply that its state is changed from LOW to HIGH or HIGH to LOW. In practice, it is not exactly like that. Because of the mechanical and physical characteristics, the state of the button (or switch) might be toggled between LOW and HIGH several times. This phenomenon is called chattering. The chattering phenomenon makes a single press that may be read as multiple presses, resulting in a malfunction in some kinds of applications. This tutorial shows how to eliminate this phenomenon (called debounce the input).
Disclosure: Some links in this section are Amazon affiliate links. If you make a purchase through these links, we may earn a commission at no extra cost to you. Additionally, some links direct to products from our own brand, DIYables .
About Button
If you do not know about button (pinout, how it works, how to program ...), learn about them in the following tutorials:
This image is created using Fritzing. Click to enlarge image
Let's see and compare Arduino code between WITHOUT and WITH debounce and their behaviors.
Reading Button without Debounce
Before learning about debouncing, just see the code without debouncing and its behavior.
Quick Steps
Connect Arduino to PC via USB cable
Open Arduino IDE, select the right board and port
Copy the below code and open with Arduino IDE
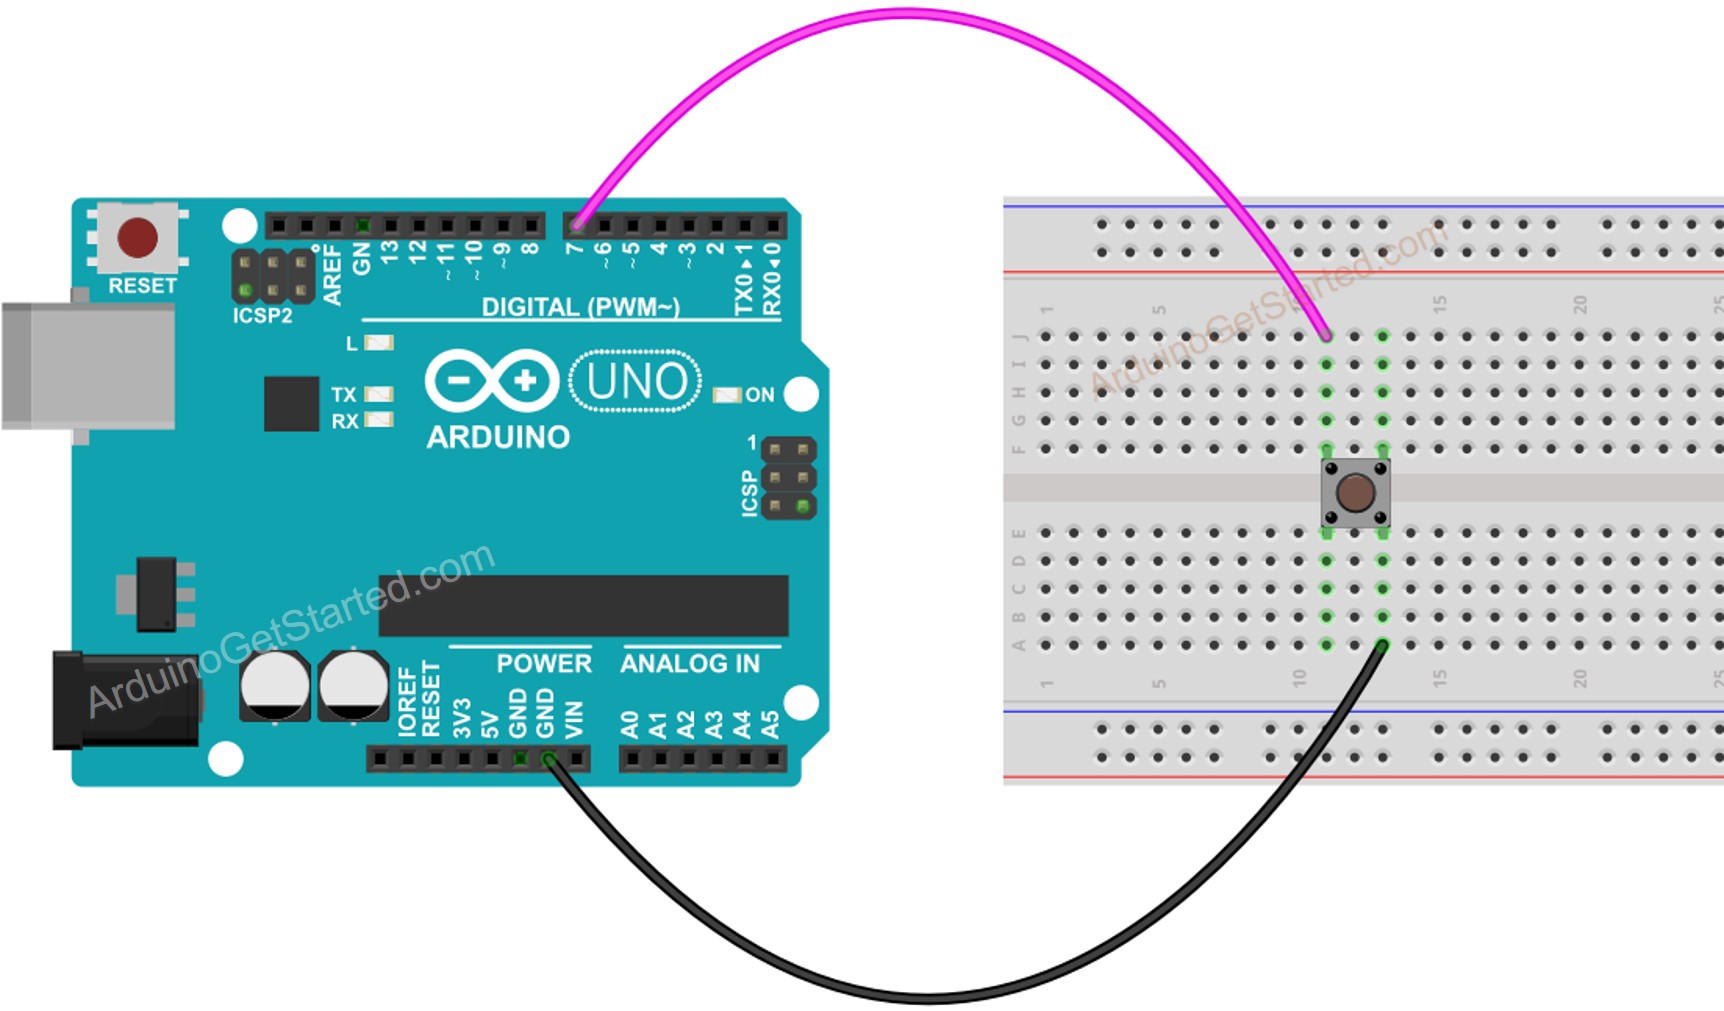
/* * Created by ArduinoGetStarted.com * * This example code is in the public domain * * Tutorial page: https://arduinogetstarted.com/tutorials/arduino-button-debounce */// constants won't change. They're used here to set pin numbers:constint BUTTON_PIN = 7; // the number of the pushbutton pin// Variables will change:int lastState = LOW; // the previous state from the input pinint currentState; // the current reading from the input pinvoidsetup() {// initialize serial communication at 9600 bits per second:Serial.begin(9600);// initialize the pushbutton pin as an pull-up input// the pull-up input pin will be HIGH when the switch is open and LOW when the switch is closed.pinMode(BUTTON_PIN, INPUT_PULLUP);}voidloop() {// read the state of the switch/button: currentState = digitalRead(BUTTON_PIN);if(lastState == HIGH && currentState == LOW)Serial.println("The button is pressed");elseif(lastState == LOW && currentState == HIGH)Serial.println("The button is released");// save the the last state lastState = currentState;}
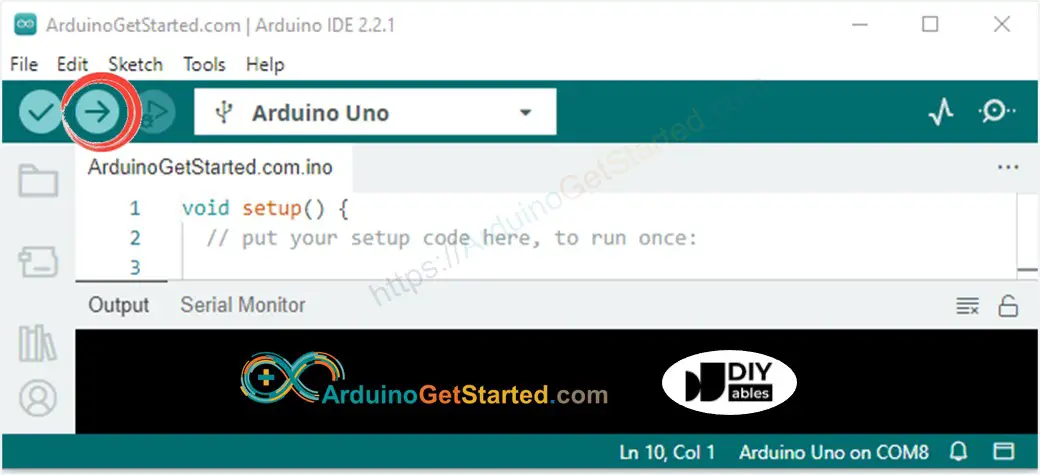
Click Upload button on Arduino IDE to upload code to Arduino
Open Serial Monitor
Keep pressing the button several seconds and then release it.
See the result on Serial Monitor
Newbiely | Arduino IDE 2.3.8
──
☐
✕
File
Edit
Sketch
Tools
Help
Arduino Uno
Newbiely.ino
···
8Serial.println("Hello World!");
Output
Serial Monitor
Message (Enter to send message to 'Arduino Uno' on 'COM15')
New Line
9600 baud
The button is pressed
The button is pressed
The button is pressed
The button is released
The button is released
Ln 11, Col 1
Arduino Uno on COM15
2
⇒ As you can see, you pressed and released the button just the once. However, Arduino recognizes it as multiple presses and releases.
Reading Button with Debounce
Quick Steps
Copy the below code and open with Arduino IDE
/* * Created by ArduinoGetStarted.com * * This example code is in the public domain * * Tutorial page: https://arduinogetstarted.com/tutorials/arduino-button-debounce */// constants won't change. They're used here to set pin numbers:constint BUTTON_PIN = 7; // the number of the pushbutton pinconstint DEBOUNCE_DELAY = 50; // the debounce time; increase if the output flickers// Variables will change:int lastSteadyState = LOW; // the previous steady state from the input pinint lastFlickerableState = LOW; // the previous flickerable state from the input pinint currentState; // the current reading from the input pin// the following variables are unsigned longs because the time, measured in// milliseconds, will quickly become a bigger number than can be stored in an int.unsignedlong lastDebounceTime = 0; // the last time the output pin was toggledvoidsetup() {// initialize serial communication at 9600 bits per second:Serial.begin(9600);// initialize the pushbutton pin as an pull-up input// the pull-up input pin will be HIGH when the switch is open and LOW when the switch is closed.pinMode(BUTTON_PIN, INPUT_PULLUP);}voidloop() {// read the state of the switch/button: currentState = digitalRead(BUTTON_PIN);// check to see if you just pressed the button// (i.e. the input went from LOW to HIGH), and you've waited long enough// since the last press to ignore any noise:// If the switch/button changed, due to noise or pressing:if (currentState != lastFlickerableState) {// reset the debouncing timer lastDebounceTime = millis();// save the the last flickerable state lastFlickerableState = currentState; }if ((millis() - lastDebounceTime) > DEBOUNCE_DELAY) {// whatever the reading is at, it's been there for longer than the debounce// delay, so take it as the actual current state:// if the button state has changed:if (lastSteadyState == HIGH && currentState == LOW)Serial.println("The button is pressed");elseif (lastSteadyState == LOW && currentState == HIGH)Serial.println("The button is released");// save the the last steady state lastSteadyState = currentState; }}
Click Upload button on Arduino IDE to upload code to Arduino
Open Serial Monitor
Keep pressing the button several seconds and then release it.
See the result on Serial Monitor
Newbiely | Arduino IDE 2.3.8
──
☐
✕
File
Edit
Sketch
Tools
Help
Arduino Uno
Newbiely.ino
···
8Serial.println("Hello World!");
Output
Serial Monitor
Message (Enter to send message to 'Arduino Uno' on 'COM15')
New Line
9600 baud
The button is pressed
The button is released
Ln 11, Col 1
Arduino Uno on COM15
2
⇒ As you can see, you pressed and released the button just the once. Arduino recognizes it as the single press and release. The chatter is eliminated.
We Made It Simple - Arduino Button Debounce Code with Library
To make it much easier for beginners, especially when using multiple buttons, we created a library, called ezButton. You can learn about ezButton library here.
Arduino Button Debounce Code for A Single Button
/* * Created by ArduinoGetStarted.com * * This example code is in the public domain * * Tutorial page: https://arduinogetstarted.com/tutorials/arduino-button-library * * This example reads the state of a button with debounce and print it to Serial Monitor. */#include <ezButton.h>ezButtonbutton(7); // create ezButton object that attach to pin 7;voidsetup() {Serial.begin(9600);button.setDebounceTime(50); // set debounce time to 50 milliseconds}voidloop() {button.loop(); // MUST call the loop() function firstif(button.isPressed())Serial.println("The button is pressed");if(button.isReleased())Serial.println("The button is released");}
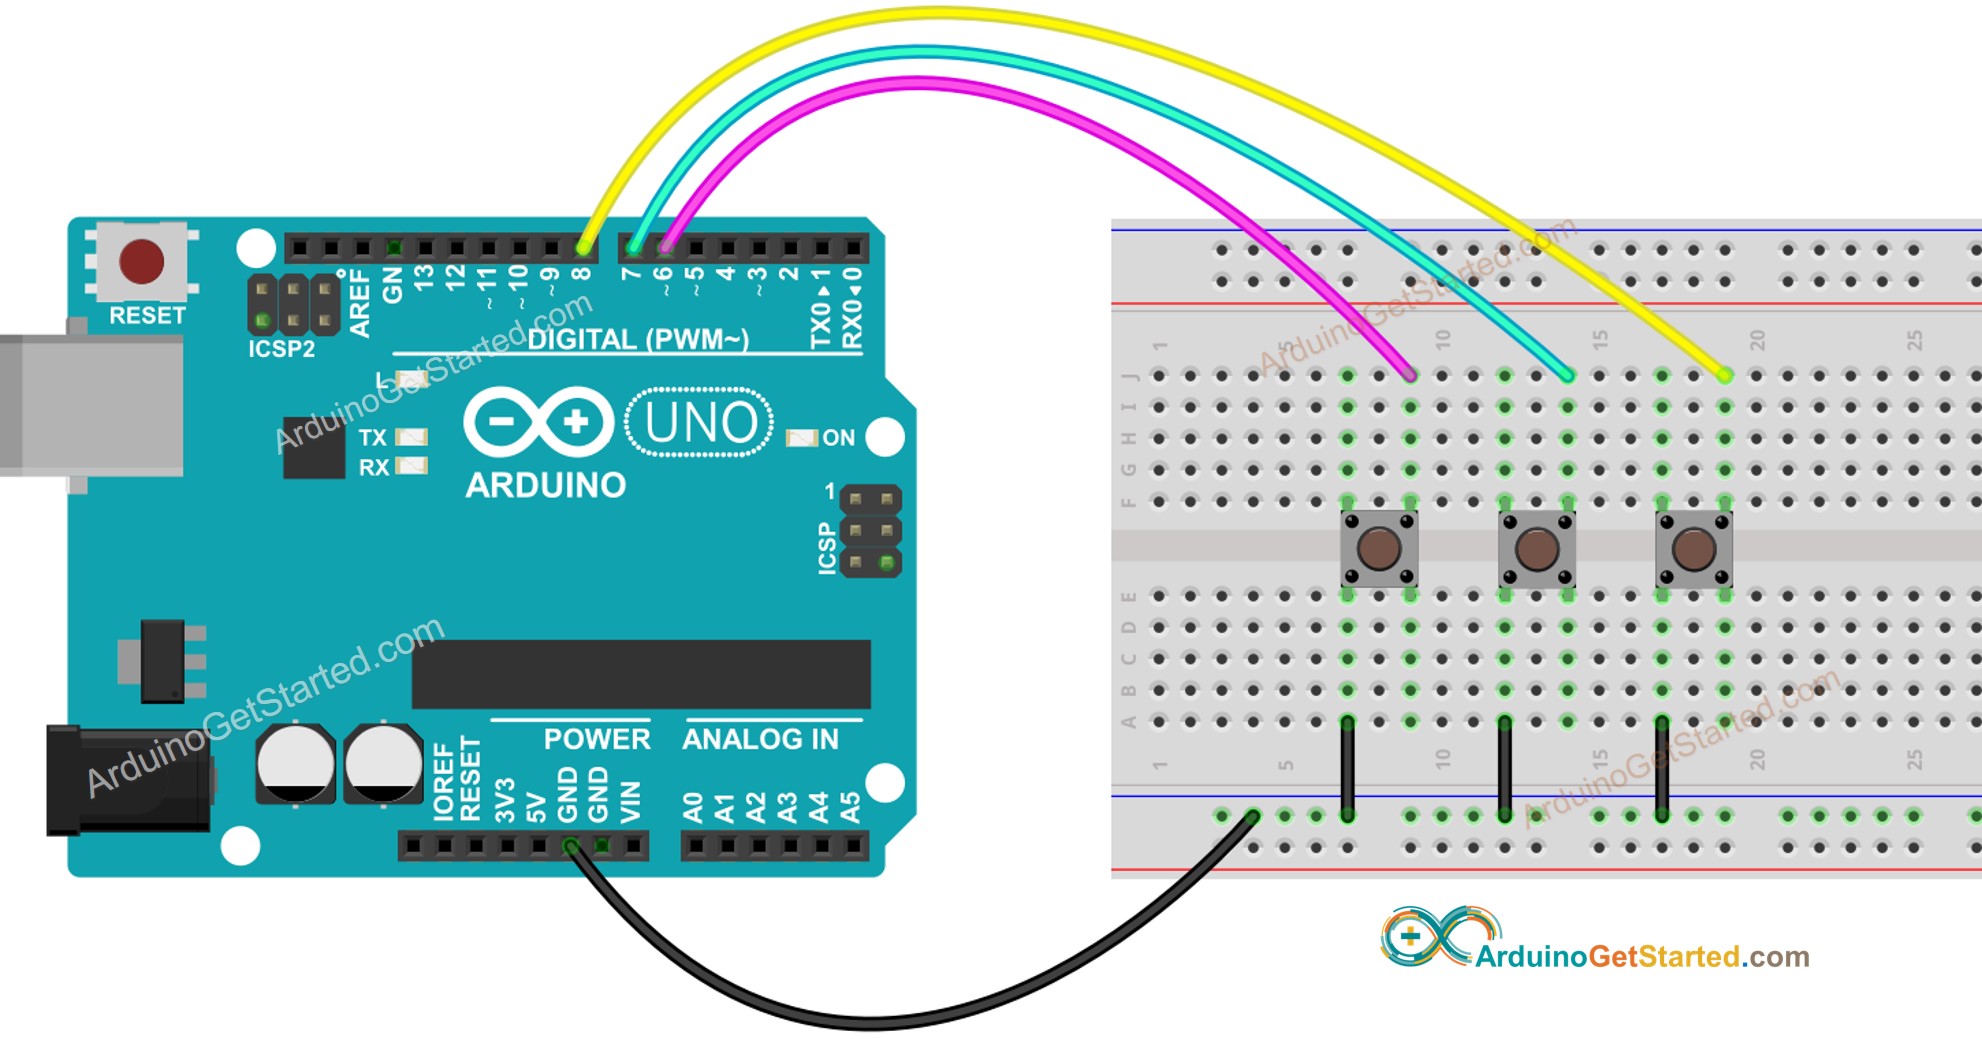
Arduino Button Debounce Code for A Multiple Buttons
/* * Created by ArduinoGetStarted.com * * This example code is in the public domain * * Tutorial page: https://arduinogetstarted.com/tutorials/arduino-button-debounce */#include <ezButton.h>ezButtonbutton1(6); // create ezButton object that attach to pin 6;ezButtonbutton2(7); // create ezButton object that attach to pin 7;ezButtonbutton3(8); // create ezButton object that attach to pin 8;voidsetup() {Serial.begin(9600);button1.setDebounceTime(50); // set debounce time to 50 millisecondsbutton2.setDebounceTime(50); // set debounce time to 50 millisecondsbutton3.setDebounceTime(50); // set debounce time to 50 milliseconds}voidloop() {button1.loop(); // MUST call the loop() function firstbutton2.loop(); // MUST call the loop() function firstbutton3.loop(); // MUST call the loop() function firstif(button1.isPressed())Serial.println("The button 1 is pressed");if(button1.isReleased())Serial.println("The button 1 is released");if(button2.isPressed())Serial.println("The button 2 is pressed");if(button2.isReleased())Serial.println("The button 2 is released");if(button3.isPressed())Serial.println("The button 3 is pressed");if(button3.isReleased())Serial.println("The button 3 is released");}
The wiring diagram for above code:
This image is created using Fritzing. Click to enlarge image
Video Tutorial
We are considering to make the video tutorials. If you think the video tutorials are essential, please subscribe to our YouTube channel to give us motivation for making the videos.
Additional Knowledge
DEBOUNCE_DELAY value depends on the applications. Different applications may use different values.
Extendability
The debounce method can apply for switch, touch sensor ...
Button on Commercial Products
Most electronic products have a reset button. Additionally, the button also keeps other functionalities in many products.
You can share the link of this tutorial anywhere. Howerver, please do not copy the content to share on other websites. We took a lot of time and effort to create the content of this tutorial, please respect our work!