Arduino - Servo.attach()
Description
Attache un objet de type Servo à une broche. Noter qu'avec l'Arduino 0016 et précédent, la librairie Servo ne supporte les servomoteurs seulement sur 2 broches : 9 et 10.
Syntaxe
Paramètres
- servo: une variable de type Servo
- broche: le numéro de la broche à laquelle la variable Servo est attachée.
- impuls_min (optional): la largeur de l'impulsion, en microsecondes, correspondant à l'angle minimum (0°) (valeur par défaut = 544)
- impuls_max (optional): la largeur de l'impulsion, en microsecondes, correspondant à l'angle maximum (180°) (valeur par défaut 2400)
Exemple
Hardware Required
| 1 | × | Official Arduino Uno | |
| 1 | × | Alternatively, DIYables STEM V3, Fully Compatible with Arduino Uno R3 | |
| 1 | × | USB 2.0 cable type A/B | |
| 1 | × | Servo Motor | |
| 1 | × | Jumper Wires |
Additionally, some links direct to products from our own brand, DIYables .
Buy Note: When using multiple servo motors, we recommend the PCA9685 16 Channel PWM Servo Driver Module to save MCU pins and make wiring easier.
Wiring Diagram
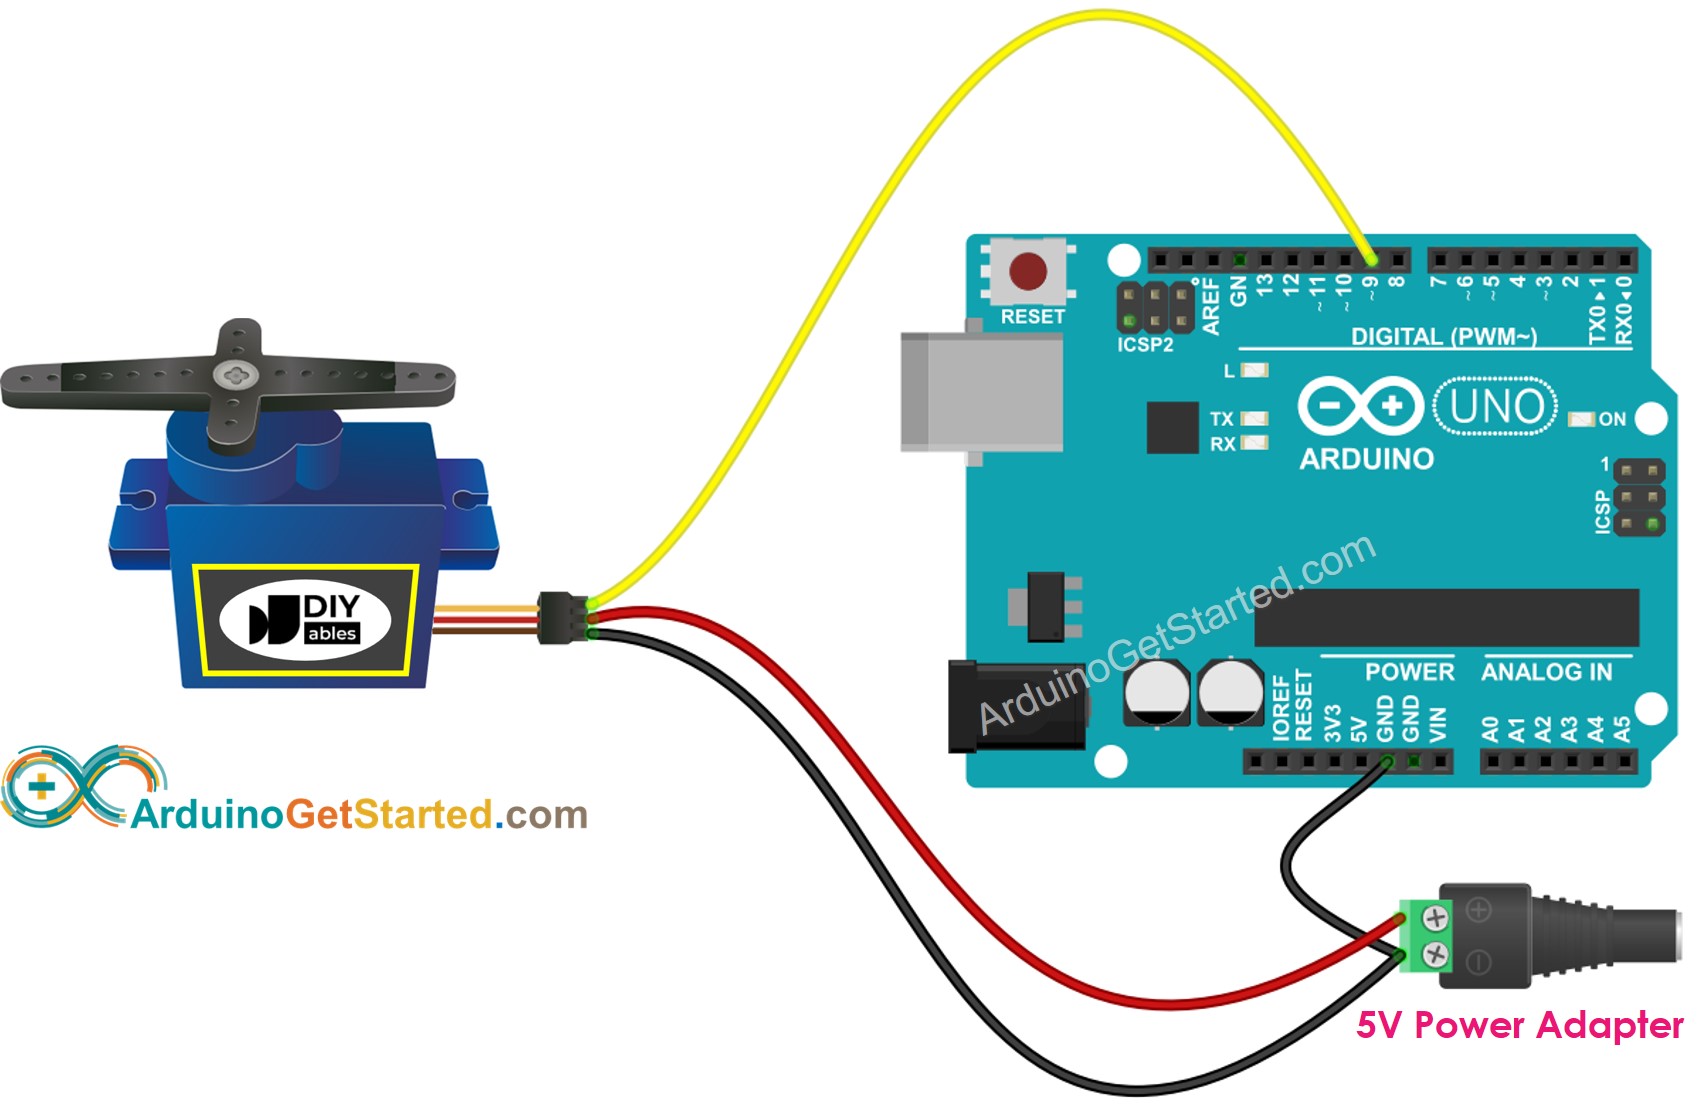
This image is created using Fritzing. Click to enlarge image
Arduino Code
※ Remarque:
Lors de l'appel de l'instruction Servo.attach(), le servomoteur est positionné sur la dernière valeur utilisée avec l'instruction Servo.write() ou Servo.writeMicroseconds() ou à 90° par défaut. Pour positionner les servomoteurs à une certaine position dès l'initialisation, mettre une instruction Servo.write() ou Servo.writeMicroseconds() juste avant.
Voir également
※ ARDUINO BUY RECOMMENDATION
| Arduino UNO R3 | |
| Arduino Starter Kit |