Arduino - Servo.attach()
Descripción
Conecte la variable Servo a un pin. Tenga en cuenta que en Arduino 0016 y anteriores, la biblioteca de servo sólo es compatible con los servos en sólo dos pines: 9 y 10.
Sintaxis
servo.attach(pin)
servo.attach(pin, min, max)
Parámetros
- servo: una variable de tipo Servo
- pin: el número del pin que el servo está conectado
- min (opcional): el ancho de pulso, en microsegundos, correspondiente al ángulo mínimo (0 grados) del servo (por defecto 544)
- max (opcional): el ancho de pulso, en microsegundos, correspondiente al ángulo máximo (180 grados) del servo (por defecto 2400)
Ejemplo
Hardware Required
| 1 | × | Official Arduino Uno | |
| 1 | × | Alternatively, DIYables STEM V3, Fully Compatible with Arduino Uno R3 | |
| 1 | × | USB 2.0 cable type A/B | |
| 1 | × | Servo Motor | |
| 1 | × | Jumper Wires |
Disclosure: Some links in this section are Amazon affiliate links. If you make a purchase through these links, we may earn a commission at no extra cost to you.
Additionally, some links direct to products from our own brand, DIYables .
Additionally, some links direct to products from our own brand, DIYables .
Buy Note: When using multiple servo motors, we recommend the PCA9685 16 Channel PWM Servo Driver Module to save MCU pins and make wiring easier.
Wiring Diagram
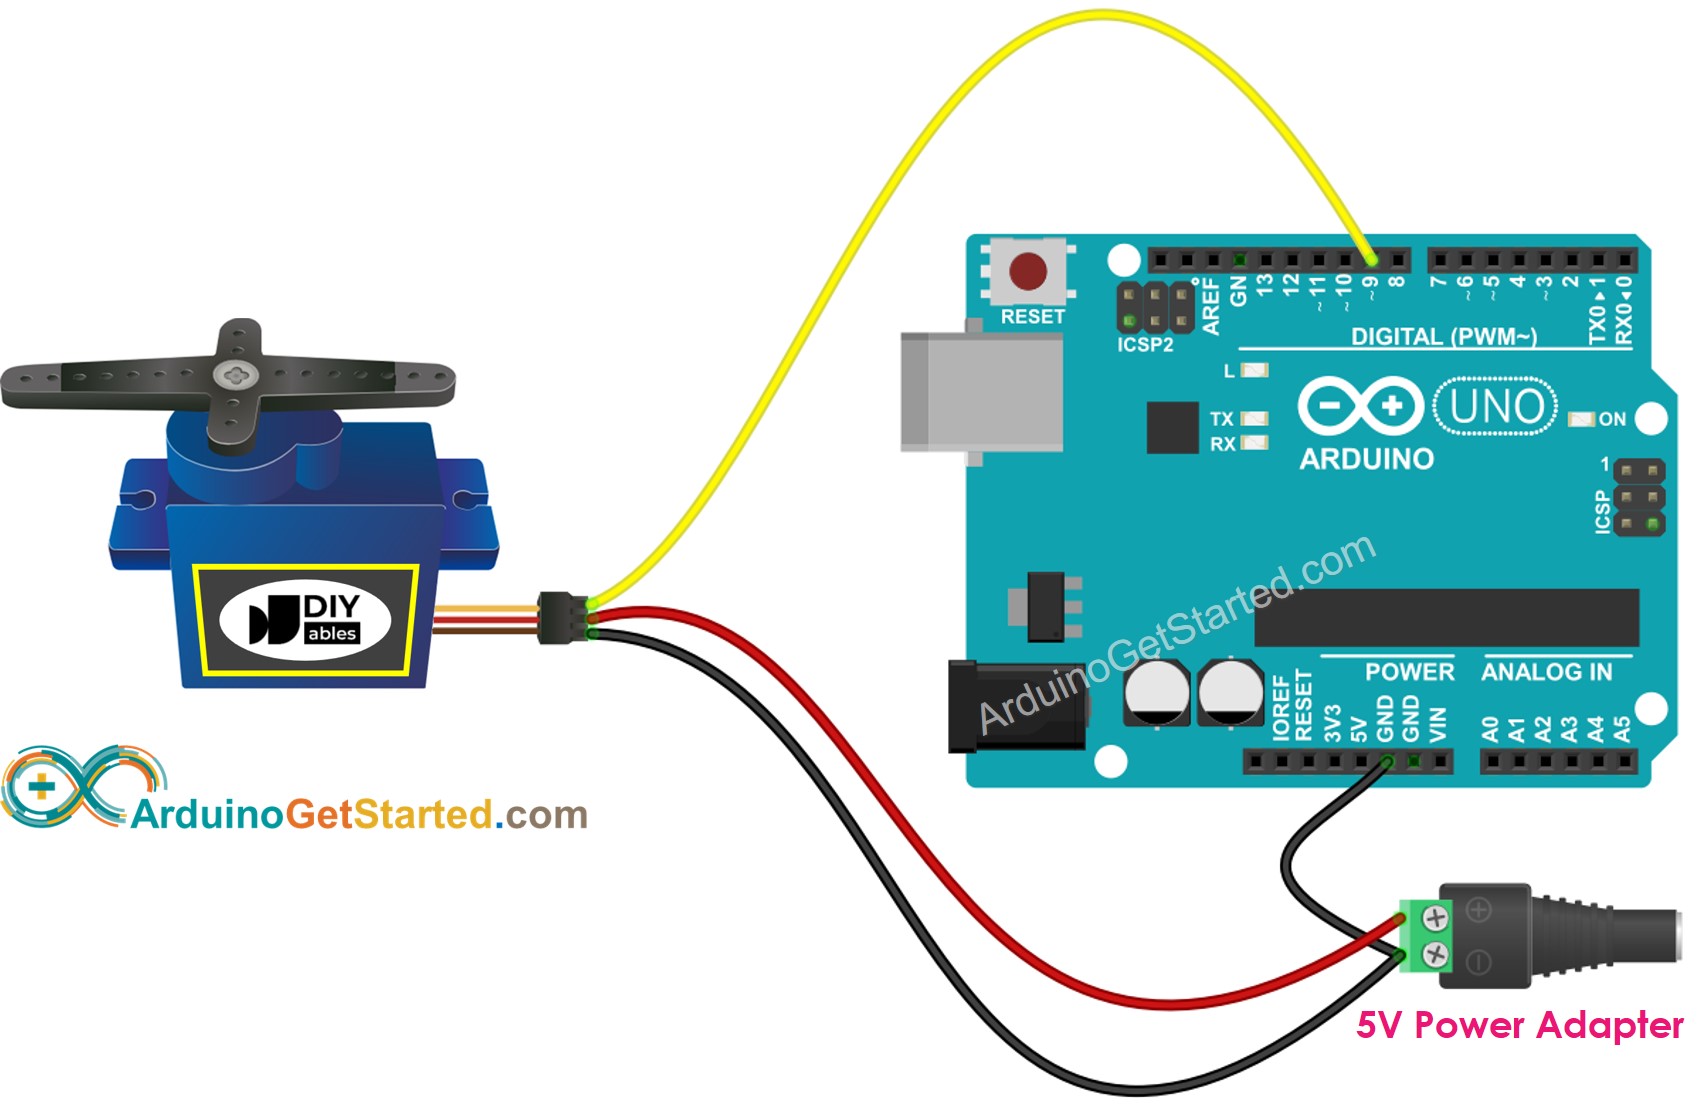
This image is created using Fritzing. Click to enlarge image
Arduino Code
#include <Servo.h>
Servo myservo;
void setup()
{
myservo.attach(9);
}
void loop() {}
※ Nota:
When calling Servo.attach() function, the servomotor rotates to the last value set by Servo.write() or Servo.writeMicroseconds() function, or 90 ° by default. Therefore, To position the servomotors at a certain position upon initialization, use Servo.write() or Servo.writeMicroseconds() function right before calling Servo.attach().
Ver También
※ ARDUINO BUY RECOMMENDATION
| Arduino UNO R3 | |
| Arduino Starter Kit |