Arduino - Servo.attach()
Description
Attach the Servo variable to a pin. Note that in Arduino 0016 and earlier, the Servo library supports only servos on only two pins: 9 and 10.
Syntax
servo.attach(pin)
servo.attach(pin, min, max)
Parameters
- servo: a variable of type Servo
- pin: the number of the pin that the servo is attached to
- min (optional): the pulse width, in microseconds, corresponding to the minimum (0-degree) angle on the servo (defaults to 544)
- max (optional): the pulse width, in microseconds, corresponding to the maximum (180-degree) angle on the servo (defaults to 2400)
Example
Hardware Required
| 1 | × | Official Arduino Uno | |
| 1 | × | Alternatively, DIYables STEM V3, Fully Compatible with Arduino Uno R3 | |
| 1 | × | USB 2.0 cable type A/B | |
| 1 | × | Servo Motor | |
| 1 | × | Jumper Wires |
Disclosure: Some links in this section are Amazon affiliate links. If you make a purchase through these links, we may earn a commission at no extra cost to you.
Additionally, some links direct to products from our own brand, DIYables .
Additionally, some links direct to products from our own brand, DIYables .
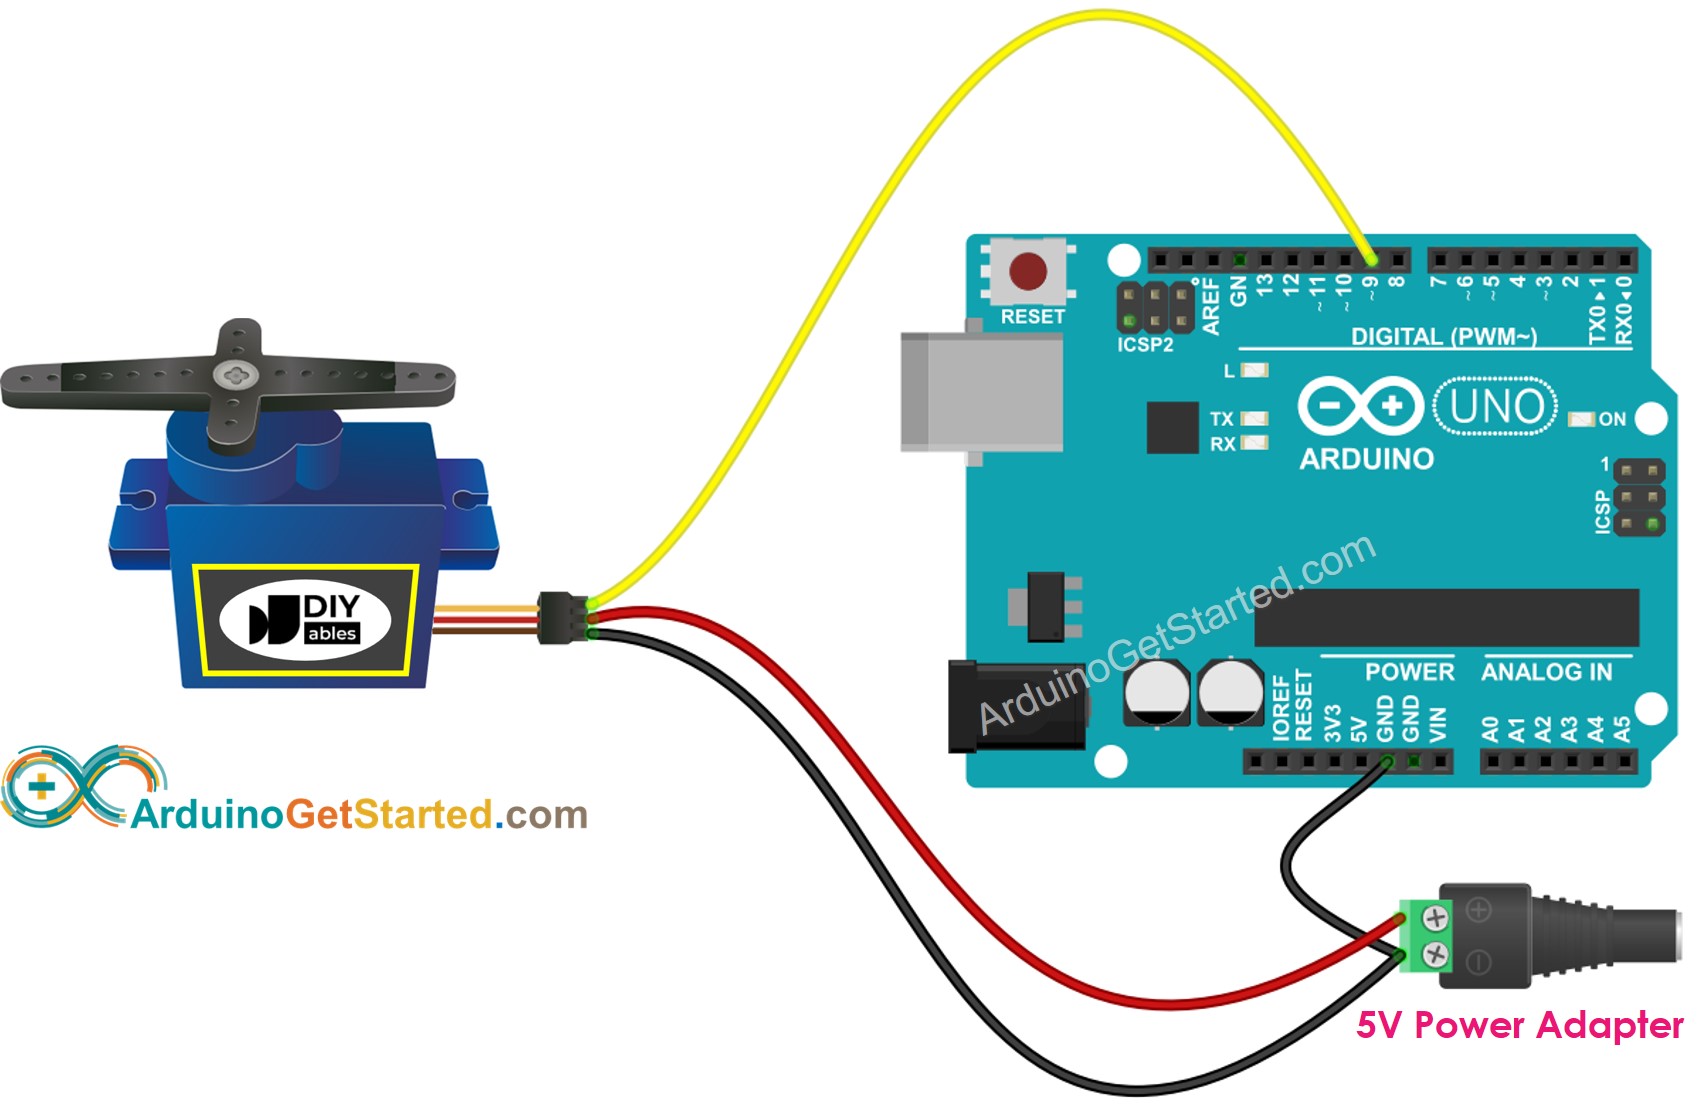
Wiring Diagram

This image is created using Fritzing. Click to enlarge image
Arduino Code
#include <Servo.h>
Servo myservo;
void setup() {
myservo.attach(9);
}
void loop() {}
※ NOTES AND WARNINGS:
When calling Servo.attach() function, the servomotor rotates to the last value set by Servo.write() or Servo.writeMicroseconds() function, or 90 ° by default. Therefore, To position the servomotors at a certain position upon initialization, use Servo.write() or Servo.writeMicroseconds() function right before calling Servo.attach().
See Also
※ ARDUINO BUY RECOMMENDATION
| Arduino UNO R3 | |
| Arduino Starter Kit |
