Arduino - Servo Motor
In this tutorial, we are going to learn how to use the servo motor with Arduino. In detail, we will learn:
- How servo motor works
- How to program Arduino to control servo motor
- How to program Arduino to control the speed of servo motor
- How to provide the extra power for high-torque servo motors.
Hardware Required
Or you can buy the following kits:
| 1 | × | DIYables STEM V3 Starter Kit (Arduino included) | |
| 1 | × | DIYables Sensor Kit (30 sensors/displays) | |
| 1 | × | DIYables Sensor Kit (18 sensors/displays) |
Additionally, some links direct to products from our own brand, DIYables .
About Servo Motor
Servo motor is a component that can rotate its handle (usually between 0° and 180°). It used to control the angular position of the object.
Pinout
The servo motor used in this example includes three pins:
- VCC pin: (typically red) needs to be connected to VCC (5V)
- GND pin: (typically black or brown) needs to be connected to GND (0V)
- Signal pin: (typically yellow or orange) receives the PWM control signal from an Arduino's pin.

How It Works
After connecting VCC pin and GND pin to 5V and 0V, respectively, we can control the servo motor by generating proper PWM signal to signal pin.
The angle is determined by the width of PWM signal.
Datasheet of the servo motor provides us the following parameters:
- Period of PWM (PERIOD)
- Minimum width of PWM (WIDTH_MAX)
- Maximum width of PWM (WIDTH_MIN)
These parameters are fixed in Arduino Servo library. We do NOT need to know the value of parameters.
The angle is determined as follows:
- If PWM's width = WIDTH_MIN, the servo motor rotates to 0°.
- If PWM's width = WIDTH_MAX, the servo motor rotates to 180°.
- If PWM's width is between WIDTH_MIN and WIDTH_MAX, the servo motor rotates to angle between 0° and 180° in proportion.
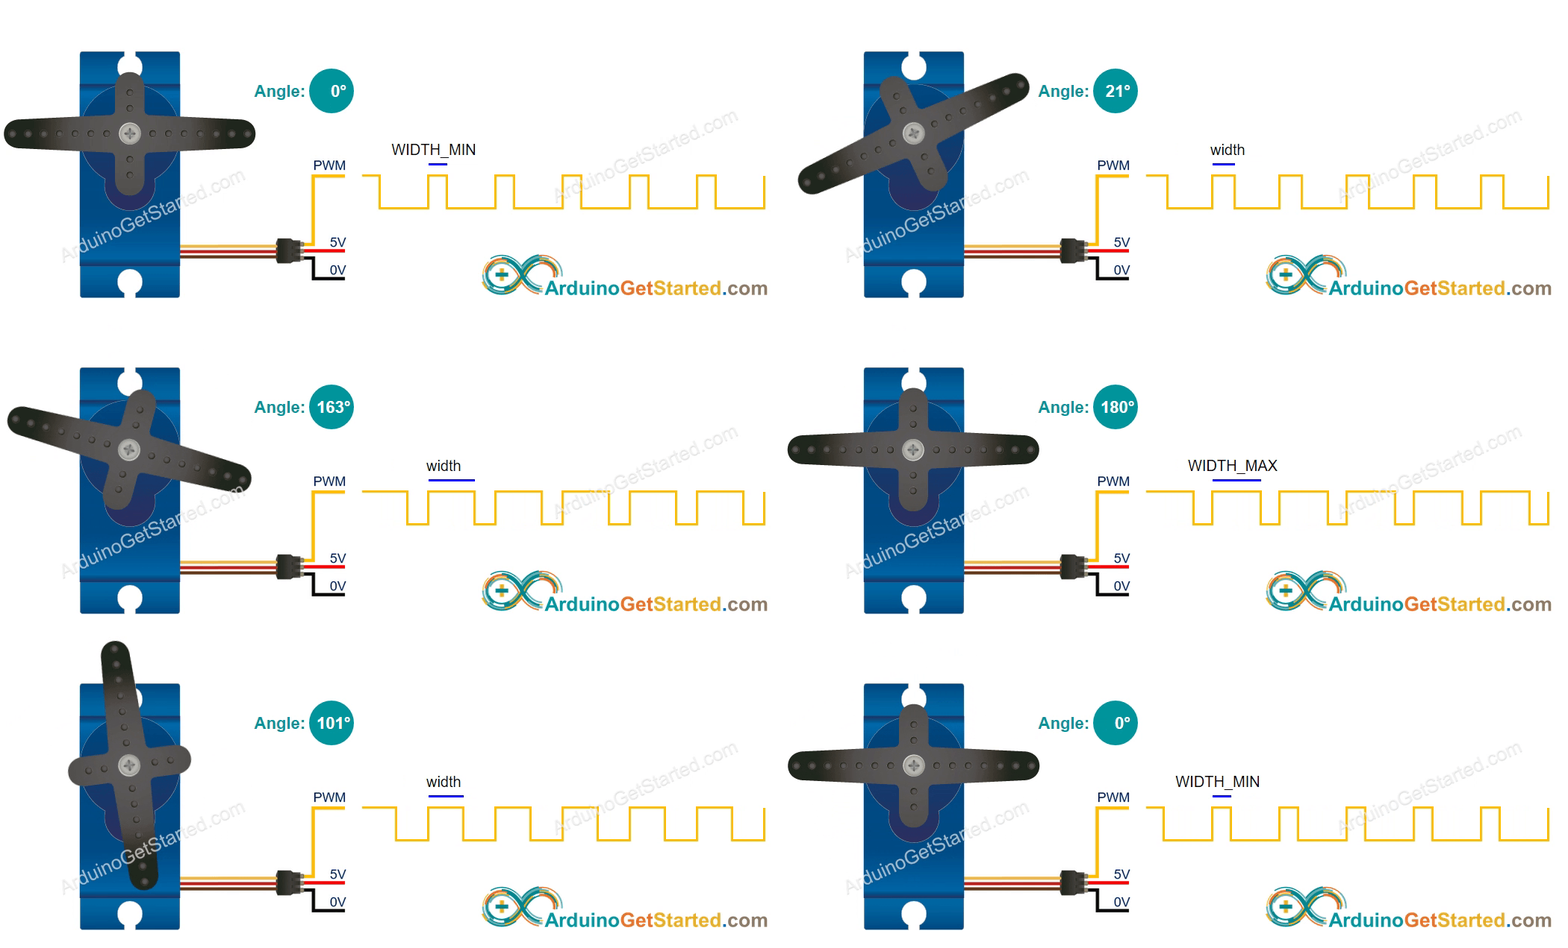
Arduino - Servo Motor
Some of Arduino pins can be programmed to generate PWM signal. We can control the servo motor by connecting the servo motor's signal pin to an Arduino's pin, and programming to generate PWM on the Arduino's pin.
Thanks to Arduino Servo library, controlling servo motor is a piece of cake. We even do NOT need to know how servo motor works. We also do NOT need to know how to generate PWM signal. We JUST need to learn how to use the library.
Wiring Diagram
You might encounter wiring diagrams online that depict a connection from the VCC pin of a servo motor directly to the 5V pin of the Arduino board, as shown below. While this approach may work, it is strongly discouraged due to the potential risk of damaging the Arduino board.
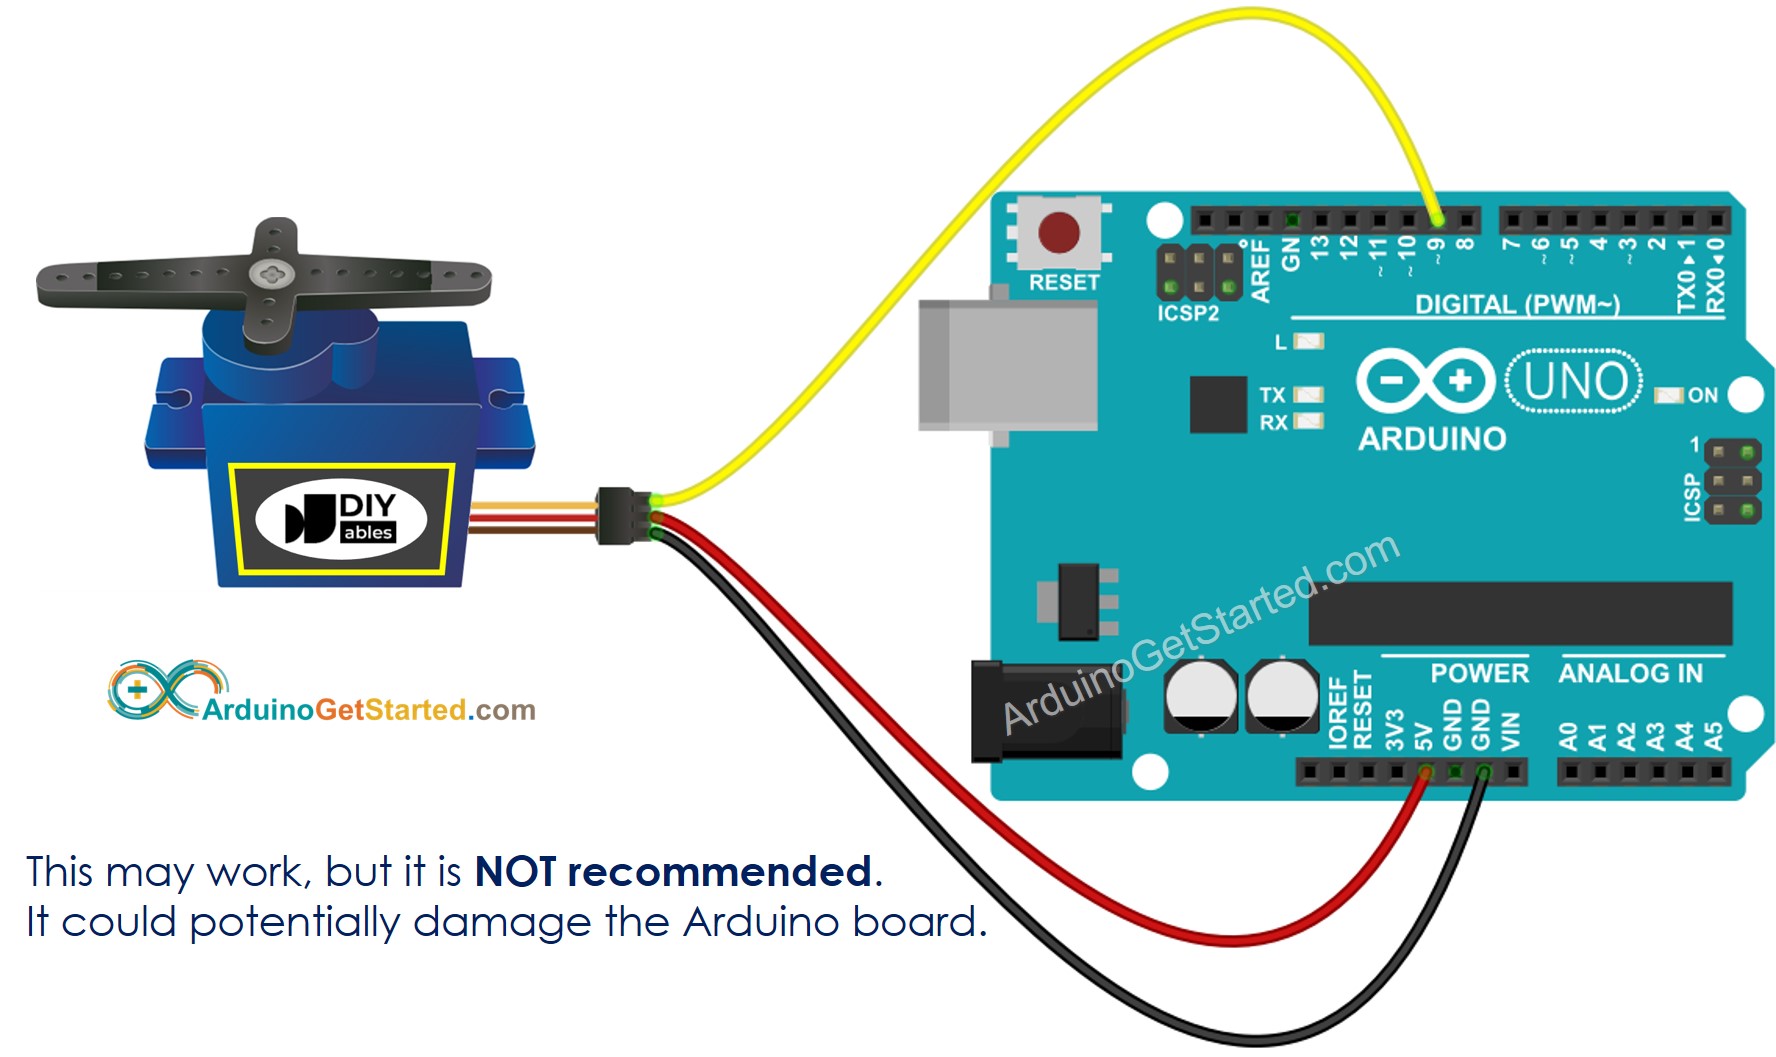
This image is created using Fritzing. Click to enlarge image
Instead, to safeguard your Arduino board, we strongly recommend using an external power supply for the servo motor. The wiring diagram below illustrates how to connect the servo motor to an external power source.
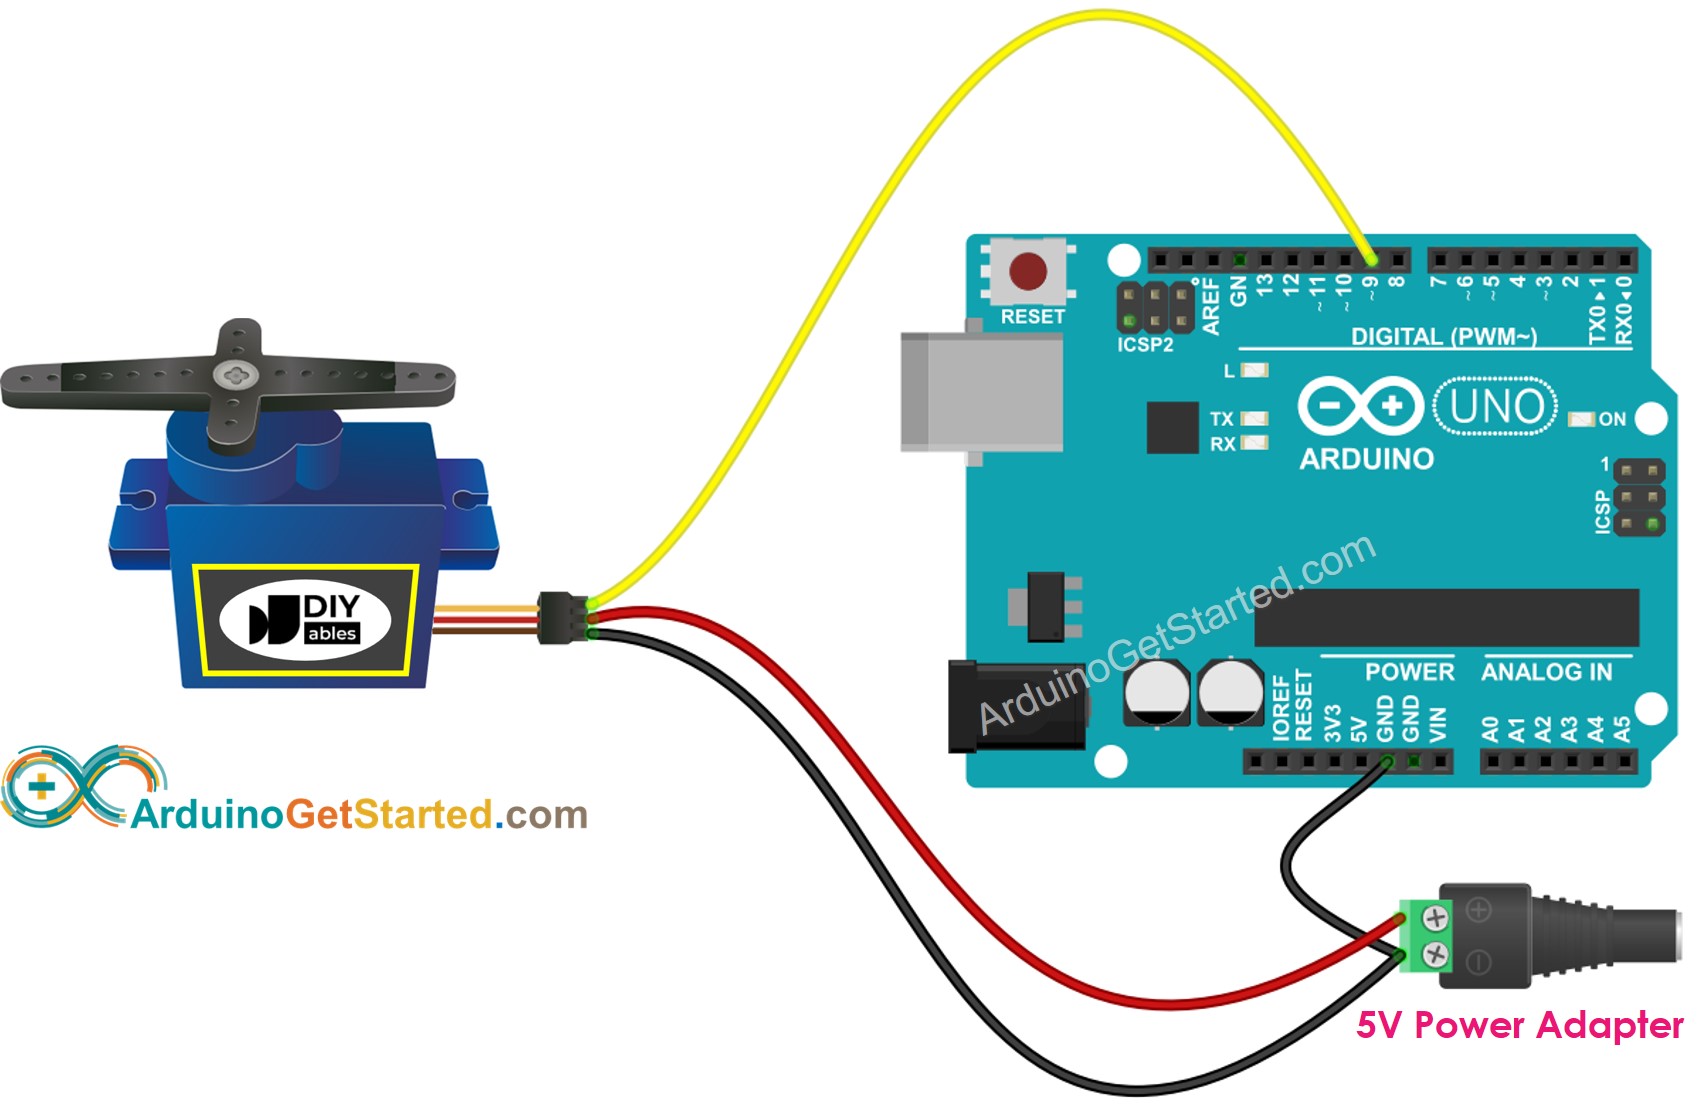
This image is created using Fritzing. Click to enlarge image
Please ensure that you connect the GND of the external power supply to the GND of the Arduino board. Don't overlook this crucial step for proper operation.
How To Program For Servo Motor
- Include the library:
- Declare a Servo object:
If you control more than one servo motors, you just need to declare more Servo objects:
- Set the control pin of Arduino, which connects to the signal pin of the servo motor. For example, pin 9:
- Lastly, rotate the angle of the servo motor to the desired angle. For example, 90°:
Arduino Code
Quick Steps
- Connect Arduino to PC via USB cable
- Open Arduino IDE, select the right board and port
- Copy the above code and open with Arduino IDE
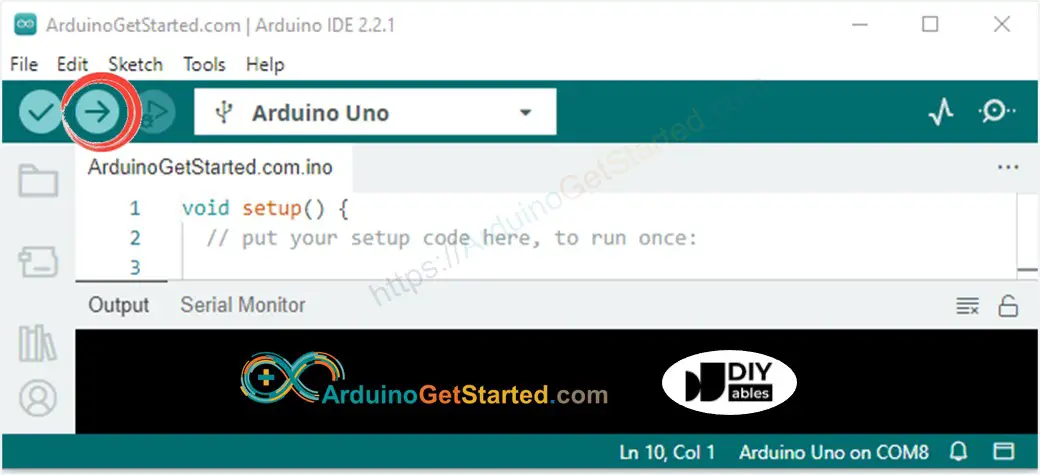
- Click Upload button on Arduino IDE to upload code to Arduino
- See the result: Servo motor rotates slowly from 0 to 180° and then back rotates slowly from 180 back to 0°
Code Explanation
Read the line-by-line explanation in comment lines of code!
How to Control Speed of Servo Motor
By using map() and millis() functions, we can control the speed of servo motor smoothly without blocking other code
Video Tutorial
We are considering to make the video tutorials. If you think the video tutorials are essential, please subscribe to our YouTube channel to give us motivation for making the videos.
Challenge Yourself
Use the servo motor to do one of the following projects:
- Controlling the position of a servo motor using a potentiometer. Hint: Refer to Arduino - Potentiometer.
- Automatically opening/closing the dustbin. Hint: Refer to Arduino - Ultrasonic Sensor.
Additional Knowledge
- The Servo library supports up to 12 motors on Arduino UNO and 48 on the Arduino Mega.
- Power from 5V pin of Arduino maybe NOT enough for servo motor in one of the following cases:
- Using a high-torque servo motor, which can carry a high-weight thing.
- Using many servo motors.
- Do not connect the positive pin of extra power source to 5V pin of Arduino.
- Must connect the negative pin of extra power source to the GND pin of Arduino.
In these cases, we may need to provide an extra power source for servo motors.
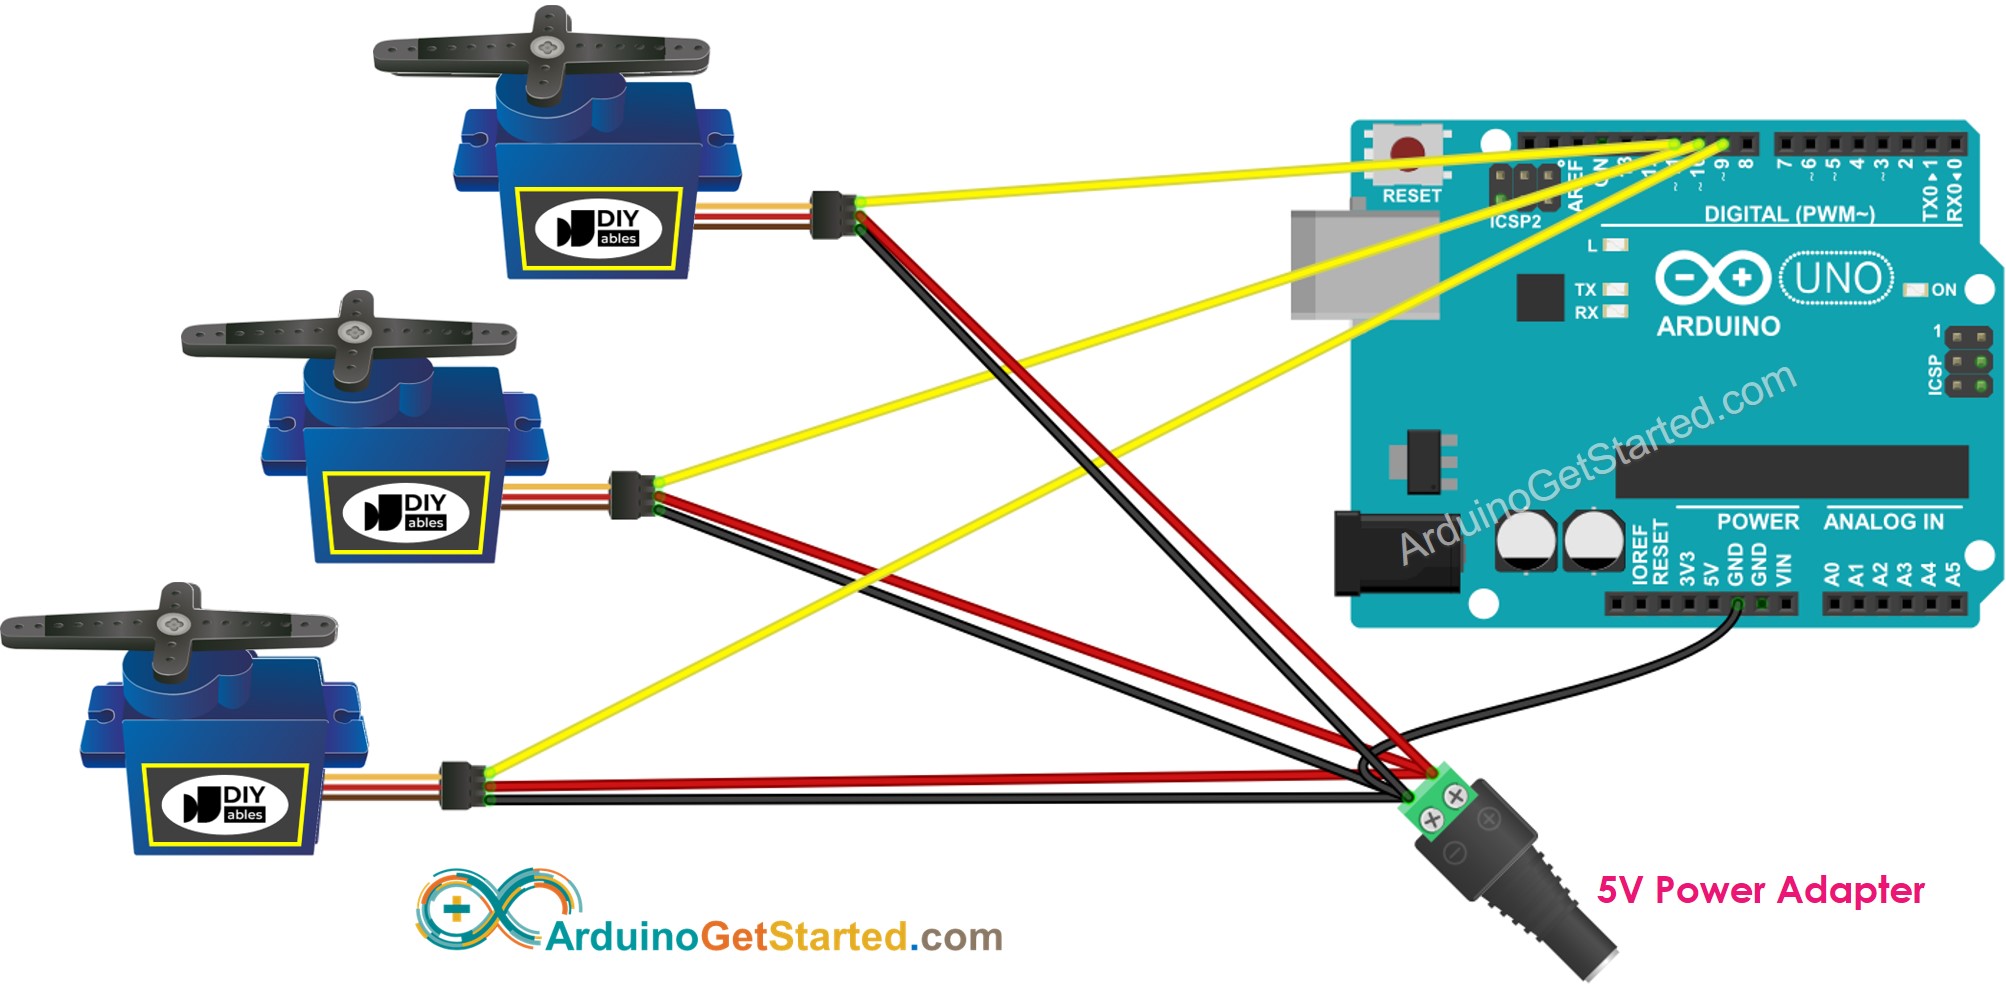
This image is created using Fritzing. Click to enlarge image
As we can see in the above diagram, the VCC pin of servo motor doest NOT connect to the 5V pin of Arduino. It connects to the positive pin of an extra power source.
Please note that:
