DIYables IR Controller - begin()
Description
Initializes the IR receiver, which is used to receive the infrared signal from IR controller. This function can be used for both 17-key and 21-key IR remote controller.
Syntax
irController.begin();
Parameters
None
Return
None
Example
Hardware Required
| 1 | × | Official Arduino Uno | |
| 1 | × | Alternatively, DIYables STEM V3, Fully Compatible with Arduino Uno R3 | |
| 1 | × | USB 2.0 cable type A/B | |
| 1 | × | IR Kit (Remote Controller and Receiver) | |
| 1 | × | CR2025 Battery | |
| 1 | × | Jumper Wires |
Disclosure: Some links in this section are Amazon affiliate links. If you make a purchase through these links, we may earn a commission at no extra cost to you.
Additionally, some links direct to products from our own brand, DIYables .
Additionally, some links direct to products from our own brand, DIYables .
Wiring Diagram

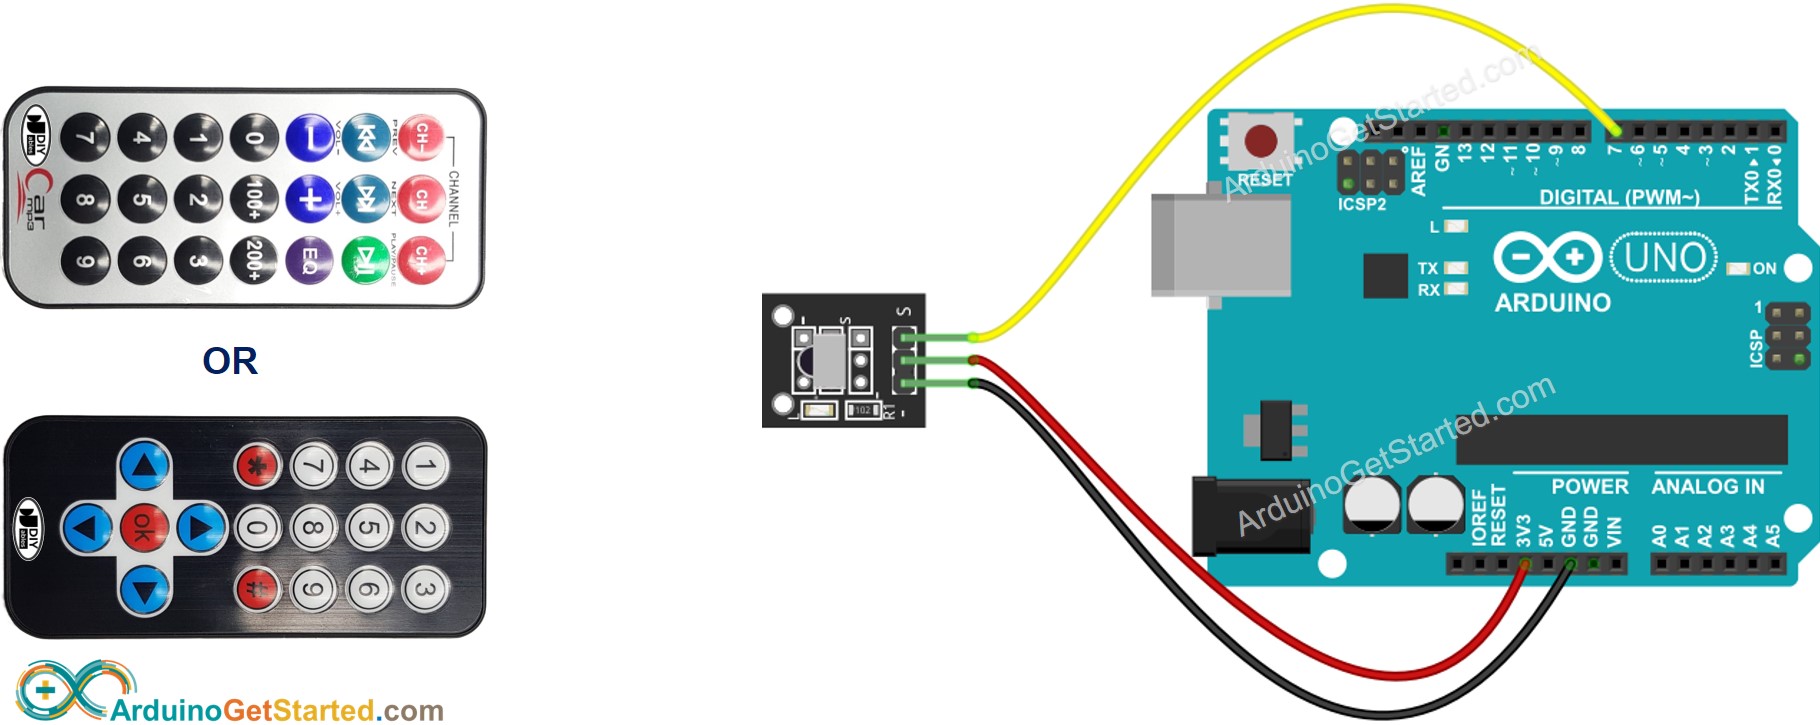
This image is created using Fritzing. Click to enlarge image
Arduino Code
/*
Created by DIYables
This example code is in the public domain
Product page: https://diyables.io/products/infrared-ir-remote-control-kit-with-17-key-controller-and-receiver
*/
#include <DIYables_IRcontroller.h> // DIYables_IRcontroller library
#define IR_RECEIVER_PIN 7 // The Arduino pin connected to IR controller
DIYables_IRcontroller_17 irController(IR_RECEIVER_PIN, 200); // debounce time is 200ms
void setup() {
Serial.begin(9600);
irController.begin();
}
void loop() {
Key17 command = irController.getKey();
if (command != Key17::NONE) {
switch (command) {
case Key17::KEY_1:
Serial.println("1");
// TODO: YOUR CONTROL
break;
case Key17::KEY_2:
Serial.println("2");
// TODO: YOUR CONTROL
break;
case Key17::KEY_3:
Serial.println("3");
// TODO: YOUR CONTROL
break;
case Key17::KEY_4:
Serial.println("4");
// TODO: YOUR CONTROL
break;
case Key17::KEY_5:
Serial.println("5");
// TODO: YOUR CONTROL
break;
case Key17::KEY_6:
Serial.println("6");
// TODO: YOUR CONTROL
break;
case Key17::KEY_7:
Serial.println("7");
// TODO: YOUR CONTROL
break;
case Key17::KEY_8:
Serial.println("8");
// TODO: YOUR CONTROL
break;
case Key17::KEY_9:
Serial.println("9");
// TODO: YOUR CONTROL
break;
case Key17::KEY_STAR:
Serial.println("*");
// TODO: YOUR CONTROL
break;
case Key17::KEY_0:
Serial.println("0");
// TODO: YOUR CONTROL
break;
case Key17::KEY_SHARP:
Serial.println("#");
// TODO: YOUR CONTROL
break;
case Key17::KEY_UP:
Serial.println("UP");
// TODO: YOUR CONTROL
break;
case Key17::KEY_DOWN:
Serial.println("DOWN");
// TODO: YOUR CONTROL
break;
case Key17::KEY_LEFT:
Serial.println("LEFT");
// TODO: YOUR CONTROL
break;
case Key17::KEY_RIGHT:
Serial.println("RIGHT");
// TODO: YOUR CONTROL
break;
case Key17::KEY_OK :
Serial.println("OK");
// TODO: YOUR CONTROL
break;
default:
Serial.println("WARNING: undefined command:");
break;
}
}
}
See Also
※ ARDUINO BUY RECOMMENDATION
| Arduino UNO R3 | |
| Arduino Starter Kit |
