LiquidCrystal() Constructor
Description
Creates a variable of type LiquidCrystal. The display can be controlled using 4 or 8 data lines. If the former, omit the pin numbers for d0 to d3 and leave those lines unconnected. The RW pin can be tied to ground instead of connected to a pin on the Arduino; if so, omit it from this function's parameters.
Syntax
There are for ways to create LiquidCrystal object:
LiquidCrystal(rs, enable, d4, d5, d6, d7)
LiquidCrystal(rs, rw, enable, d4, d5, d6, d7)
LiquidCrystal(rs, enable, d0, d1, d2, d3, d4, d5, d6, d7)
LiquidCrystal(rs, rw, enable, d0, d1, d2, d3, d4, d5, d6, d7)
Parameters
- rs: the number of the Arduino pin that is connected to the RS pin on the LCD
- rw: the number of the Arduino pin that is connected to the RW pin on the LCD (optional)
- enable: the number of the Arduino pin that is connected to the enable pin on the LCD
- d0, d1, d2, d3, d4, d5, d6, d7: the numbers of the Arduino pins that are connected to the corresponding data pins on the LCD. d0, d1, d2, and d3 are optional; if omitted, the LCD will be controlled using only the four data lines (d4, d5, d6, d7).
Example
Hardware Required
Disclosure: Some links in this section are Amazon affiliate links. If you make a purchase through these links, we may earn a commission at no extra cost to you.
Additionally, some links direct to products from our own brand, DIYables .
Additionally, some links direct to products from our own brand, DIYables .
Wiring Diagram
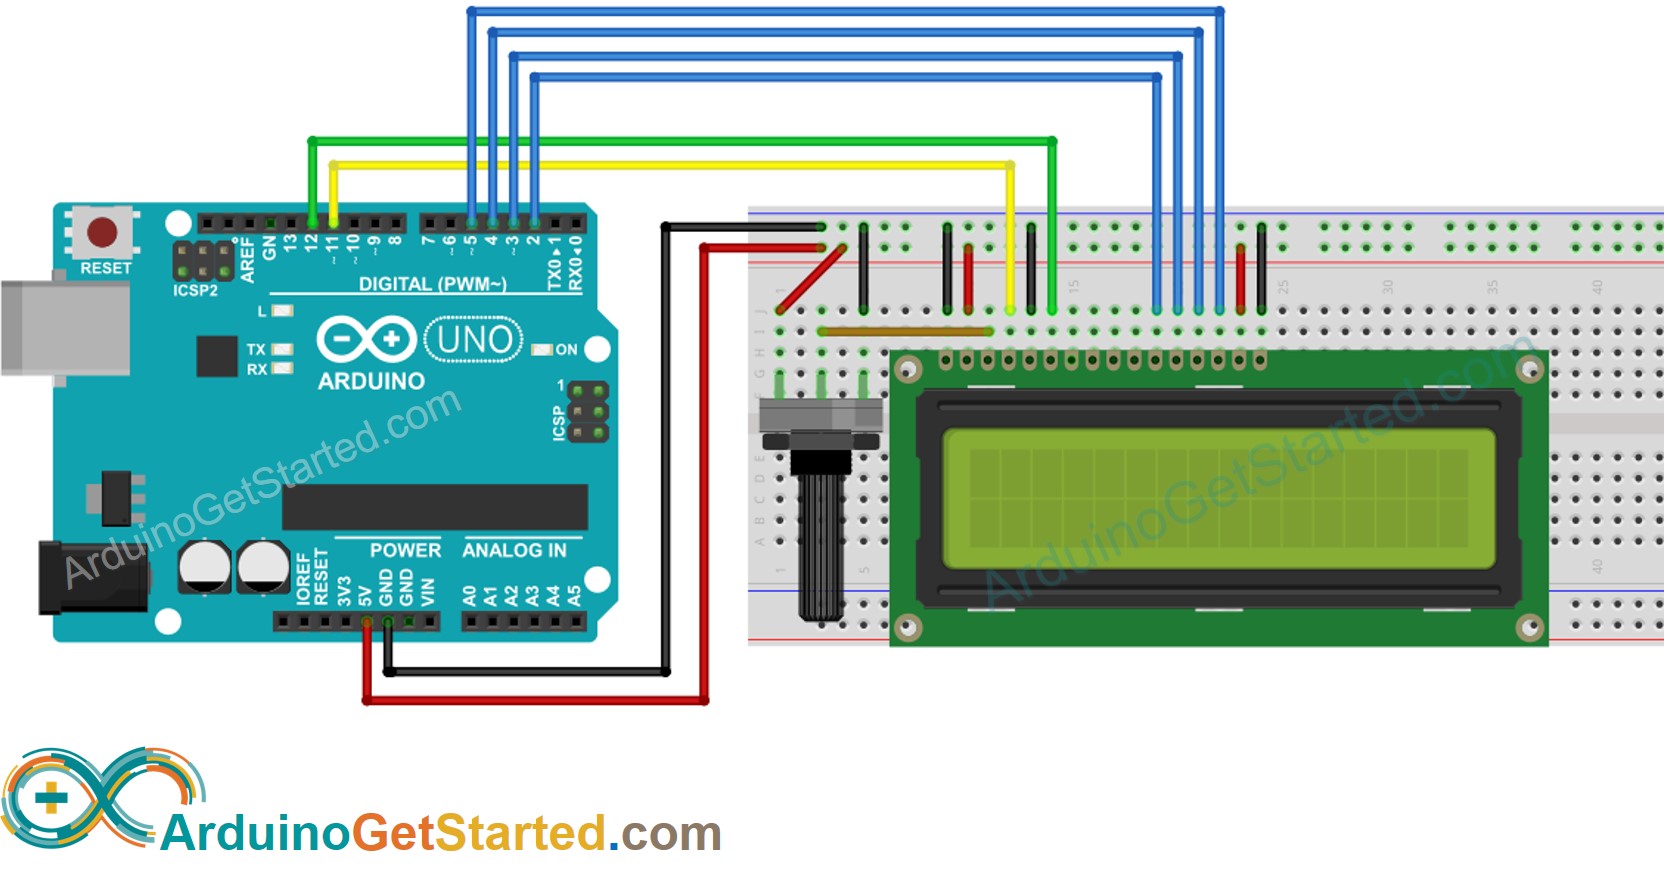
This image is created using Fritzing. Click to enlarge image
Arduino Code
#include <LiquidCrystal.h>
LiquidCrystal lcd(11, 12, 2, 3, 4, 5);
void setup()
{
lcd.begin(16, 2); // set up the LCD 16x2
lcd.print("hello, world!"); // print a message to the LCD
}
void loop() {}
See Also
※ ARDUINO BUY RECOMMENDATION
| Arduino UNO R3 | |
| Arduino Starter Kit |