Arduino - lcd.createChar()
Description
Create a custom character (glyph) for use on the LCD. Up to eight characters of 5x8 pixels are supported (numbered 0 to 7). The appearance of each custom character is specified by an array of eight bytes, one for each row. The five least significant bits of each byte determine the pixels in that row. To display a custom character on the screen, write() its number.
※ NOTES AND WARNINGS:
- When referencing custom character "0", if it is not in a variable, you need to cast it as a byte, otherwise the compiler throws an error. See the example below.
- To create the custom character, use The custom character generator
Syntax
lcd.createChar(num, data)
Parameters
- lcd: a variable of type LiquidCrystal
- num: which character to create (0 to 7)
- data: the character's pixel data
Example
Hardware Required
Disclosure: Some links in this section are Amazon affiliate links. If you make a purchase through these links, we may earn a commission at no extra cost to you.
Additionally, some links direct to products from our own brand, DIYables .
Additionally, some links direct to products from our own brand, DIYables .
Wiring Diagram
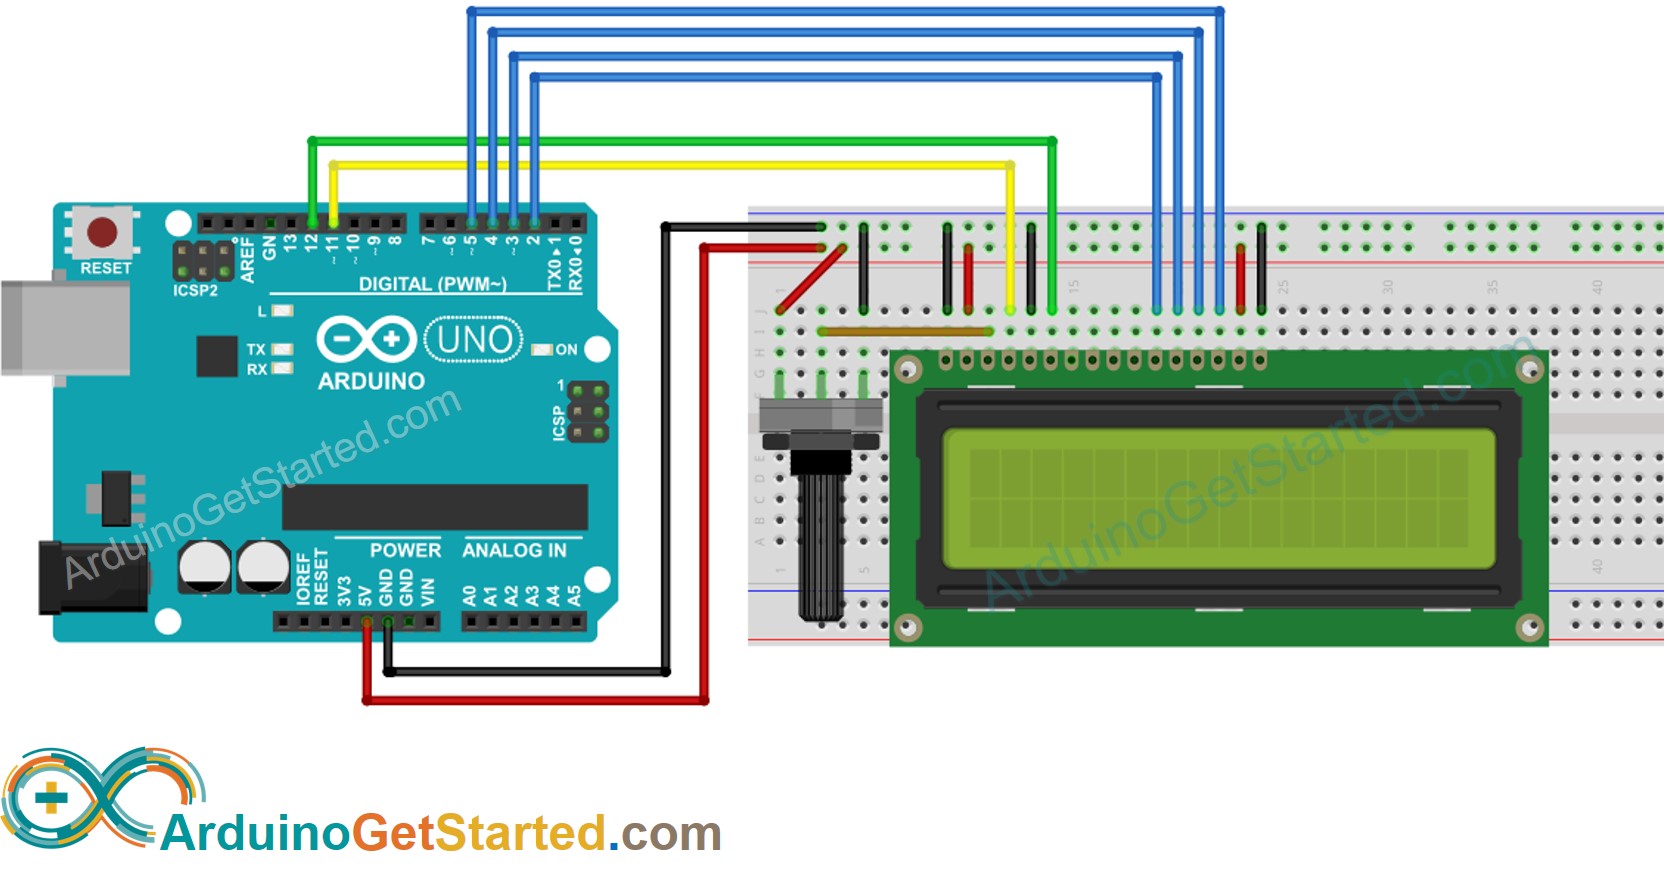
This image is created using Fritzing. Click to enlarge image
Arduino Code
#include <LiquidCrystal.h>
LiquidCrystal lcd(11, 12, 2, 3, 4, 5);
byte smiley[8] = {
B00000,
B10001,
B00000,
B00000,
B10001,
B01110,
B00000,
};
void setup() {
lcd.createChar(0, smiley);
lcd.begin(16, 2);
lcd.write(byte(0));
}
void loop() {}
See Also
※ ARDUINO BUY RECOMMENDATION
| Arduino UNO R3 | |
| Arduino Starter Kit |