Arduino - Servo.writeMicroseconds()
Description
Writes a value in microseconds (uS) to the servo, controlling the shaft accordingly. On a standard servo, this will set the angle of the shaft. On standard servos a parameter value of 1000 is fully counter-clockwise, 2000 is fully clockwise, and 1500 is in the middle.
Note that some manufactures do not follow this standard very closely so that servos often respond to values between 700 and 2300. Feel free to increase these endpoints until the servo no longer continues to increase its range. Note however that attempting to drive a servo past its endpoints (often indicated by a growling sound) is a high-current state, and should be avoided.
Continuous-rotation servos will respond to the writeMicrosecond function in an analogous manner to the Servo.write() function.
Syntax
Parameters
- servo: a variable of type Servo
- uS: the value of the parameter in microseconds (int)
Example
Hardware Required
| 1 | × | Official Arduino Uno | |
| 1 | × | Alternatively, DIYables STEM V3, Fully Compatible with Arduino Uno R3 | |
| 1 | × | USB 2.0 cable type A/B | |
| 1 | × | Servo Motor | |
| 1 | × | Jumper Wires |
Additionally, some links direct to products from our own brand, DIYables .
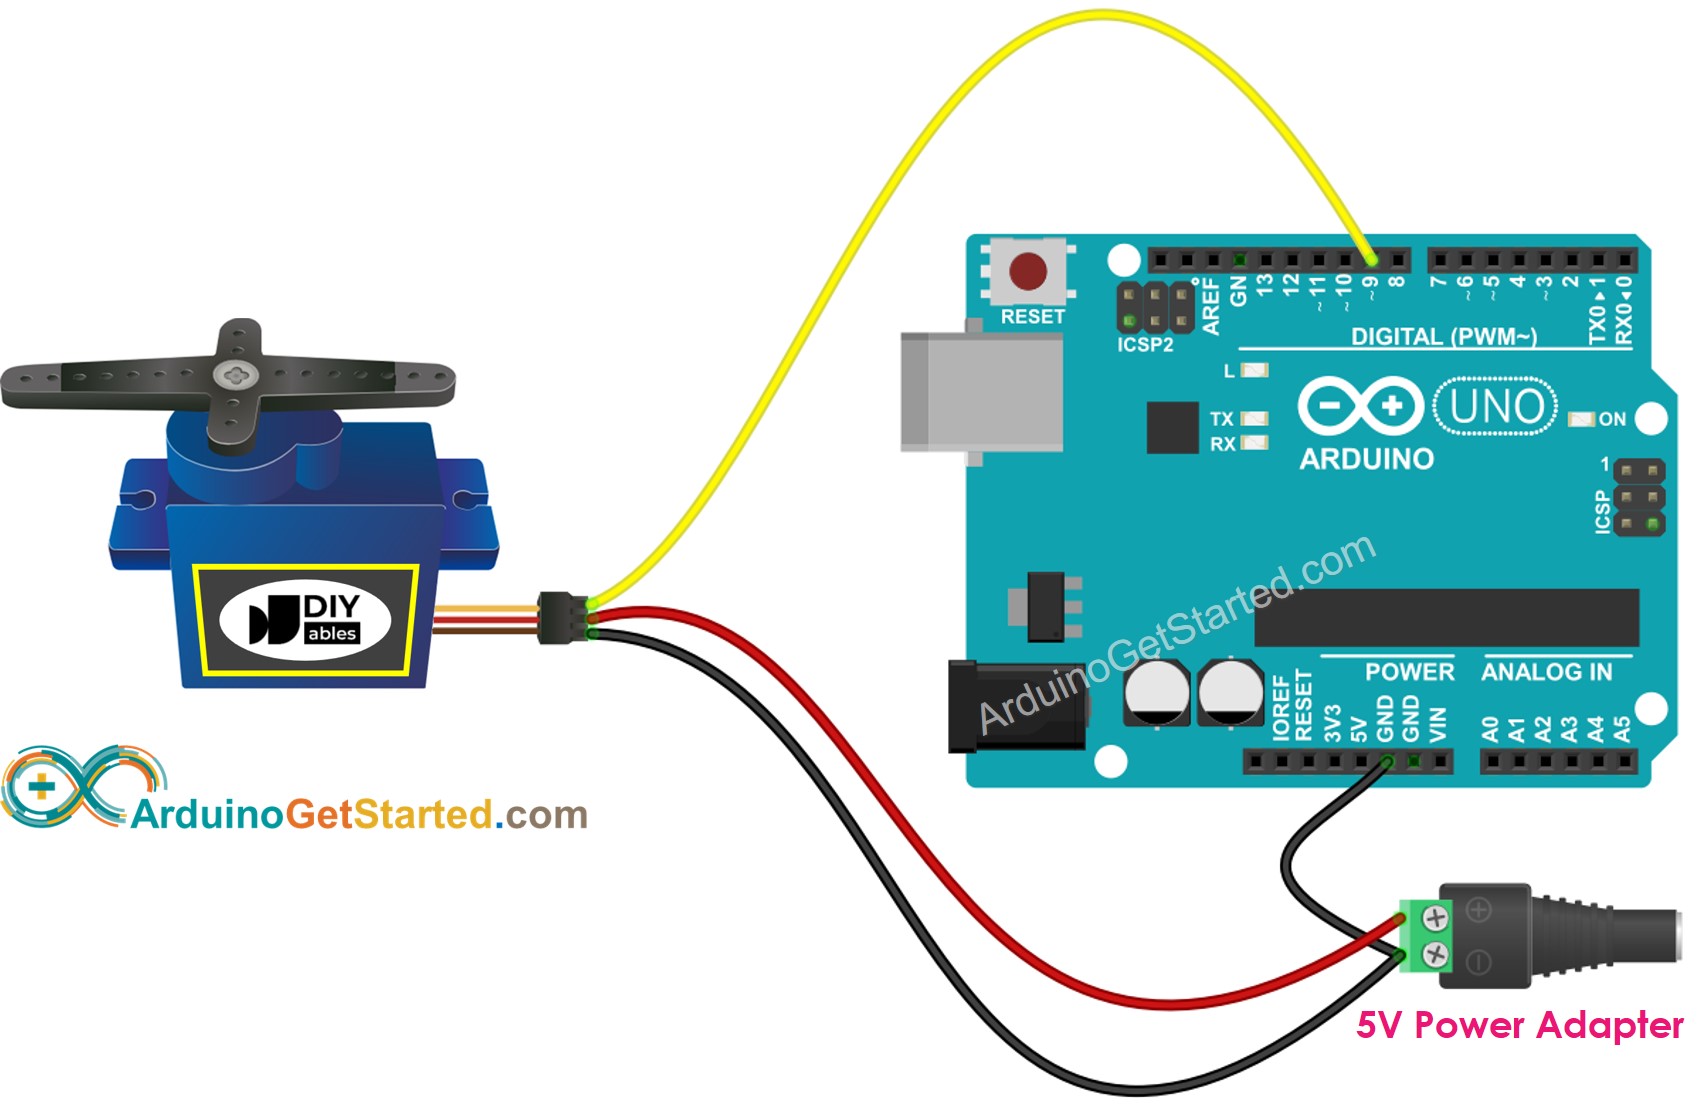
Wiring Diagram

This image is created using Fritzing. Click to enlarge image
Arduino Code
See Also
※ ARDUINO BUY RECOMMENDATION
| Arduino UNO R3 | |
| Arduino Starter Kit |
