tone()
Descripción
Genera en un pin una onda cuadrada de la frecuencia especificada (y ciclo de trabajo del 50%). Se puede especificar una duración, de lo contrario la onda continúa hasta una llamada a noTone(). El pin puede ser conectado a un zumbador piezoeléctrico o a un altavoz para reproducir tonos.
Sólo un tono puede ser generado a la vez. Si un tono ya se está reproduciendo en un pin diferente, la llamada a tono() no tendrá ningún efecto. Si el tono se está reproduciendo en el mismo pin, la llamada ajustará su frecuencia.
El uso de la función tone() interferirá con la salida PWM en los pines 3 y 11 (en las placas distintas de la Mega).
| Placa | Frecuencia Mín (Hz) | Frecuencia Máx (Hz) |
|---|---|---|
| Uno, Mega, Leonardo y otras placas AVR | 31 | 65535 |
| Gemma | No implementado | No implementado |
| Zero | 41 | 275000 |
| Due | No implementado | No implementado |
Para detalles técnicos ver las notas Brett Hagman's.
※ Nota:
Si desea reproducir tonos diferentes en varios pines, es necesario llamar noTone() en un pin antes de llamar a tone() en el siguiente pin.
Sintaxis
tone(pin, frequency)
tone(pin, frequency, duration)
Parámetros
- pin: el pin en el que se quiere generar el tono
- frequency: la frecuencia del tono en hertzios - int sin signo
- duration: la duración del tono en milisegundos (opcional) - long sin signo
Retornos
- Ninguno
Ejemplo
Let's to play "Jingle Bells" song with Arduino.
Hardware Required
Additionally, some links direct to products from our own brand, DIYables .
Wiring Diagram
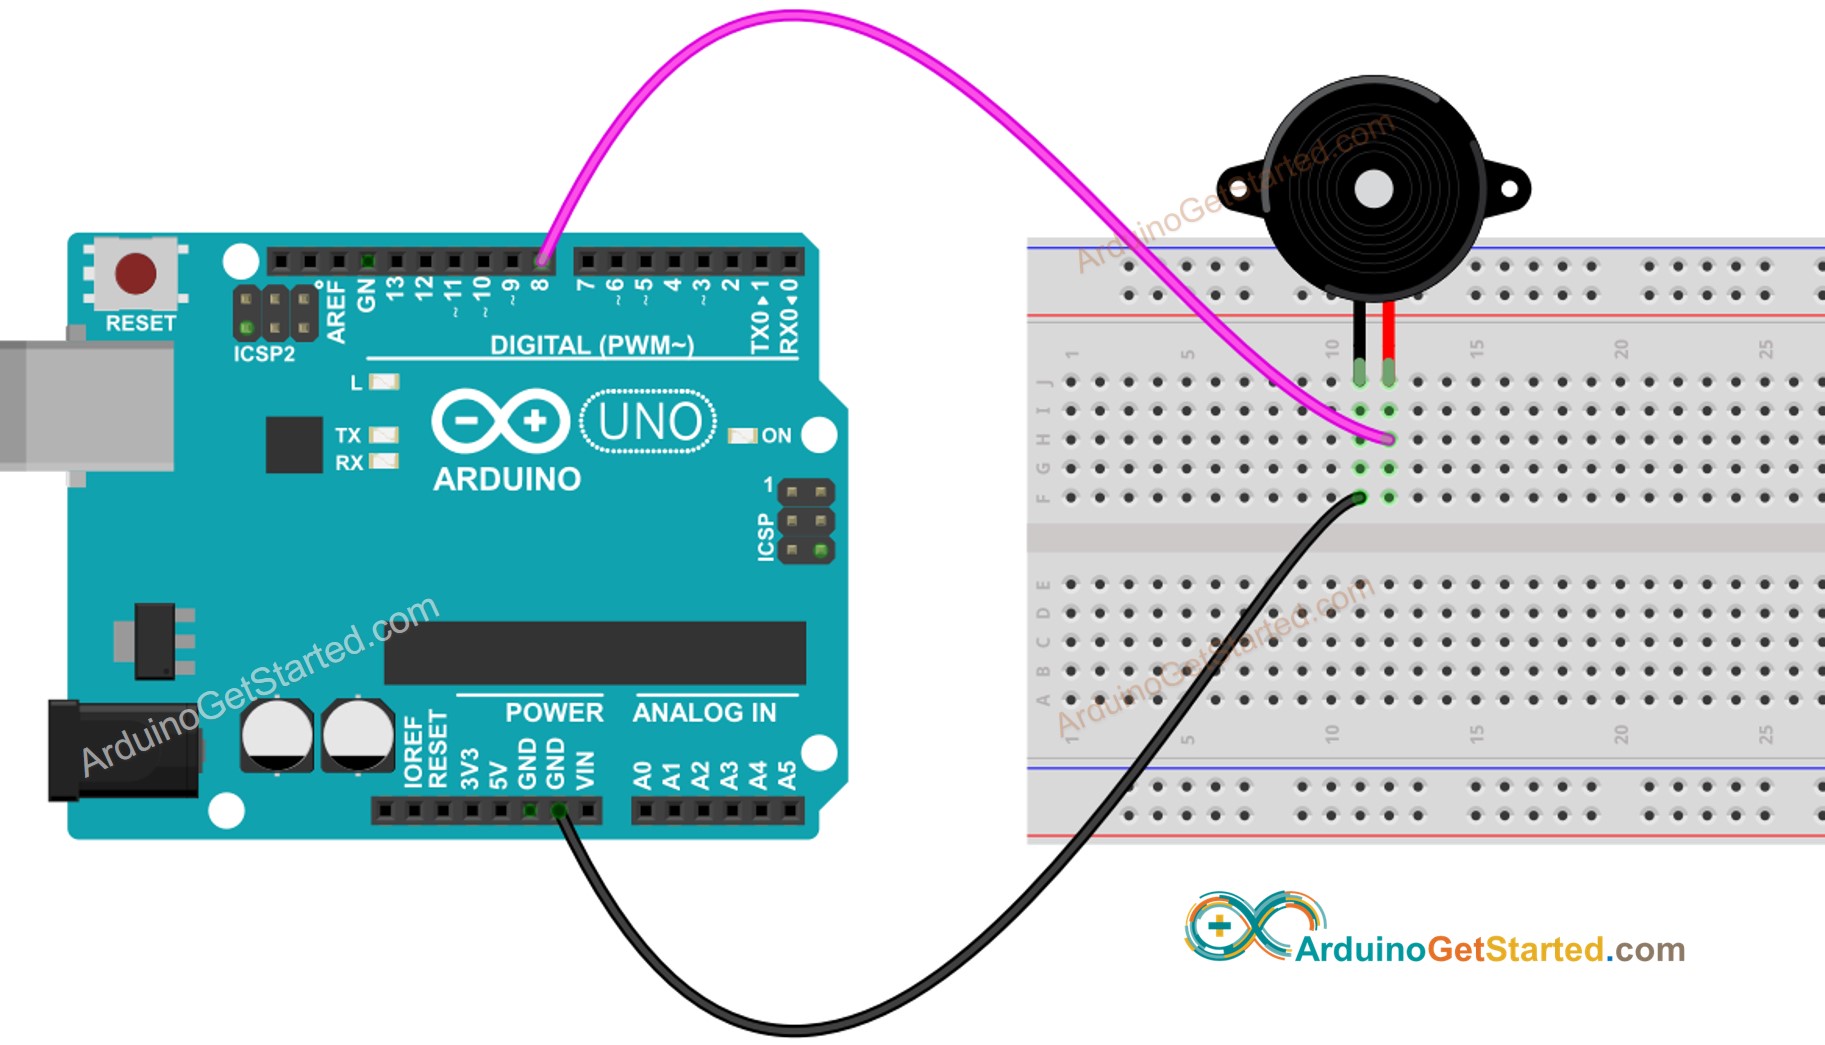
This image is created using Fritzing. Click to enlarge image
Arduino Code
For more detailed instruction, see Arduino - Piezo Buzzer
※ ARDUINO BUY RECOMMENDATION
| Arduino UNO R3 | |
| Arduino Starter Kit |