Arduino - Piezo Buzzer
In this tutorial, we are going to learn how to use the buzzer with Arduino, In detail, we will learn:
- Active buzzer vs passive buzzer
- How buzzer works
- How to connect the piezo buzzer to Arduino
- How to program Arduino to control piezo buzzer to generate sound, melody
Hardware Required
Or you can buy the following kits:
| 1 | × | DIYables STEM V3 Starter Kit (Arduino included) | |
| 1 | × | DIYables Sensor Kit (18 sensors/displays) |
Additionally, some links direct to products from our own brand, DIYables .
About Buzzer
The buzzers are used to generate sound, beep or even melody of a song. They come in several types, categorized by distinct characteristics. Let's explore these categories based on the following characteristics:
- Control Method:
- Active Buzzers
- Passive Buzzers
- Sound-Generating Mechanism:
- Piezo Buzzers
- Regular Buzzers
- Operating Voltage:
- Low Voltage (3-5V)
- High Voltage (12V)
- Active Buzzer:
- Produces sound when voltage is applied.
- Needs a continuous electrical signal to make sound.
- Easier to use, requiring only a voltage source.
- Typically used in basic alerting applications.
- Passive Buzzer:
- Requires an external oscillating signal to create sound.
- Can produce different tones by changing the input frequency.
- Requires more complex circuitry to operate.
- Commonly used in musical applications and tone generation tasks.
- Piezo Buzzer:
- Uses piezoelectric crystals.
- Produces high-pitched, clear sounds.
- Versatile with various tones and frequencies.
- Efficient and commonly used in alarms and musical devices.
- Regular Buzzer:
- Uses electromagnetic coils.
- Produces basic, buzzy sounds.
- Limited tone variation.
- Used in simpler applications like doorbells and basic alarms.
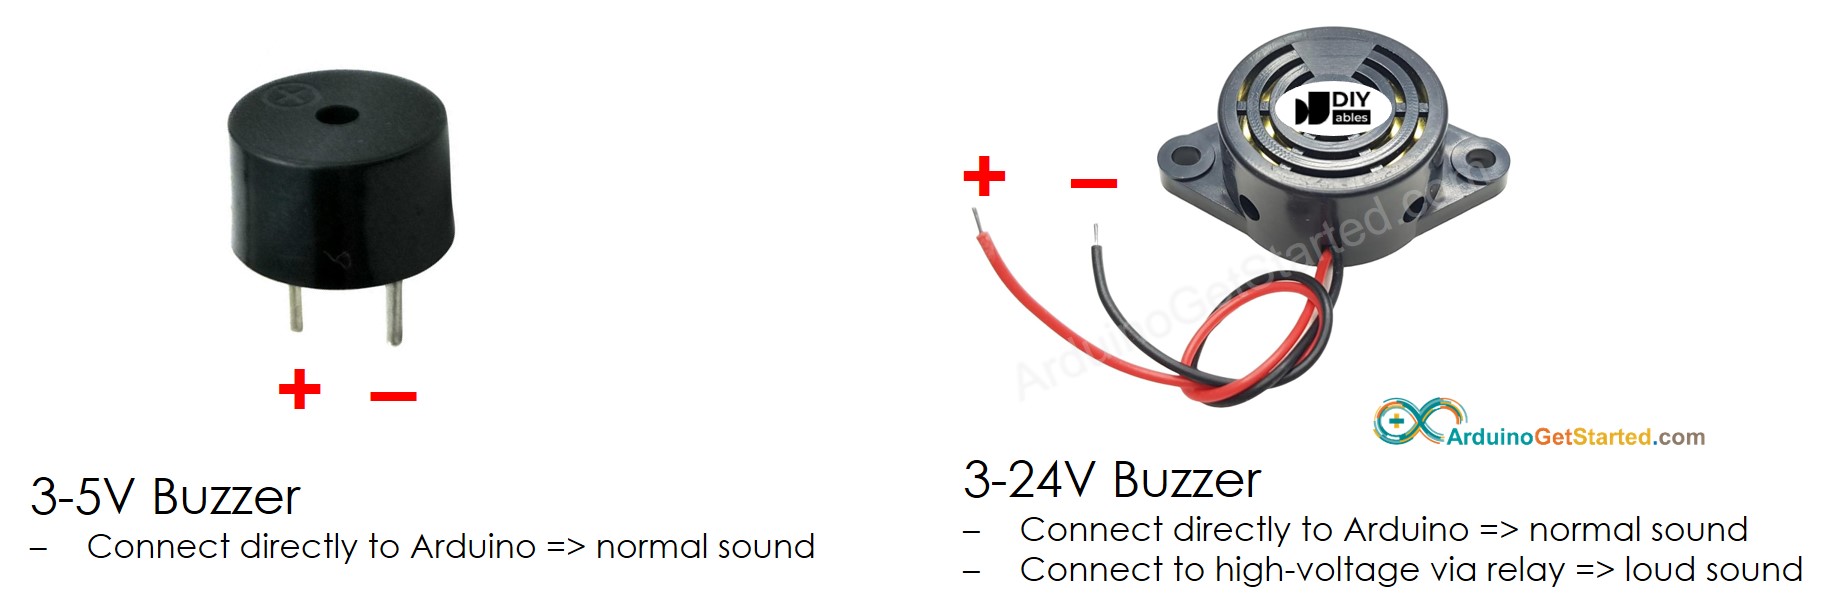
- When you connect this buzzer directly to Arduino pin, it will create a normal sound ⇒ suitable for sound indicator like keypad sound
- When you connect this buzzer to a high-voltage via a relay, it will create a loud sound ⇒ suitable for the warning sound.
- Negative (-) pin: Connect this pin to GND (0V).
- Positive (+) pin: This pin receives the control signal from the Arduino, either directly or via a relay.
- GND pin: Connect this pin to GND (0V).
- VCC pin: Connect this pin to a power supply (5V or 3.3V).
- I/O pin: This pin receives the PWM control signal from an ESP32's GPIO pin.
- If connecting VCC to the positive pin, piezo buzzer generates the constant sound
- If generating a square wave of the specified frequency (and 50% duty cycle) on the positive pin, the piezo buzzer generates tones. The different frequency makes a different tone. By changing the frequency of the signal on the positive pin, we can create the melody of a song.
- Unlike the active buzzer, if just connecting VCC to the positive pin, the passive buzzer does NOT generates the constant sound
- Just like the active buzzer, If generating a square wave of the specified frequency (and 50% duty cycle) on the positive pin, the piezo buzzer generates tones. The different frequency makes a different tone. By changing the frequency of the signal on the positive pin, we can create the melody of a song
Let's see more detail.
Active Buzzer vs Passive Buzzer
Piezo Buzzer vs Regular Buzzer
In the market, there is a 3V-24V active buzzer, which you can use as 3-5V active buzzer or high voltage buzzer (12V...),
In this tutorial, we will learn 3-5V active and passive piezo buzzer. For 12V buzzer, please refer to the Arduino - 12V buzzer tutorial
Pinout
Buzzer Pinout
A standard buzzer typically has two pins:
Piezo Buzzer Module Pinout
A Piezo Buzzer module generally includes three pins:
How an Active Buzzer Works
How an Passive Buzzer Works
Wiring Diagram
- The wiring between Arduino and piezo buzzer
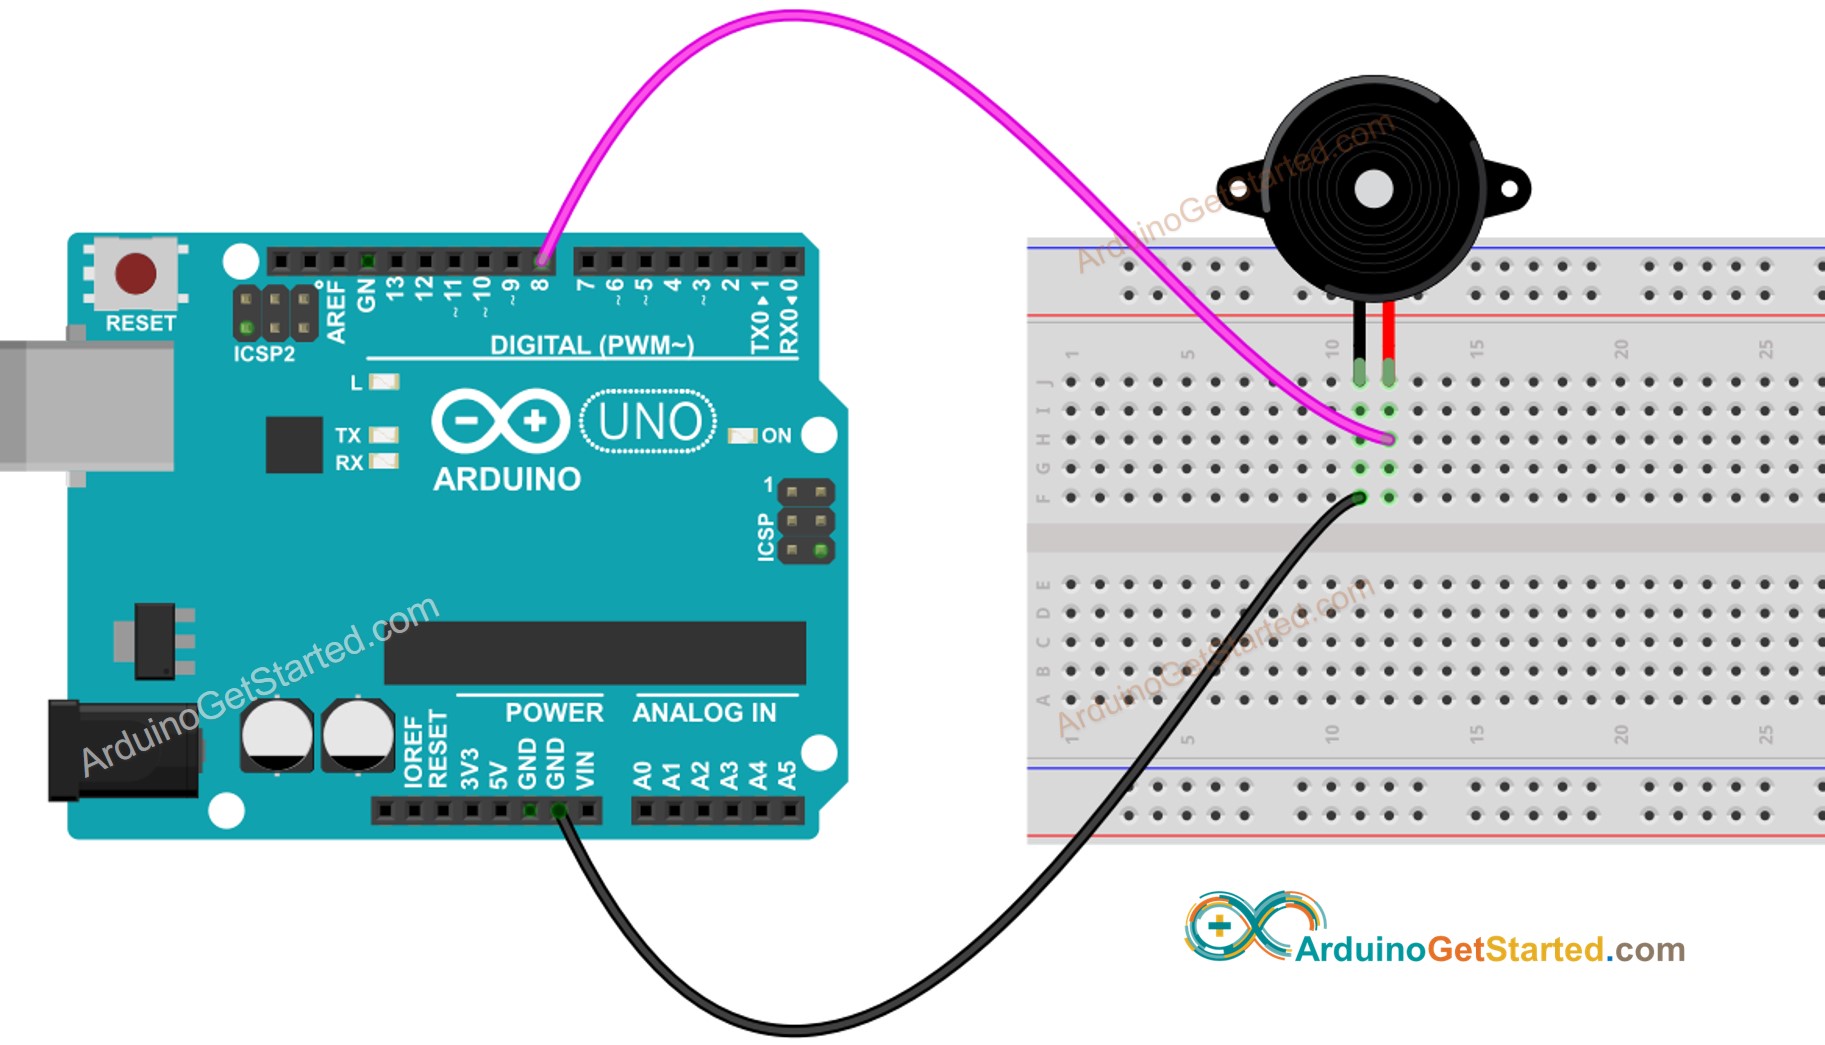
This image is created using Fritzing. Click to enlarge image
- The wiring between Arduino and piezo buzzer module
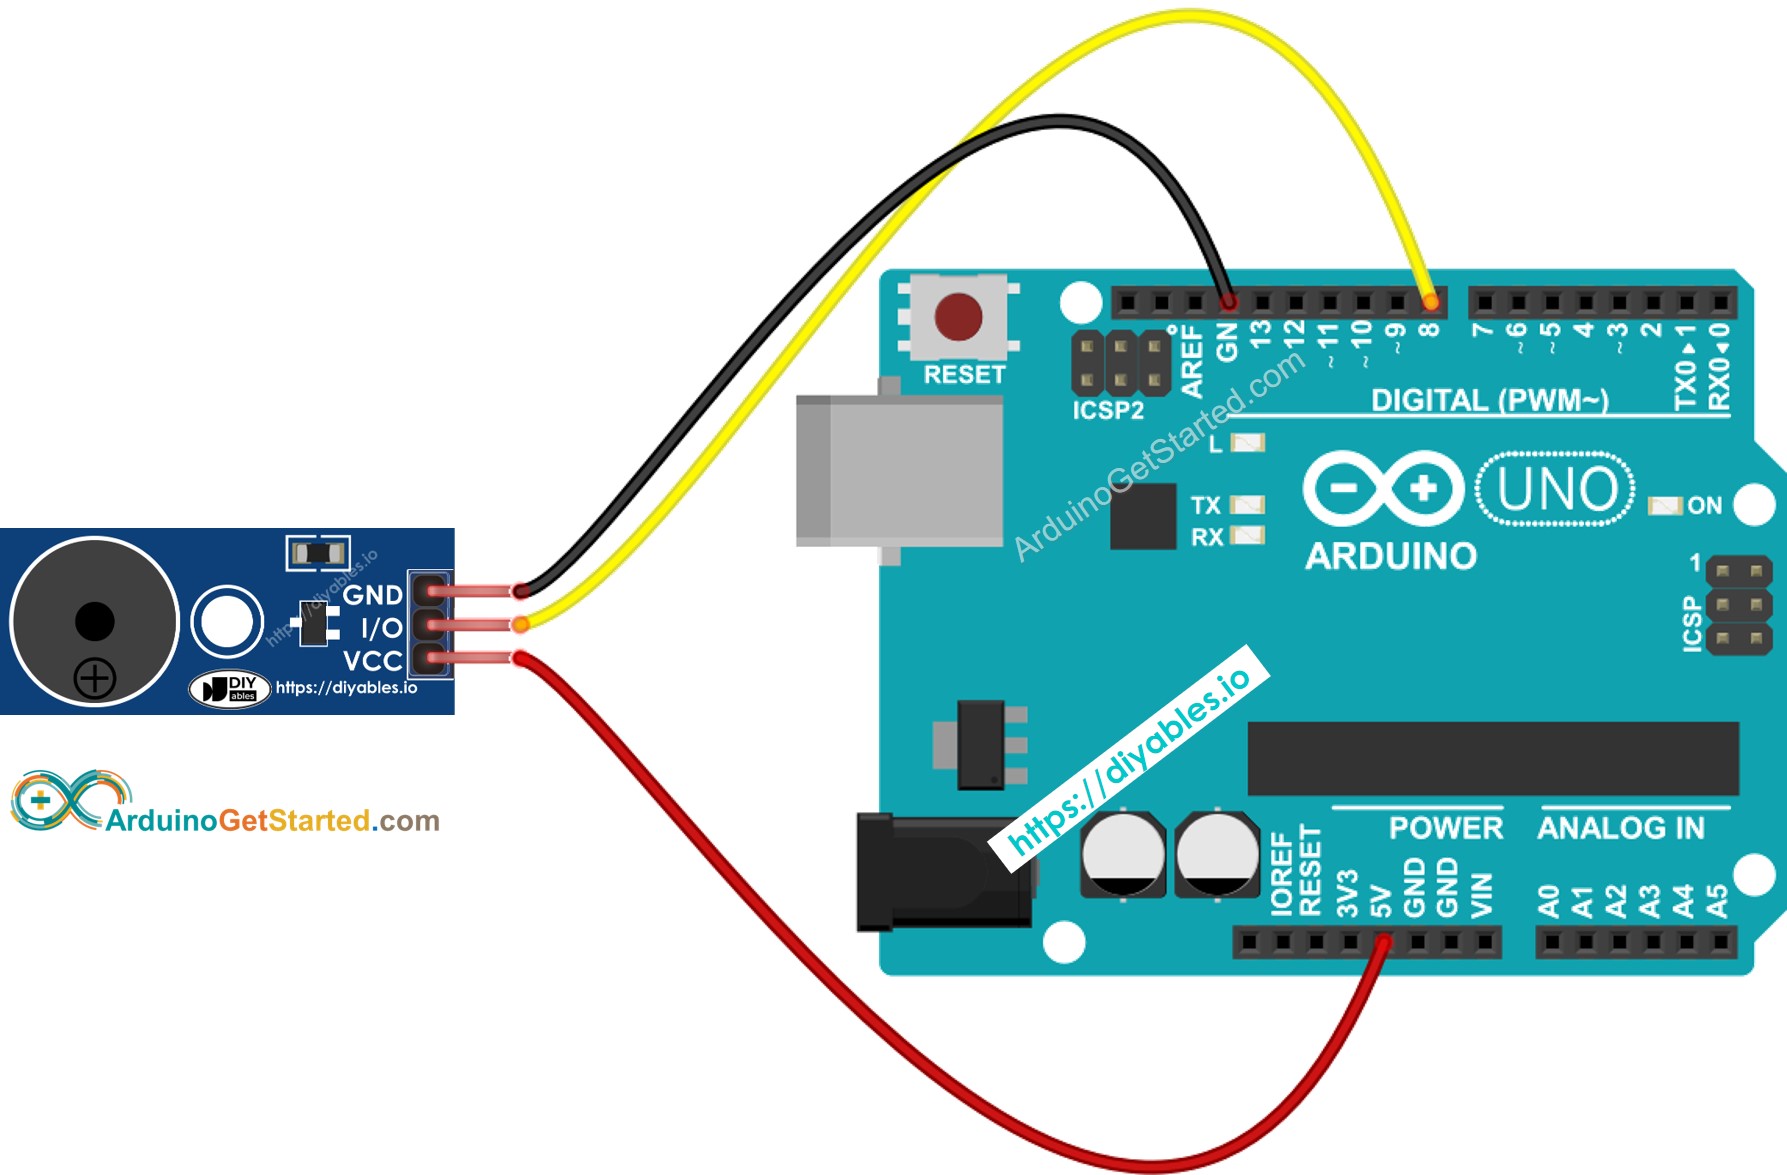
This image is created using Fritzing. Click to enlarge image
How To Program For Buzzer
Thanks to the Arduino library, playing a melody is easy. We do NOT need to know how to generate the square wave. We just need to use two functions: tone() and noTone() the library.
Arduino Code
Quick Steps
- Connect Arduino to PC via USB cable
- Open Arduino IDE, select the right board and port
- Copy the above code and open with Arduino IDE
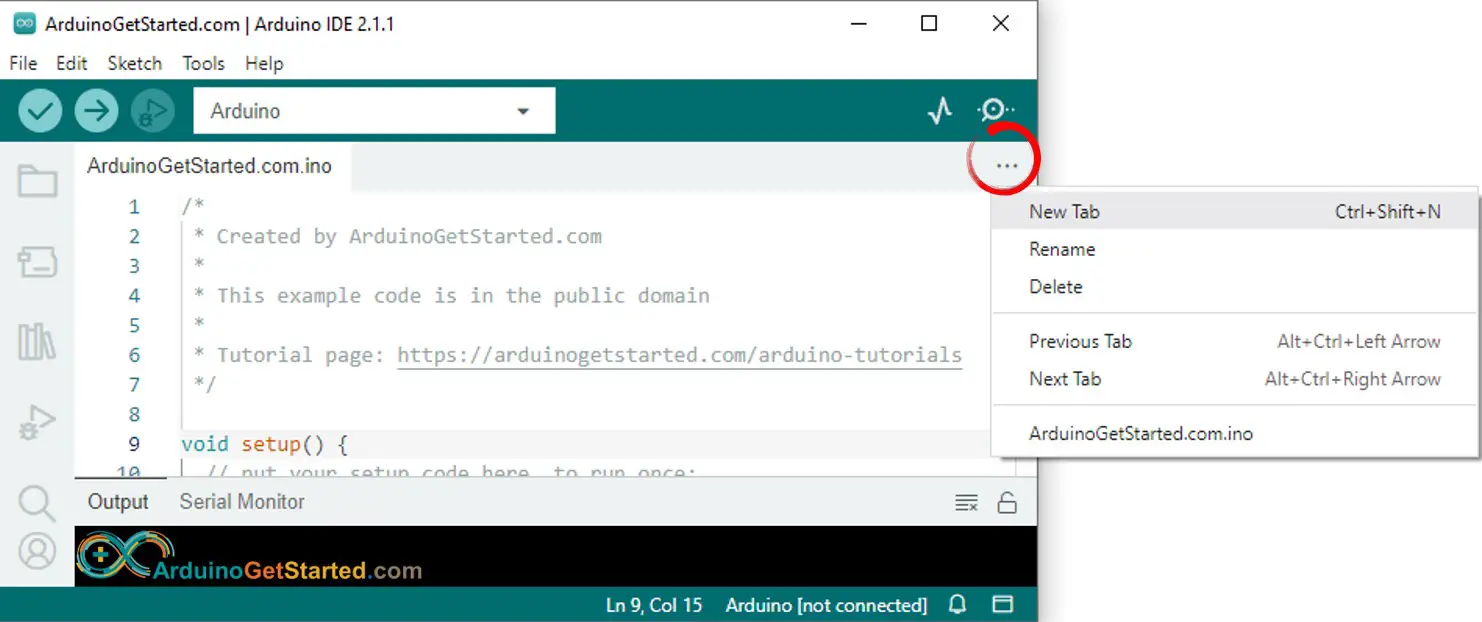
- Create the pitches.h file On Arduino IDE by:
- Either click on the button just below the serial monitor icon and choose New Tab, or use Ctrl+Shift+N keys.
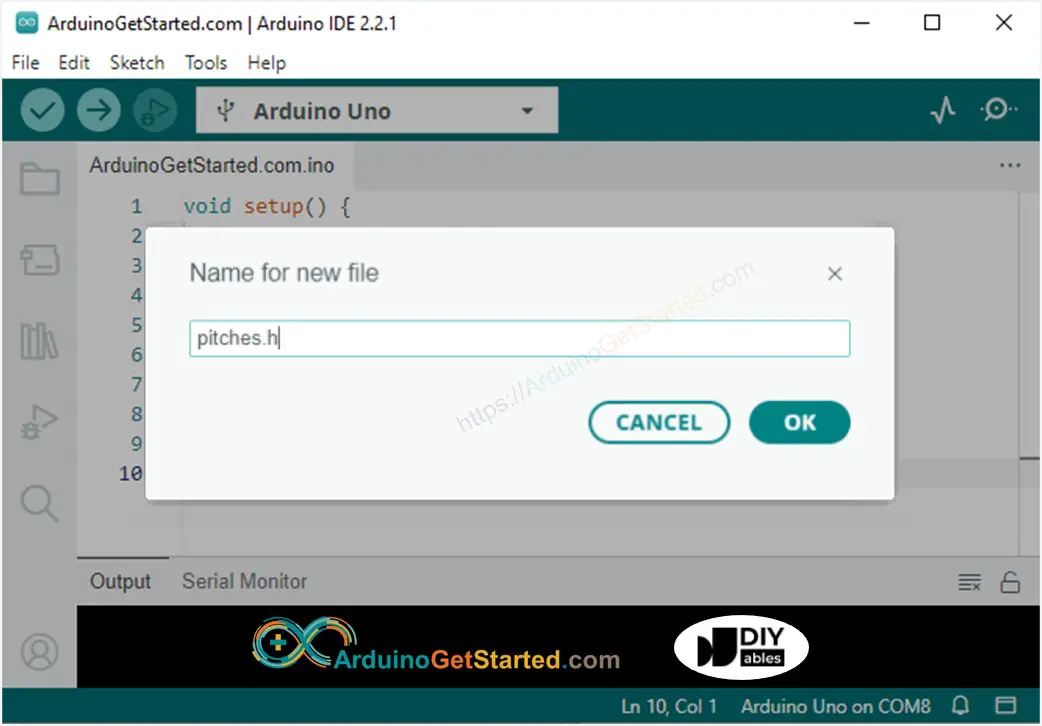
- Give file's name pitches.h and click OK button
- Copy the below code and paste it to the created pitches.h file.
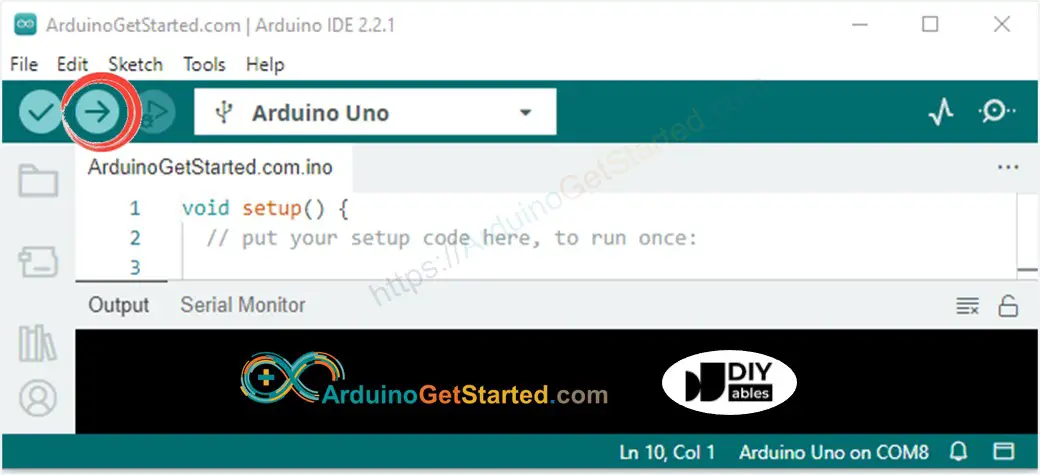
- Click Upload button on Arduino IDE to upload code to Arduino
- Enjoy the melody
Modifying Arduino Code
Now, we are going to modidy the code to play "Jingle Bells" song.
We only need to change value of two arrays: int melody[] and int noteDurations[].
Video Tutorial
We are considering to make the video tutorials. If you think the video tutorials are essential, please subscribe to our YouTube channel to give us motivation for making the videos.
Challenge Yourself
- Use Piezo Buzzer to play the song you love
- Automatically make alarm when someone approaches your valuable stuff. Hint: Refer to Arduino - Motion Sensor.