analogWrite()
설명
아날로그 값(PWM 파)을 핀에 출력합니다. LED를 다양한 밝기로 켜거나 다양한 속도로 모터를 돌리는 데 쓸 수 있습니다. analogWrite() 를 호출하면, 해당 핀에 다음 analogWrite() (또는 digitalRead() 또는 digitalWrite() )가 불릴 때까지 특정 듀티 사이클의 구형파를 발생시킵니다. 대부분 핀에서 PWM 신호의 주파수는 약 490Hz입니다. Uno, 혹은 비슷한 보드에서, 5, 6번 핀은 약 980Hz의 주파수를 가집니다.
대부분의 아두이노 보드(ATmega168 또는 ATmega328P가 장착된)에서, 이 함수는 3, 5, 6, 9, 10, 11번 핀에서 동작합니다. 아두이노 메가에서는 2 - 13번 핀 그리고 44 - 46번 핀에서 동작합니다. ATmega8을 탑재한 구형 아두이노 보드는 9, 10, 11번 핀에서만 analogWrite() 를 지원합니다. 아두이노 DUE는 2번 핀에서 13번 핀까지, 그리고 DAC0과 DAC1 핀에서 analogWrite() 를 지원합니다. PWM 핀과 달리, DAC0과 DAC1은 디지털을 아날로그로 바꾸는 컨버터이며, 실제 아날로그 출력처럼 동작합니다. analogWrite() 를 부르기 전에 핀을 출력으로 설정하기 위해 pinMode() 를 부를 필요는 없습니다. analogWrite 함수는 아날로그 핀 또는 analogRead 함수와 아무 관련이 없습니다.
문법
analogWrite(pin, value)
매개변수
- pin: 출력할 핀. 허용되는 자료형: int
- value: 듀티 사이클: 0 (언제나 꺼짐)과 255 (언제나 켜짐) 사이. 허용되는 자료형: int
반환값
- 없음
예제 코드
가변 저항으로부터 읽은 값에 비례하게 LED 출력을 설정합니다.
Hardware Required
Additionally, some links direct to products from our own brand, DIYables .
Wiring Diagram
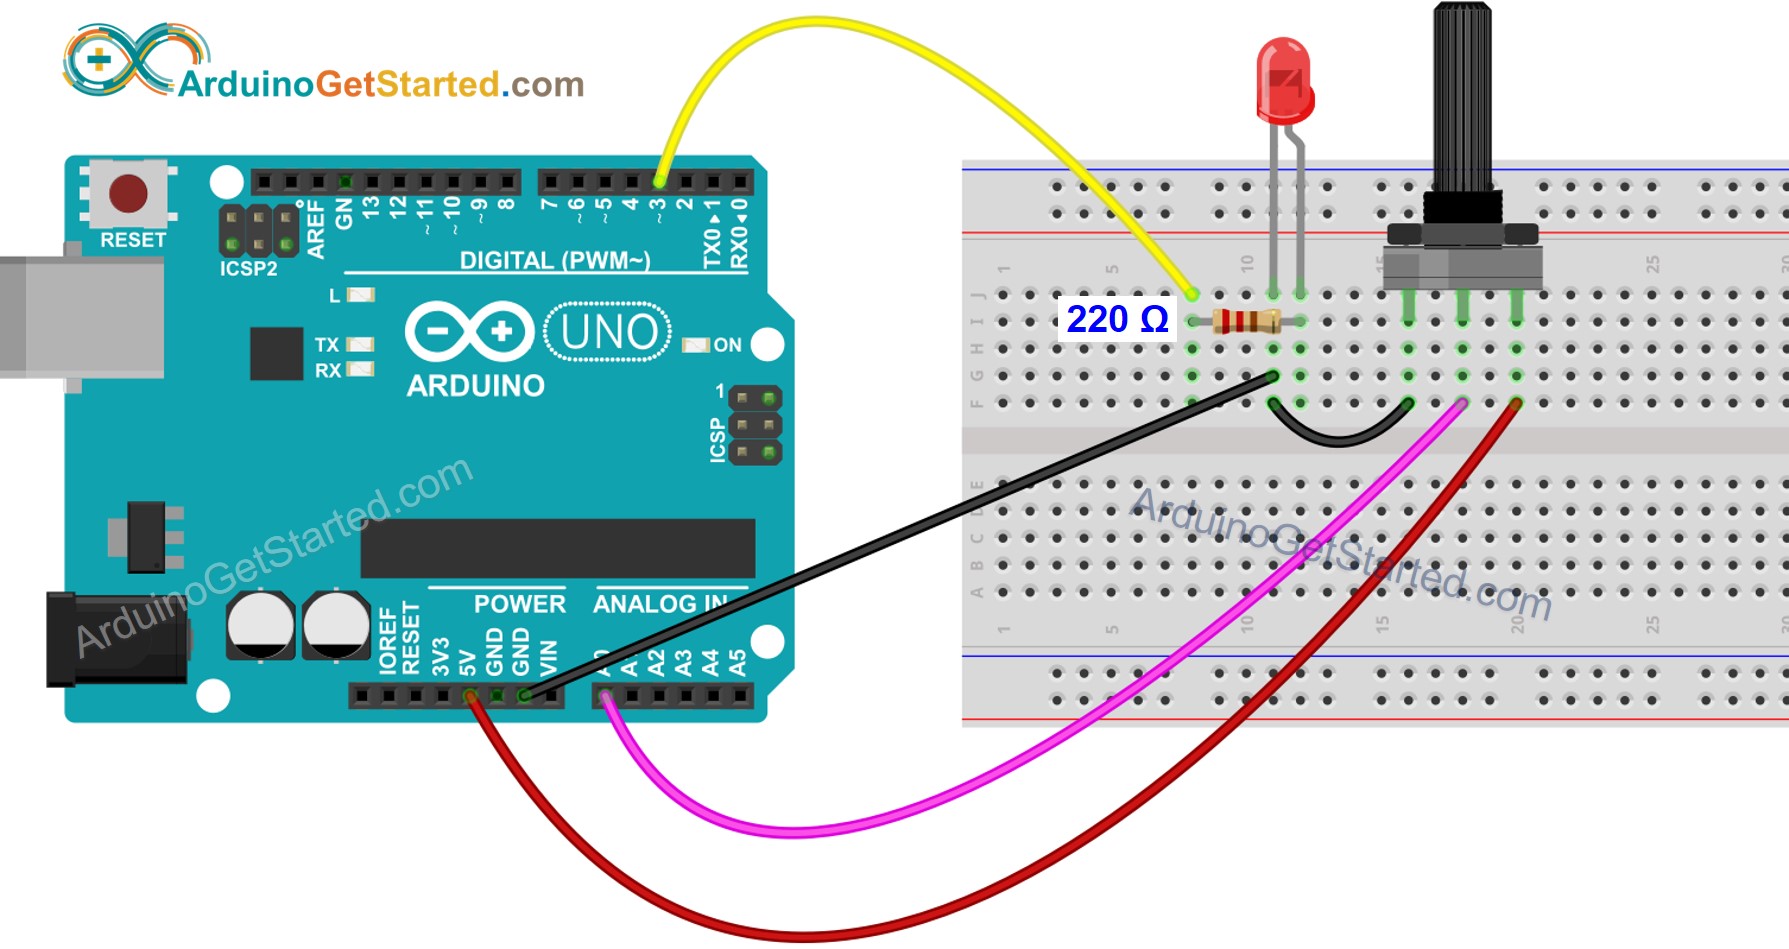
This image is created using Fritzing. Click to enlarge image
Arduino Code
For more detailed instruction, see Arduino - Potentiometer fade LED
※ 주의 및 경고:
- 핀 5와 6에서 생성된 PWM 출력은 예상보다 높은 듀티 사이클을 가질 것입니다. 이것은 PWM 출력을 생성하기 위해 같은 내부 타이머를 공유하는 millis() 와 delay() 함수의 상호작용 때문입니다. 이는 대부분 낮은 듀티 사이클 설정(예: 0 - 10)에서 발견되며, 값을 0으로 설정해도 핀 5와 6이 출력을 완전히 끄지 않는 결과가 나올 수 있습니다.
- The analogRead() and analogWrite() functions do NOT read and write the same thing. analogRead() function reads the analog value which is converted from the voltage. analogWrite() function writes PWM signal. If you use the analogWrite() function first, and then use analogRead() function to read the value on the same pin, the read value is diferent from the wrote value. In other word, analogRead() function uses ADC (Analog to Digital) converter, but analogWrite() function does NOT use DAC (Digital to Analog) converter.
- The analog input pins can be used as digital pins, referred to as A0, A1, etc. The exception is the Arduino Nano, Pro Mini, and Mini's A6 and A7 pins, which can only be used as analog inputs.
더보기
- 언어 : analogRead()
- 언어 : analogReference()
- 튜토리얼 : Arduino - Fade LED
- 튜토리얼 : Arduino - Servo Motor
- 튜토리얼 : Blink
- Definition : PWM
※ ARDUINO BUY RECOMMENDATION
| Arduino UNO R3 | |
| Arduino Starter Kit |