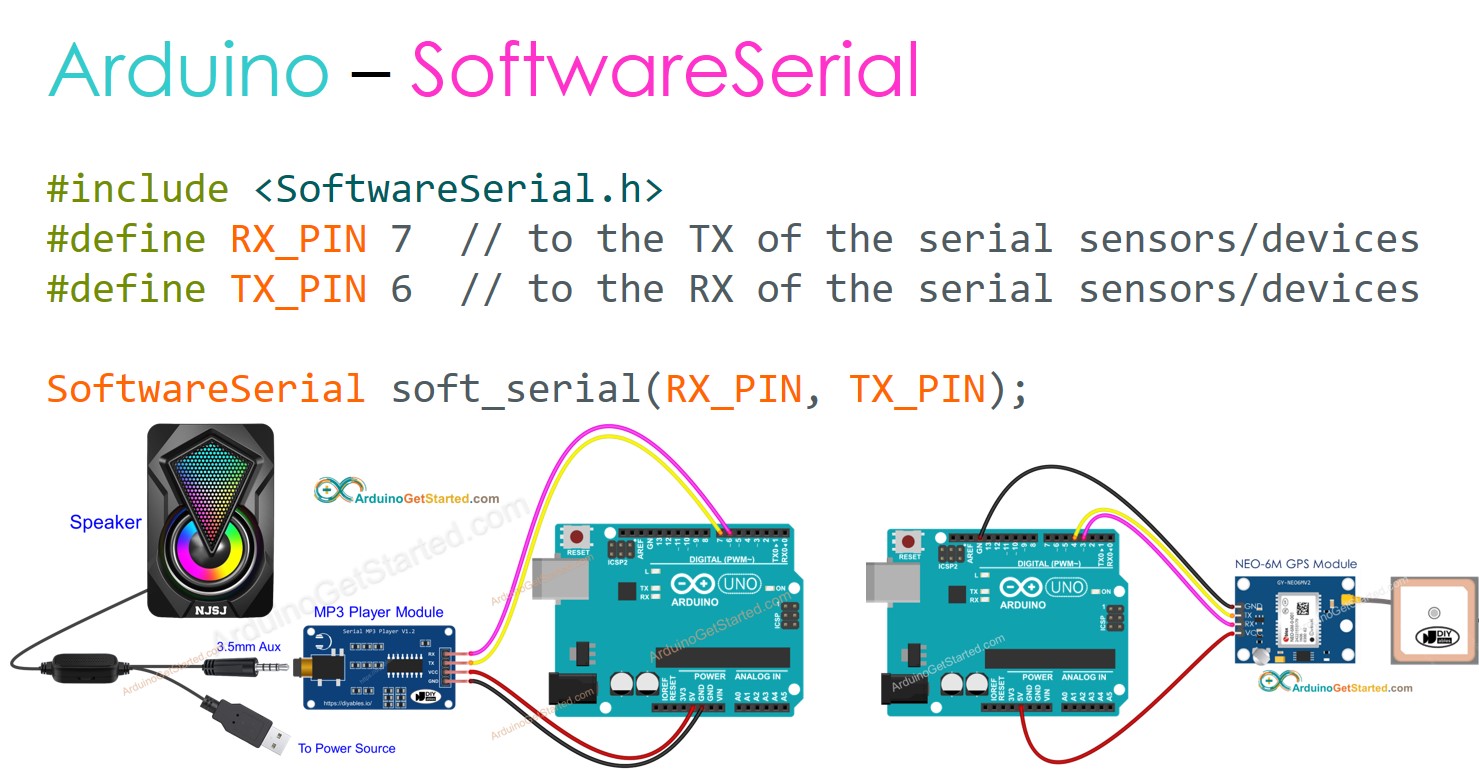
Arduino - SoftwareSerial
This tutorial will guide you through the utilization of SoftwareSerial in Arduino. Specifically, we will cover the following aspects:
- Configuring any Arduino pin for serial communication.
- Establishing connections between SoftwareSerial pins and serial sensors or devices.

Hardware Required
Or you can buy the following kits:
| 1 | × | DIYables STEM V3 Starter Kit (Arduino included) | |
| 1 | × | DIYables Sensor Kit (30 sensors/displays) | |
| 1 | × | DIYables Sensor Kit (18 sensors/displays) |
Additionally, some links direct to products from our own brand, DIYables .
About SoftwareSerial
Arduino boards have one or several hardware serial interfaces. One serial interface is usually used for debuging purpose. In many cases that Arduino needs to communicate with serial sensors/devices
How to use SoftwareSerial on Arduino
Create the wiring connection
- Select any two Arduino pins: one for RX (e.g., D7), one for TX (e.g., D6)
- Connect the Arduino pin (selected as RX) to the TX of the serial sensors/devices
- Connect the Arduino pin (selected as TX) to the RX of the serial sensors/devices
Please note that, there is a special case. If you uses SoftwareSerial to connect to the RS232 to TTL Module, you need to:
- Connect the Arduino pin (selected as RX) to the RX of the RS232 to TTL Module
- Connect the Arduino pin (selected as TX) to the TX of the RS232 to TTL Module
Wiring Diagram
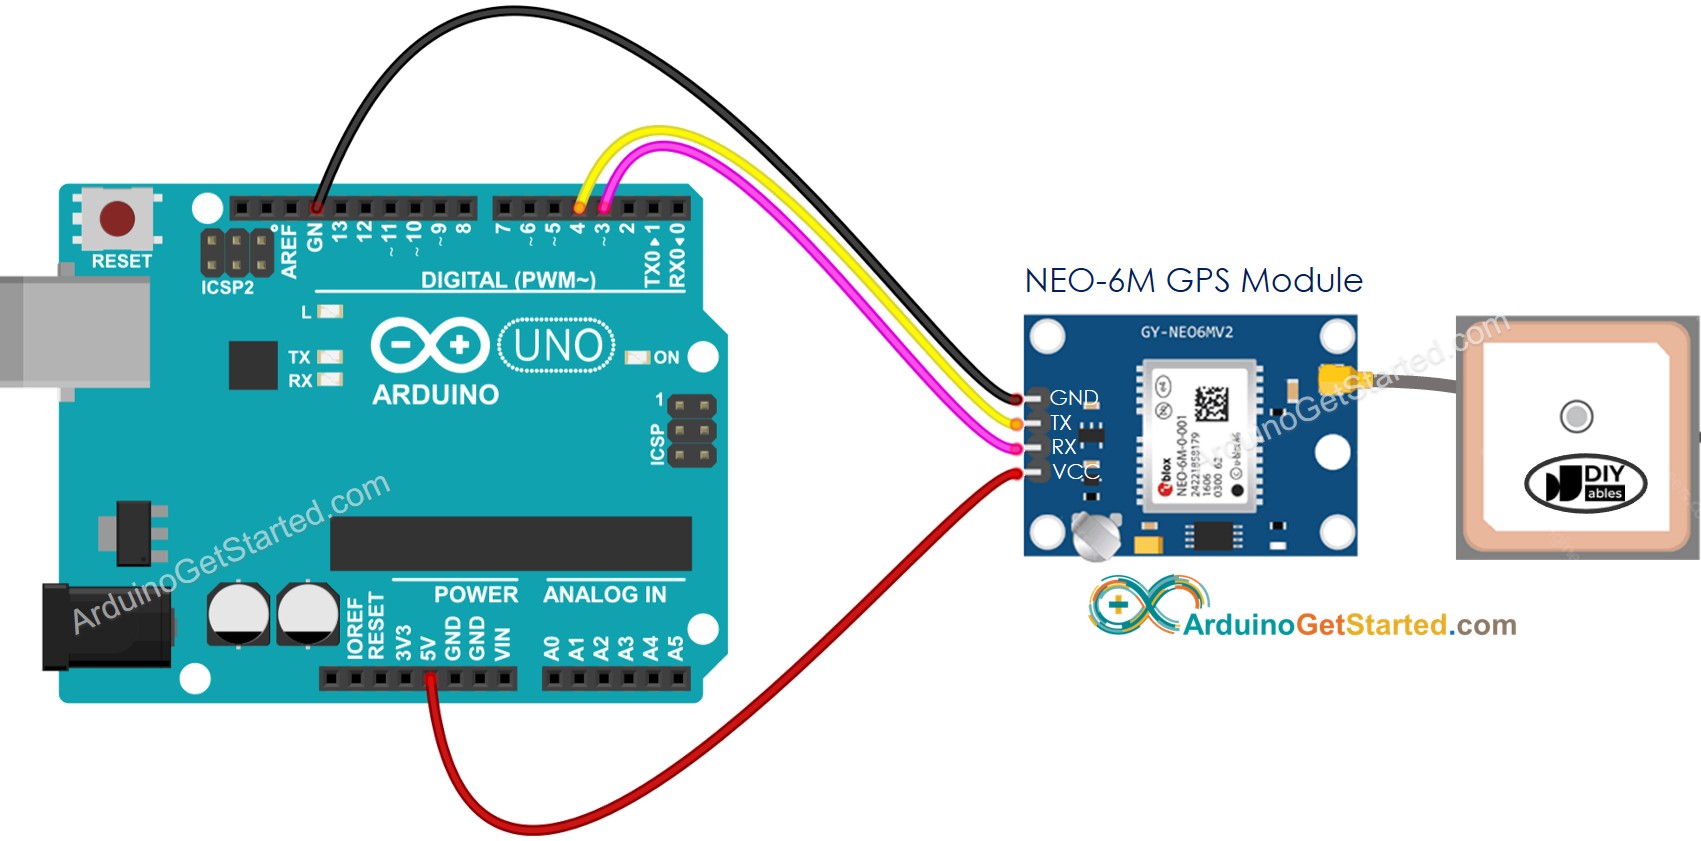
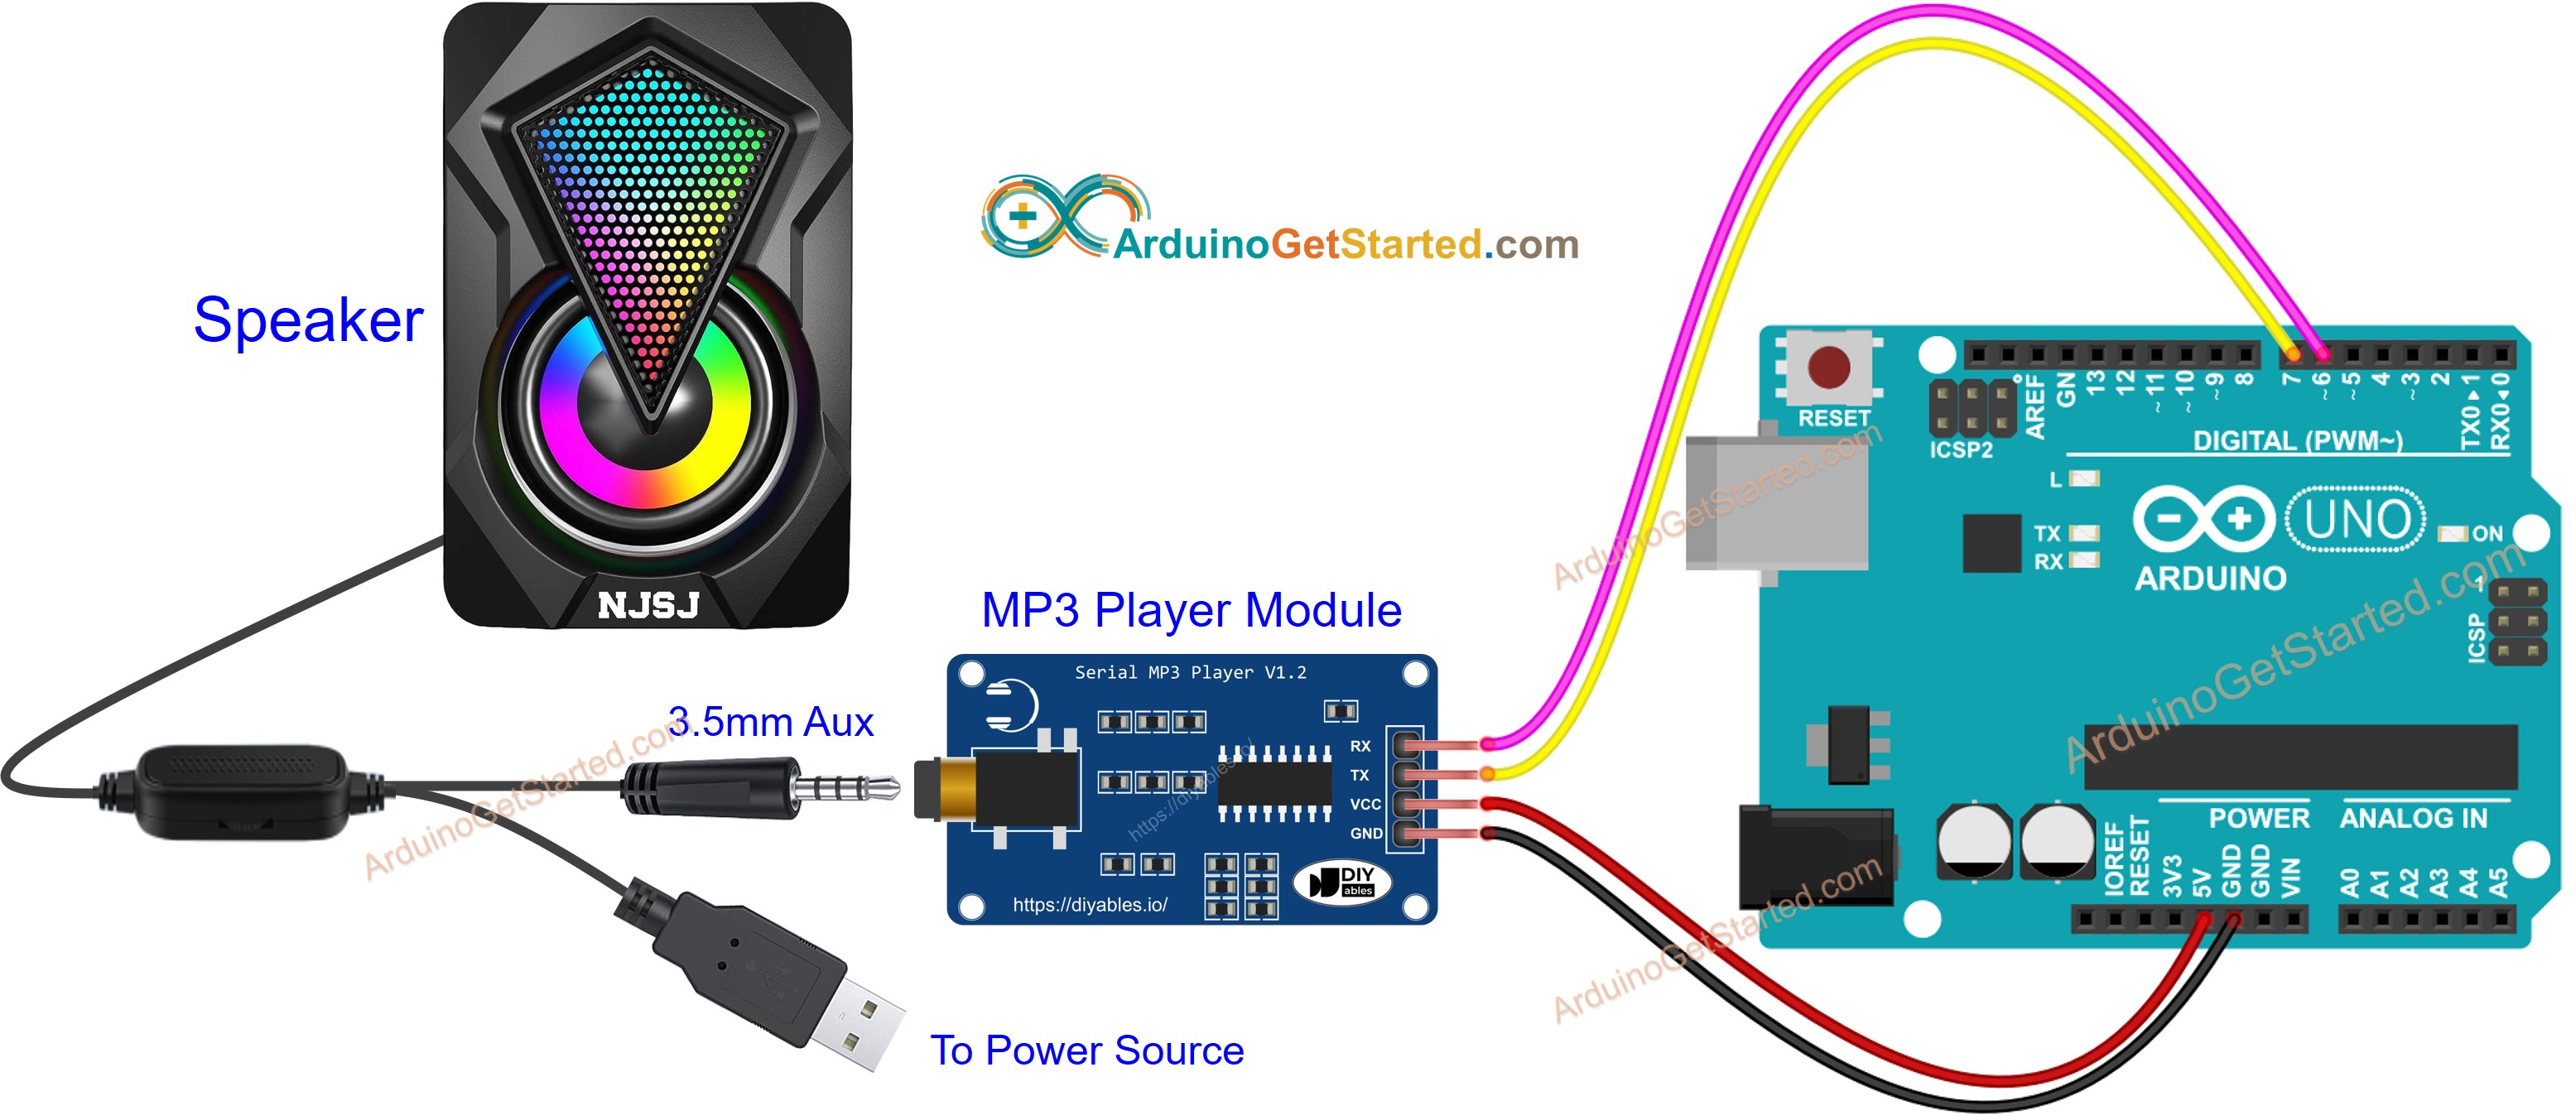
Examples of wiring:
- Arduino pin D4 as RX, pin D3 as TX

This image is created using Fritzing. Click to enlarge image
- Arduino pin D7 as RX, pin D6 as TX

This image is created using Fritzing. Click to enlarge image
Write Arduino code
- Include the SoftwareSerial library
- Define the selected Arduino pins
- Create the SoftwareSerial object with paramaters are RX and TX pins
- Initialize the software serial
And now you can use it as the hardware serial. For the list of functions you can use, please refer to Serial Reference
Examples of Use Cases for SoftwareSerial:
Video Tutorial
We are considering to make the video tutorials. If you think the video tutorials are essential, please subscribe to our YouTube channel to give us motivation for making the videos.
