Arduino - Modbus
In this tutorial, we are going to learn:
- What is Modbus?
- Why needs Modbus?
- Which are Modbus's alternatives?
- How Modbus works
- Modbus RTU/ASCII and Modbus TCP
- How to use Arduino Modbus library
What is Modbus?
Modbus is a protocol that uses to communicate between device and device, device and software/app, and devices to HMI. It is widely used in industrial areas to control/monitor devices.
In a simple word, Modbus is a language that a device uses to communicate with other devices, software/app, and HMI device.
This tutorial is about Arduino, so Arduino represents for the device. By using Modbus, we can make:
- Two Arduinos talk with each other to control/monitor the output/input
- Arduino talks with the software on PC or app on the smartphone
- Arduino talks with HMI device
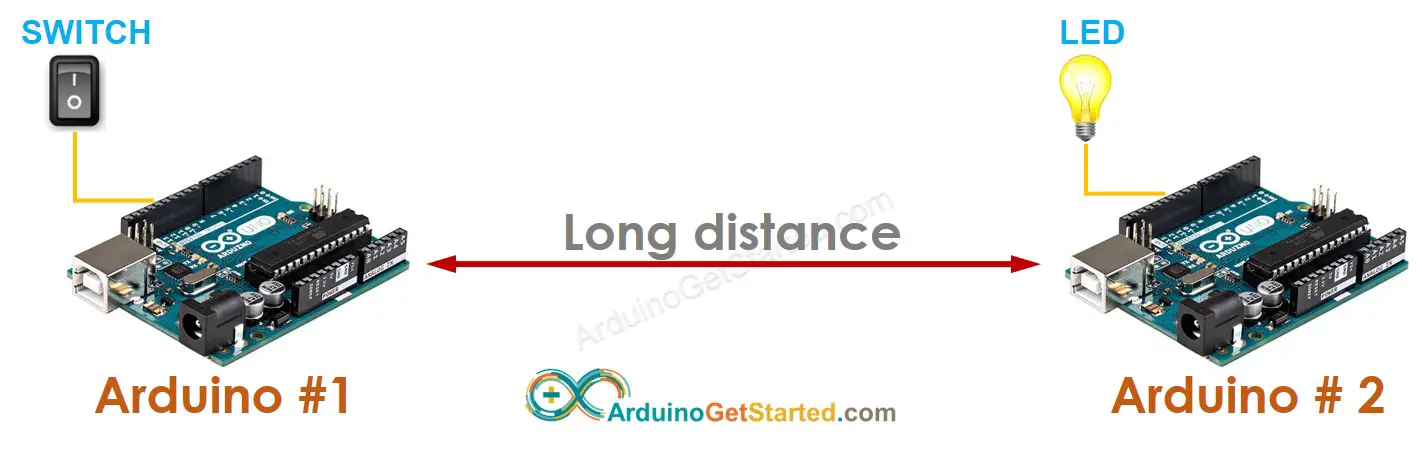
For example, Arduino #1 with 4 switches controls Arduino #2 with 4 light bulbs over a long distance.
Why needs Modbus?
To answer these questions, let's consider a case: A switch connected to Arduino #1 controls an LED connected to Arduino #2 over a long distance.
The simplest alternative way of Modbus is to define a simple protocol by ourselves:
- Arduino #1:
- When the switch is switched to ON, Arduino #1 sends a byte (command) with value 1 to Arduino #2.
- When the switch is switched to OFF, Arduino #1 sends a byte (command) with value 0 to Arduino #2.
- Arduino #2:
- If the received byte is 1, Turn ON LED
- If the received byte is 0, Turn OFF LED
- Arduino #1 wants to know whether the command is executed successfully by Arduino #2
- Arduino #1 wants to check the state of the LED on Arduino #2
- Arduino #1 with multiple switches wants to control multiple LED on Arduino #2
- Arduino #1 wants to use a switch to control an LED on Arduino #2 and Arduino #2 also wants to use a switch to control an LED on Arduino #1
- And more use case.
- We do NOT need to define the commands, Modbus has defined it for every case. We just need to implement it.
- Our device can work with other devices/software that support Modbus WITHOUT co-working with the device/software's creator.
The above protocol is defined by ourselves, not a standard protocol. We need to define more if:
It is not easy to define all commands by ourselves. The problem becomes more complicated when we mix the above requirements. And we also cannot guarantee error-free
Another problem occurs when defining the protocol by ourselves. If we want our Arduino to work with other Arduino used a protocol defined by another person, It is impossible unless we co-work and share the self-defined protocol.
Those are the reasons why we need Modbus protocol. If we use the Modbus protocol:
If we use the Modbus protocol for Arduino, we can use many free software/app to control/monitor our Arduino.
When to use and NOT use Modbus
Modbus protocol is not easy for beginners to understand and implement it, even the Modbus library is available. Therefore, it is ok to use a simple self-defined protocol as described above if:
- The system is simple, such as several switches on Arduino #1 controls several LED on Arduino #2
- Arduino does NOT need to work with other devices/software from other creators
We should use Modbus when:
- The system is complicated
- The system required the high reliability
- Arduino needs to work with other devices/software from other creators
※ NOTE THAT:
There are some other standard protocols and non-standard protocols that are alternatives for Modbus. They are out of the scope of this tutorial.
How Modbus protocol works
As described earlier, An Arduino can communicate with software/app, HMI device, or another Arduino via Modbus protocol. This tutorial takes communication between two Arduino as an example of Modbus communication. The others are the same.
Concepts
There are some concepts in Modbus:
- Master and Slave
- Request and Response
- Function Code (FC) and Address
Modbus protocol works in the Master-Slave model. Among two Arduino, one MUST work as a Master, and the other works as a Slave.
Master sends a request, and the Slave sends a response.
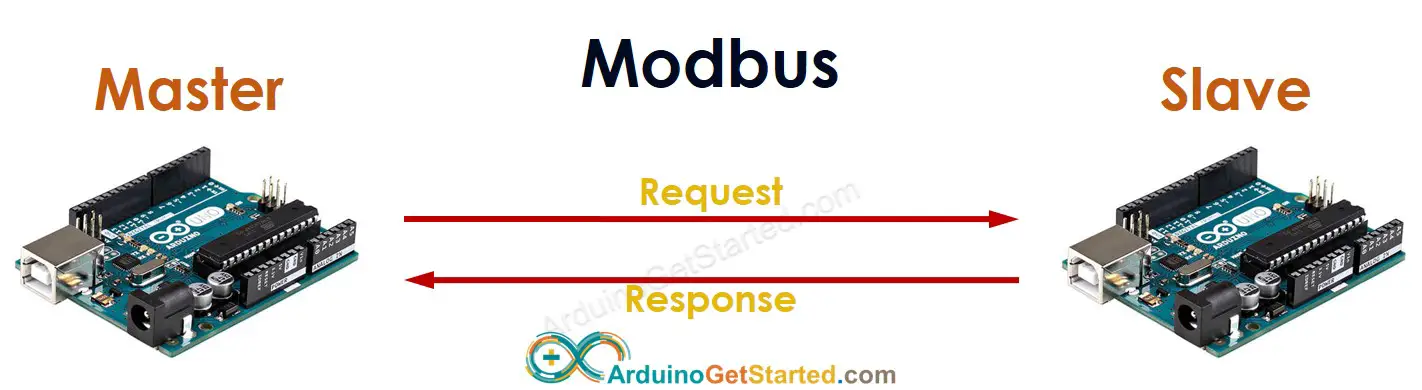
A request sent by Master basically contains the following information:
- Function Code (FC): 1 byte, is the command, which tells Slave what to do. For example, reads the state of a digital input pin, a digital output pin or analog input pin, controls a digital output pin.
- Address: 2 bytes, is used to identified pin. Each digital input pin, digital output pin, the analog input pin is given an address.
- Data (e,g control value)
Once receiving a request, the Slave takes the corresponding action and send back a response which contains the result of action or the information that Master requested.
Function Code
The Function Code was defined by the Modbus standard. There are many Function Code. Let's see some basic Function Code below:
- FC 01 (Read Coils): is a command used to read the state of a single or several digital output pins
- FC 05 (Write Single Coil): is a command used to control (write) the state of a single or several digital output pins
- FC 02 (Read Discrete Inputs): is a command used to read the state of a single or several digital input pins
"FC 01" means the value of the Function Code is 0x01.
There are more Function Code. In order to avoid overloading newbies, this tutorial only present some essential Function Code.
When using Arduino Modbus library, you need to:
- Decide which Function Code to use
- Give addresses for each Arduino pin (only pins that you use)
The detailed instruction of using Modbus library will be presented in the next tutorial, like our Facebook page to get the new tutorial notification.
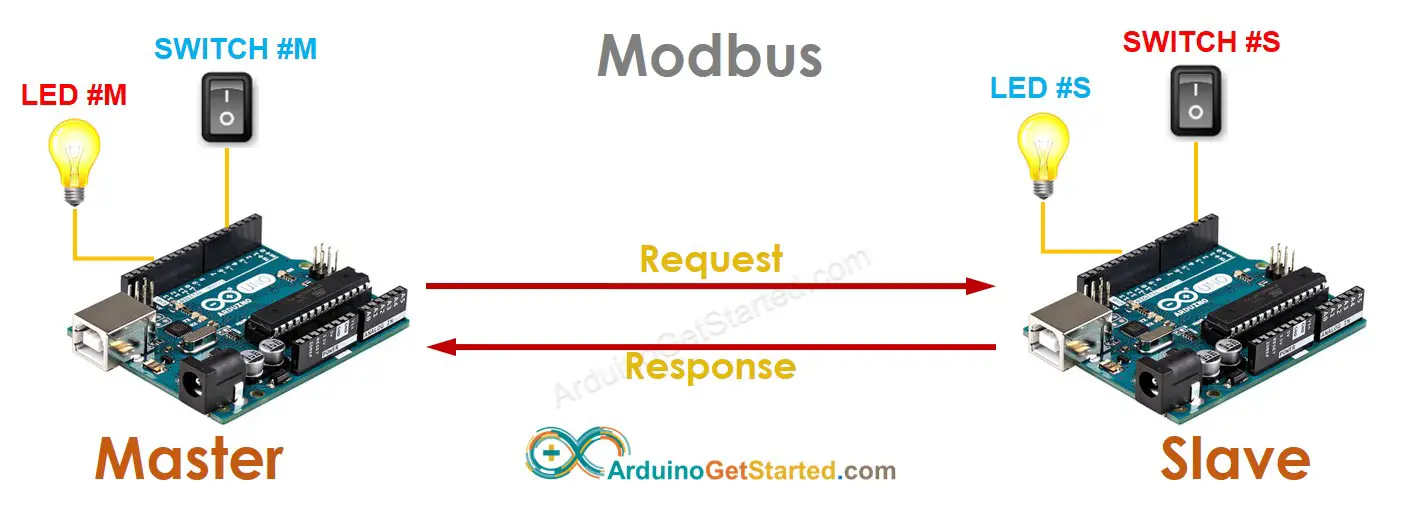
Arduino Master can read the state of its digital input pin, and then control the digital output's state of Arduino Slave, and vice versa
For example:
- Arduino Master is wired to LED #M, SWITCH #M
- Arduino Slave is wired to LED #S, SWITCH #S
- Let's make SWITCH #M control LED #S, and SWITCH #S control LED #M
Solution:
- Master reads the state of SWITCH #M → send a request to Slave to control LED #S according to the state of SWITCH #M → Slave controls LED #S and send the response
- Master sends a request Slave to read the state of SWITCH #S → Slave responds with state of SWITCH #S → Master controls LED #M according to the state of SWITCH #S
※ NOTE THAT:
- In the above, we use "digital input pin", "digital output pin" terms to make it easier for beginners. In fact, "digital input pin" represents for any device's state that read-only, "digital output pin" represents for any device's state that read/write
- Modbus can support multiple Masters and multiple Slaves
- Modbus can use not only for digital input/output but also for analog input/output
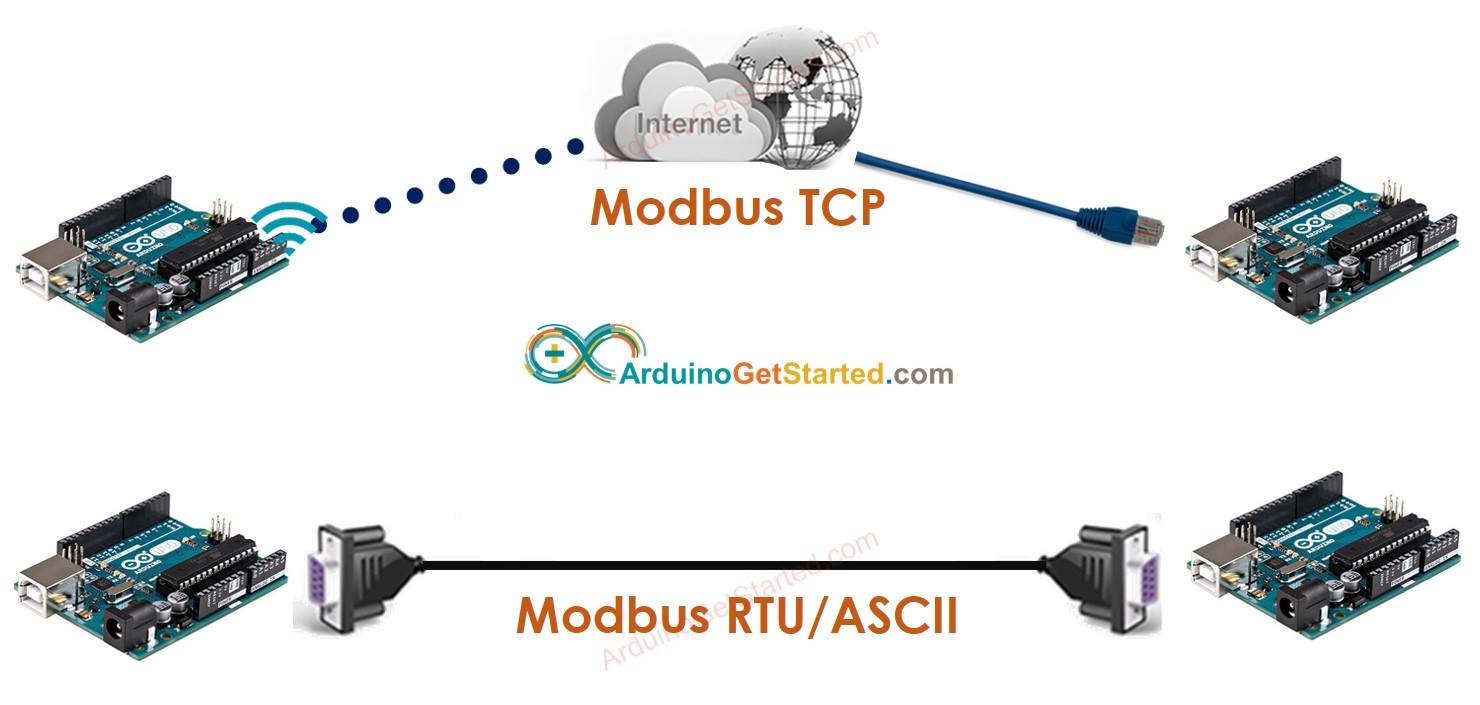
Modbus RTU/ASCII and Modbus TCP
There are three popular Modbus types: Modbus RTU, Modbus ASCII, and Modbus TCP. The working principles are the same for all of Modbus types, as described above. Each type of Modbus is designed to adapt to the network environment: Serial or TCP.
- System diagram
- Protocol stack
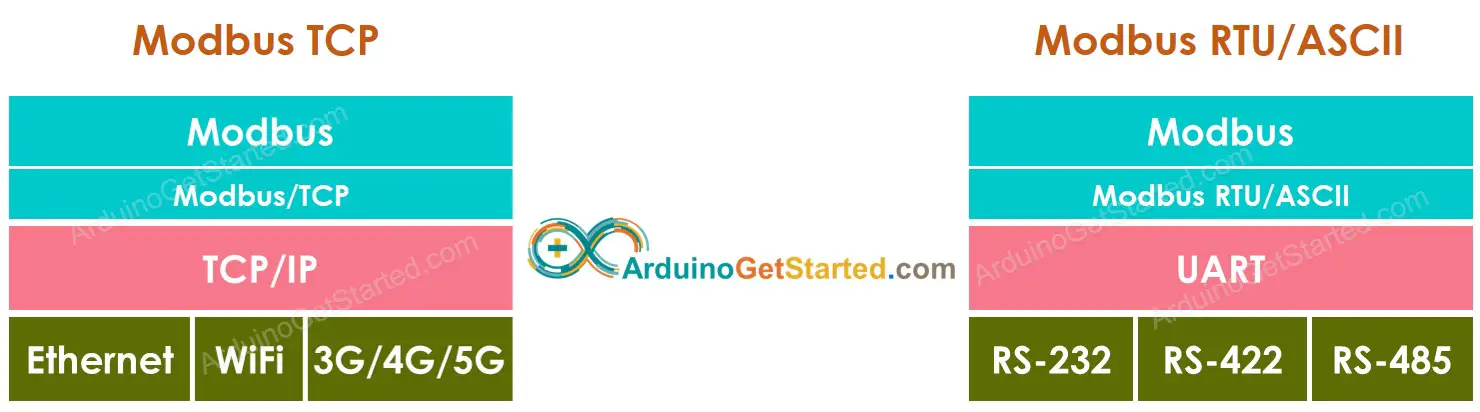
Differences between Modbus RTU/ASCII and Modbus TCP
| Modbus RTU/ASCII | Modbus TCP |
|---|---|
| Over serial (RS-232/RS-422/RS-485) | Over TCP |
| Support single transaction(*) | Support multiple transactions(**) |
- (*): Modbus RTU/ASCII supports a single transaction only. It means that when a Master sends a Modbus request, it MUST wait for a Modbus response or timeout before sending another request.
- (): Modbus TCP supports multiple transactions. It means that when a Master sends a Modbus request, it does NOT need to wait for a Modbus response. It can send multiple requests continuously. To identify a response corresponding to a request, Modbus TCP has an additional field, called "Transaction ID". The request and the corresponding response have the same Transaction ID.
How to use Arduino Modbus library
Thanks to Modbus library, using Modbus with Arduino is simplified.
We are going to make a tutorial about how to use Modbus library. Like our Facebook page to get the new tutorial notification.