Arduino - Soil Moisture Sensor
In this tutorial, we are going to learn how to use the moisture sensor with Arduino. In detail, we will learn:
- Resistive Moisture Sensor vs Capacitive Moisture Sensor
- How to read the value from a capacitive moisture sensor using Arduino
- How to calibrate a capacitive moisture sensor
- How to determine if the soil is wet or dry
Hardware Required
Or you can buy the following kits:
| 1 | × | DIYables STEM V3 Starter Kit (Arduino included) | |
| 1 | × | DIYables Sensor Kit (18 sensors/displays) |
Additionally, some links direct to products from our own brand, DIYables .
Buy Note: Many capacitive soil moisture sensors on the market are low-quality, regardless of the version. We highly recommend buying the sensor with TLC555I Chip from the DIYables brand using the link above. We tested it, and it worked well.
About Soil Moisture Sensor Sensor
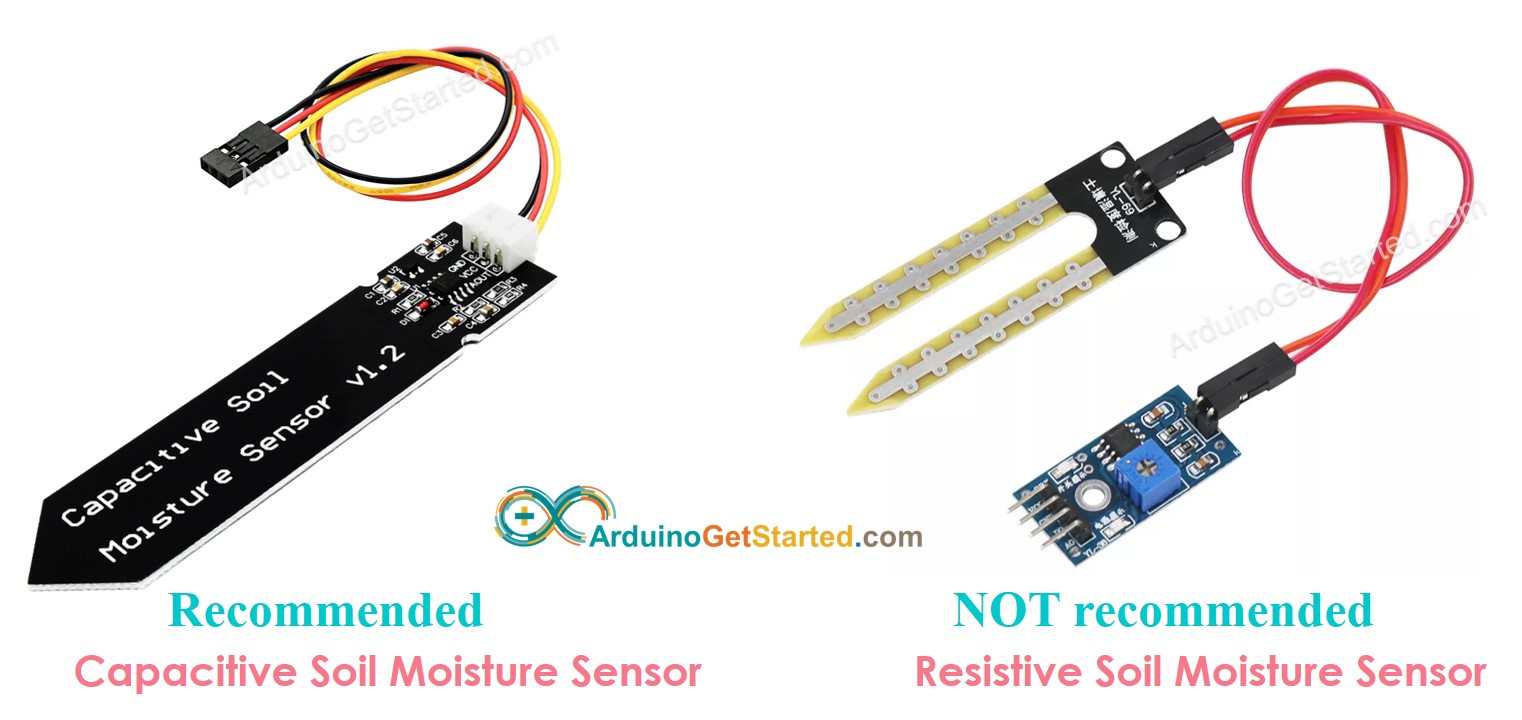
There are two kinds of moisture sensors:
- Resistive moisture sensor
- Capacitive moisture sensor.
Both sensors provide soil moisture information. However, their working principles are different. We highly recommend using the capacitive moisture sensor, because of the following reason:
- The resistive soil moisture sensor corrodes over time. That is because the electrical current flows between its probes. This causes electrochemical corrosion.
- The capacitive soil moisture sensor does NOT corrode over time. That is because its electrodes are not exposed electrodes and is comparatively corrosion-free.
The below image shows a resistive soil moisture sensor that corroded over time.
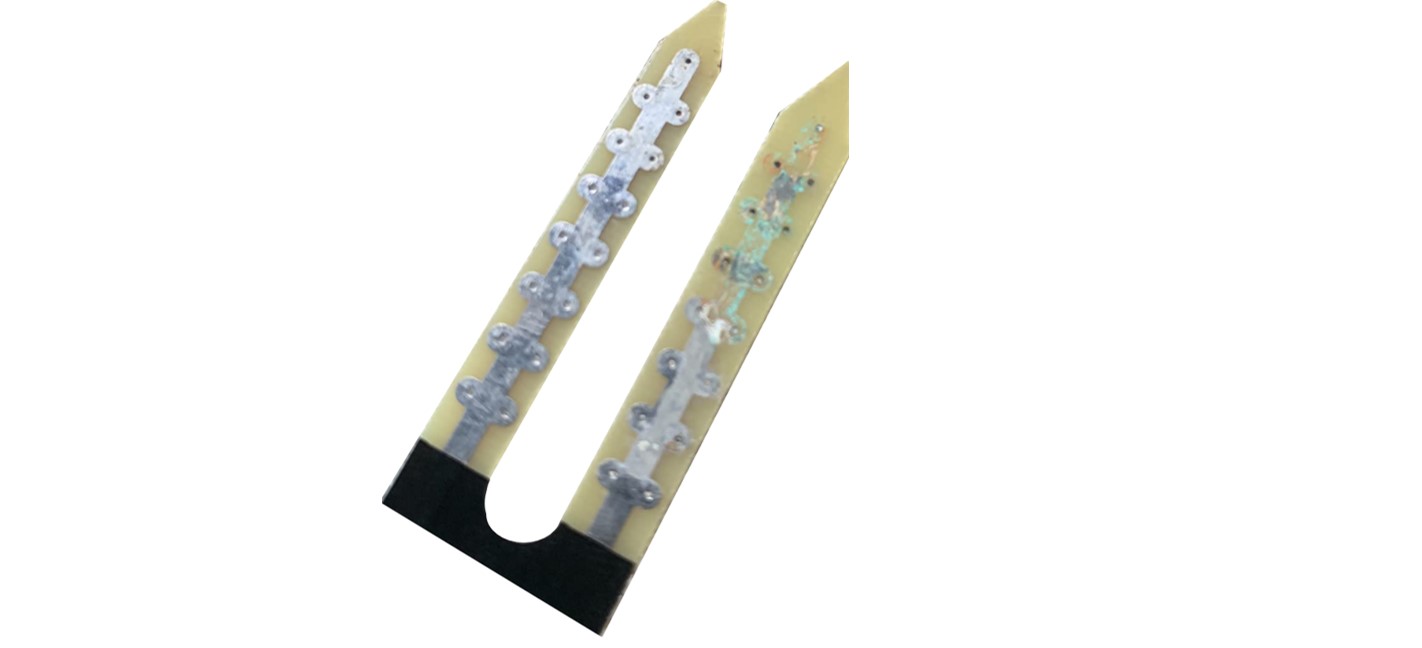
The rest of this tutorial will use the capacitive soil moisture sensor.
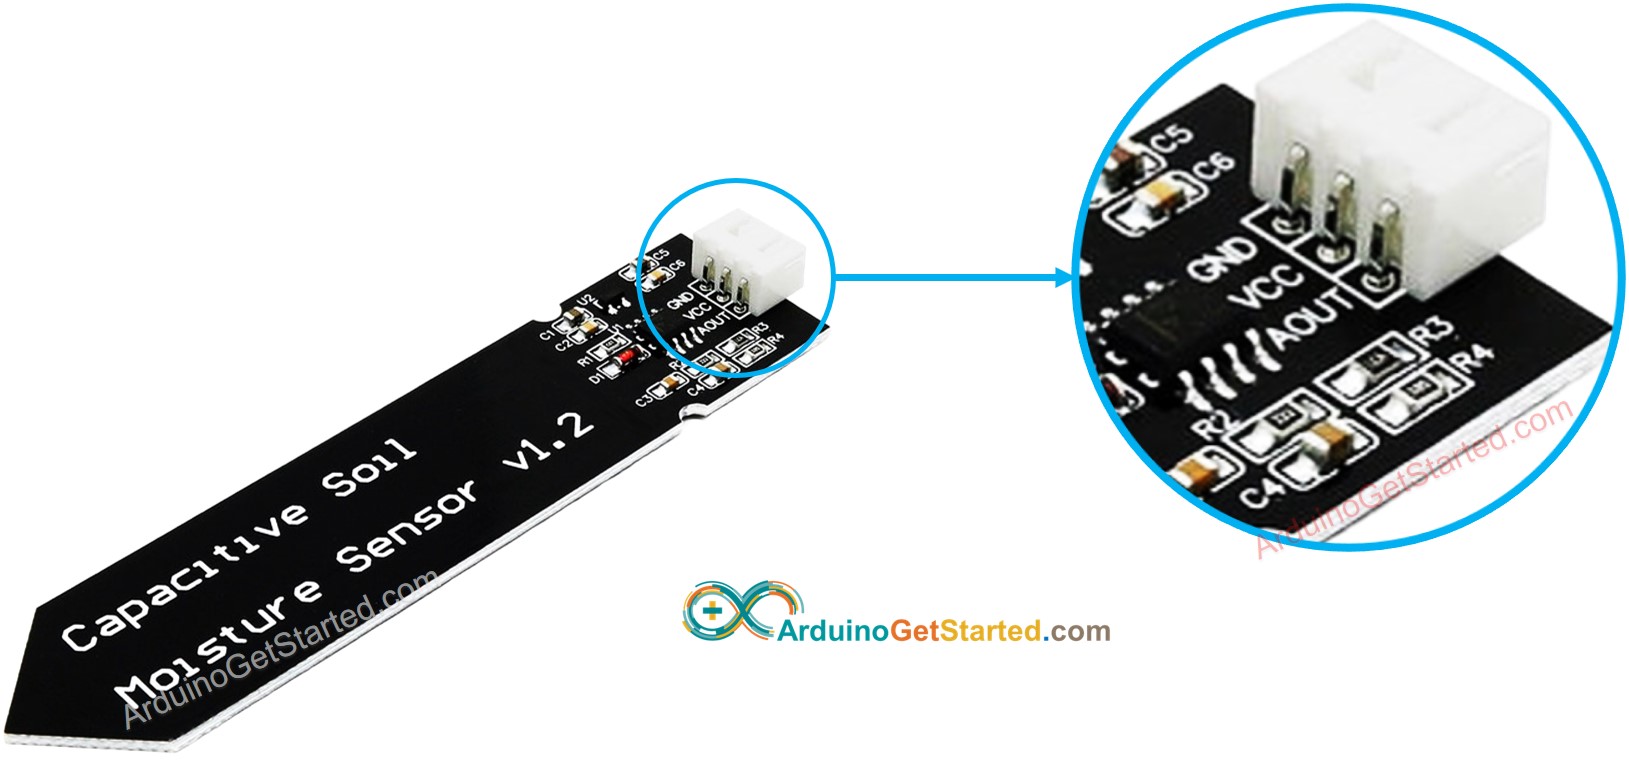
Capacitive Soil Moisture Sensor Pinout
A capacitive soil moisture sensor has three pins:
- GND pin: needs to be connected to GND (0V)
- VCC pin: needs to be connected to VCC (5V or 3.3v)
- AOUT pin: Analog signal output pin outputs the voltage in inverse proportion to the soil moisture level. Connect this pin to an Arduino's analog input pin.
How It Works
The more the water in the soil, the lower the voltage in the AOUT pin is
Wiring Diagram
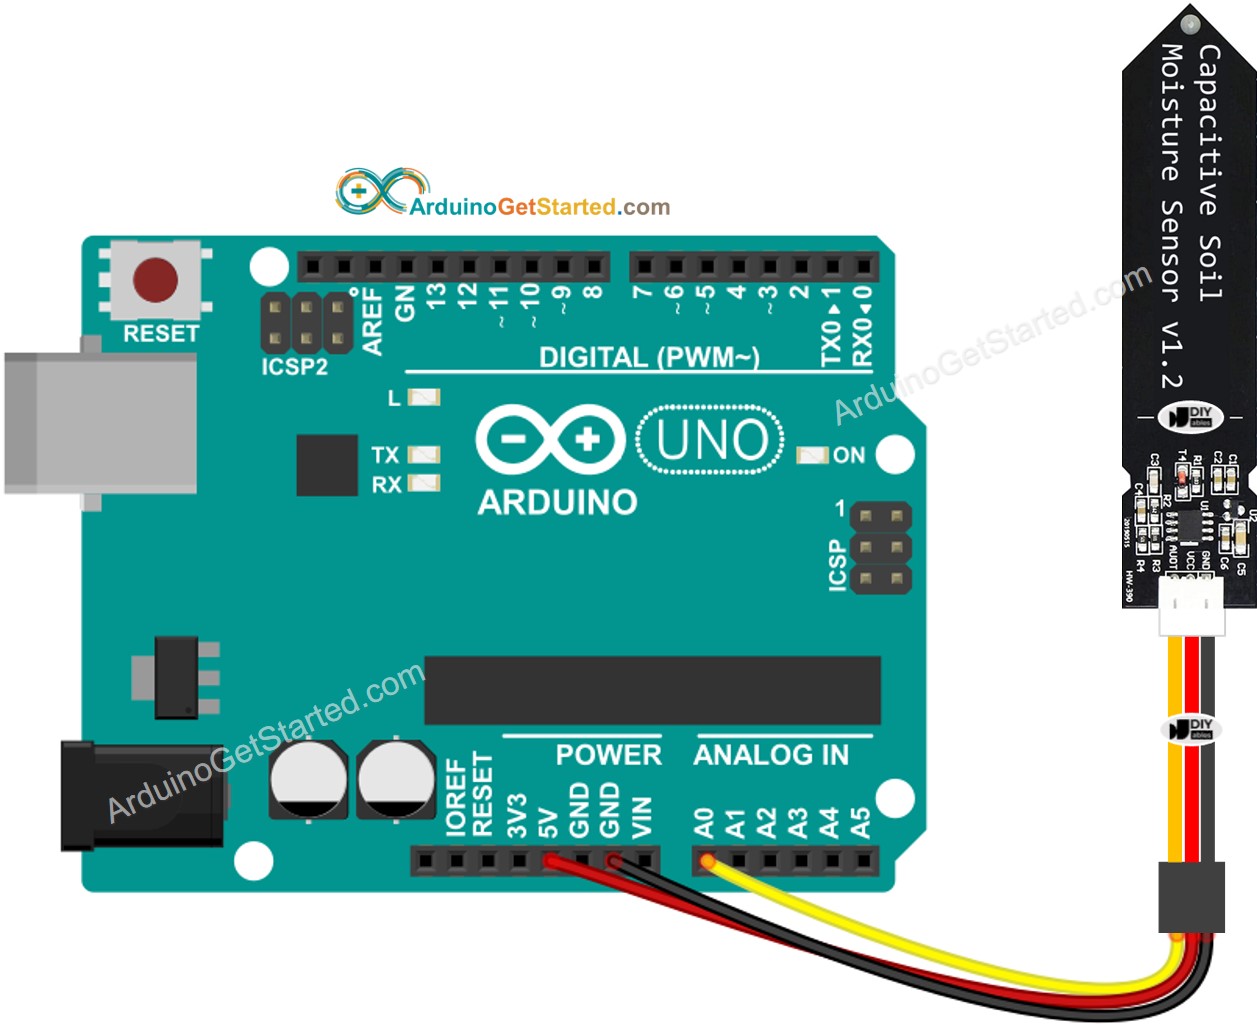
This image is created using Fritzing. Click to enlarge image
Arduino Code
Quick Steps
- Copy the above code and open it with Arduino IDE
- Click Upload button on Arduino IDE to upload code to Arduino
- Bury the sensor in soil, then pour water into the soil. Or slowly submerge it into a cup of salt water.
- Check out the result on Serial Monitor. It looks like the below:
※ NOTE THAT:
- Do NOT use pure water for testing since it doesn't conduct electricity, which means it won't impact the sensor readings.
- The sensor readings typically don't drop to zero. It's normal for them to stay within the range of 500 to 600, but this might change based on factors such as how deep the sensor is placed, the type of soil or water, and the voltage of the power supply.
- Never bury the circuit part (found on top of the sensor) in soil or water, as this could harm the sensor.
Calibration for Capacitive Soil Moisture Sensor
The measured value from the moisture sensor is relative. It depends on the soil's composition and water. In practice, we need to do calibration to determine a threshold that is a border between wet and dry.
How to do calibration:
- Run the above code on Arduino
- Embed the moisture sensor into the soil
- Embed the moisture sensor into the soil
- Pour water into the soil slowly
- Watch Serial Monitor.
- Write down a value at the time you feel that the soil changes its moisture from dry to wet. This value is called THRESHOLD.
Determine if the soil is wet or dry
After the calibration, update the THRESHOLD value you wrote down to the below code. The below code determines if the soil is wet or dry
The result on Serial Monitor.
Video Tutorial
We are considering to make the video tutorials. If you think the video tutorials are essential, please subscribe to our YouTube channel to give us motivation for making the videos.