Arduino control LED via Bluetooth
In this tutorial, we are going to learn how program Arduino to control a LED via Bluetooth or BLE.
- If you want to control the LED via Bluetooth, use HC-05 Bluetooth module.
- If you want to control the LED via BLE, use HM-10 BLE module.
This tutorial provides the instruction for both modules
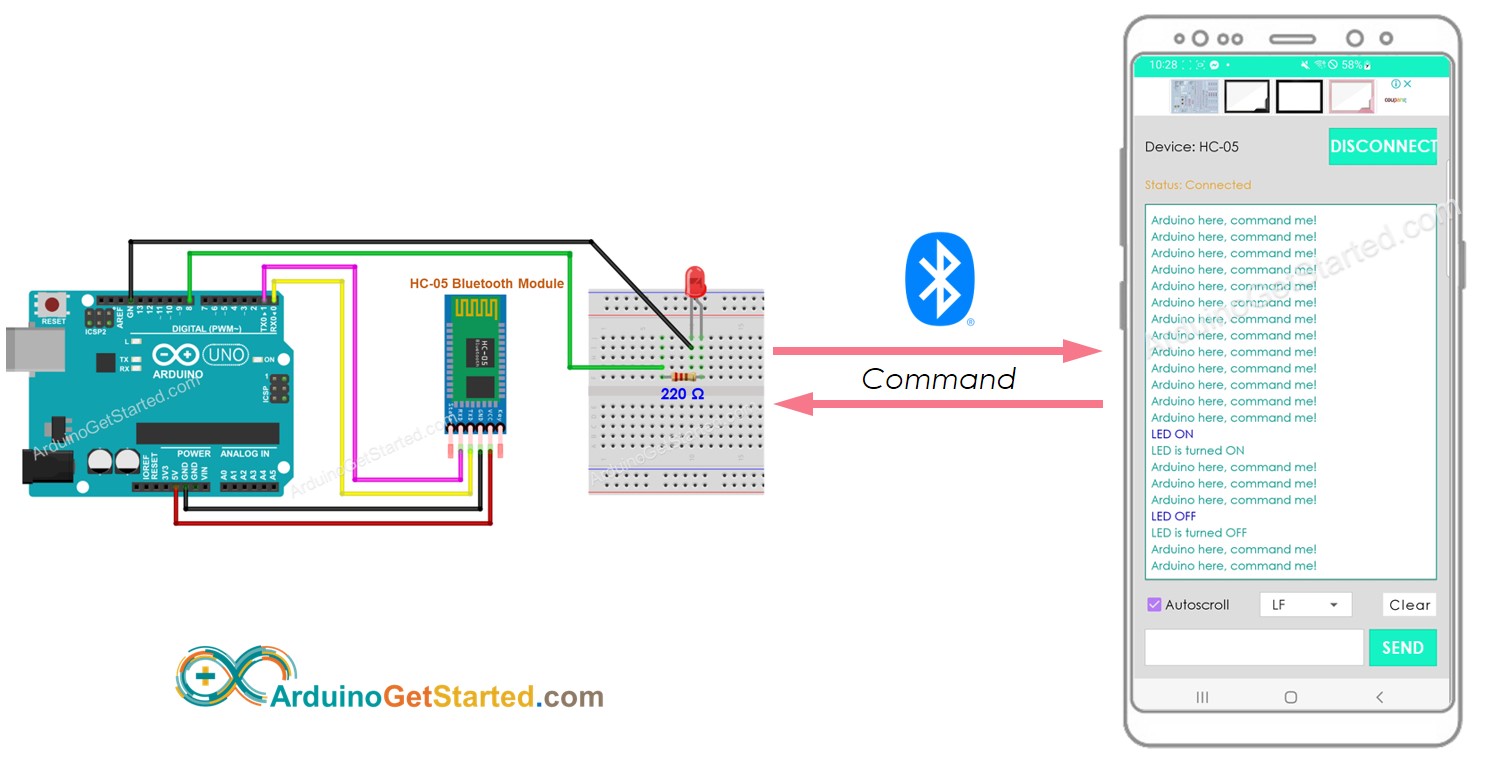
We will use the Bluetooth Serial Monitor App on smartphone to send commands to Arduino. The commands include:
- ON: turn on LED
- OFF: turn off LED
Hardware Required
Or you can buy the following kits:
| 1 | × | DIYables STEM V3 Starter Kit (Arduino included) | |
| 1 | × | DIYables Sensor Kit (18 sensors/displays) |
Additionally, some links direct to products from our own brand, DIYables .
Buy Note: To simplify the wiring process, we recommend using the LED Module, which comes with a built-in resistor.
About LED and Bluetooth Module
If you do not know about LED and Bluetooth Module (pinout, how it works, how to program ...), learn about them in the following tutorials:
Wiring Diagram
- If you want to control LED via Bluetooth, use HC-05 Bluetooth module with the below wiring diagram
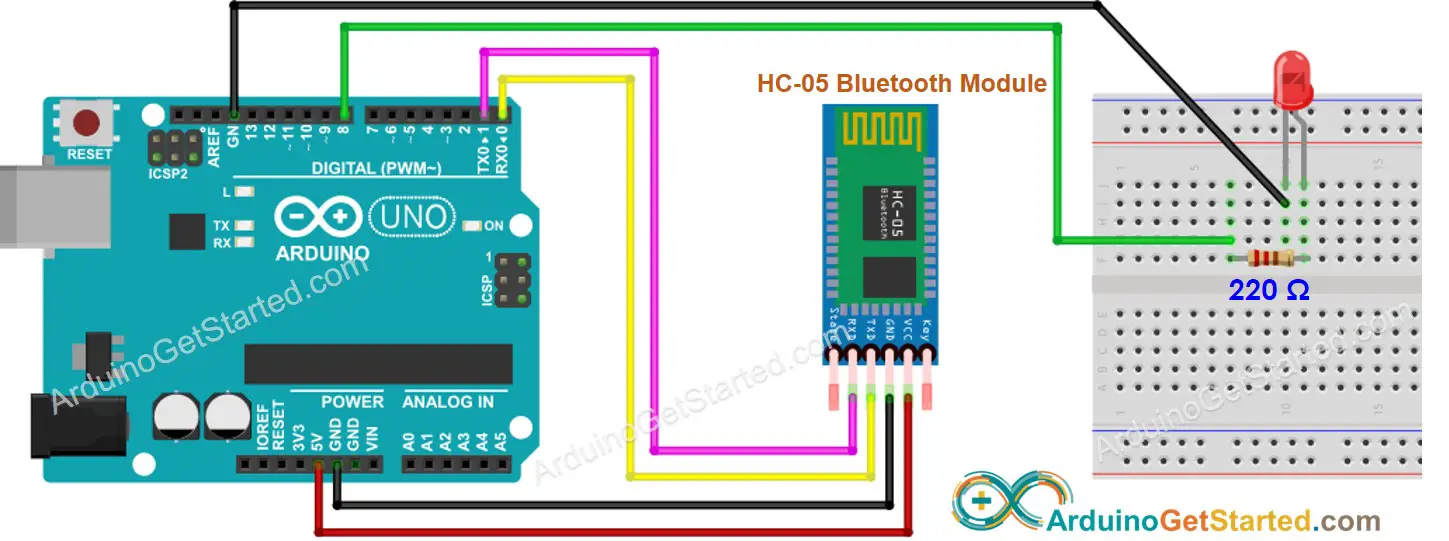
This image is created using Fritzing. Click to enlarge image
- If you want to control LED via BLE, use HM-10 BLE module with the below wiring diagram
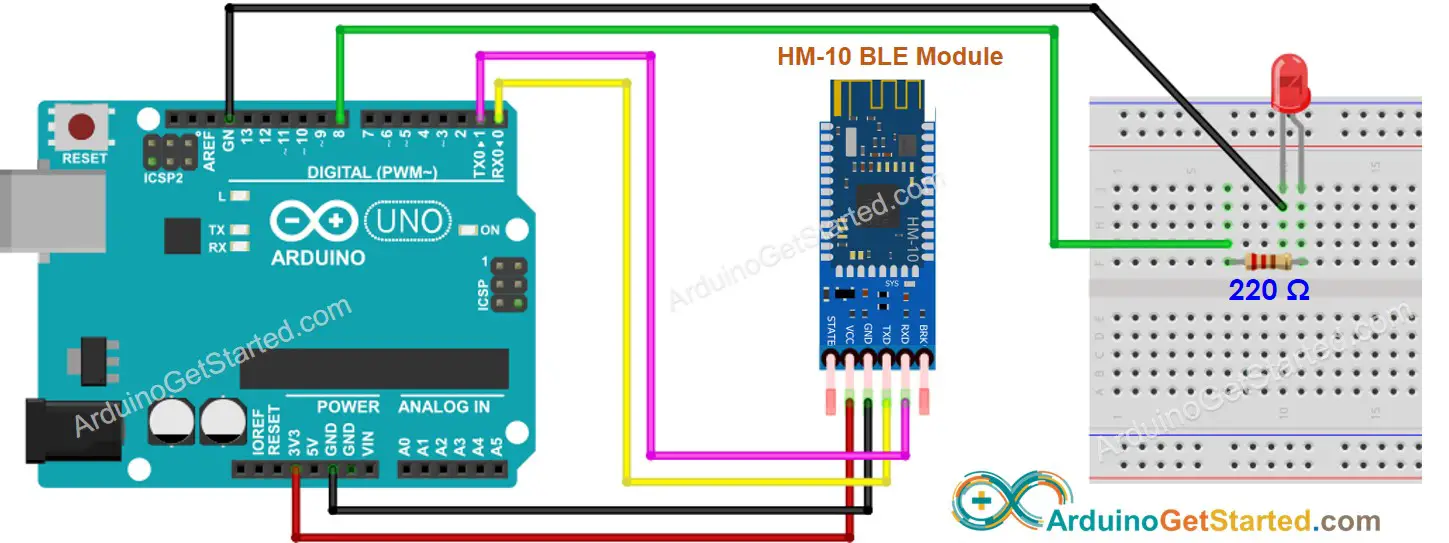
This image is created using Fritzing. Click to enlarge image
Arduino Code - controls LED via Bluetooth/BLE
The below code works for both HC-10 Bluetooth module and HM-10 BLE module
Quick Steps
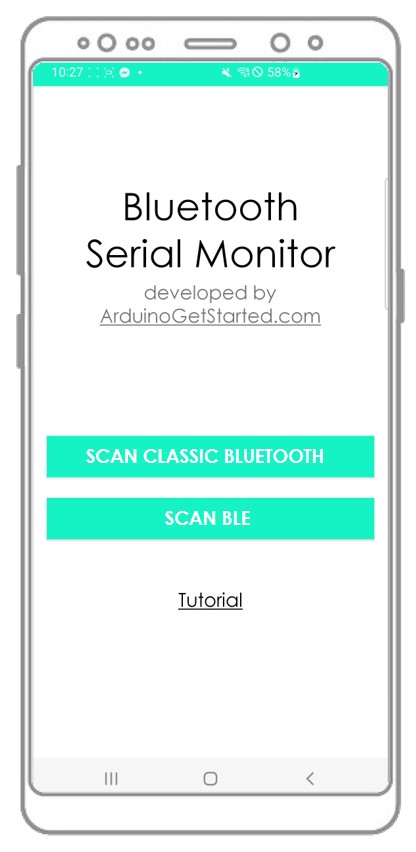
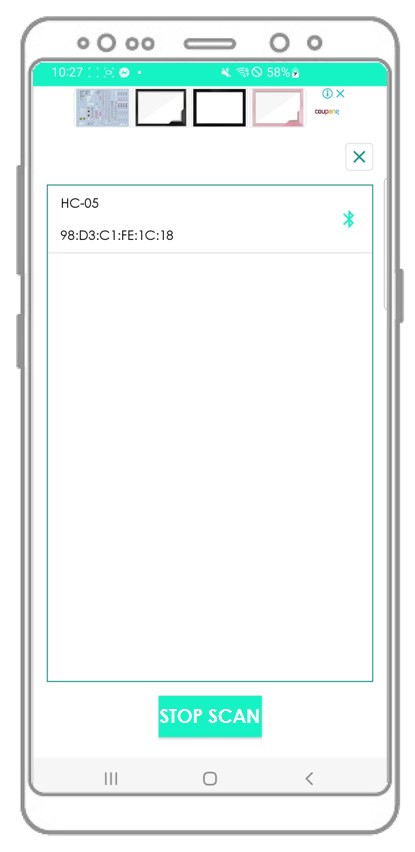
- Install Bluetooth Serial Monitor App on your smartphone
- Copy the above code and open with Arduino IDE and upload the code to Arduino
- Click Upload button on Arduino IDE to upload code to Arduino. If you are unable to upload code to your Arduino, try disconnecting the TX and RX pins from the Bluetooth module, uploading the code, and then reconnecting the RX/TX pins again.
- Open Bluetooth Serial Monitor App on your smartphone
- Select the Classic Bluetooth or BLE according to the module you used
- Pair the Bluetooth App with HC-05 Bluetooth module or HM-10 BLE module
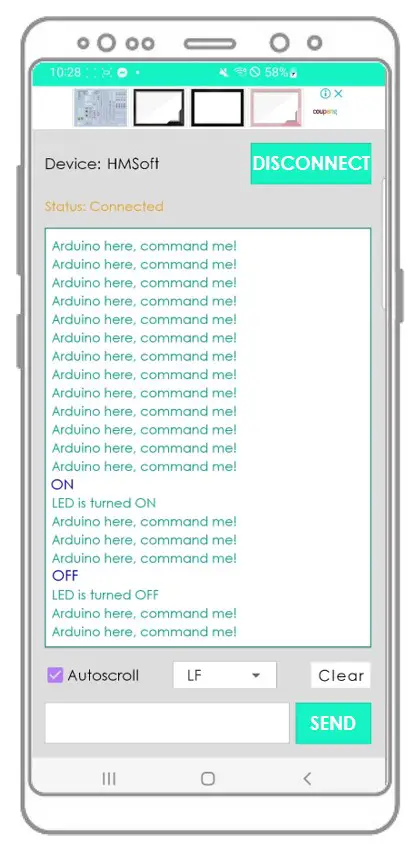
- Type “ON” or “OFF” and click Send button
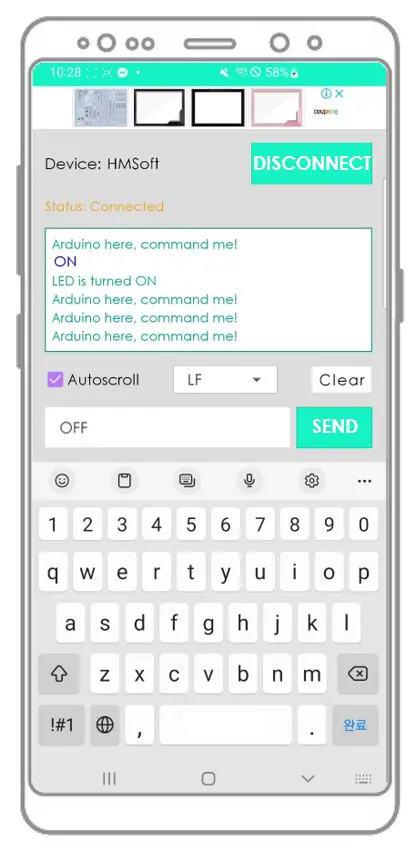
- See the LED's state on Arduino board. We will see LED's state is ON or OFF, respectively.
- We also see LED's state on Bluetooth App
- See the result on the Android App.
You may wonder how Arduino can receive a complete command? For example, when we send “OFF” command, how Arduino can know the command is “O”, “OF” or “OFF”?
⇒ When sending a command, The bluetooth App appends a newline character ('\n') by selecting “newline” option on the App. Arduino will read data until it meets the newline character. The newline character acts as a command delimiter.
If the Bluetooth Serial Monitor app is useful for you, please give it a 5-star rating on Play Store. Thank you!
Video Tutorial
We are considering to make the video tutorials. If you think the video tutorials are essential, please subscribe to our YouTube channel to give us motivation for making the videos.