Arduino - DC Motor - Limit Switch
In this Arduino tutorial, we are going to learn how to use Arduino to control DC motor by limit switch and L298N driver. In detail, we are going to learn:
- How to stop DC motor when a limit switch is touched
- How to change the direction of DC motor when a limit switch is touched
- How to change the direction of DC motor when two limit switches is touched
Hardware Required
Or you can buy the following kits:
| 1 | × | DIYables STEM V3 Starter Kit (Arduino included) | |
| 1 | × | DIYables Sensor Kit (18 sensors/displays) |
Additionally, some links direct to products from our own brand, DIYables .
About DC Motor and Limit Switch
If you do not know about DC motor and limit switch (pinout, how it works, how to program ...), learn about them in the following tutorials:
- Arduino - Limit Switch tutorial
- Arduino - Controls DC Motor tutorial
Wiring Diagram
This tutorial provides the Arduino codes for two cases: One DC motor + one limit switch, One DC motor + two limit switches.
- Wiring diagram between the DC motor and a limit switch
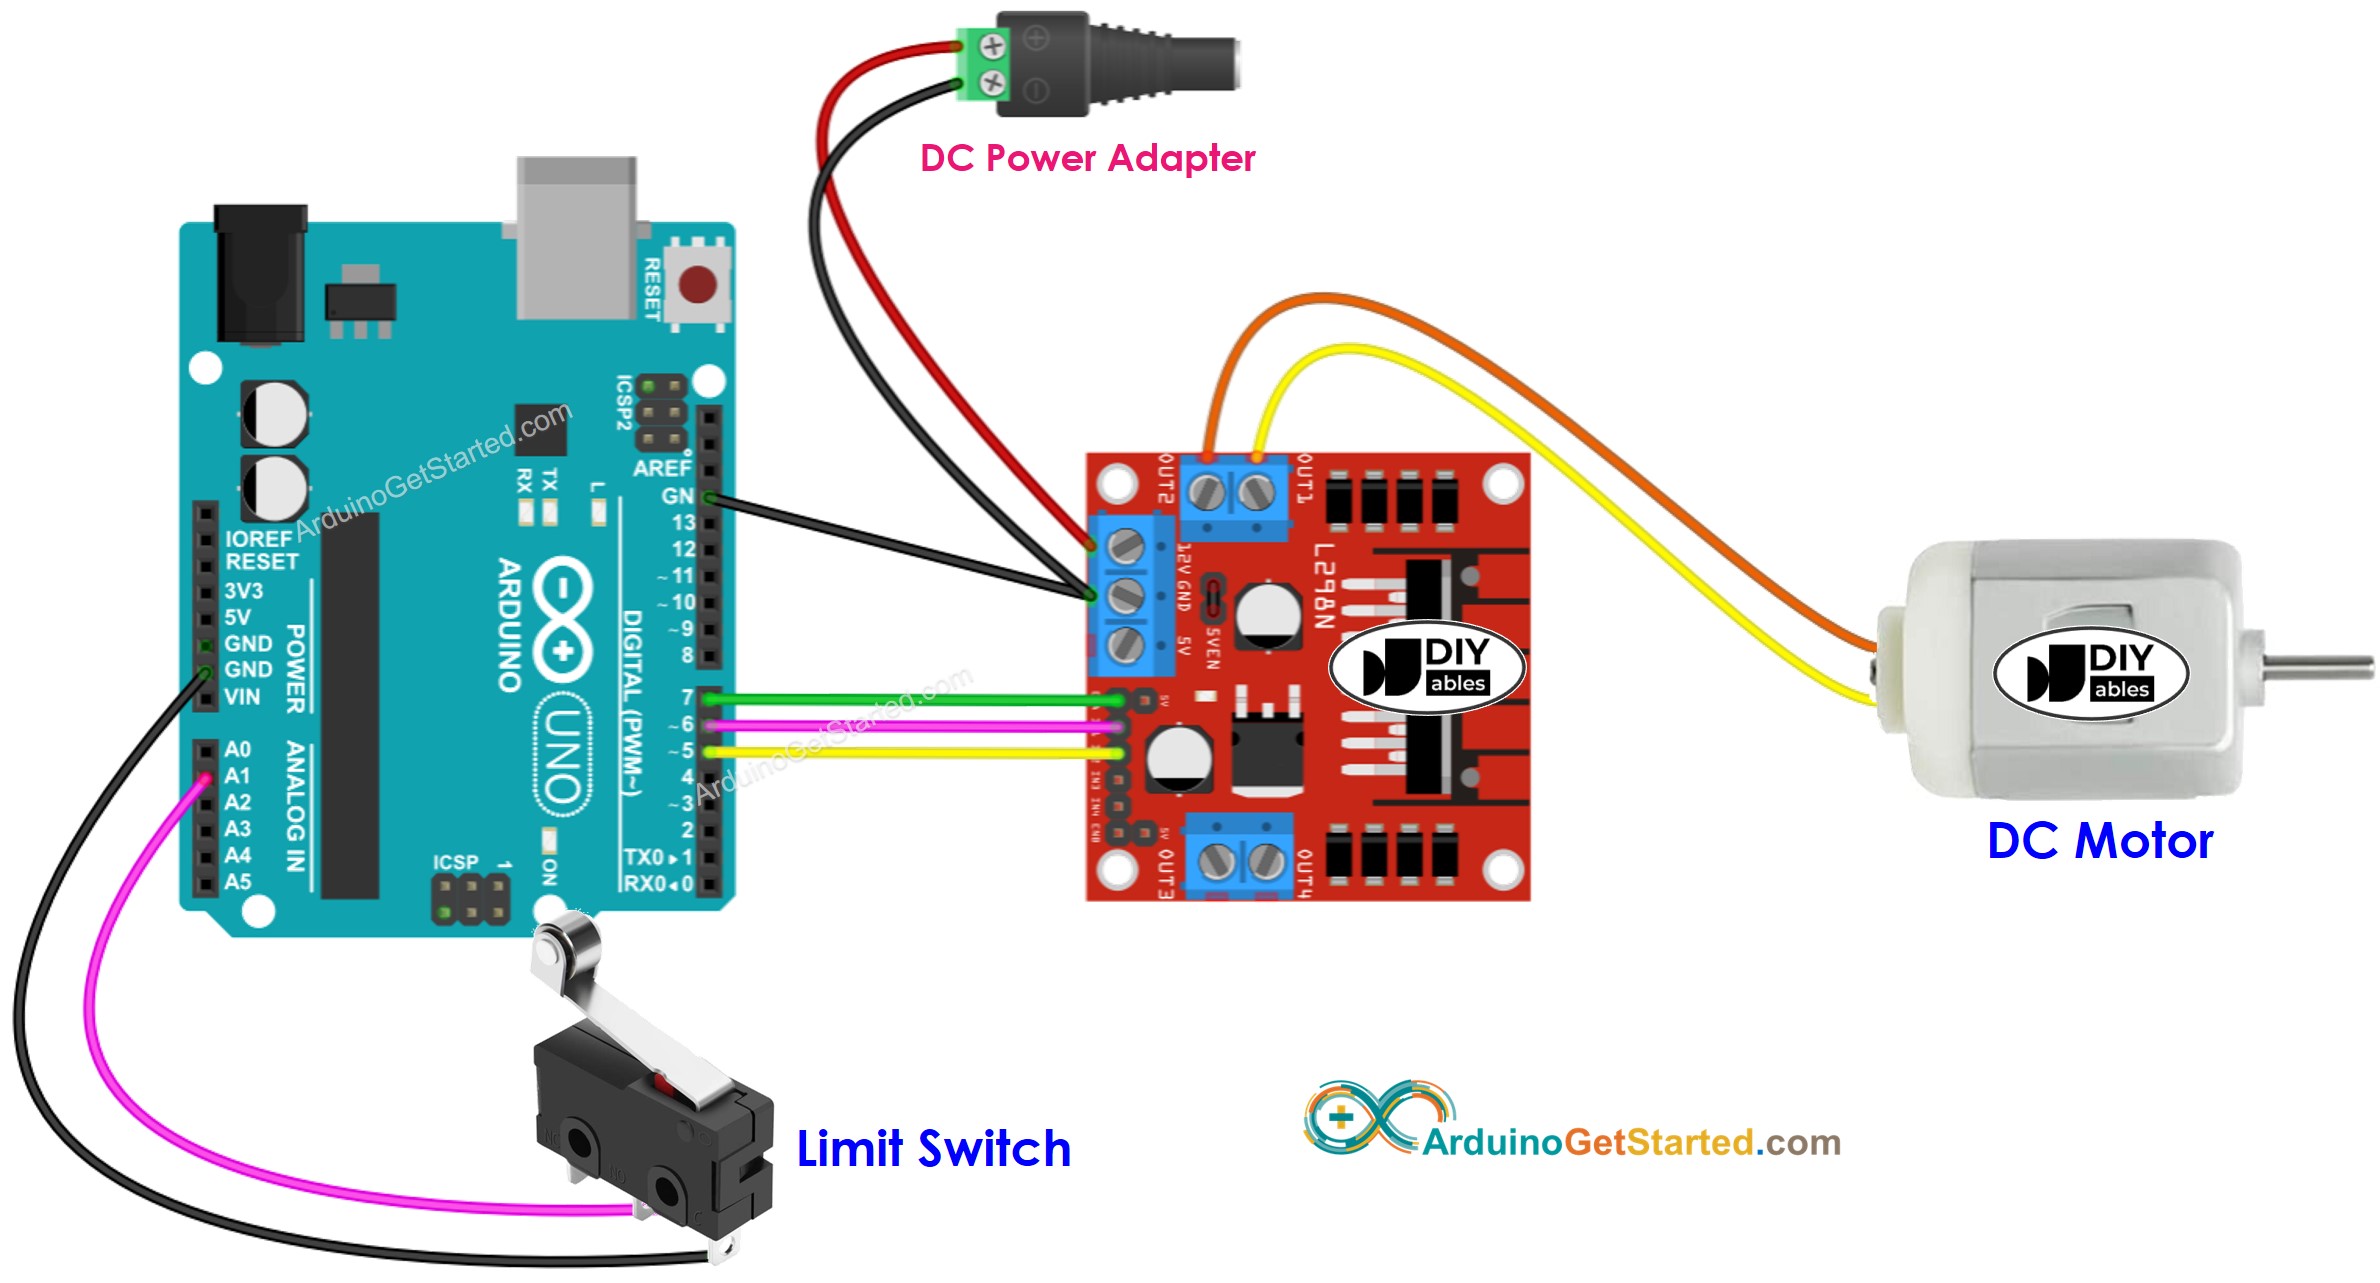
This image is created using Fritzing. Click to enlarge image
- Wiring diagram between the DC motor and two limit switches
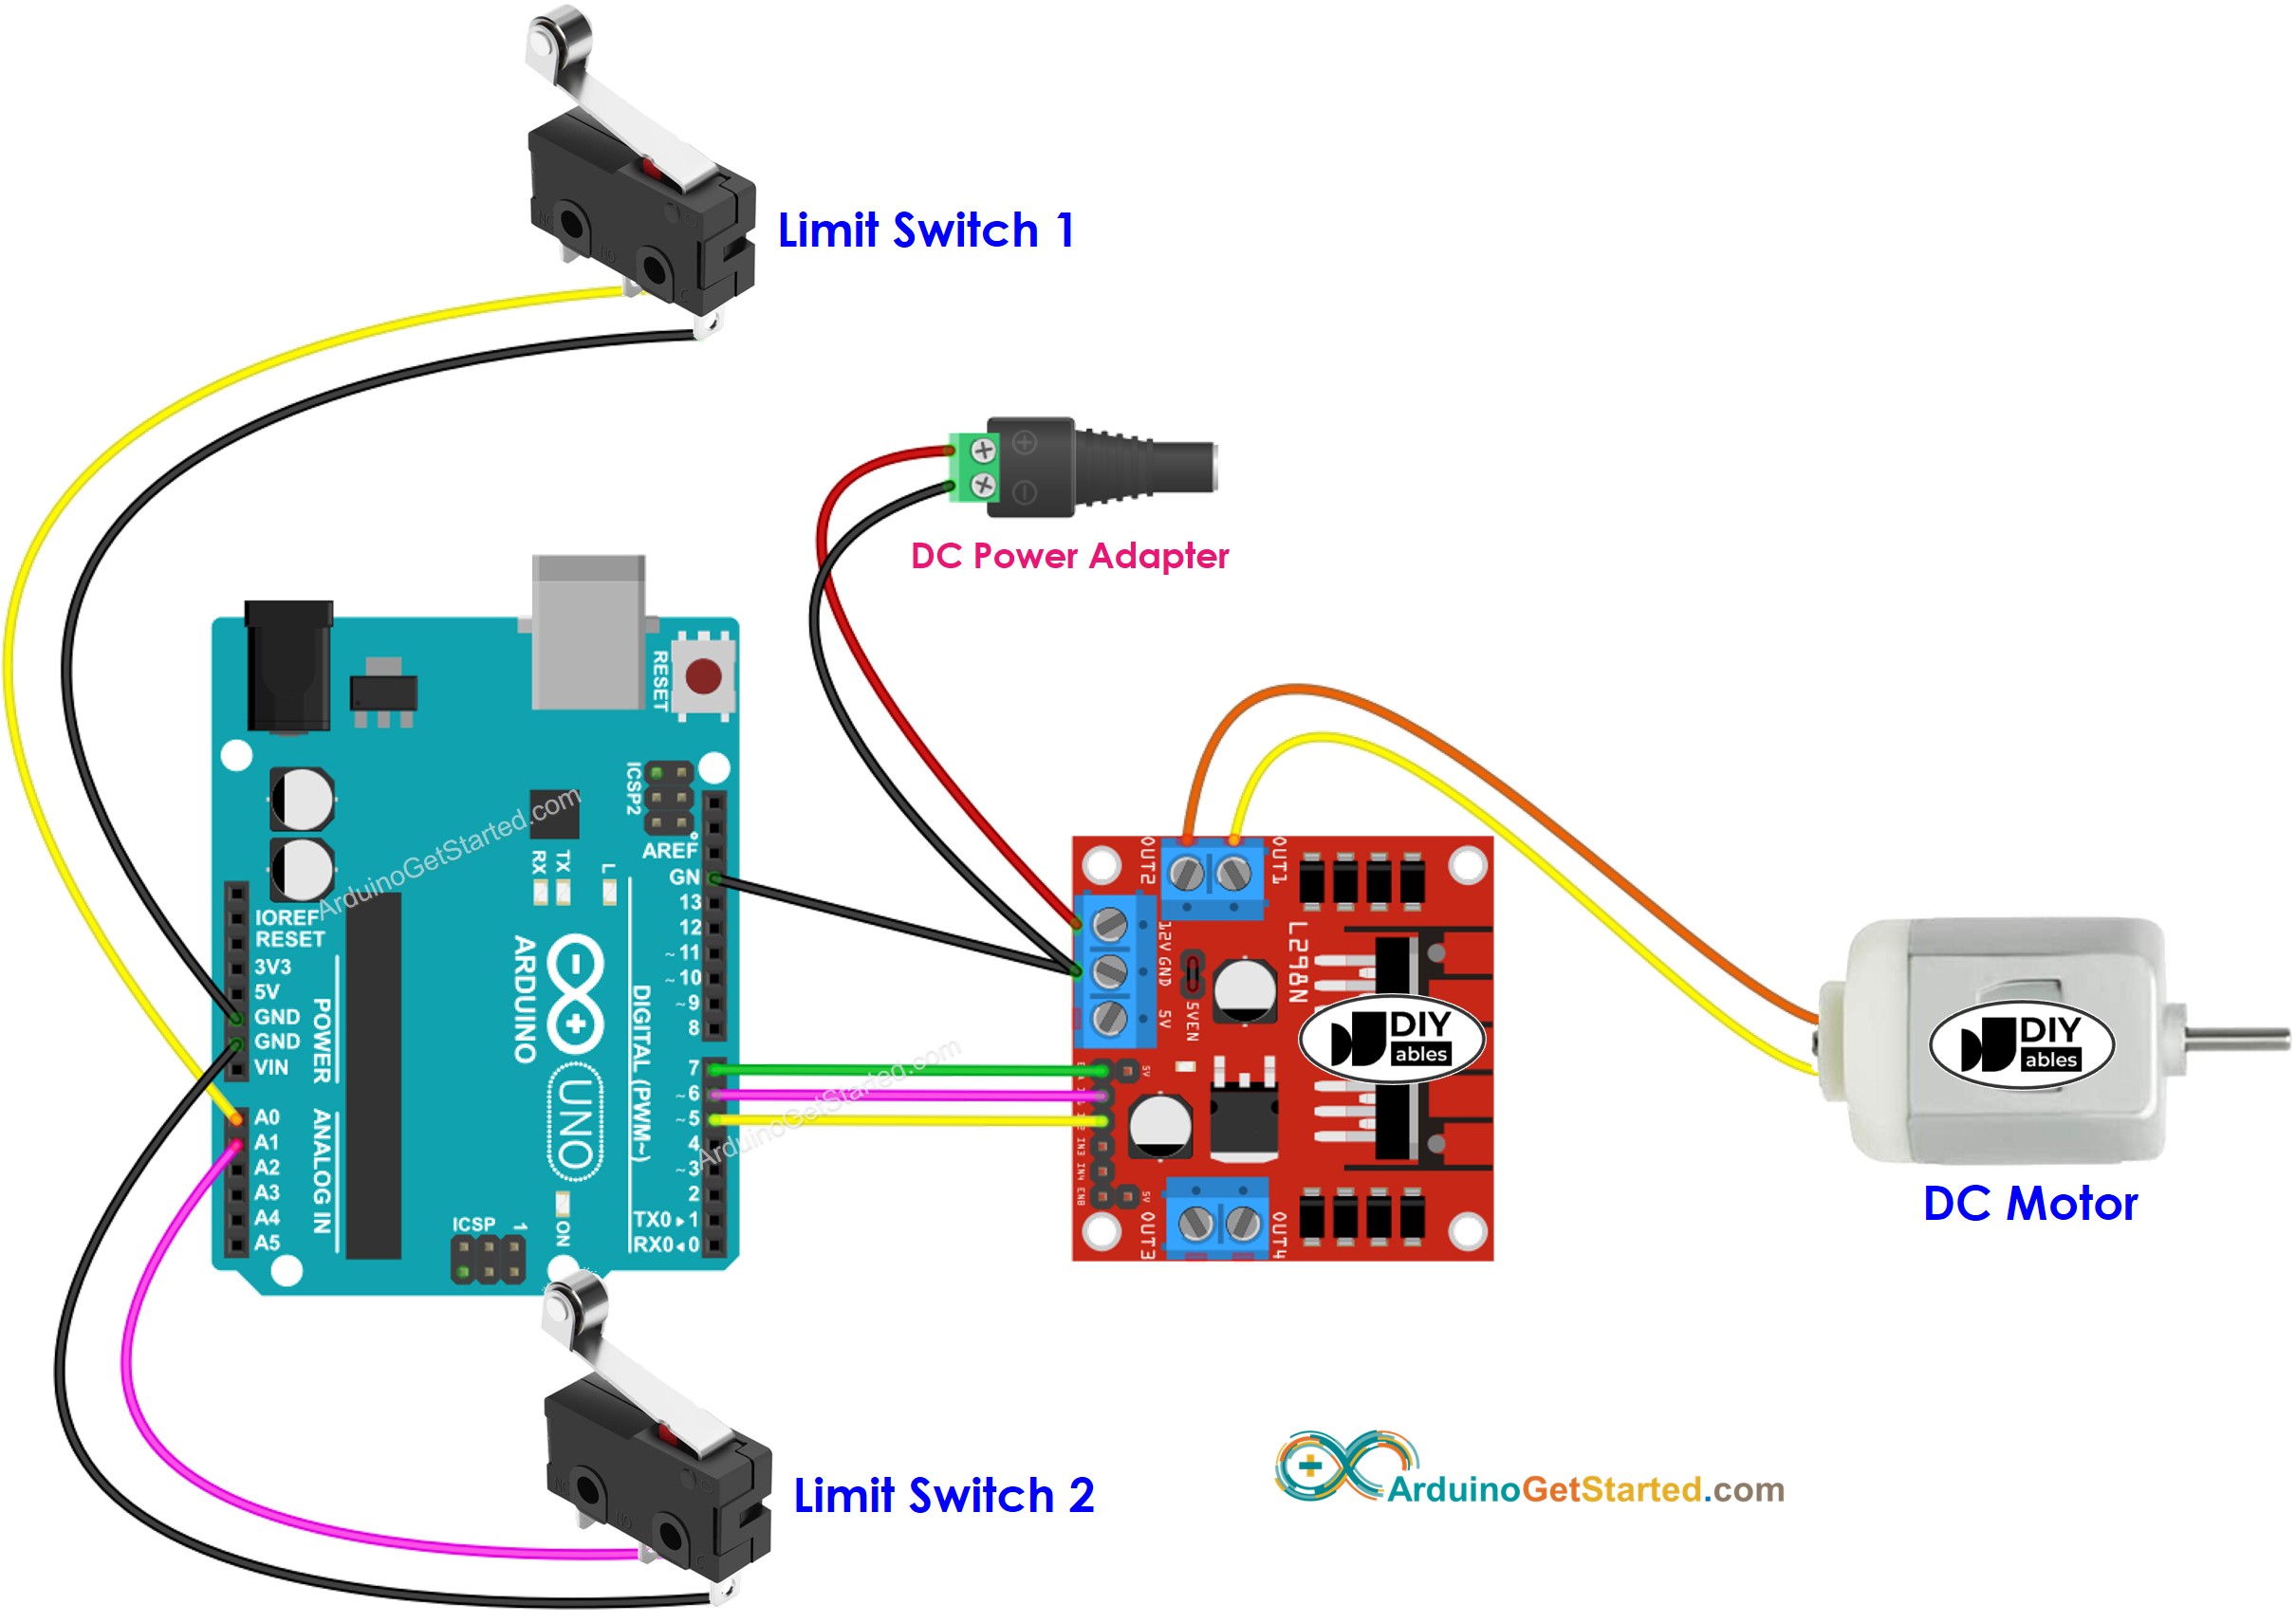
This image is created using Fritzing. Click to enlarge image
Arduino Code - Stop DC Motor by a Limit Switch
The below code make a DC motor spin infinitely and stop immediately when a limit switch is touched
Quick Steps
- Connect Arduino to PC via USB cable
- Open Arduino IDE, select the right board and port
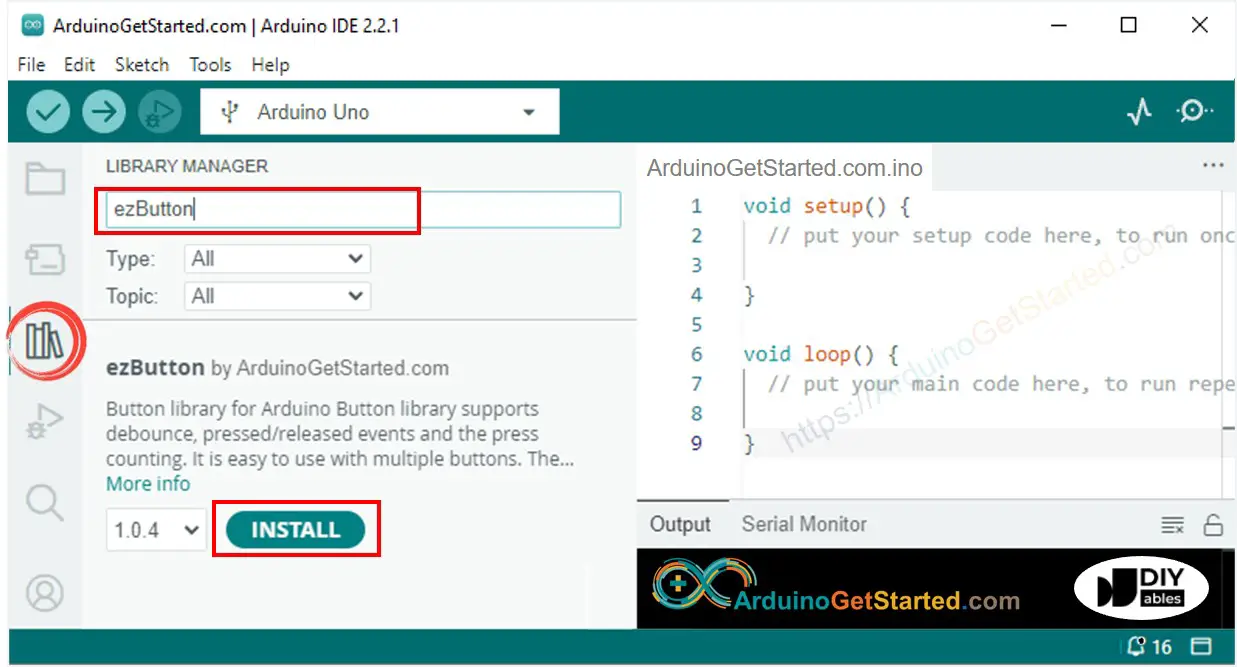
- Navigate to the Libraries icon on the left bar of the Arduino IDE.
- Search “ezButton”, then find the button library by ArduinoGetStarted.com
- Click Install button to install ezButton library.
- Copy the above code and open with Arduino IDE
- Click Upload button on Arduino IDE to upload code to Arduino
- If the wiring is correct, you will see the motor rotates clockwise direction.
- Touch the limit switch
- You will see the motor is stopped immediately
- The result on Serial Monitor looks like below
Code Explanation
Read the line-by-line explanation in comment lines of code!
Arduino Code - Change Direction of DC Motor by a Limit Switch
The below code make a DC motor spin infinitely and change its direction when a limit switch is touched
Quick Steps
- Copy the above code and open with Arduino IDE
- Click Upload button on Arduino IDE to upload code to Arduino
- If the wiring is correct, you will see the motor spins in the clockwise direction.
- Touch the limit switch
- You will see the DC motor's direction is changed to the anti-clockwise
- Touch the limit switch again
- You will see the DC motor's direction is changed to clockwise
- The result on Serial Monitor looks like below
Arduino Code - Change Direction of DC Motor by two Limit Switches
The below code make a DC motor spin infinitely and change its direction when one of two limit switches is touched
Quick Steps
- Copy the above code and open with Arduino IDE
- Click Upload button on Arduino IDE to upload code to Arduino
- If the wiring is correct, you will see the motor spins in the clockwise direction.
- Touch the limit switch 1
- You will see the DC motor's direction is changed to anti-clockwise
- Touch the limit switch 2
- You will see the DC motor's direction is changed to clockwise
- The result on Serial Monitor looks like below
Video Tutorial
We are considering to make the video tutorials. If you think the video tutorials are essential, please subscribe to our YouTube channel to give us motivation for making the videos.