Arduino - Temperature Humidity Sensor - OLED Display
In this tutorial, we are going to learn:
You can use DHT22 sensor instead of DHT11 sensor.
Or you can buy the following kits:
Disclosure: Some links in this section are Amazon affiliate links. If you make a purchase through these links, we may earn a commission at no extra cost to you.
Additionally, some links direct to products from our own brand,
DIYables .
If you do not know about OLED display, DHT11 and DHT22 temperature humidity sensor (pinout, how it works, how to program ...), learn about them in the following tutorials:

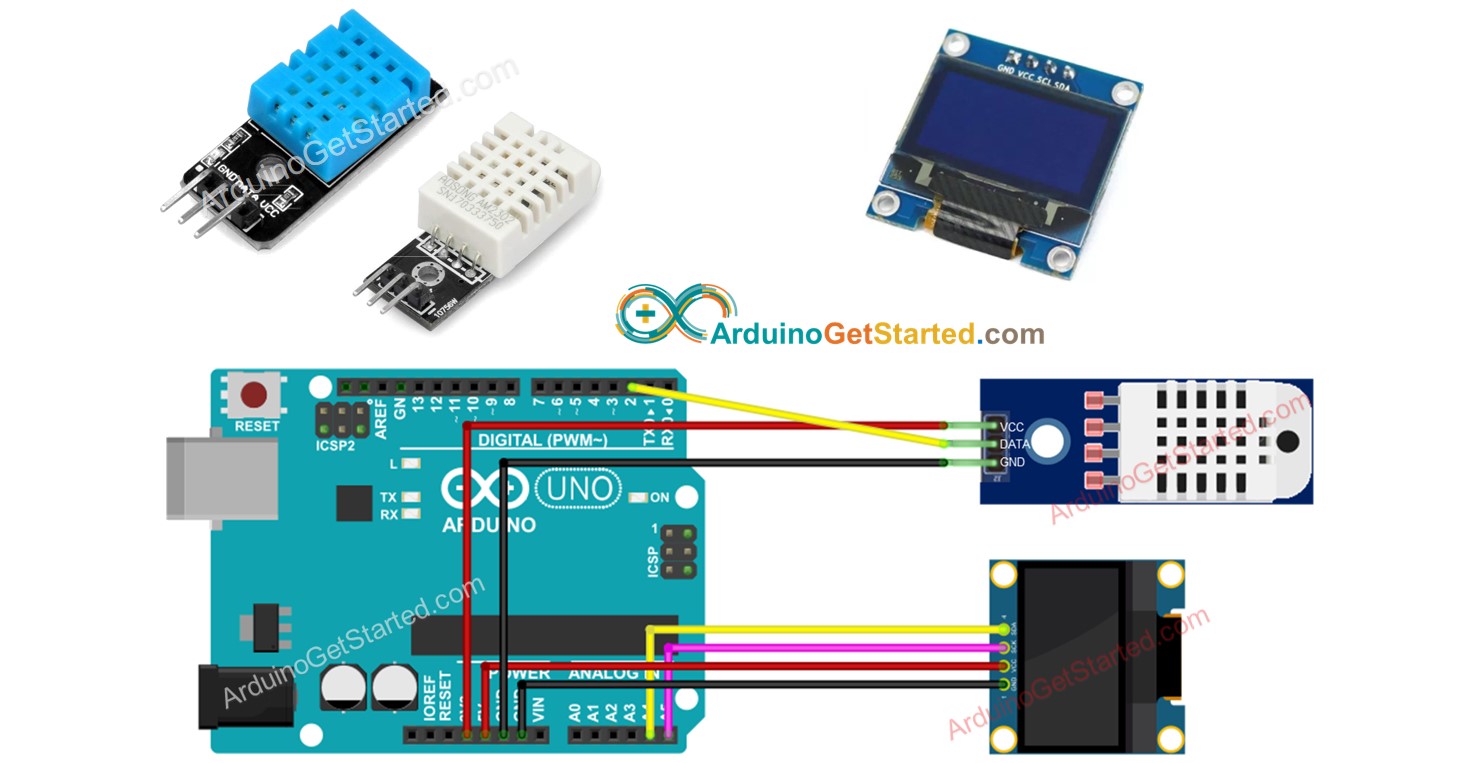
This image is created using Fritzing. Click to enlarge image
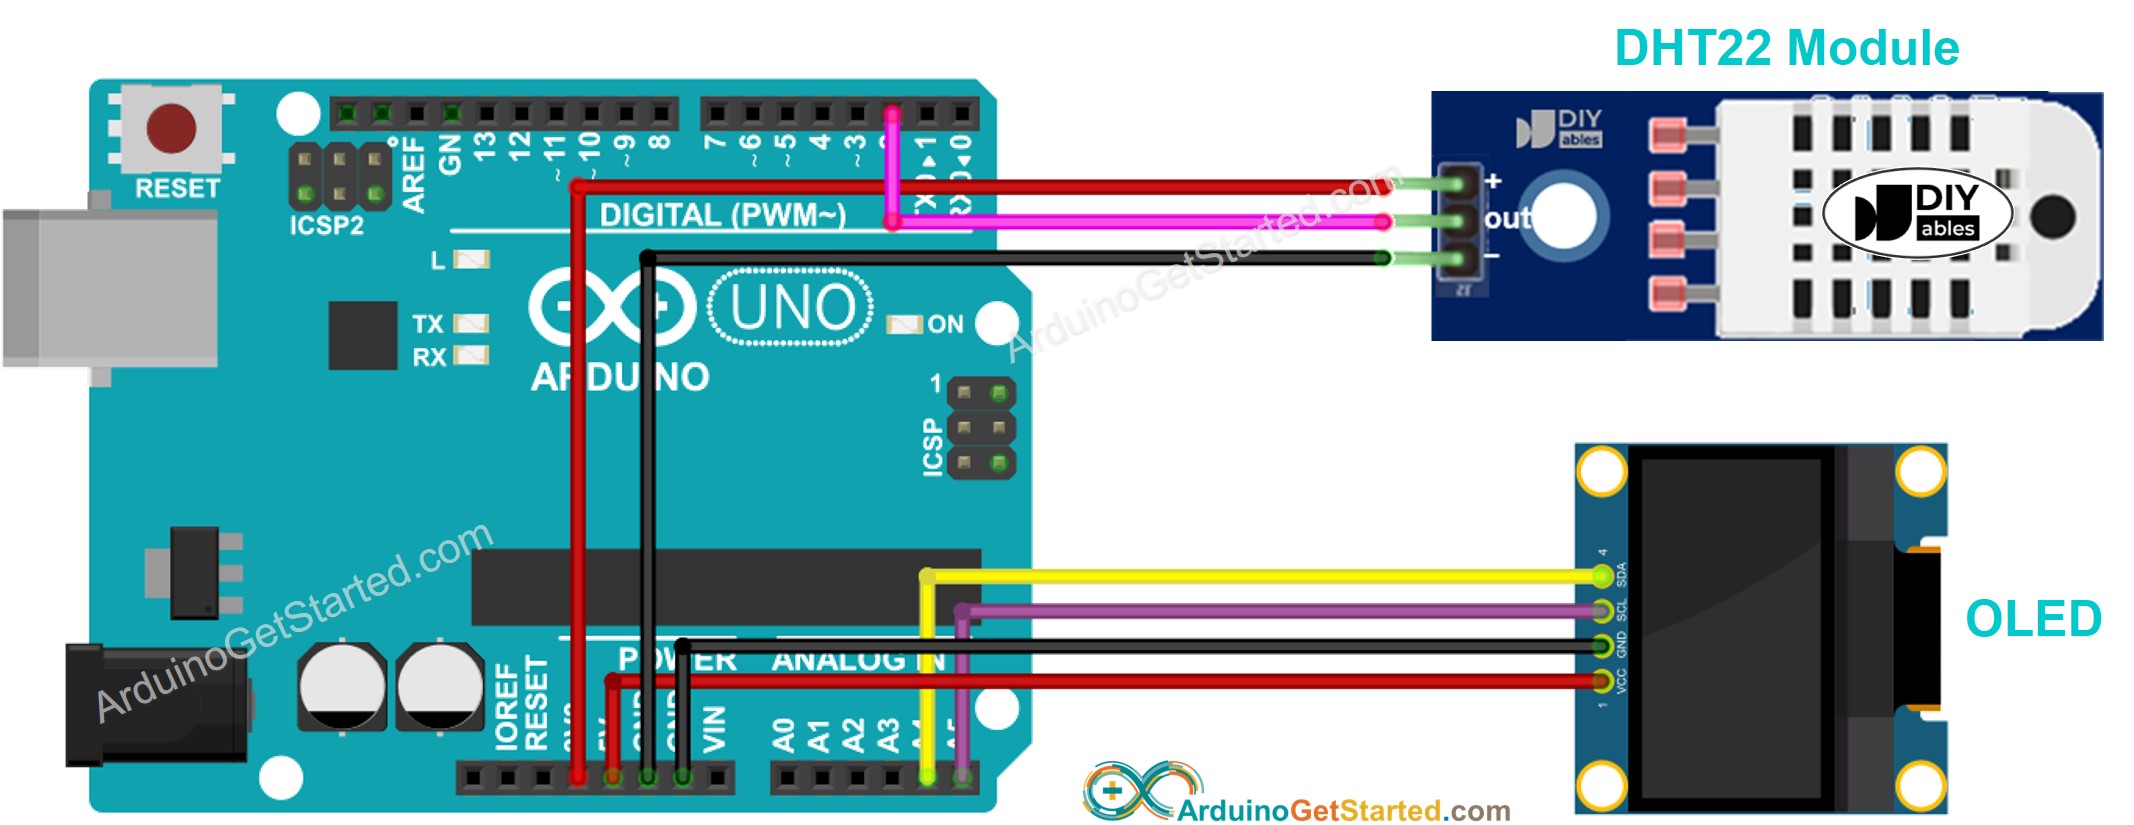
This image is created using Fritzing. Click to enlarge image
#include <Wire.h>
#include <Adafruit_GFX.h>
#include <Adafruit_SSD1306.h>
#include <DHT.h>
#define SCREEN_WIDTH 128
#define SCREEN_HEIGHT 64
#define DHTPIN 2
#define DHTTYPE DHT11
Adafruit_SSD1306 oled(SCREEN_WIDTH, SCREEN_HEIGHT, &Wire, -1);
DHT dht(DHTPIN, DHTTYPE);
String temperature;
String humidity;
void setup() {
Serial.begin(9600);
if (!oled.begin(SSD1306_SWITCHCAPVCC, 0x3C)) {
Serial.println(F("SSD1306 allocation failed"));
while (true)
;
}
delay(2000);
oled.clearDisplay();
oled.setTextSize(3);
oled.setTextColor(WHITE);
oled.setCursor(0, 10);
dht.begin();
temperature.reserve(10);
humidity.reserve(10);
}
void loop() {
float humi = dht.readHumidity();
float tempC = dht.readTemperature();
if (isnan(humi) || isnan(tempC)) {
temperature = "Failed";
humidity = "Failed";
} else {
temperature = String(tempC, 1);
temperature += char(247);
temperature += "C";
humidity = String(humi, 1);
humidity += "%";
}
Serial.print(tempC);
Serial.print("°C | " );
Serial.print(humi);
Serial.println("%");
oledDisplayCenter(temperature, humidity);
}
void oledDisplayCenter(String temperature, String humidity) {
int16_t x1;
int16_t y1;
uint16_t width_T;
uint16_t height_T;
uint16_t width_H;
uint16_t height_H;
oled.getTextBounds(temperature, 0, 0, &x1, &y1, &width_T, &height_T);
oled.getTextBounds(temperature, 0, 0, &x1, &y1, &width_H, &height_H);
oled.clearDisplay();
oled.setCursor((SCREEN_WIDTH - width_T) / 2, SCREEN_HEIGHT / 2 - height_T - 5);
oled.println(temperature);
oled.setCursor((SCREEN_WIDTH - width_H) / 2, SCREEN_HEIGHT / 2 + 5);
oled.println(humidity);
oled.display();
}
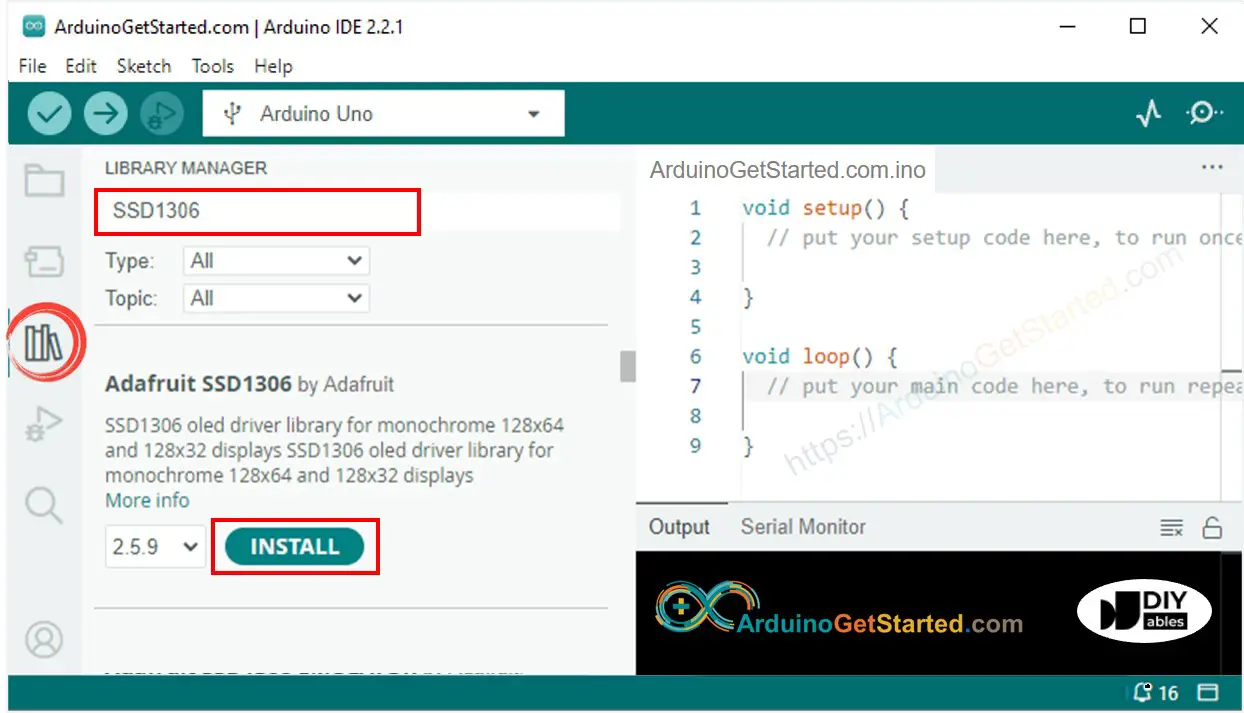
Open Arduino IDE on your PC.
Navigate to the Libraries icon on the left bar of the Arduino IDE.
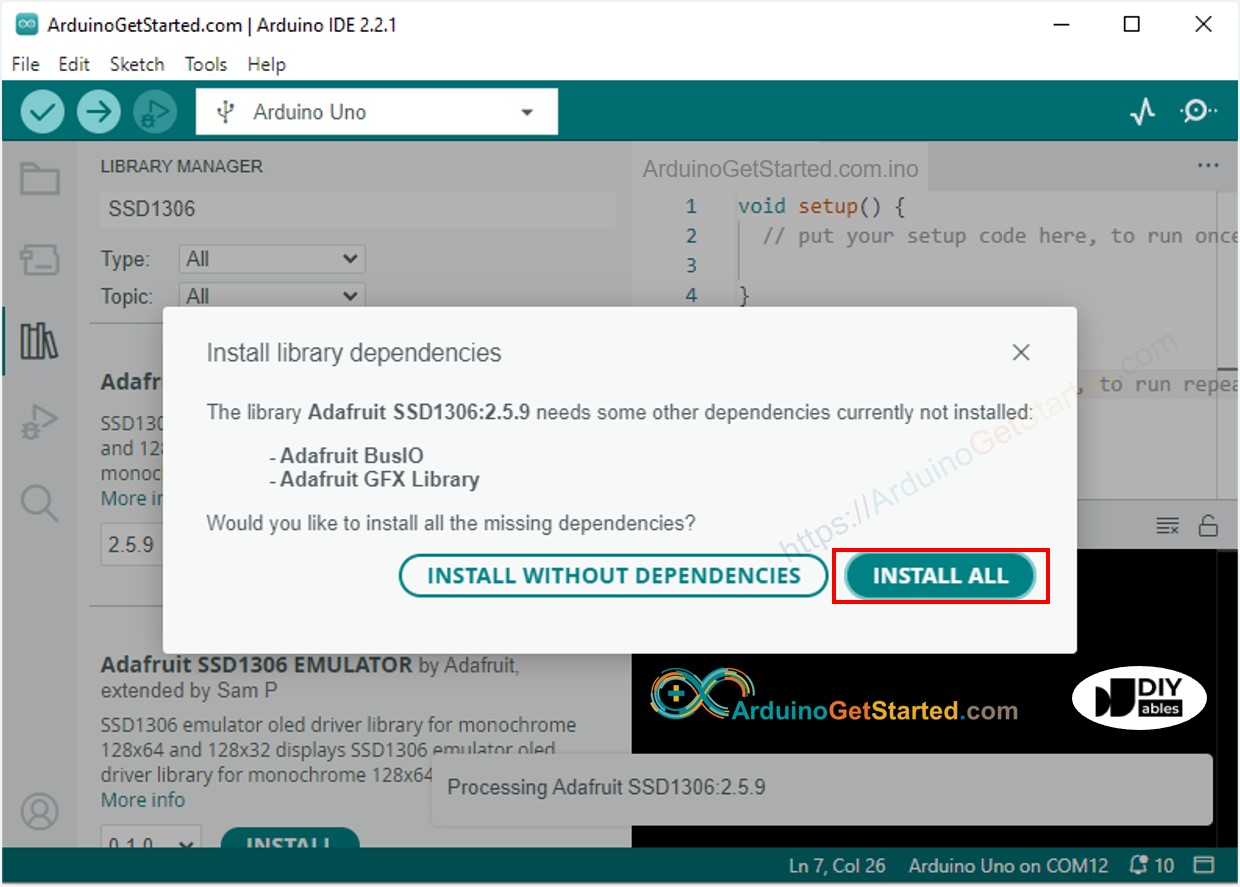
Search “SSD1306”, then find the SSD1306 library by Adafruit
Click Install button to install the library.
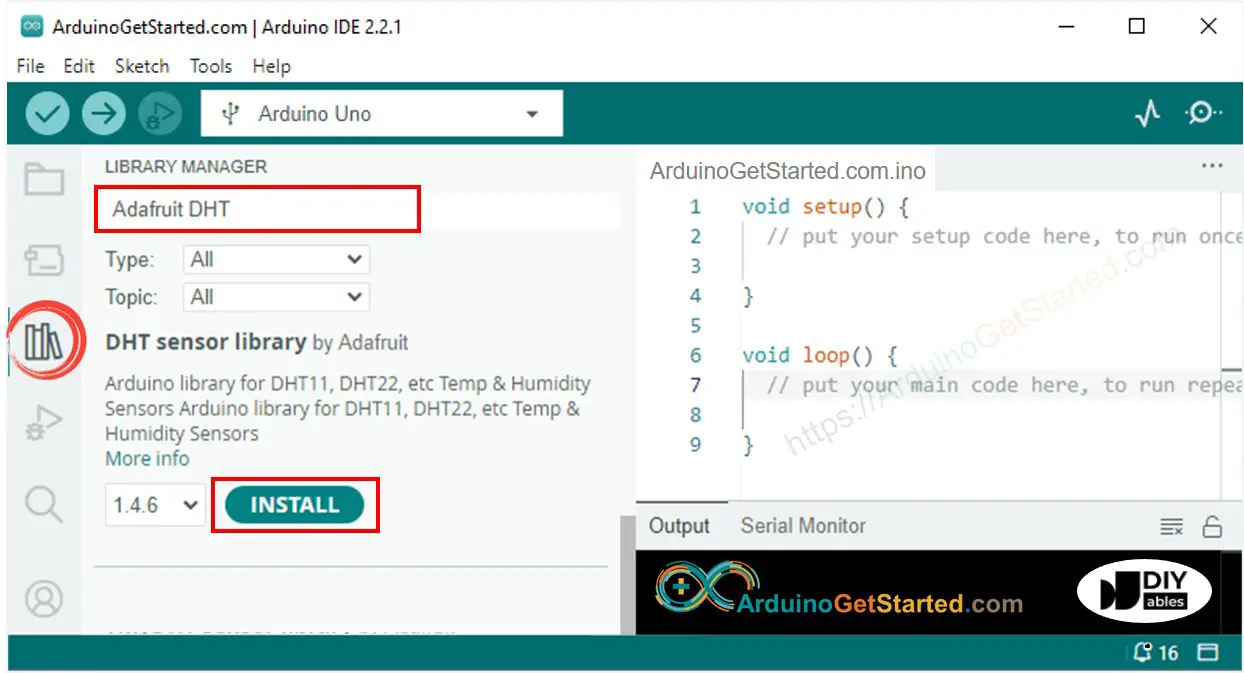
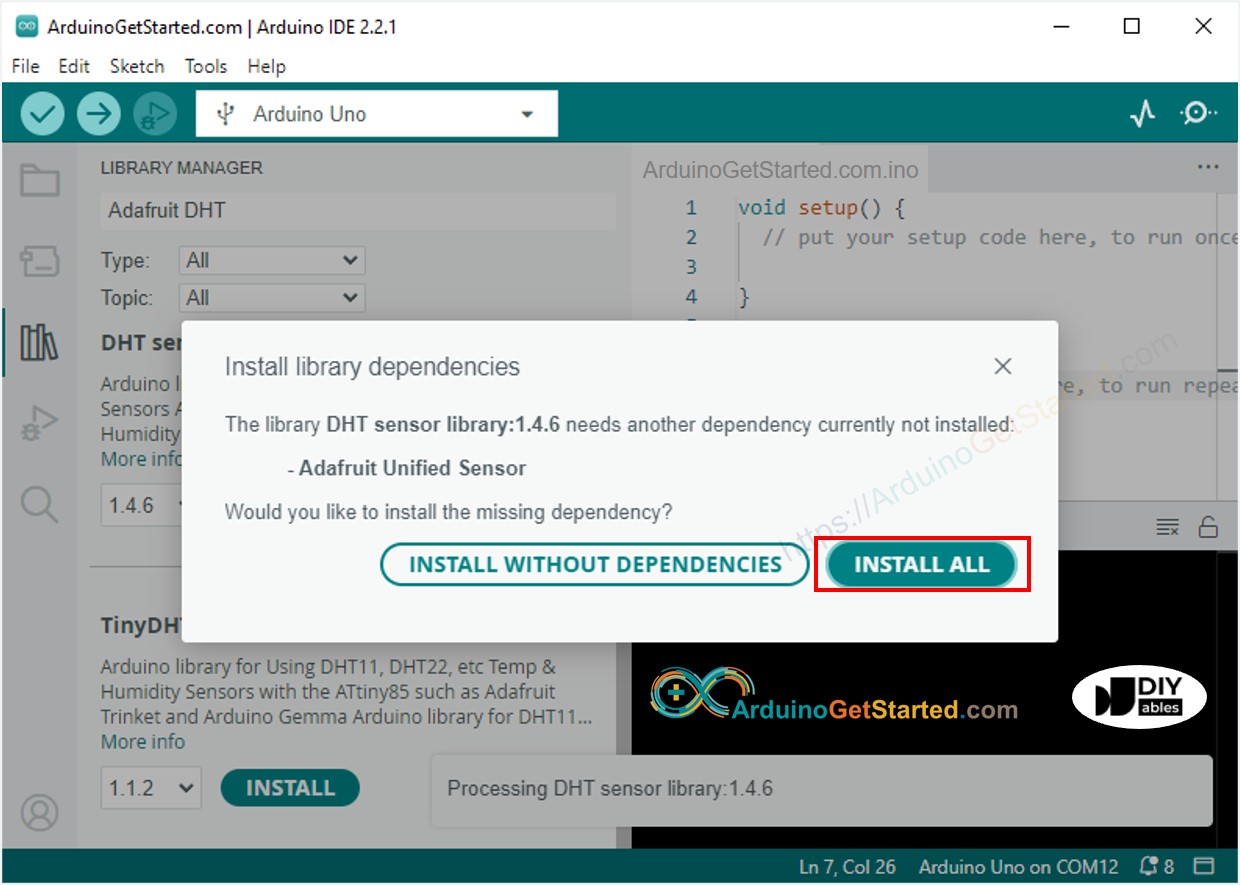
Search “DHT”, then find the DHT sensor library by Adafruit
Click Install button to install the library.
Copy the above code and open with Arduino IDE
Click Upload button on Arduino IDE to upload code to Arduino
Put the sensor on hot and cold water, or grasp the sensor by your hand
See the result on OLED and Serial Monitor
※ NOTE THAT:
The about code automatically horizontal and vertical center aligns the text on OLED display
#include <Wire.h>
#include <Adafruit_GFX.h>
#include <Adafruit_SSD1306.h>
#include <DHT.h>
#define SCREEN_WIDTH 128
#define SCREEN_HEIGHT 64
#define DHTPIN 2
#define DHTTYPE DHT22
Adafruit_SSD1306 oled(SCREEN_WIDTH, SCREEN_HEIGHT, &Wire, -1);
DHT dht(DHTPIN, DHTTYPE);
String temperature;
String humidity;
void setup() {
Serial.begin(9600);
if (!oled.begin(SSD1306_SWITCHCAPVCC, 0x3C)) {
Serial.println(F("SSD1306 allocation failed"));
while (true)
;
}
delay(2000);
oled.clearDisplay();
oled.setTextSize(3);
oled.setTextColor(WHITE);
oled.setCursor(0, 10);
dht.begin();
temperature.reserve(10);
humidity.reserve(10);
}
void loop() {
float humi = dht.readHumidity();
float tempC = dht.readTemperature();
if (isnan(humi) || isnan(tempC)) {
temperature = "Failed";
humidity = "Failed";
} else {
temperature = String(tempC, 1);
temperature += char(247);
temperature += "C";
humidity = String(humi, 1);
humidity += "%";
Serial.print(tempC);
Serial.print("°C | " );
Serial.print(humi);
Serial.println("%");
}
oledDisplayCenter(temperature, humidity);
}
void oledDisplayCenter(String temperature, String humidity) {
int16_t x1;
int16_t y1;
uint16_t width_T;
uint16_t height_T;
uint16_t width_H;
uint16_t height_H;
oled.getTextBounds(temperature, 0, 0, &x1, &y1, &width_T, &height_T);
oled.getTextBounds(temperature, 0, 0, &x1, &y1, &width_H, &height_H);
oled.clearDisplay();
oled.setCursor((SCREEN_WIDTH - width_T) / 2, SCREEN_HEIGHT / 2 - height_T - 5);
oled.println(temperature);
oled.setCursor((SCREEN_WIDTH - width_H) / 2, SCREEN_HEIGHT / 2 + 5);
oled.println(humidity);
oled.display();
}
※ NOTE THAT:
Code for DHT11 and DHT22 are identical except for one line of code. Library for DHT11 and DHT22 are the same.
We are considering to make the video tutorials. If you think the video tutorials are essential, please subscribe to our YouTube channel to give us motivation for making the videos.
※ OUR MESSAGES
You can share the link of this tutorial anywhere. Howerver, please do not copy the content to share on other websites. We took a lot of time and effort to create the content of this tutorial, please respect our work!