Arduino - BLE
In this tutorial, we are going to learn:
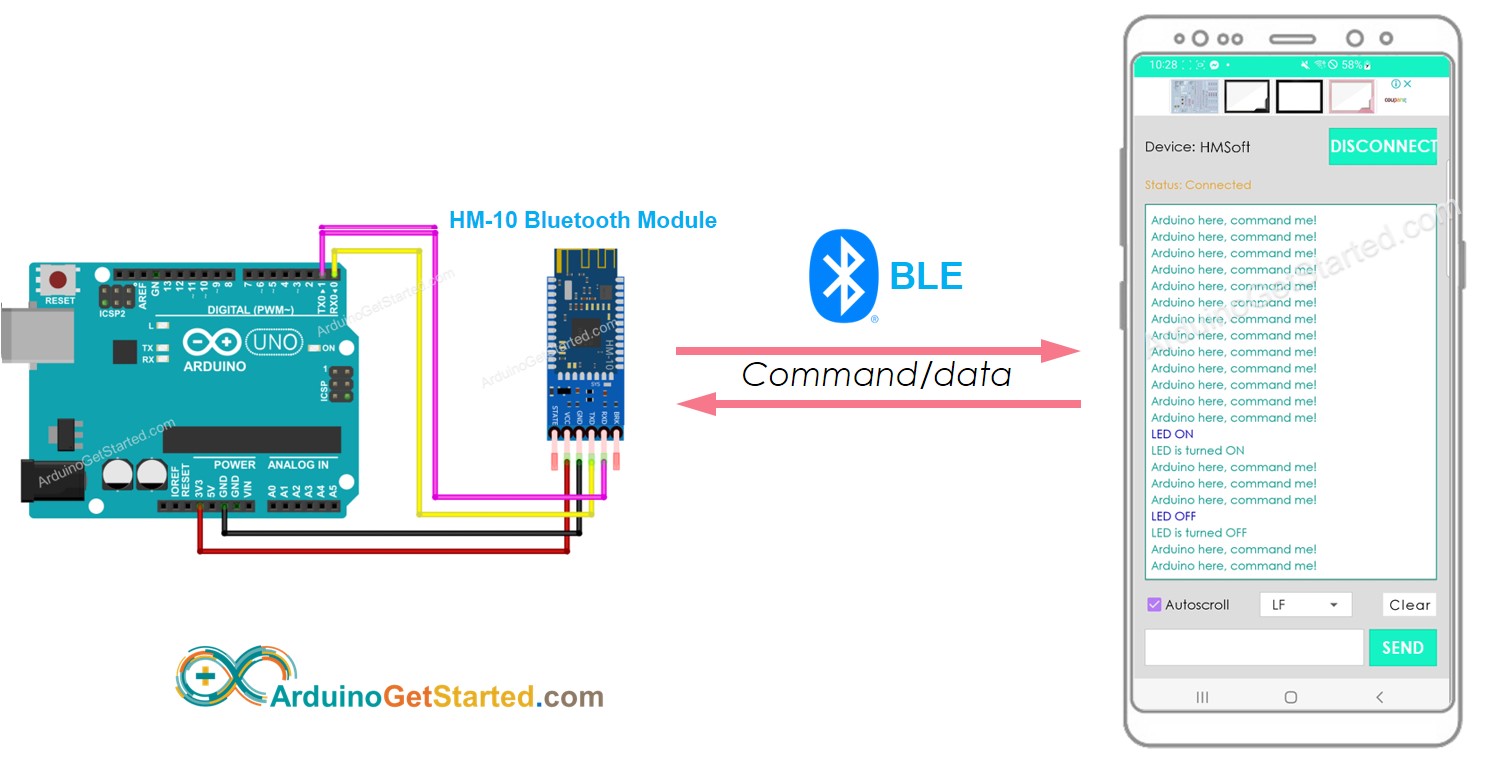
- How to use Bluetooth Low Energy (BLE) technology with Arduino
- How to send data from Arduino to a smartphone app through BLE
- How to receive data on Arduino from a smartphone app through BLE
- How to control Arduino from a smartphone app through BLE.
The scope of this tutorial:
- Data exchange between Arduino and a smartphone app through BLE. Communication between two Arduinos via BLE will be covered in another tutorial.
- Use of the widely popular HM-10 Bluetooth Low Energy module.
- Demonstration of the Bluetooth Serial Monitor app on Android, but any Android/iOS app can be used.
- Control of various devices connected to Arduino through the smartphone app, with examples including an LED and servo motor.
It's worth noting that this tutorial specifically covers Bluetooth Low Energy (BLE, Bluetooth 4.0). If you are looking for information on Classic Bluetooth (Bluetooth 2.0), please refer to a similar tutorial Arduino - Bluetooth.
Hardware Required
Or you can buy the following kits:
| 1 | × | DIYables STEM V3 Starter Kit (Arduino included) | |
| 1 | × | DIYables Sensor Kit (18 sensors/displays) |
Additionally, some links direct to products from our own brand, DIYables .
About HM-10 Bluetooth Module
The HM-10 is a Serial BLE module that functions as a Serial to Bluetooth Low Energy converter. It performs the following actions:
- Receives data from the Serial RX pin and transmits it to a paired device such as a smartphone via BLE
- Receives data from BLE (from the paired device) and sends it to the Serial TX pin.
Specifically, when using an Arduino to communicate with a smartphone app (Android/iOS), the following occurs:
- The Arduino connects to the HM-10 Bluetooth module through the Serial/SoftwareSerial pins
- The HM-10 Bluetooth module is paired with a smartphone app
- The Arduino sends data to the smartphone app by sending it to the Serial/SoftwareSerial
- The Arduino receives data from the smartphone app by reading it from the Serial/SoftwareSerial
- No additional BLE code is required on the Arduino.
Pinout
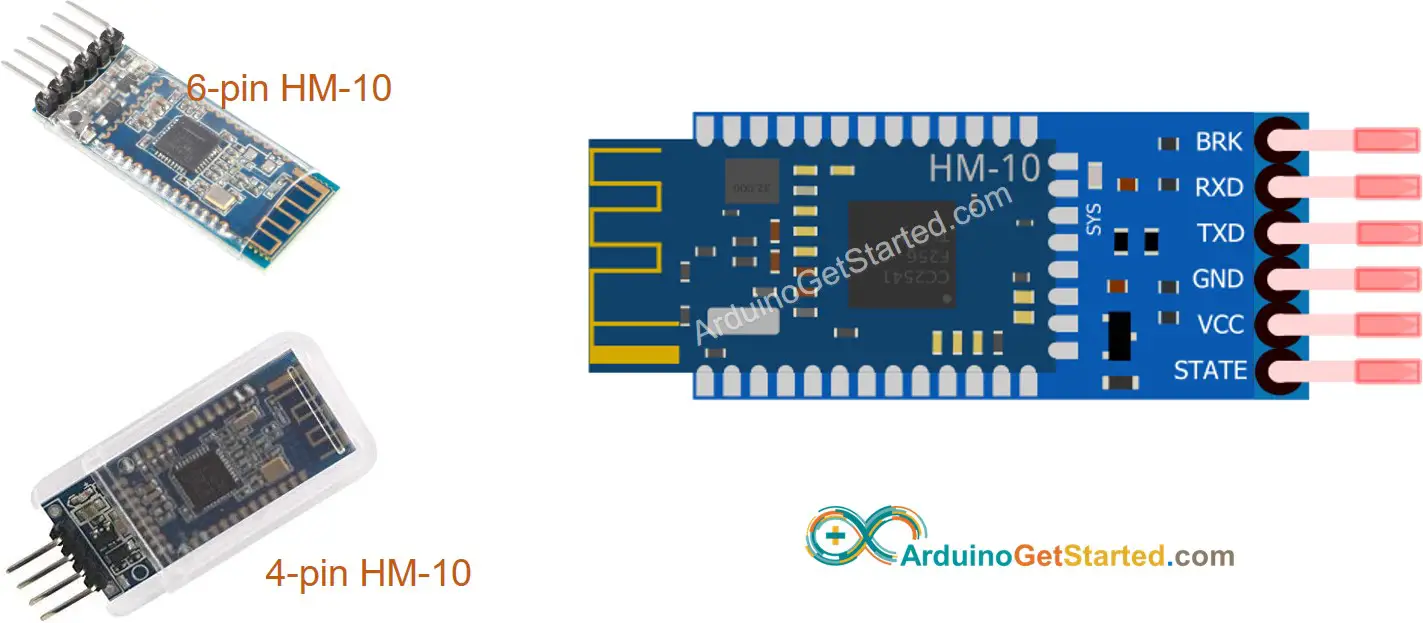
The HM-10 BLE Module has 6 pins:
- BKR pin: to control behavior of the module. Ignore this pin if you are a beginner.
- RX pin: Serial data pin, connect this pin to the TX pin of Arduino. The data received from this pin will be sent to Bluetooth.
- TX pin: Serial data pin, connect this pin to the RX pin of Arduino. The data received via BLE will be sent to this pin as serial data.
- GND pin: power pin, connect this pin to the GND of the power source.
- VCC pin: power pin, connect this pin to 3.3V of Supply voltage
- STATE pin: Indicates the working states:
- Blink in standby mode - repeat 500ms pulse;
- On in connection state - high level.
- We only need to use 4 pins: VCC, GND, RX, TX
- Some manufacturers produce the HM-10 with only four pins.
※ NOTE THAT:
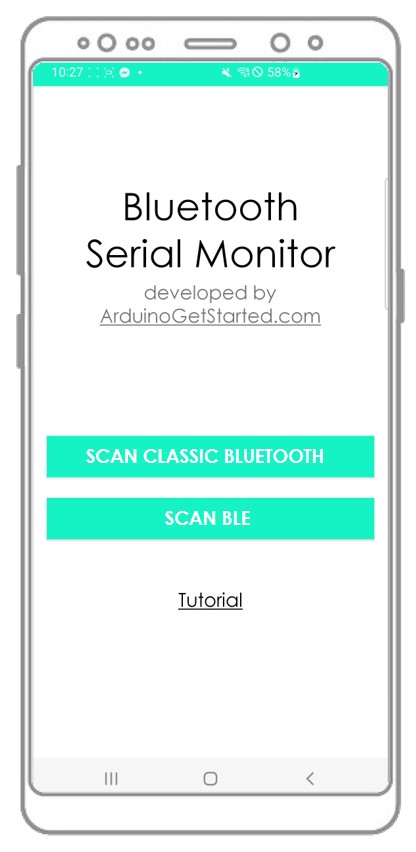
About Bluetooth Serial Monitor App
The Bluetooth Serial Monitor App is a mobile application that mimics the appearance of the Serial Monitor in Arduino IDE. It allows communication with an Arduino board through Bluetooth without the need for additional code in the Arduino sketch. To use it, follow these steps:
- Connect the Arduino to an HM-10 Bluetooth module
- Download and install the Bluetooth Serial Monitor App on your smartphone
- Open the app and connect it to the HM-10 Bluetooth module
With these steps completed, you can now send and receive data from the Arduino as if you were using the Serial Monitor in Arduino IDE, without the need to modify your existing Arduino code or add any Bluetooth-specific code.
Wiring Diagram
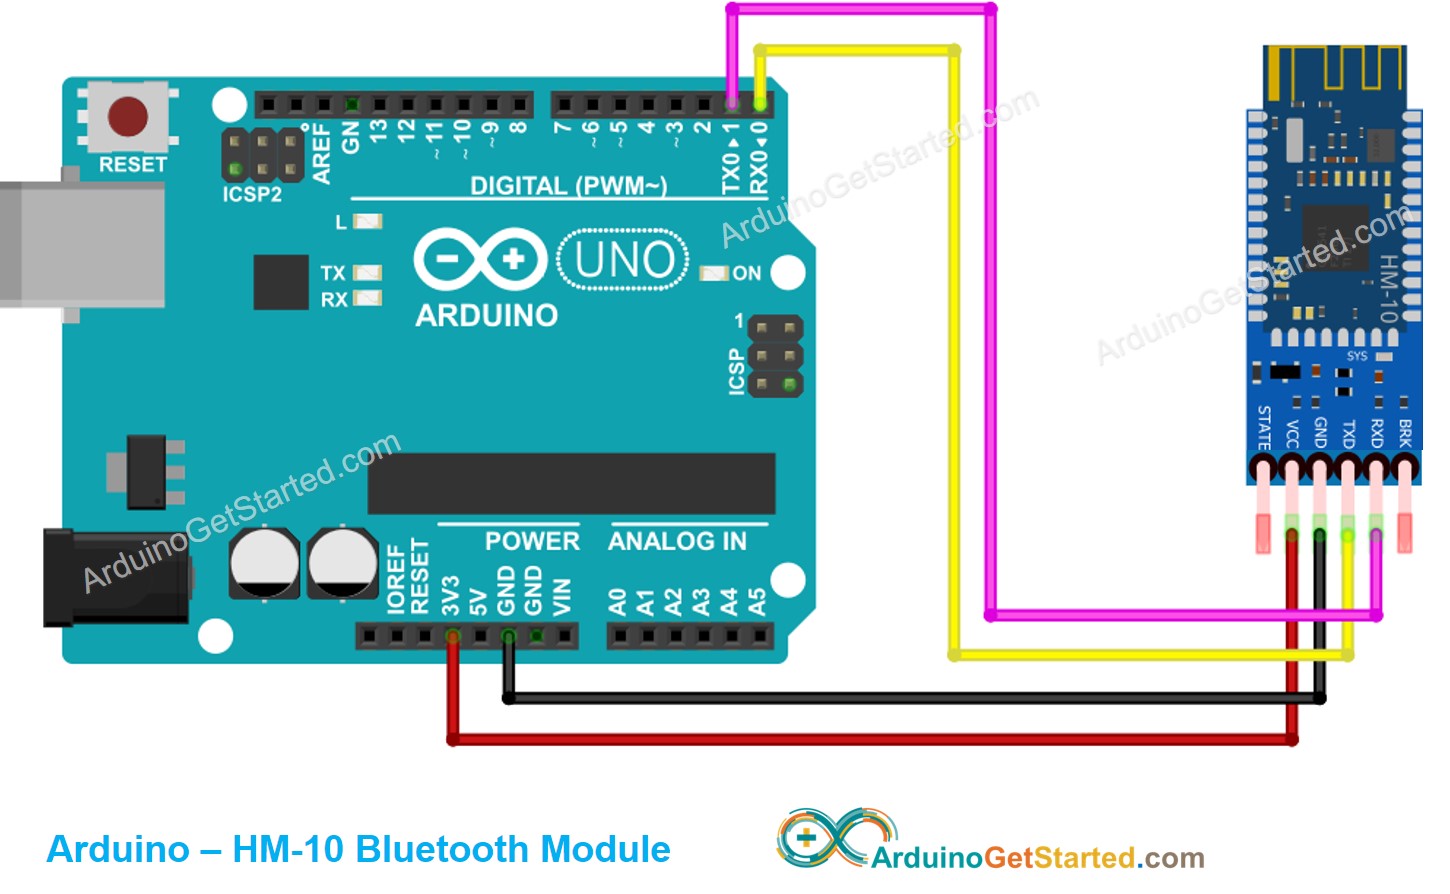
This image is created using Fritzing. Click to enlarge image
The Wiring Table
| Arduino Pins | HM-10 Bluetooth Pins |
|---|---|
| RX (Pin 0) | TX |
| TX (Pin 1) | RX |
| 5V | VCC |
| GND | GND |
| BKR (NOT connected) | |
| STATE (NOT connected) |
※ NOTE THAT:
The Arduino code can use other pins by replacing the Serial object with an alternative such as Serial1, Serial2, or SoftwareSerial (if available).
How To Program For Bluetooth
No specialized Bluetooth code is necessary, only Serial code is needed.
Arduino sends data to Bluetooth App on Smartphone
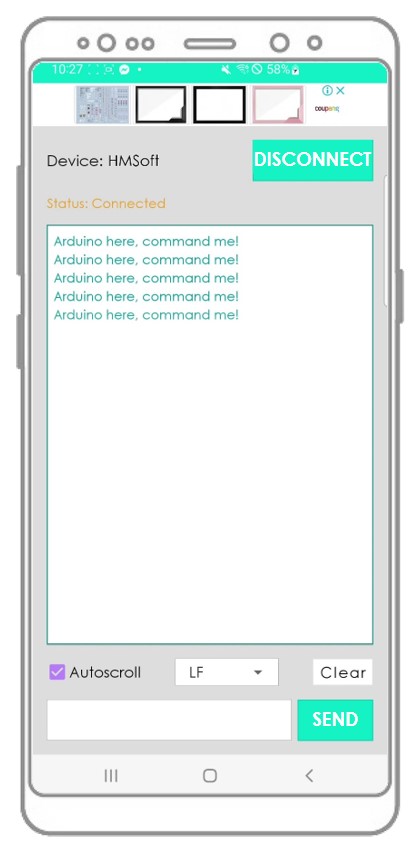
To transmit data from an Arduino board to a Bluetooth app on a smartphone, the following Arduino code can be used. This example demonstrates sending the message “Arduino here, command me!” from the Arduino to the smartphone app every second
Quick Steps
To use the code and connect an Arduino board to a smartphone via BLE, follow these steps:
- Install the Bluetooth Serial Monitor App on your smartphone.
- Connect the HM-10 Bluetooth module to the Arduino board according to the wiring diagram provided.
- Open the Arduino IDE, copy the code provided above, and upload it to the Arduino board. If you are unable to upload the code, disconnect the TX and RX pins from the Bluetooth module, upload the code, and then reconnect the RX/TX pins.
- Open the Serial Monitor on the Arduino IDE.
- On your smartphone, open the Bluetooth Serial Monitor App and select the BLE mode.
- Pair the smartphone with the HM-10 Bluetooth module.
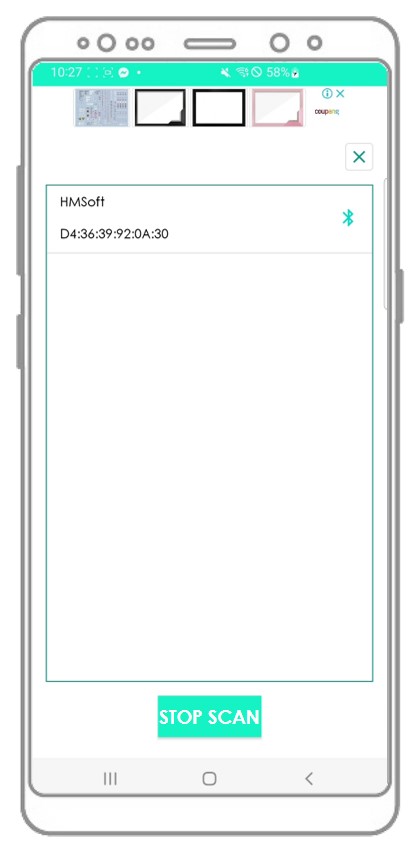
- Observe the result on the Android App.
- Observe the result on the Serial Monitor of Arduino IDE.
If you follow the steps and run the code, you will observe that the data displayed on the Serial Monitor of the Arduino IDE and on the Android app will match.
Bluetooth App Send data To Arduino
The code below performs the following actions:
- Send data from the Bluetooth app to the Arduino board
- The Arduino board will read the incoming data and then sends a response back to the Bluetooth device.
Quick Steps
Here are the steps to use the code with Arduino and an Android app:
- Open the Arduino IDE and paste the code provided above.
- Click the Upload button to upload the code to the Arduino board.
- Open the Serial Monitor on the Arduino IDE.
- Open Android App and pair it with the HM-10 Bluetooth module using the instructions provided in a previous example.
- Once connected, type "LED ON" or "LED OFF" in the Android app and press the "SEND" button.
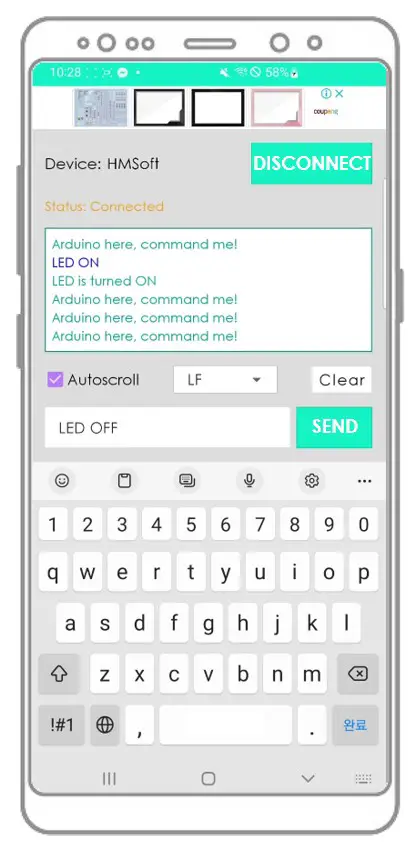
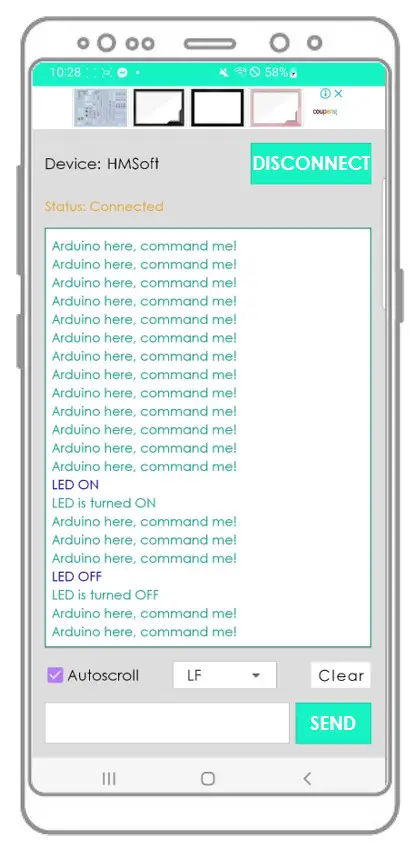
- The Arduino board will receive the data, print a response to the Serial port. This data will be sent to the Bluetooth app.
- Check the result on the Android app.
- Check the result on the Serial Monitor of the Arduino IDE
When you complete the steps above, you will notice that the information displayed on the Serial Monitor of the Arduino IDE and the Android app will be the same
Arduino Code - Control LED with smartphone App via BLE
The following Arduino example code utilizes commands “ON” and “OFF” received through the Bluetooth Serial Monitor App to turn on/off a built-in LED.
You can see the instructions in more detail in Arduino controls LED via Bluetooth/BLE tutorial
Arduino Code - Control Servo Motor with smartphone App via BLE
The following Arduino code receives an angle value from the Bluetooth Serial Monitor App to control the angle of a servo motor.
You can see the instructions in more detail in Arduino controls Servo Motor via Bluetooth/BLE tutorial
If the Bluetooth Serial Monitor app is useful for you, please give it a 5-star rating on Play Store. Thank you!
Video Tutorial
We are considering to make the video tutorials. If you think the video tutorials are essential, please subscribe to our YouTube channel to give us motivation for making the videos.