Arduino - RFID MP3 Player
In this tutorial, we will explore the process of creating an RFID-based MP3 player using Arduino, an RC522 RFID reader, and an MP3 player module. The MP3 player module is equipped with a micro SD card where multiple songs are stored. Each RFID card represents for a song, and the number of RFID cards matches the number of songs.
By swiping an RFID card in front of the RFID reader, the Arduino plays the corresponding song associated with that specific RFID card.
Hardware Required
Or you can buy the following kits:
| 1 | × | DIYables STEM V3 Starter Kit (Arduino included) | |
| 1 | × | DIYables Sensor Kit (18 sensors/displays) |
Additionally, some links direct to products from our own brand, DIYables .
About RFID/NFC RC522 Module and MP3 Player
If you do not know about RFID/NFC RC522 Module and MP3 player (pinout, how it works, how to program ...), learn about them in the following tutorials:
Wiring Diagram
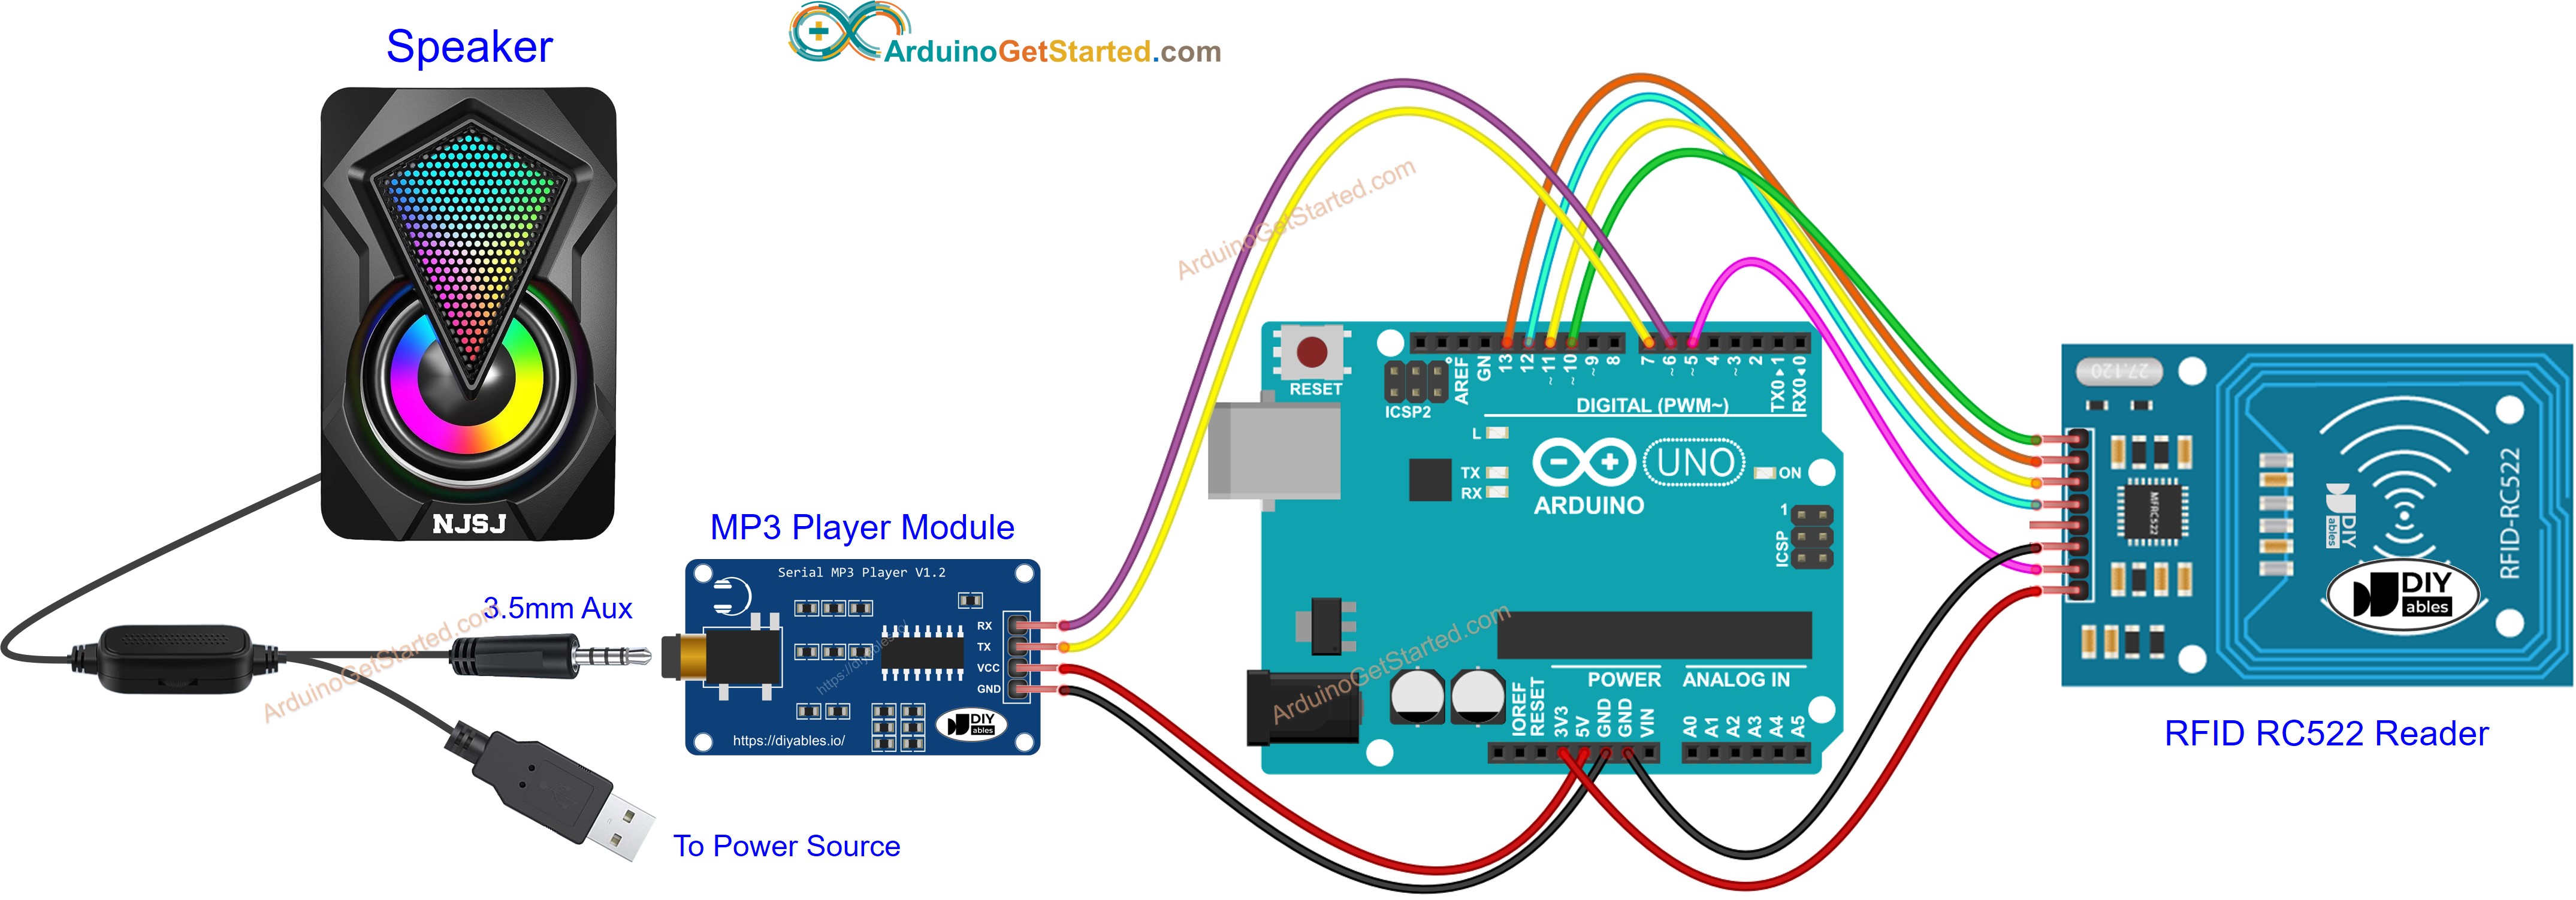
This image is created using Fritzing. Click to enlarge image
To simplify the setup, the pins of the RC522 module are directly connected to the Arduino pins. However, this direct connection may lead to issues, as the output pins of the Arduino provide 5V, while the RC522 module's pins are designed for a 3.3V operation. It is advisable to regulate the voltage between the Arduino pins and the RC522 module's pins to prevent potential problems. For more detailed guidance, please consult the Arduino - RFID RC522 tutorial. The provided diagram illustrates how resistors can be employed to regulate the 5V to 3.3V:
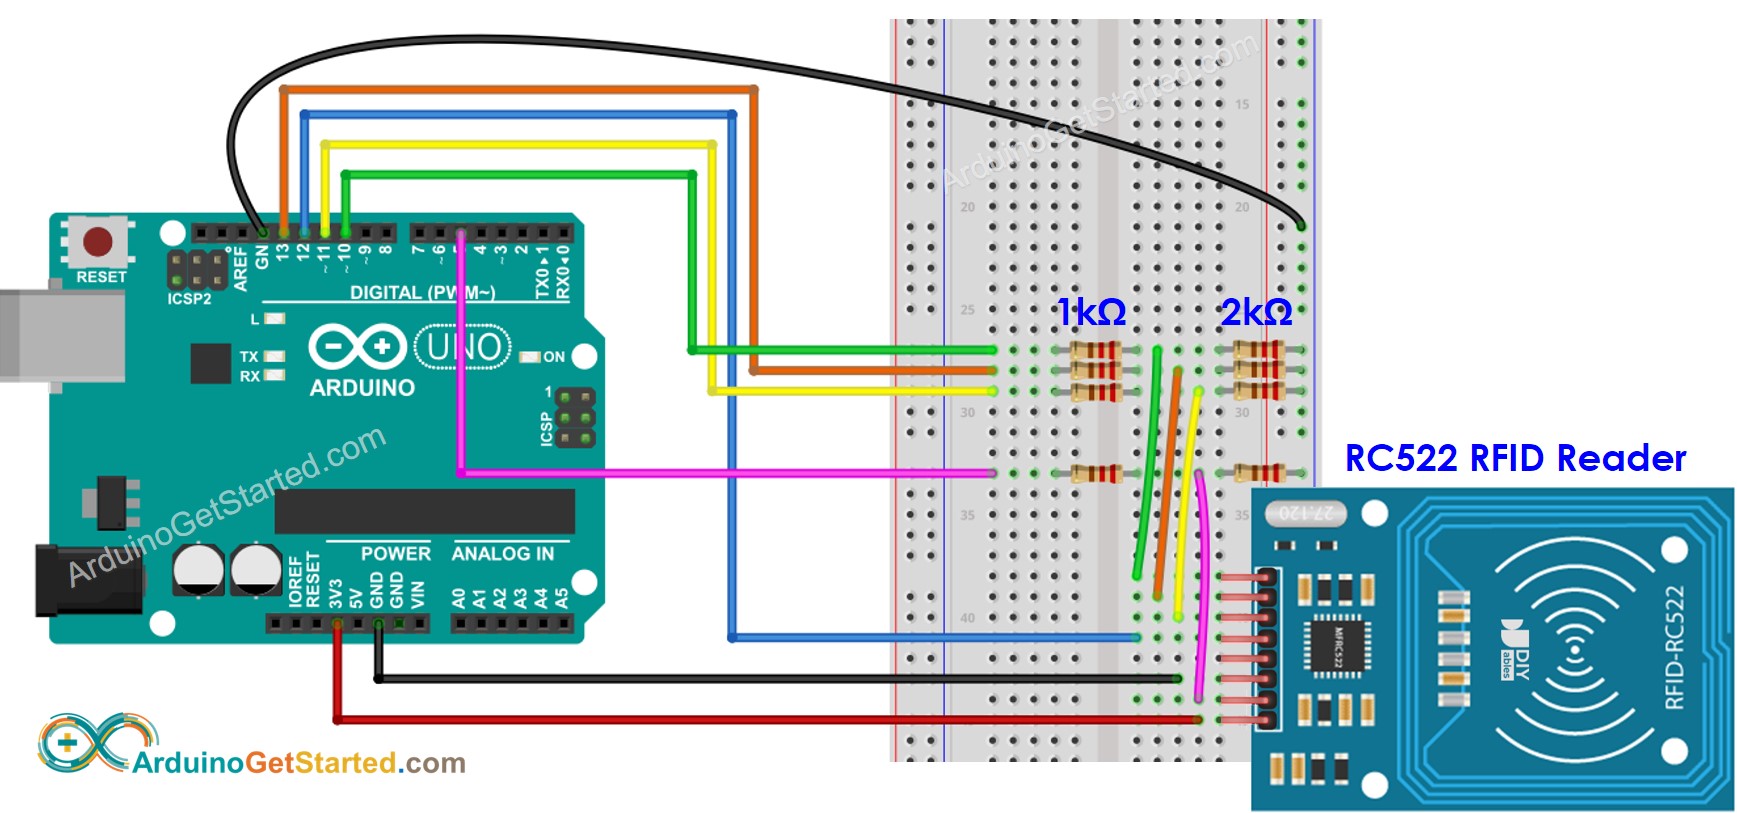
This image is created using Fritzing. Click to enlarge image
※ NOTE THAT:
The order of pins can vary according to manufacturers. ALWAYS use the labels printed on the module. The above image shows the pinout of the modules from DIYables brand.
Preparation
- Pre-store a list of songs that you want to play to micro SD Card.
- Insert the micro SD Card to the MP3 player module
- Connect the MP3 player module to Arduino
- Connect the speaker to the MP3 player module to a
- Connect the speaker to a power source.
- Connect the RFID reader to the Arduino.
Because UID is usually not printed on RFID Tag, The first step we need to do is to find out the tags' UID. This can be done by:
- Copy the below code and open with Arduino IDE
- Click Upload button on Arduino IDE to upload code to Arduino
- Open Serial Monitor
- Tap RFID card/keyfob one by one on RFID-RC522 module
- Take note of UIDs on Serial Monitor, it looks like below:
We will use these RFID UIDs to update the Arduino code below
Arduino Code - RFID Mp3 Player
Quick Steps
- Copy the above code and open with Arduino IDE
- Update UIDs you obtained in the preperation step to the above code.
- Upload the code to Arduino
- Tap an RFID Tag on RFID-RC522 module one by one
- Check out the sound from MP3 Player
- If the everything run smoothly, each RFID card will be associlated with a song.
- You can mark the name of the song on each RFID card.
Video Tutorial
We are considering to make the video tutorials. If you think the video tutorials are essential, please subscribe to our YouTube channel to give us motivation for making the videos.