Arduino - Door Sensor Toggle LED
In a previous tutorial, We have learned how to turn on the LED if the door is open, and turn off LED if the door is closed. In this tutorial, We are going to learn how to toggle LED each time door is closed.
Hardware Required
Or you can buy the following kits:
| 1 | × | DIYables STEM V3 Starter Kit (Arduino included) | |
| 1 | × | DIYables Sensor Kit (18 sensors/displays) |
Additionally, some links direct to products from our own brand, DIYables .
Buy Note: To simplify the wiring process, we recommend using the LED Module, which comes with a built-in resistor.
About LED and Door Sensor
If you do not know about LED and door sensor (pinout, how it works, how to program ...), learn about them in the following tutorials:
Wiring Diagram
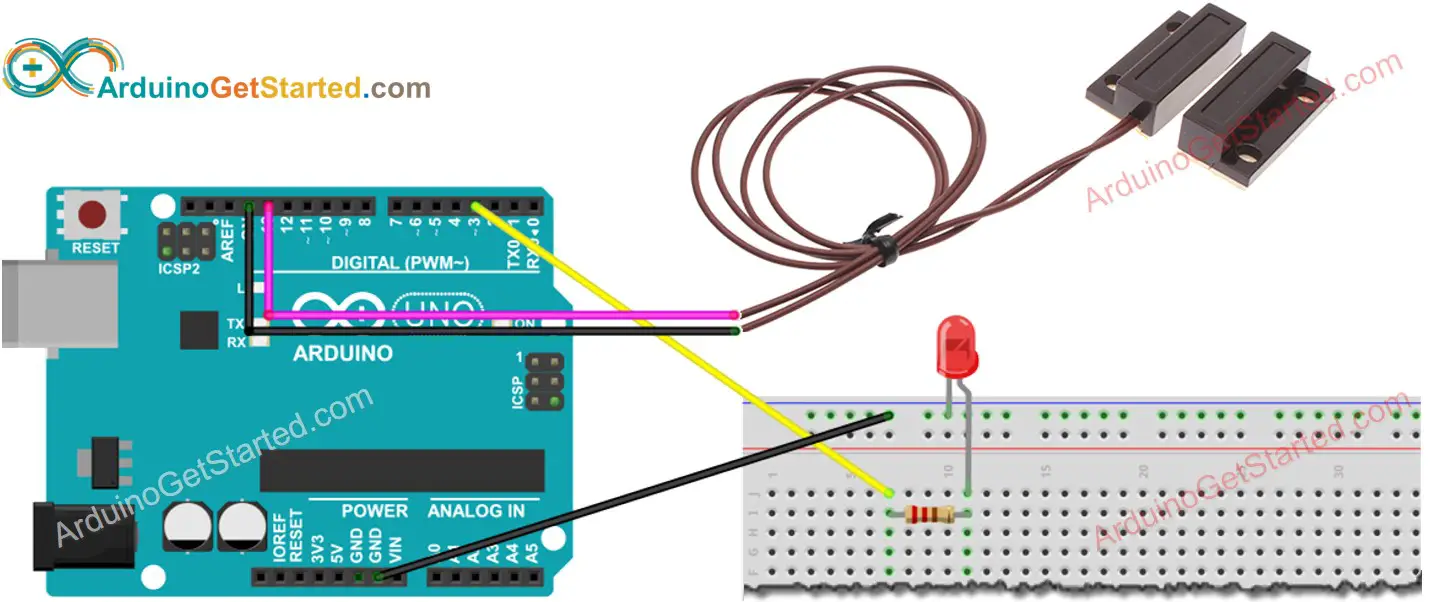
This image is created using Fritzing. Click to enlarge image
Arduino Code - Door Sensor Toggles LED
Quick Steps
- Connect Arduino to PC via USB cable
- Open Arduino IDE, select the right board and port
- Copy the above code and open with Arduino IDE
- Click Upload button on Arduino IDE to upload code to Arduino
- Move the magnet close to the reed switch and them move it far from the reed switch. Repeat this several times
- See the change of LED's state
Code Explanation
Read the line-by-line explanation in comment lines of code!
In the code, ledState = !ledState is equivalent to the following code:
Video Tutorial
We are considering to make the video tutorials. If you think the video tutorials are essential, please subscribe to our YouTube channel to give us motivation for making the videos.