Arduino - Electromagnetic Lock
The electromagnetic lock (EM lock) is widely used to lock the door. It is usually used with switch, fingerprint reader, RFID/NFC reader, keypad, or application on PC/mobille to control access to door, buiding gate... The electromagnetic lock is also known as magnetic lock, or maglock.
An alternative to the Electromagnetic Lock is Solenoid Lock. You can learn more in Arduino - Solenoid Lock tutorial
Hardware Required
Or you can buy the following kits:
| 1 | × | DIYables STEM V3 Starter Kit (Arduino included) | |
| 1 | × | DIYables Sensor Kit (18 sensors/displays) |
Additionally, some links direct to products from our own brand, DIYables .
About Electromagnetic Lock
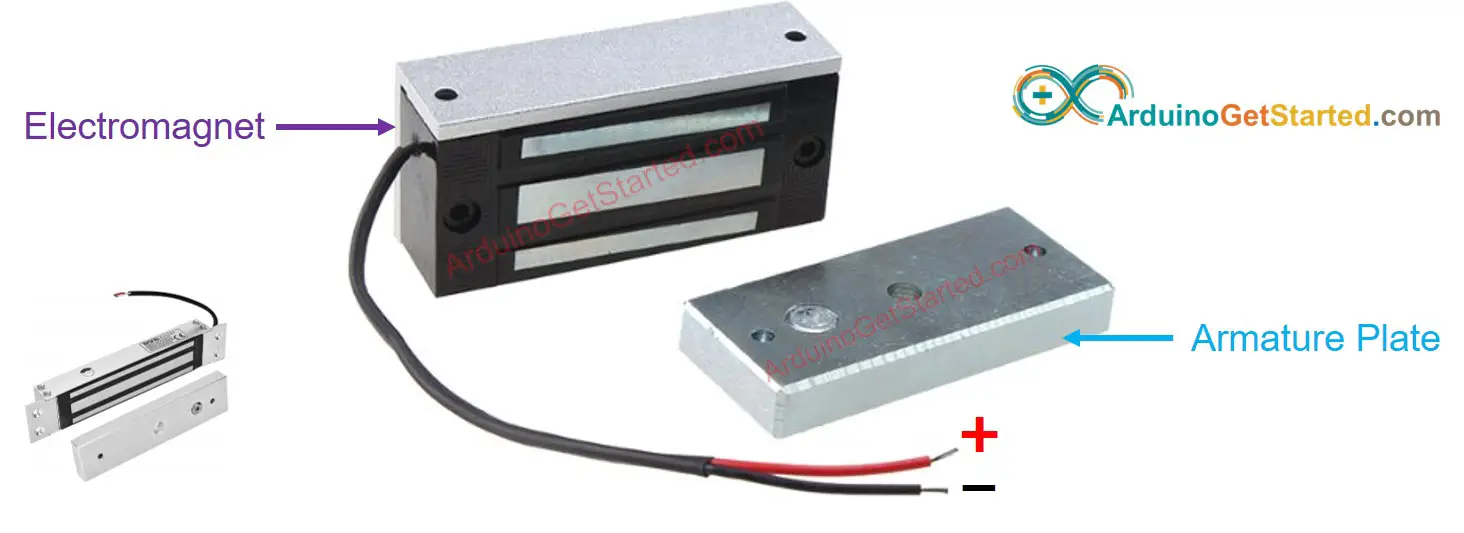
Pinout
Electromagnetic Lock includes two components:
- One electromagnet with two pins
- One armature plate
How It Works
- When the electromagnet is powered, a current passing through the electromagnet creates a magnetic flux that causes the armature plate to attract to the electromagnet ⇒ a locking action
- When the electromagnet is NOT powered, there is no a magnetic flux, armature plate does NOT attract to the electromagnet ⇒ a unlocking action
※ NOTE THAT:
The electromagnetic lock usually uses 12V, 24V or 48V power suppply. Therefore, we CANNOT connect the electromagnetic lock directly to Arduino pin. We have to connect it to Arduino pin via a relay
If we connect the electromagnetic lock to a relay (normally open mode):
- When relay is open, door is unlocked
- When relay is closed, door is locked
By connecting Arduino to the relay, we can program for Arduino to control the electromagnetic lock. Learn more about relay in Arduino - Relay tutorial.
For installation, the armature plate is attached to the door/window (moving part), and the electromagnet is attached to the door frame (fixed part). The two components are in contact when the door is closed
Wiring Diagram
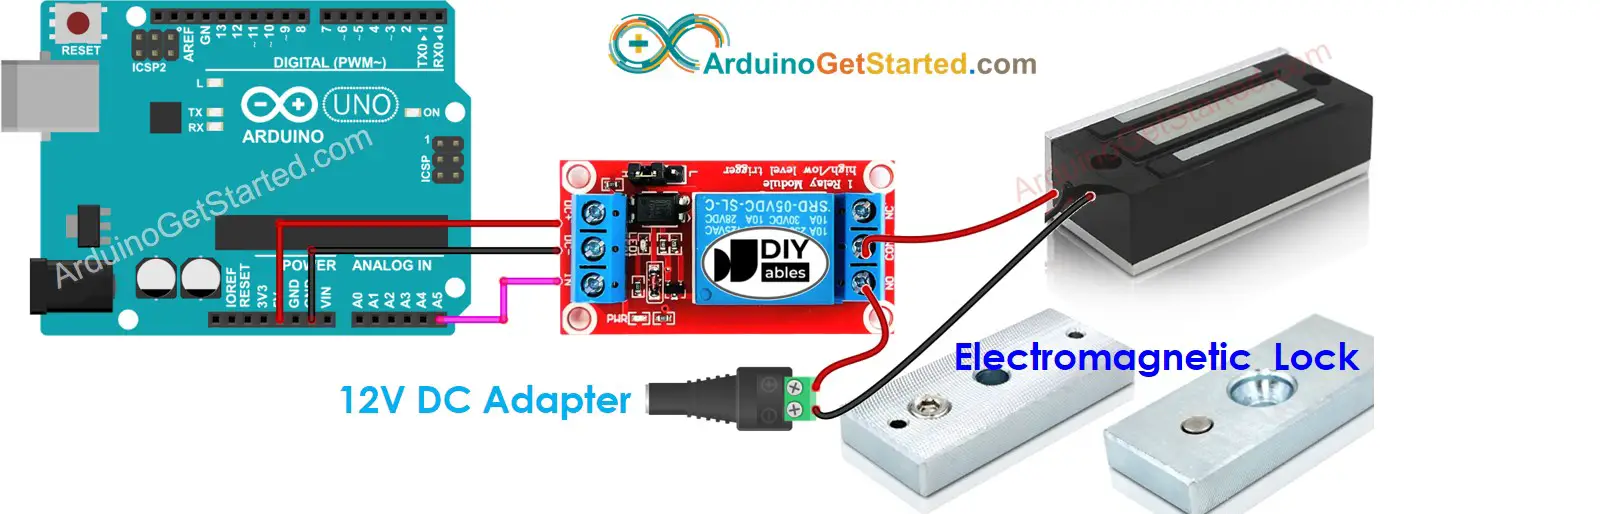
This image is created using Fritzing. Click to enlarge image
Arduino Code
The below code lock/unlock the door every 5 seconds
Quick Steps
- Copy the above code and open with Arduino IDE
- Click Upload button on Arduino IDE to upload code to Arduino
- Put the armature plate close to electromagnet.
- See the attraction between armature plate and electromagnet.
Video Tutorial
We are considering to make the video tutorials. If you think the video tutorials are essential, please subscribe to our YouTube channel to give us motivation for making the videos.