Arduino - Send Email
In this tutorial, we are going to learn how to use Arduino to send the email.
There are several ways to send email from Arduino:
- Using SMTP Library: disadvantages: can not send email from ESMTP email account (such as Gmail), can be filtered as spam mail, needs to store email password in the Arduino.
- Using Email Library from PHPoC: disadvantages: needs to store email password in the Arduino, works only with PHPoC Shield.
- Using Temboo: disadvantages: Supports Yun shield only
- Using OAuth 2.0 and email API disadvantages: it is very dificult for beginners
- Using IFTTT: very easy and simple
This tutorial uses IFTTT to send the email. We also learn how to include the sensor's data in the email. The code is available for Arduino Ethernet Shield. You can easily adapt the code for any other WiFi/Ethernet Shield with a small modification.
The tutorial provides the Arduino code for two cases:
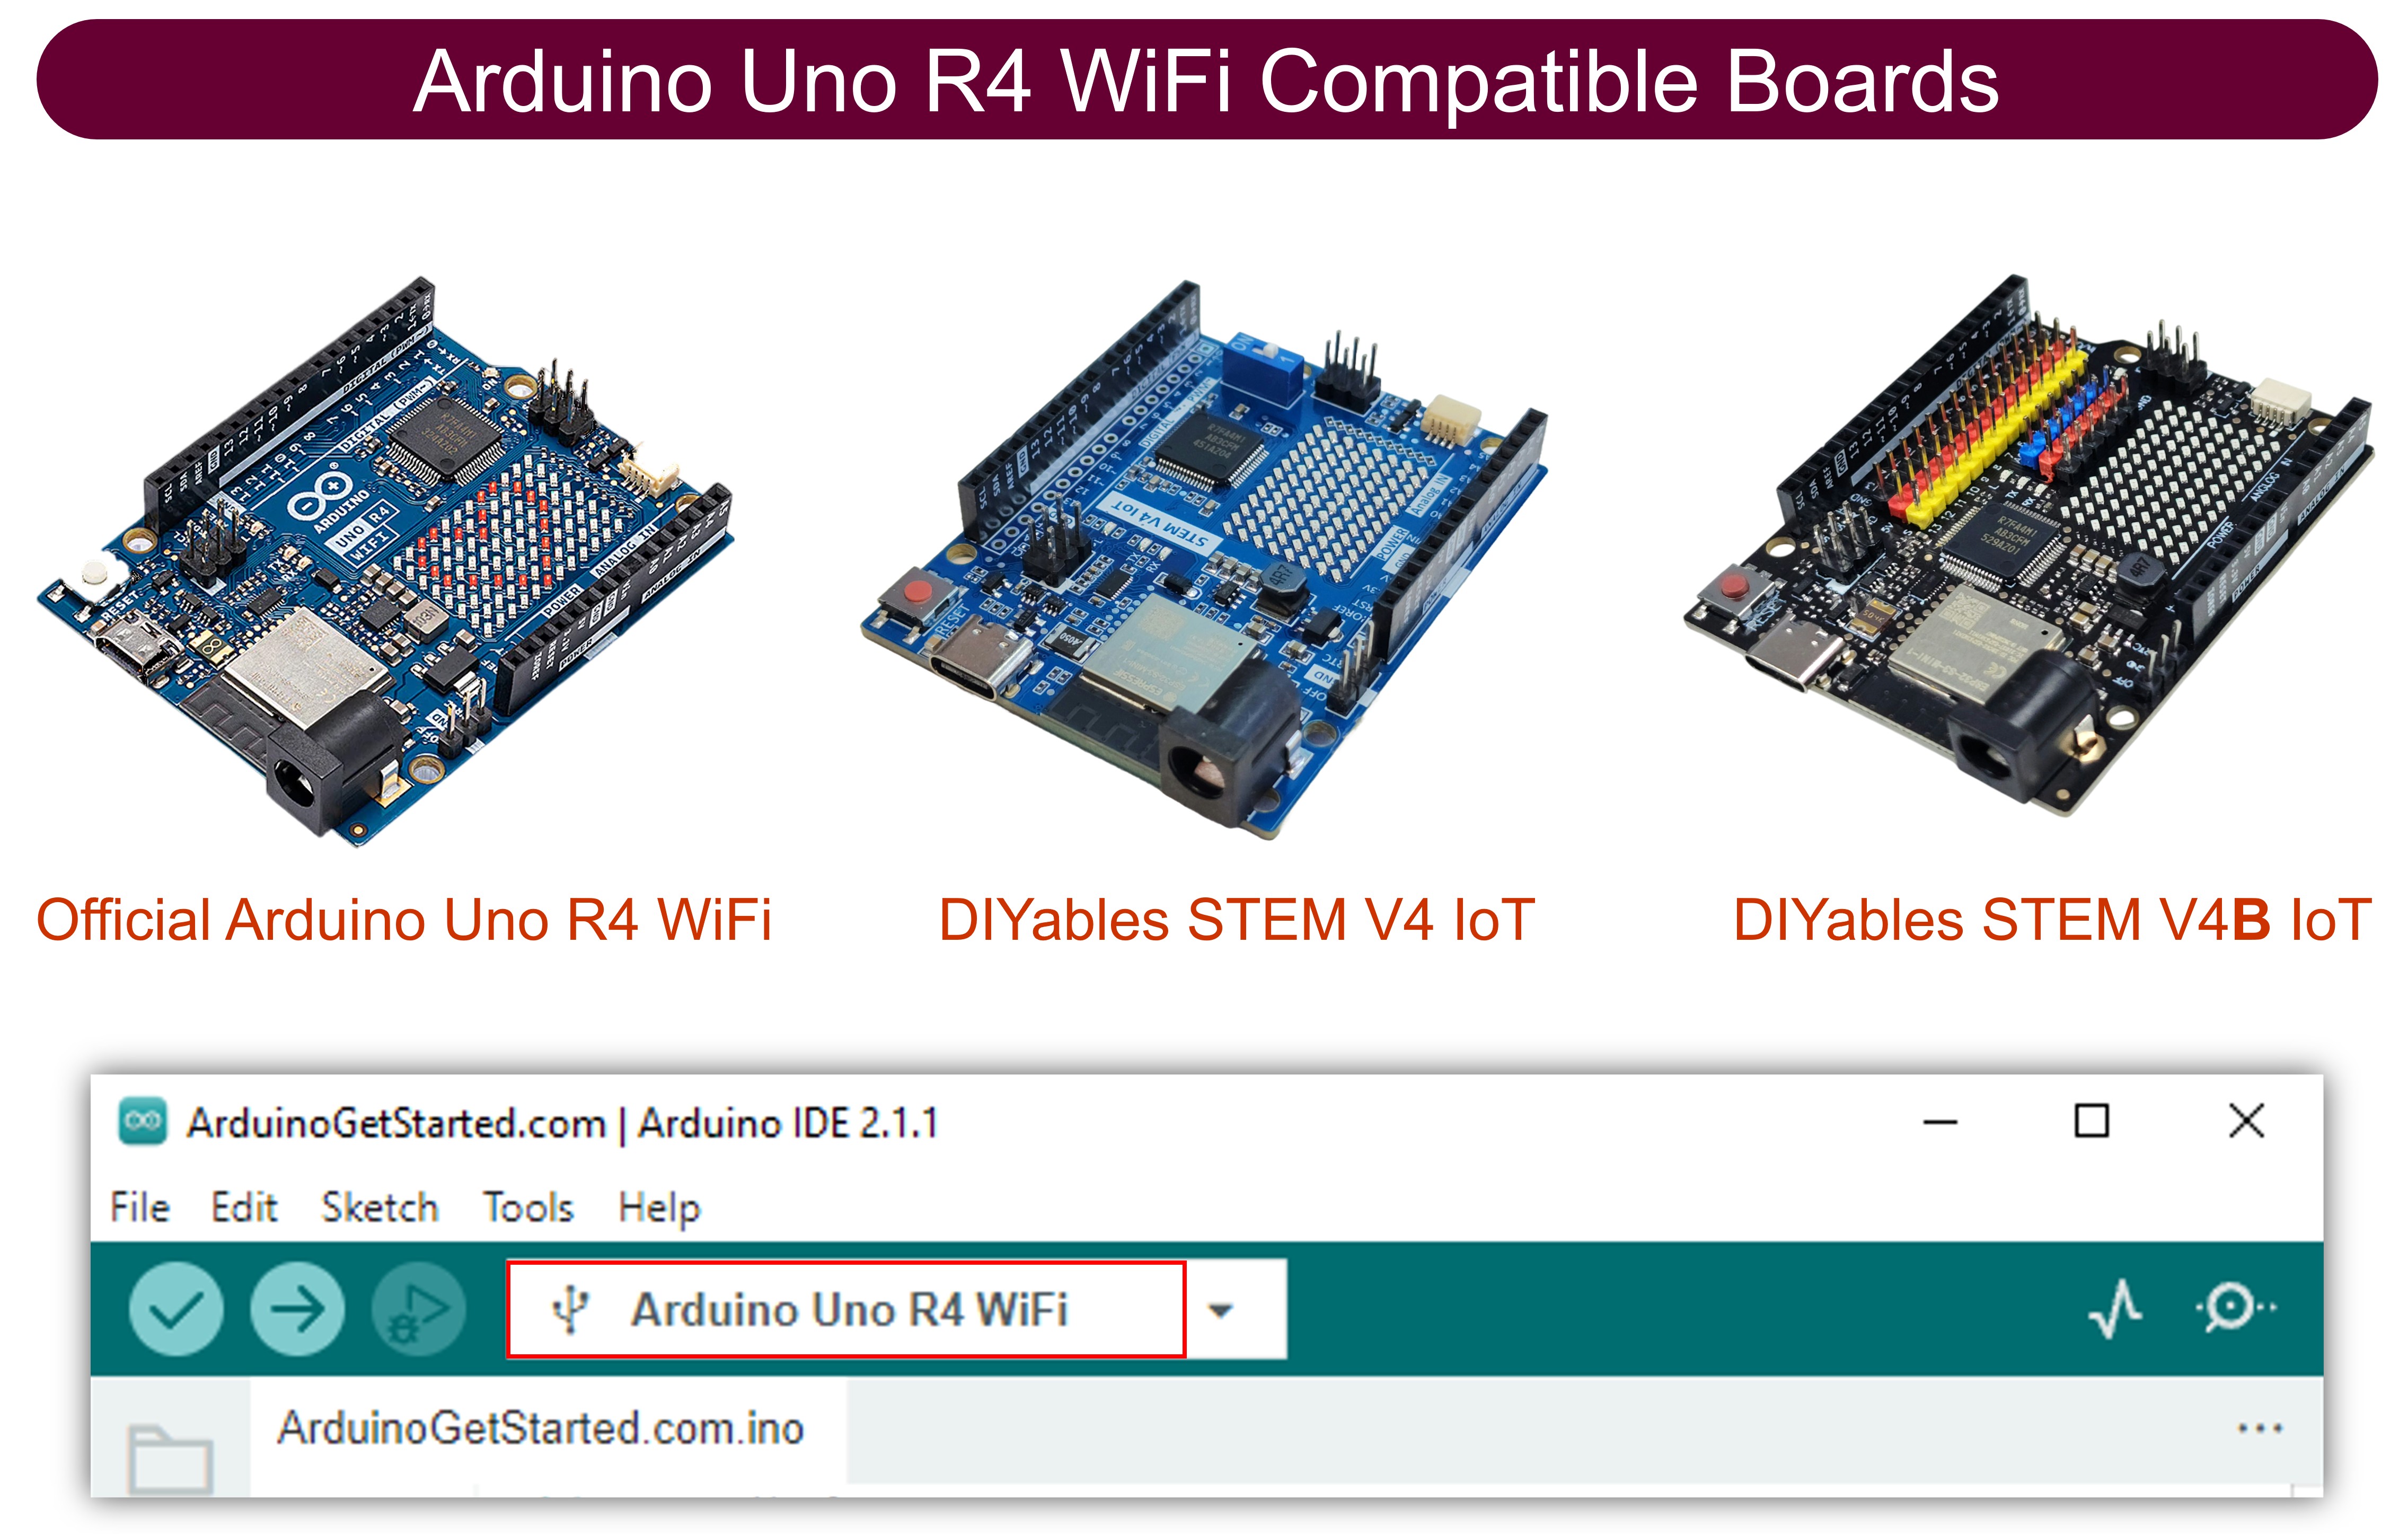
- Arduino Uno R4 WiFi
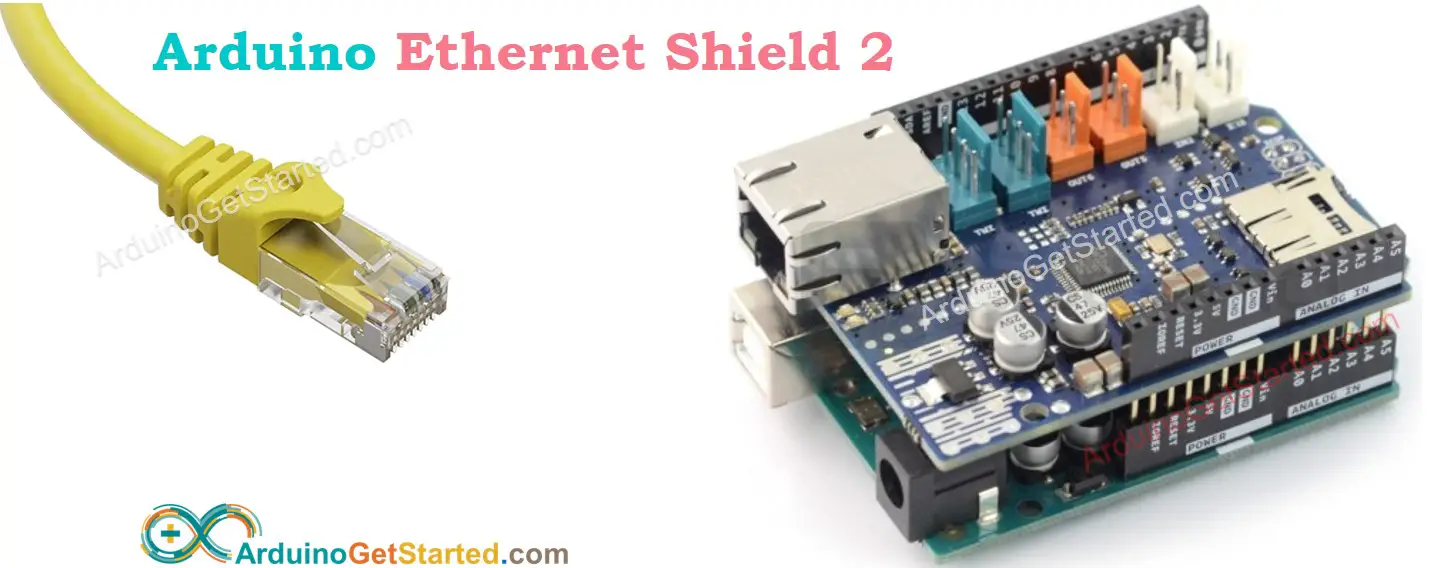
- Arduino Uno/Mega with Ethernet Shield
Hardware Required
| 1 | × | Arduino UNO R4 WiFi | |
| 1 | × | Alternatively, DIYables STEM V4 IoT | |
| 1 | × | Alternatively, DIYables STEM V4B IoT | |
| 1 | × | USB Cable Type-A to Type-C (for USB-A PC) | |
| 1 | × | USB Cable Type-C to Type-C (for USB-C PC) |
Alternatively if using Ethernet:
Or you can buy the following kits:
| 1 | × | DIYables STEM V3 Starter Kit (Arduino included) | |
| 1 | × | DIYables Sensor Kit (18 sensors/displays) |
Additionally, some links direct to products from our own brand, DIYables .
Prerequisite
If you do not know about IFTTT and related concepts, We highly recommend you reading the following tutorials:
Wiring Diagram
We just need to stack the shield on Arduino Uno/Mega
How It Works
We need to create an IFTTT Applet on the IFTTT website, which connects Webhooks to the email service.
When we create the Applet on the IFTTT website:
- We can input the receiver's email address.
- We can type the subject and the content of the email to be sent.
- We can specify the data variables that IFTTT will extract from Arduino's request to include in the email content.
※ NOTE THAT:
The email content is specified on the Applet, not in the Arduino code.
Workflow
After creating the Applet:
- Arduino makes an HTTP request to Webhooks of IFTTT,
- The Webhooks triggers the email service on IFTTT
- The email service on IFTTT sends an email to the email address you specified.
- If we specify the data variables, IFTTT will extract the variable's value and include it in the email content
What we need to do
We need to do to main tasks:
- Create an Applet on the IFTTT website
- Write Arduino code that makes an HTTP request to the Applet
How To Create an Applet between Webhooks and Email service
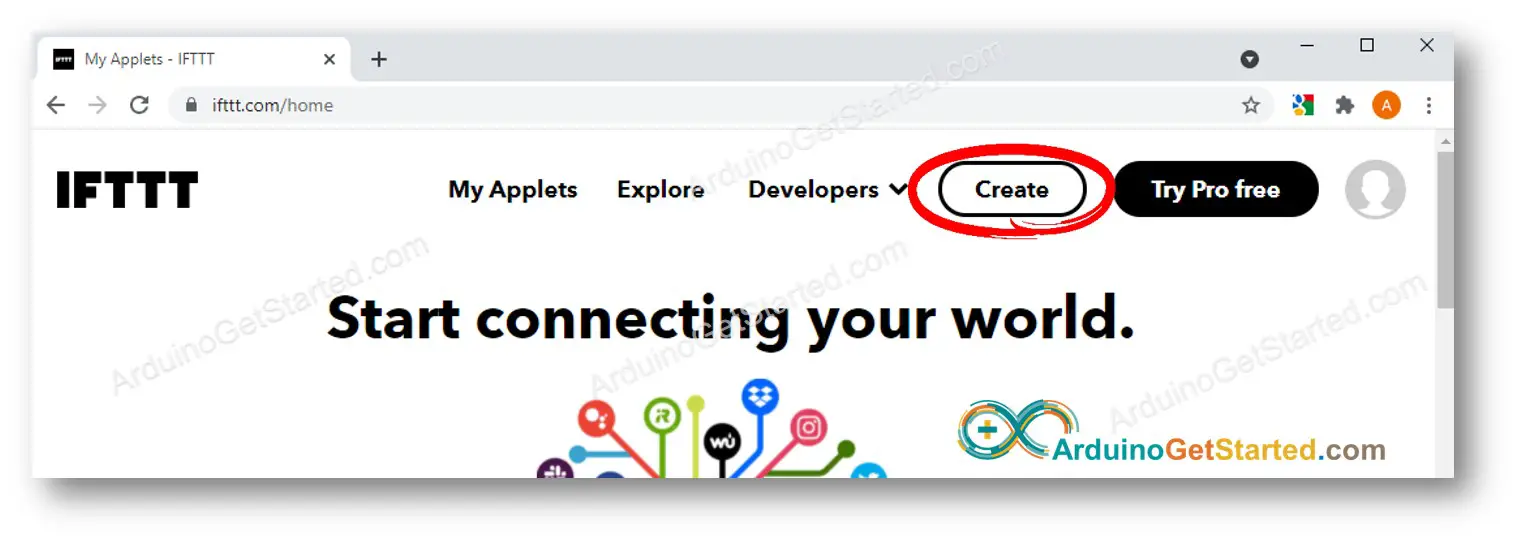
- Create an IFTTT account and Login to IFTTT.
- Go to IFTTT Home page and click the Create button
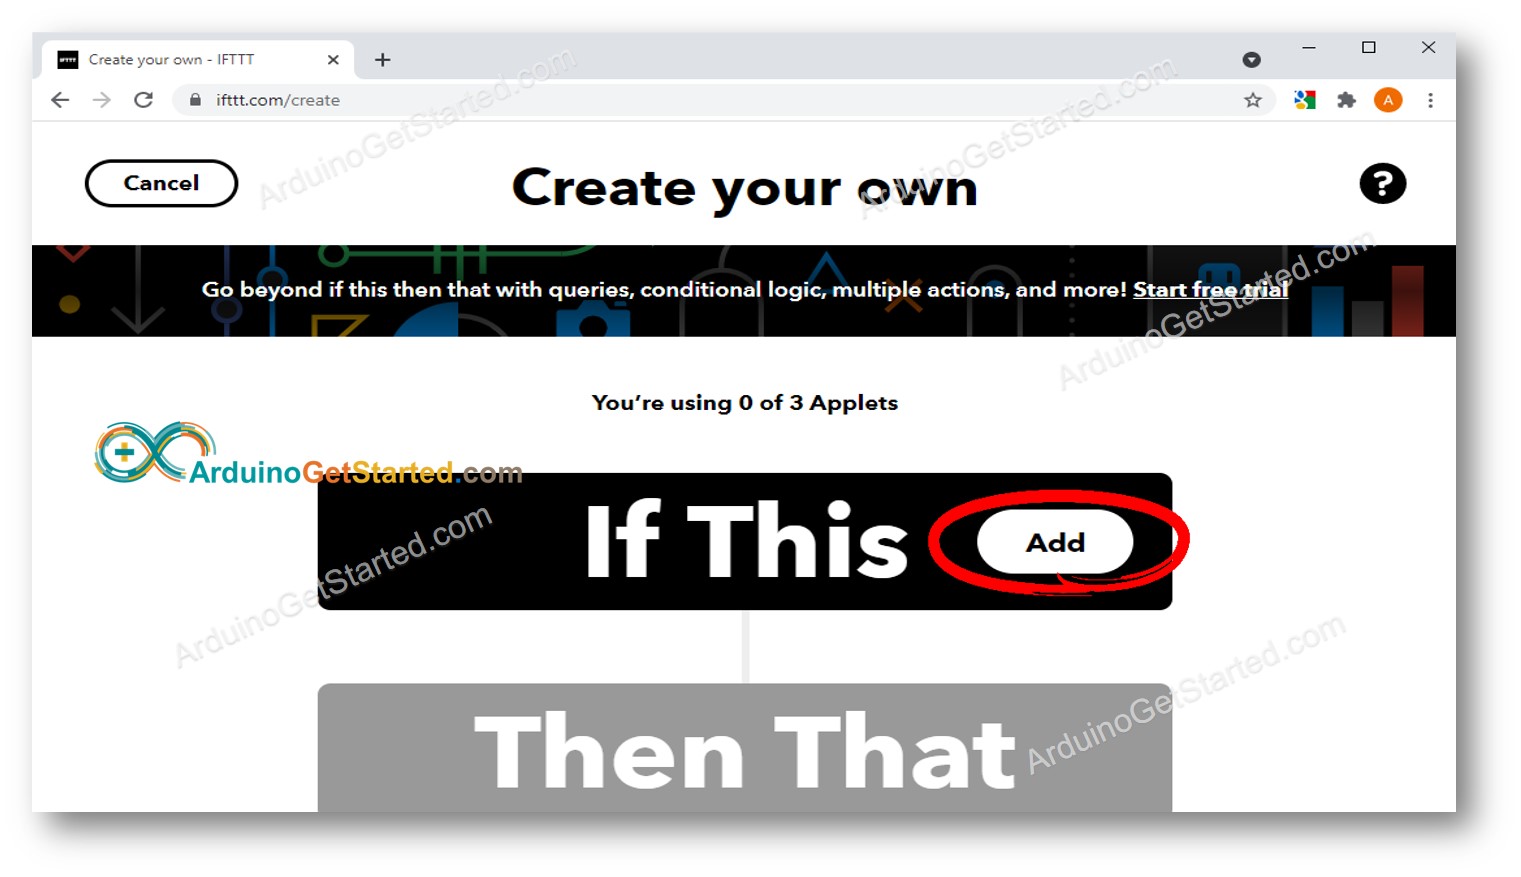
- Click the Add button
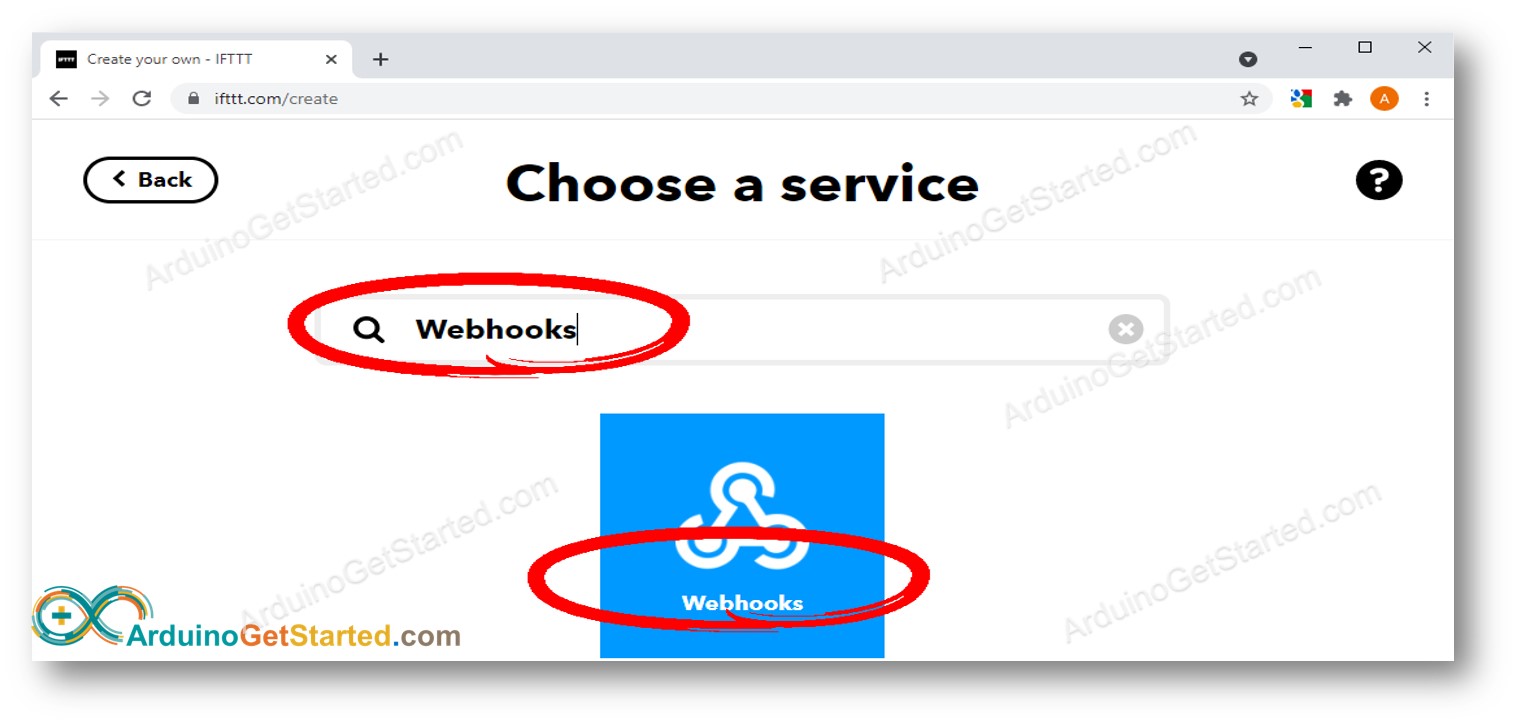
- Search for Webhooks, and then click the Webhooks icon
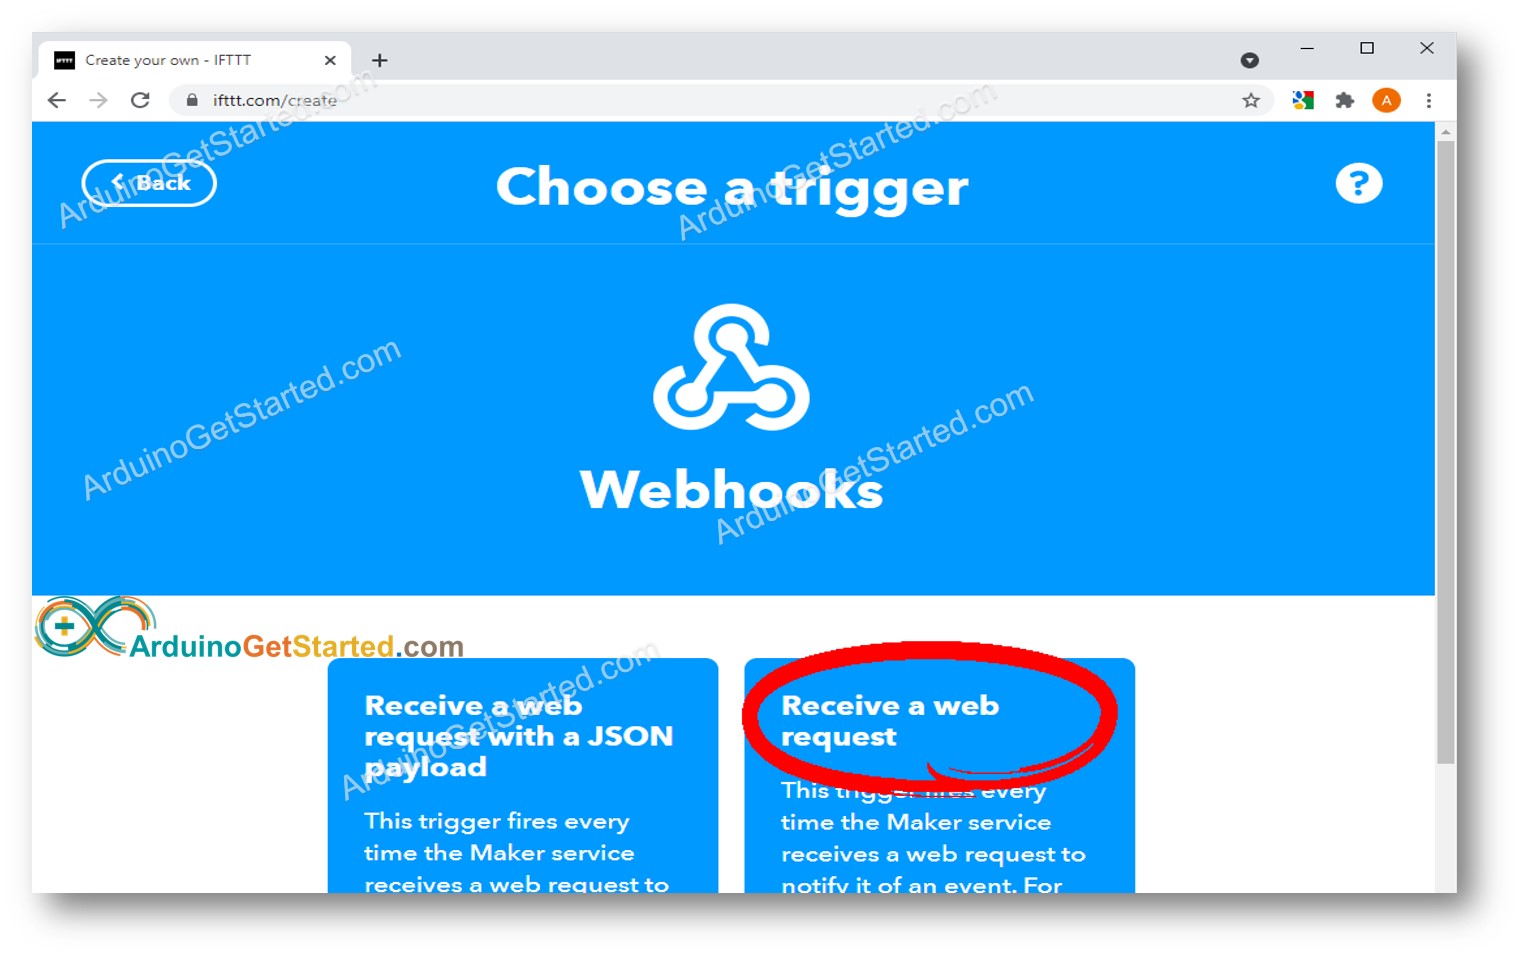
- Click the Receive a web request icon
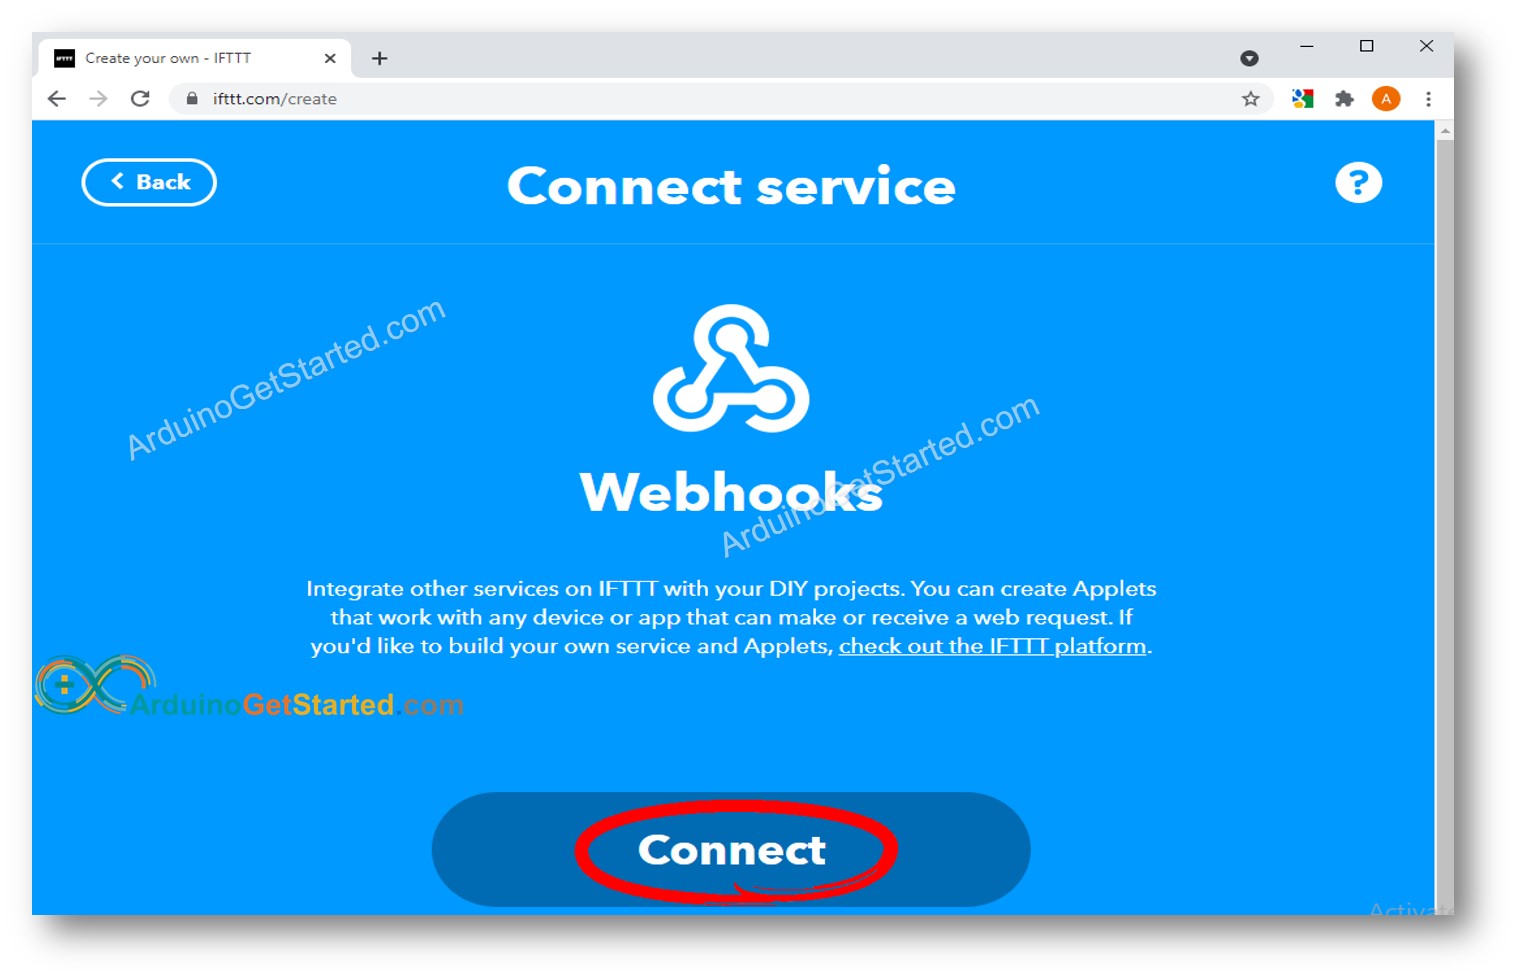
- Click the Connect button
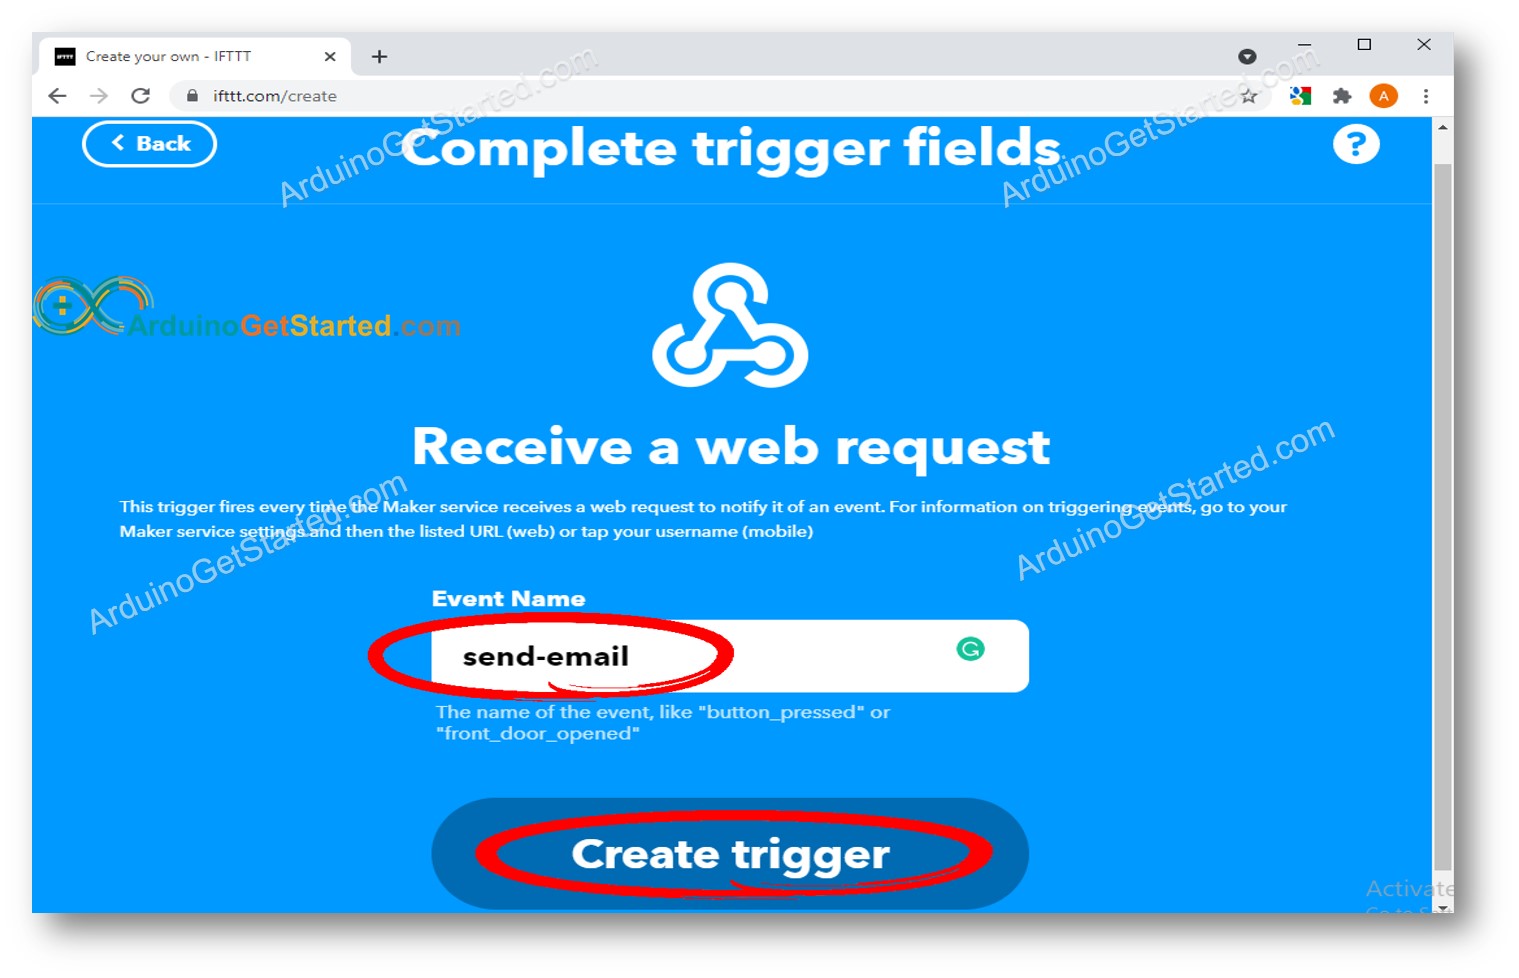
- Type an event name. You can give any name you want and memorize it to use later. The event name is a part of URL that Arduino will make request to. In this tutorial, we use a name send-email. And then click Create trigger button
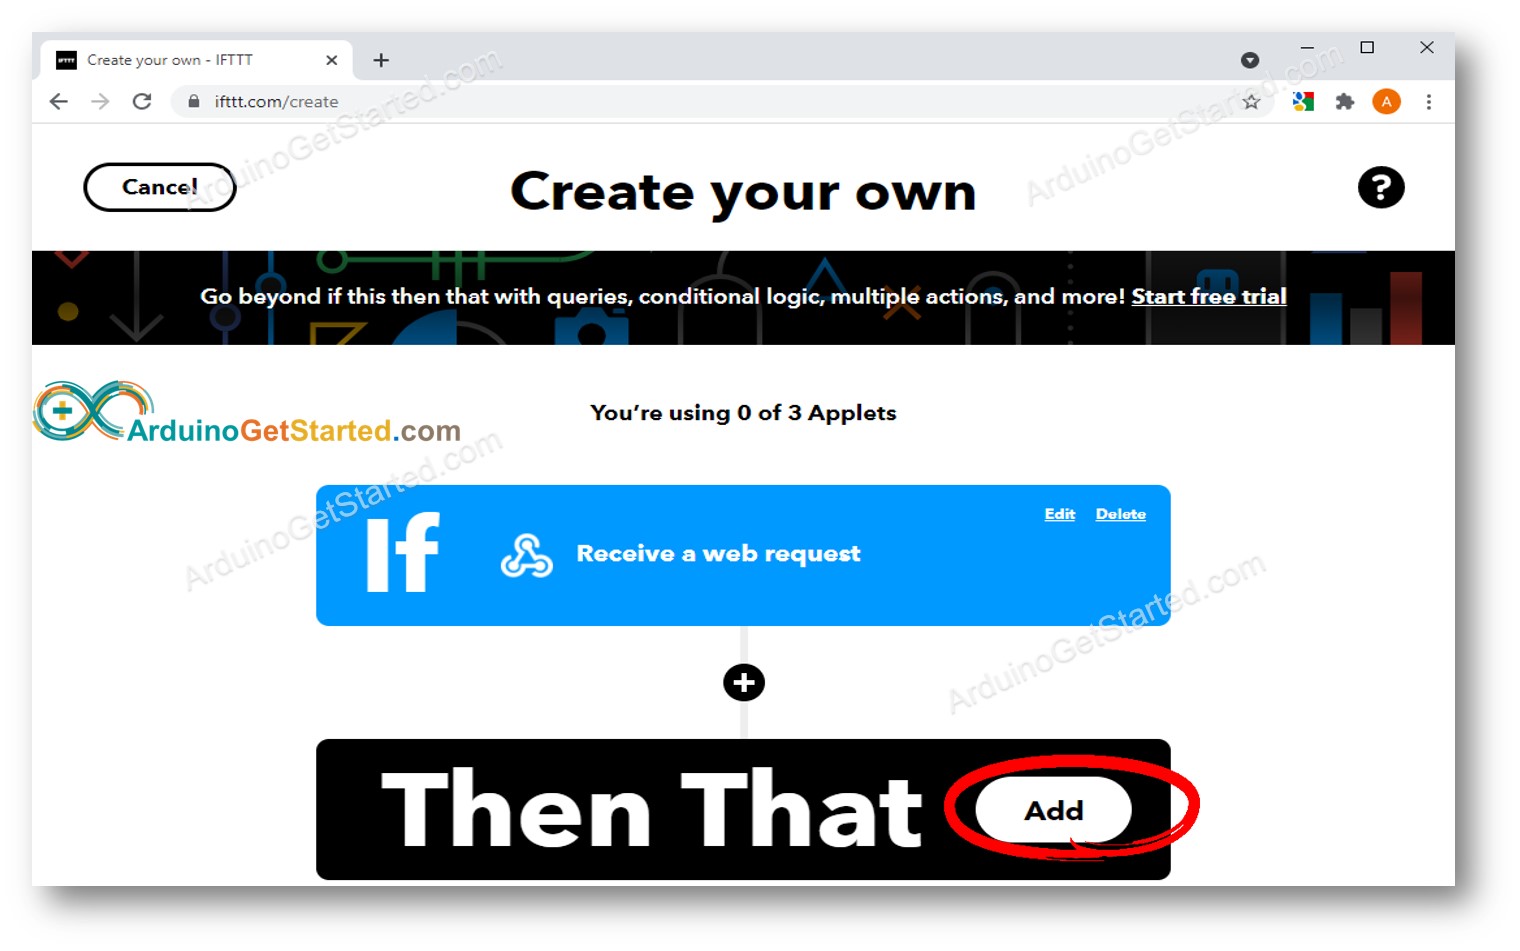
- Click the Add button to add the action
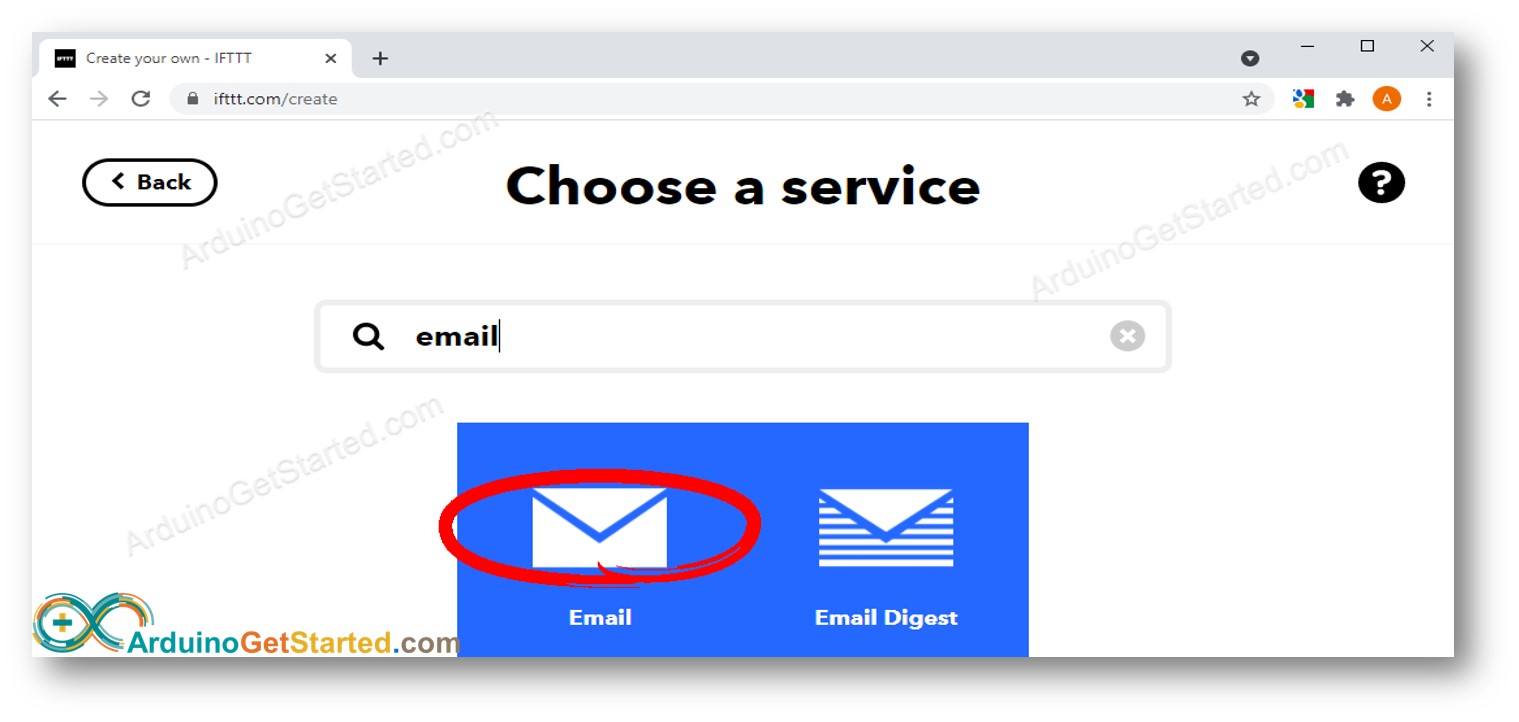
- Search for email, and then click the Email icon
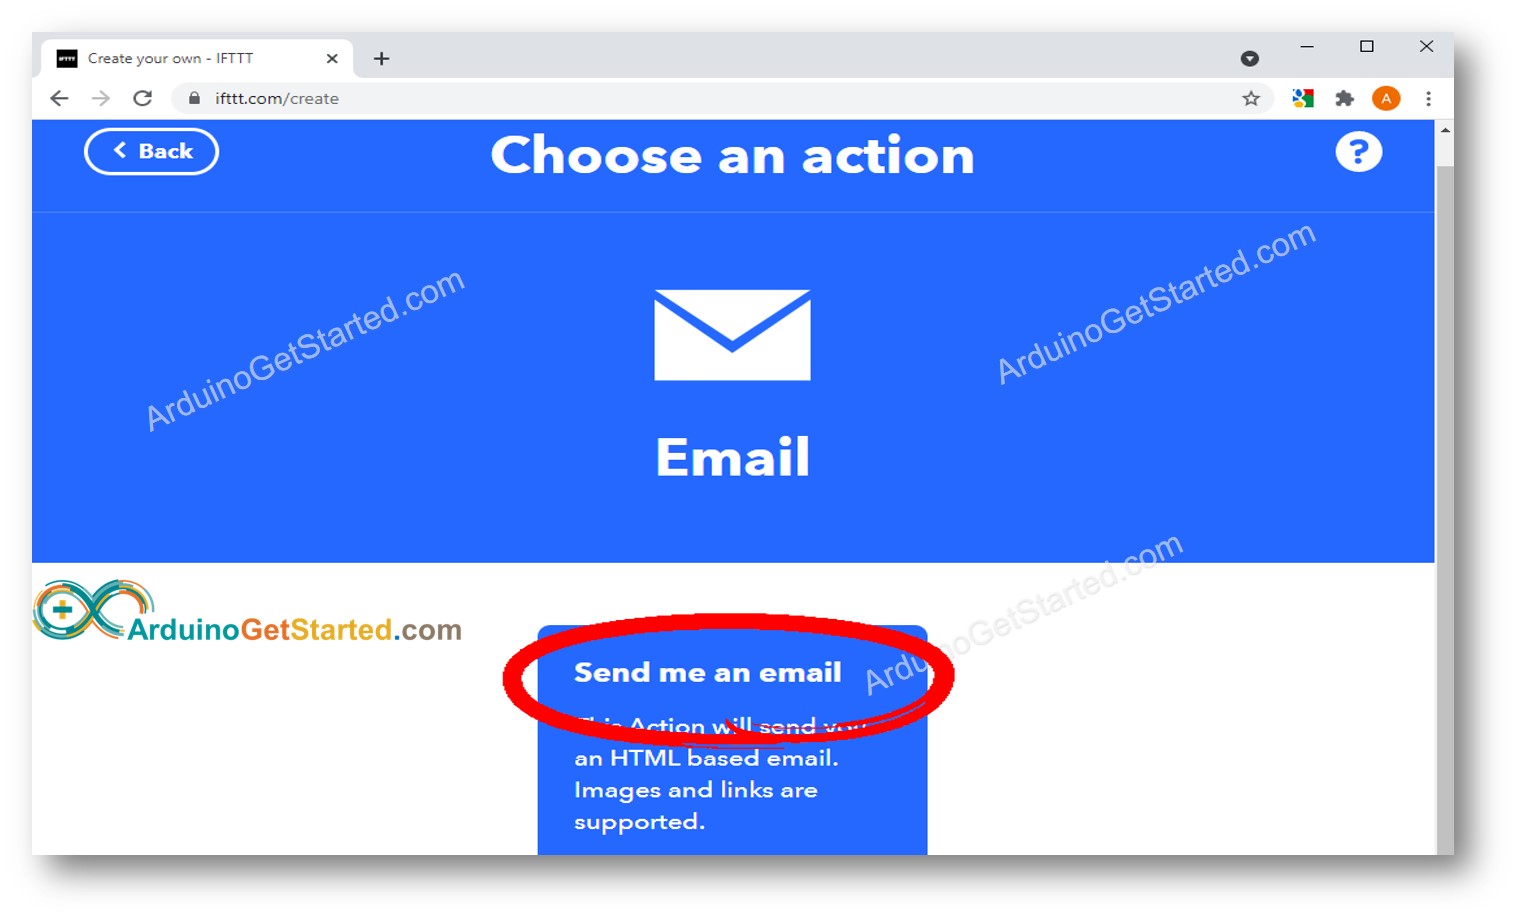
- Click the Send me an email icon
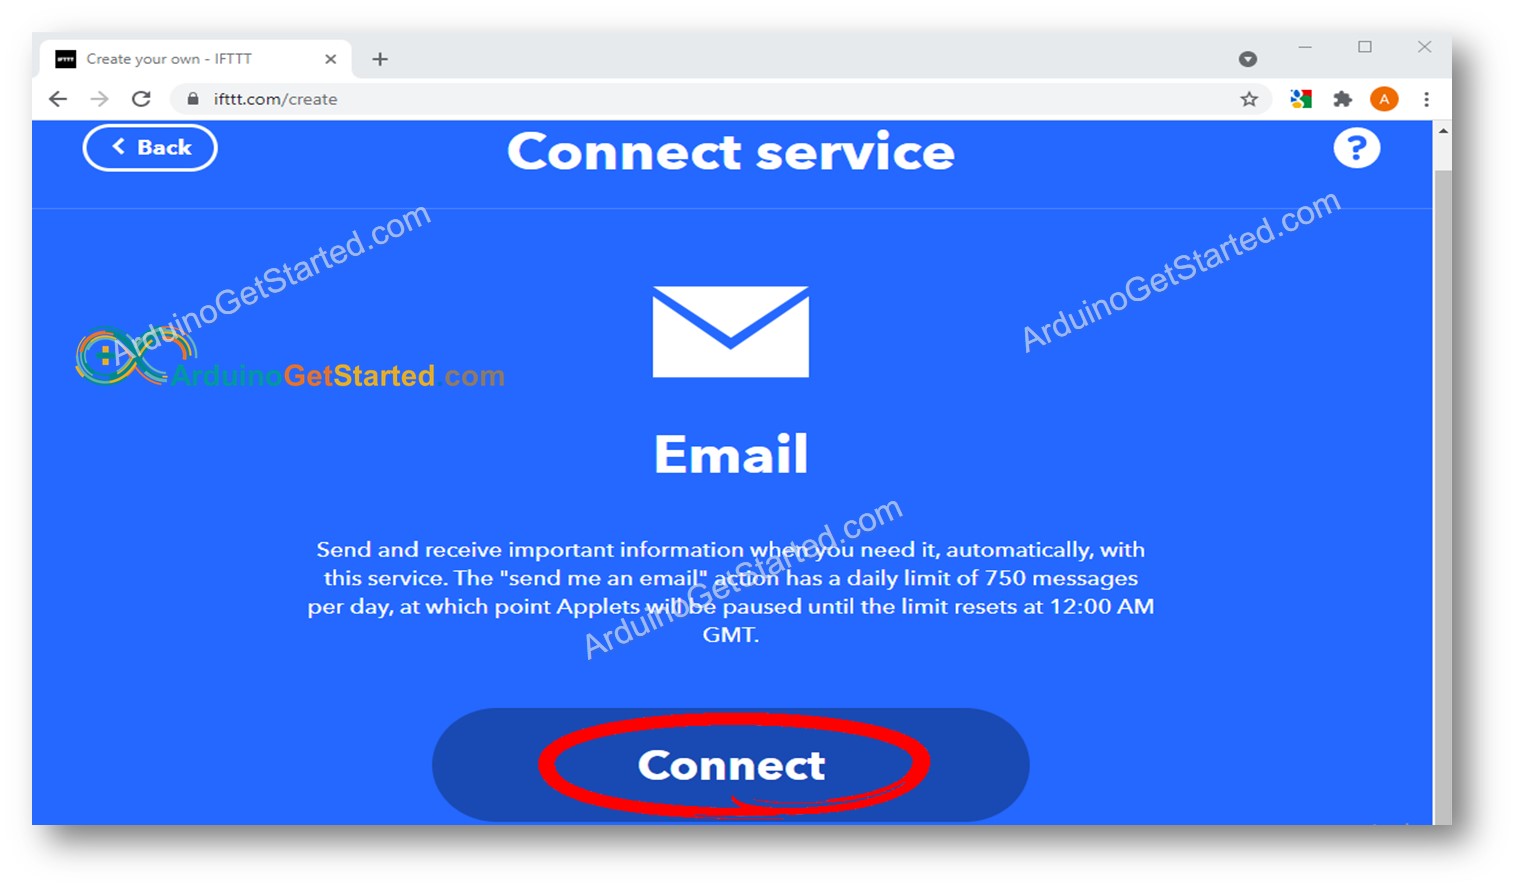
- Click the Connnect button
- Input your email address and then click the Semd PIN button
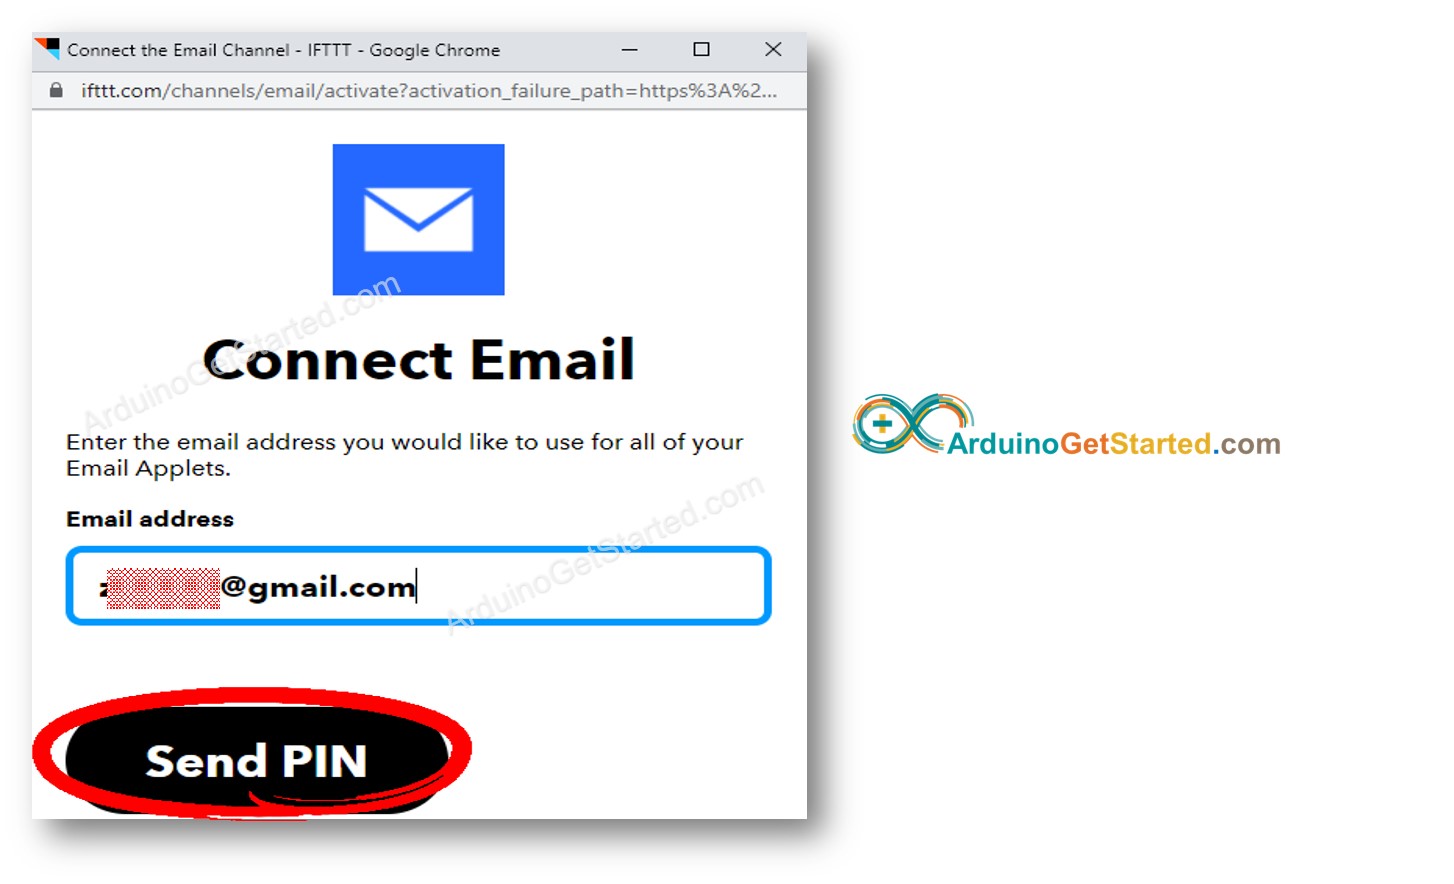
- You will receive an email, get the PIN from email and input to Web UI to do verification
- After that the email subject and content editor appears
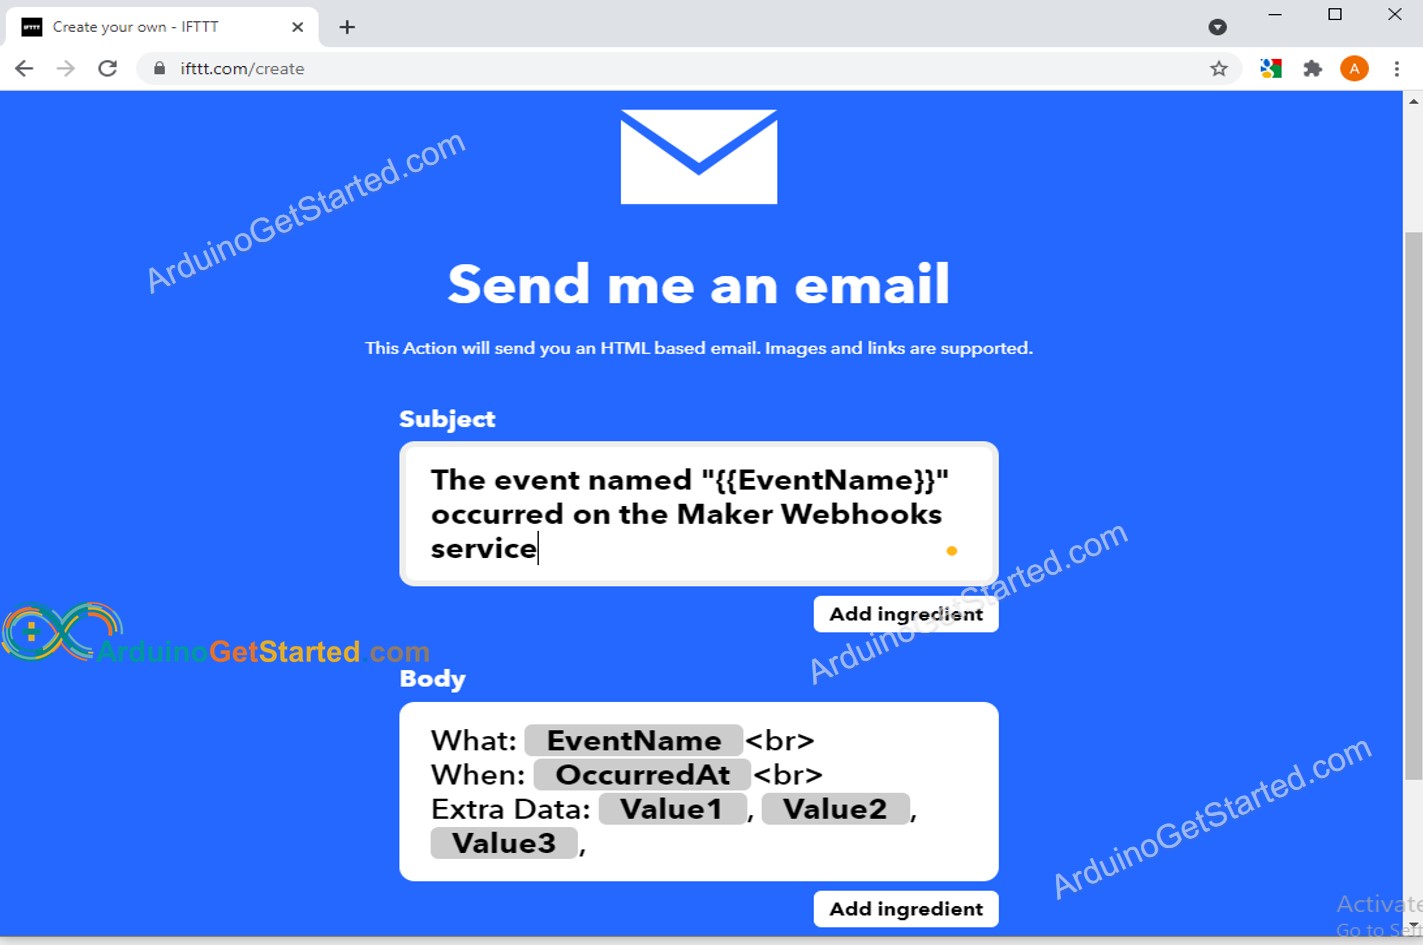
- You can give any subject and content for the email. The below are example
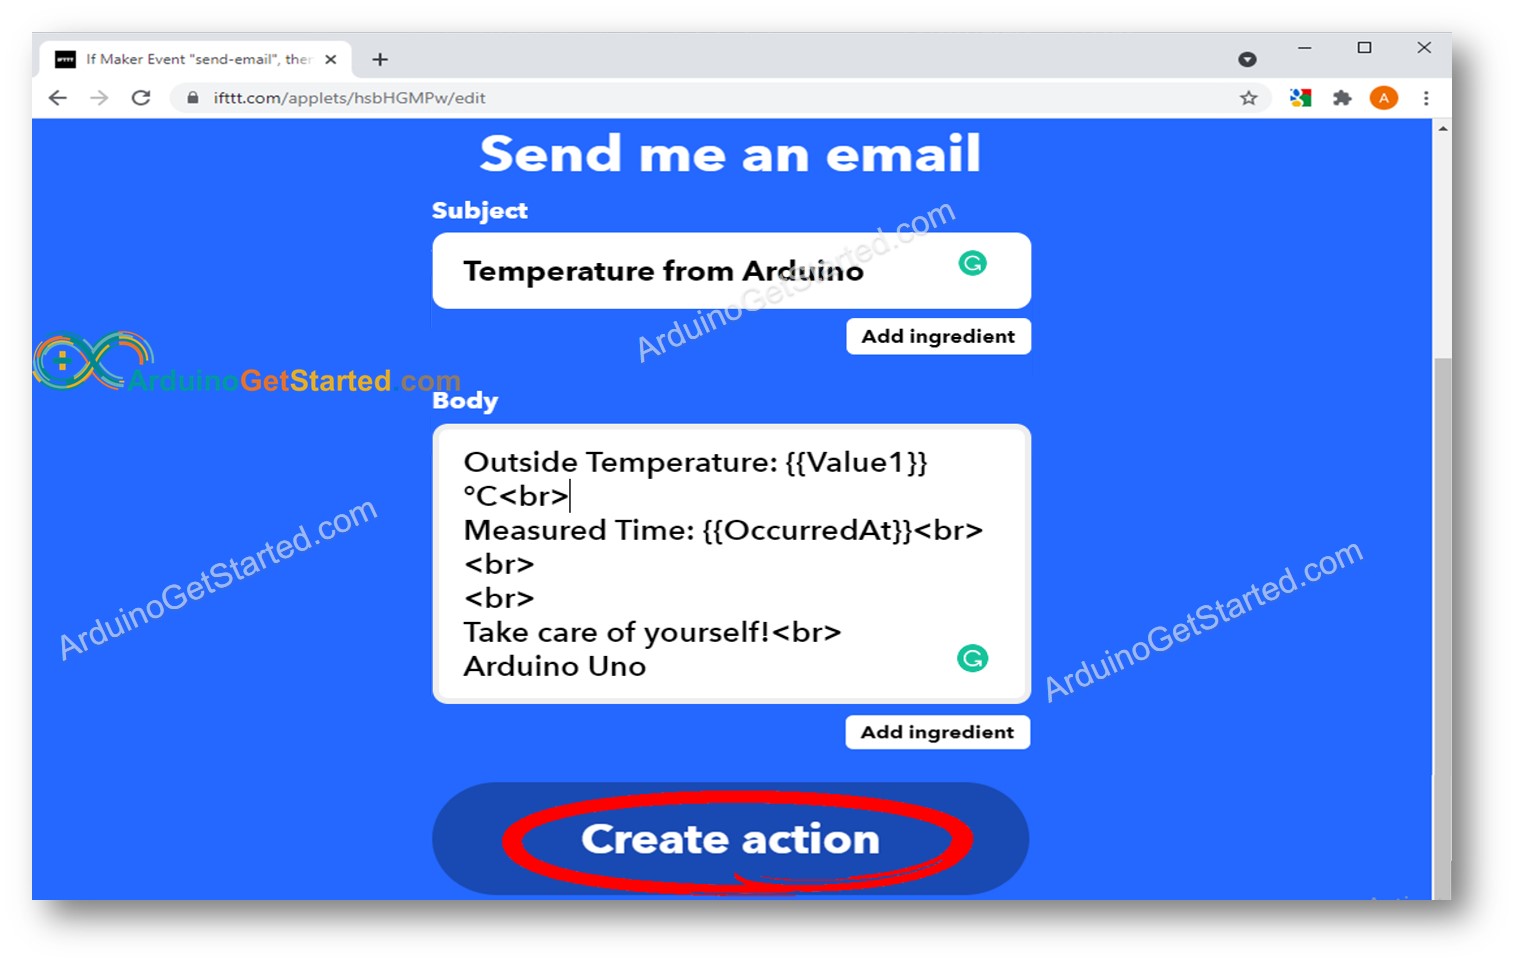
- Subject:
- Content:
Measured Time: {{OccurredAt}}
Take care of yourself!
Arduino Uno
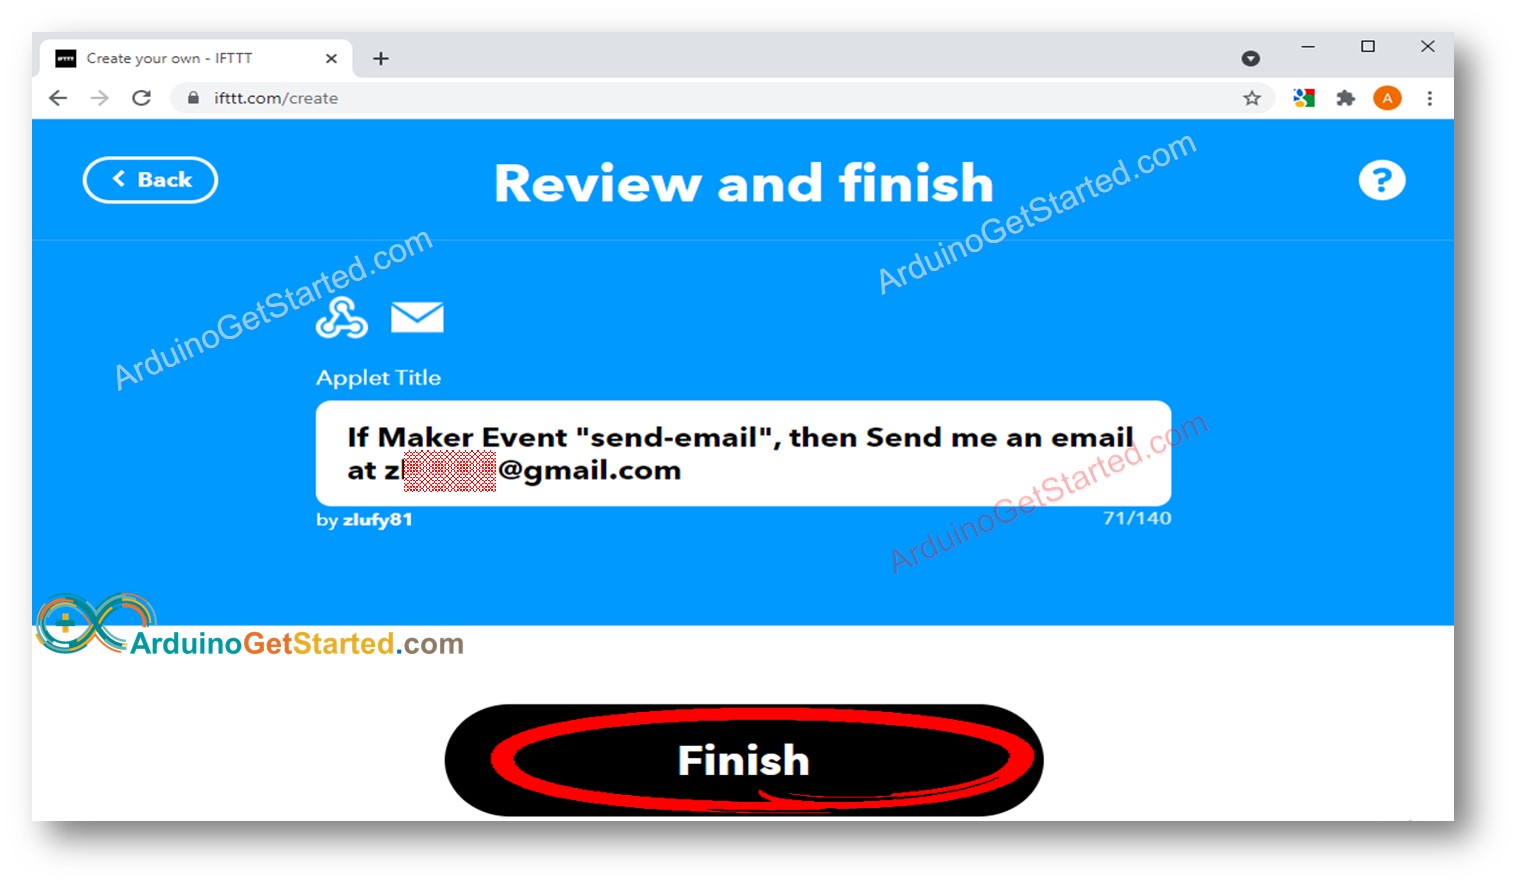
- Click the Create Action button
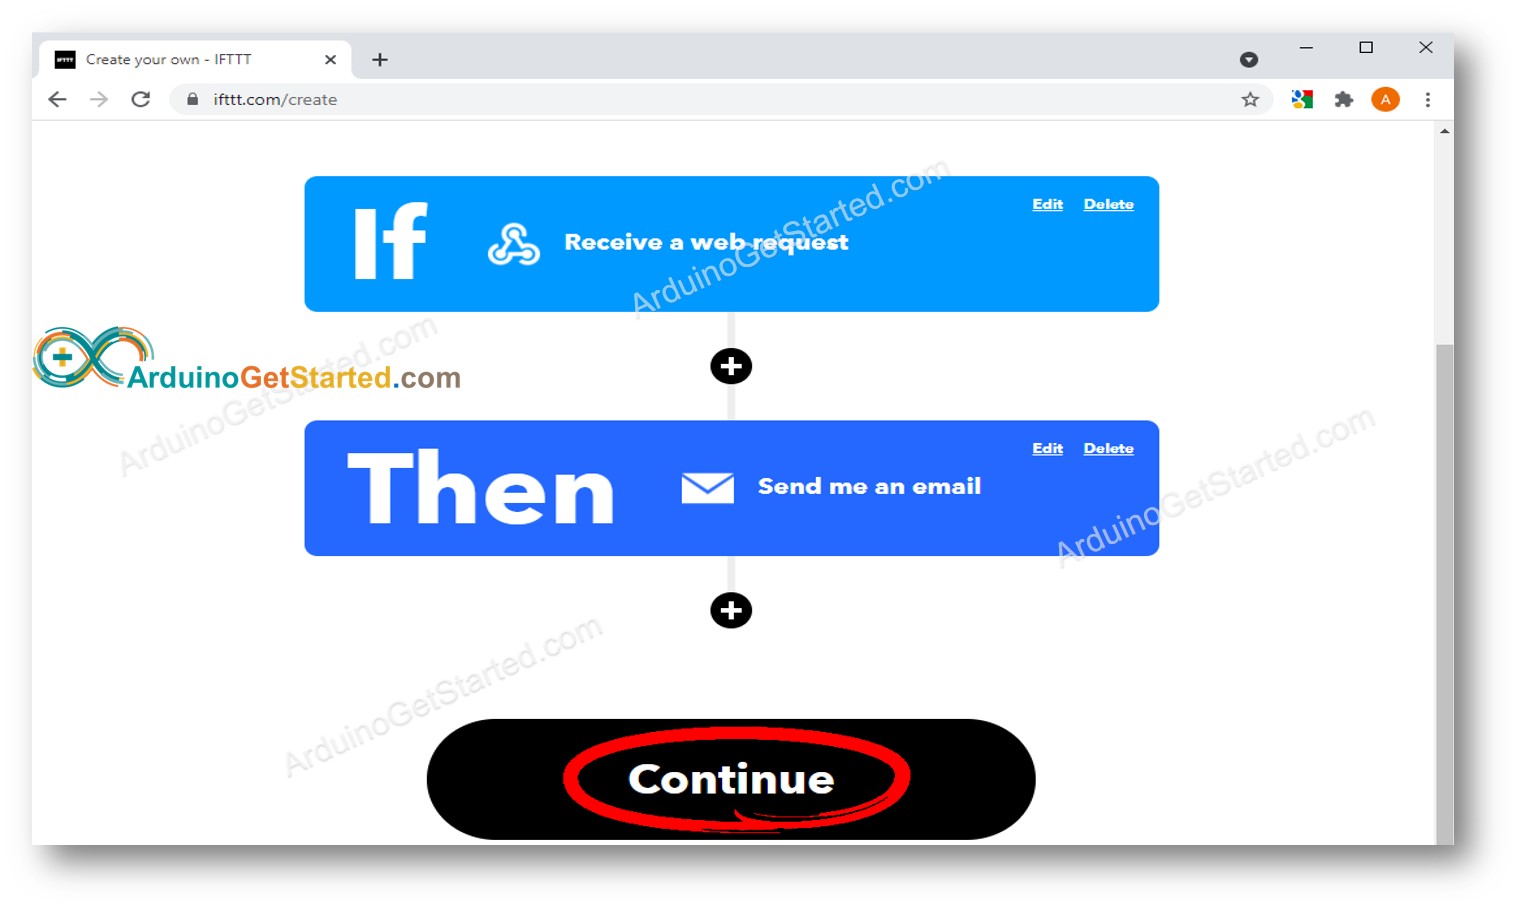
- Click the Continue button
- Click the Finish button
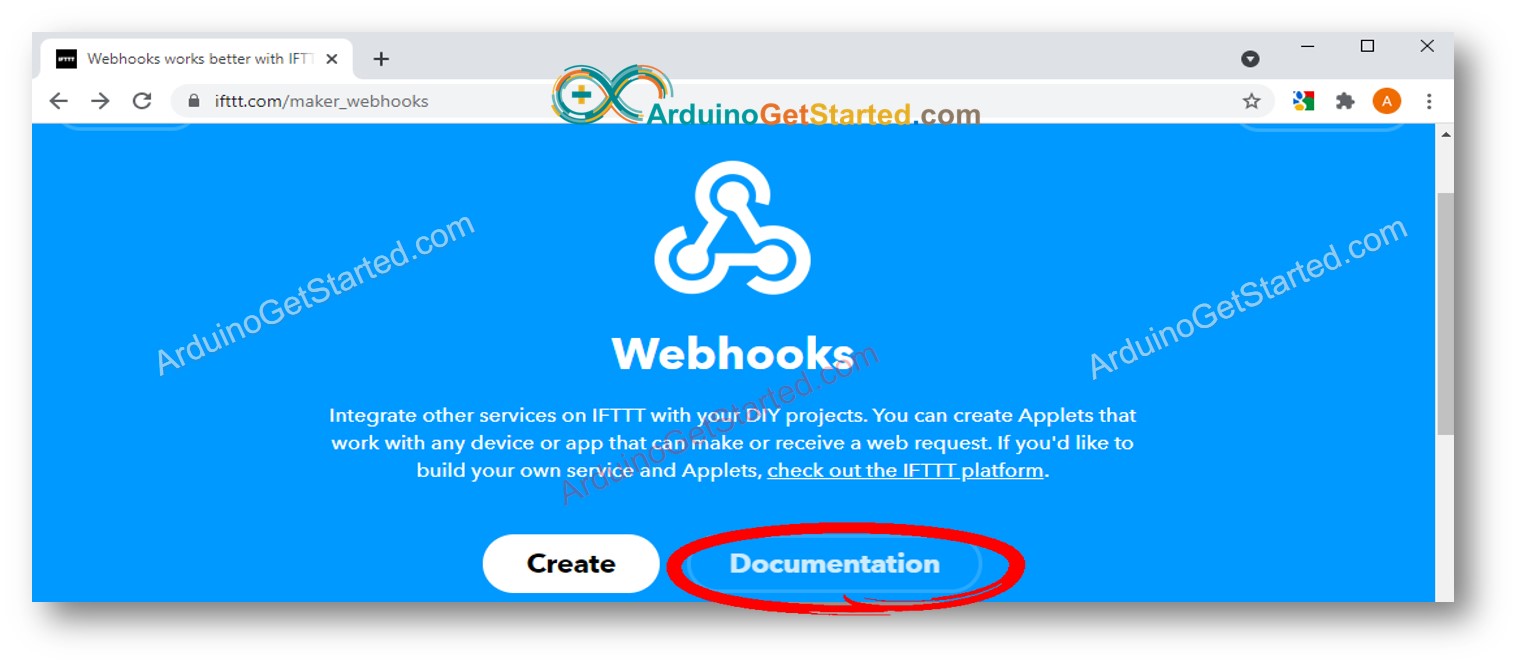
Now you succeeded to create an IFTTT Applets for your Arduino. The next step is to get the IFTTT Webhooks key, which is used to authenticate and identify your Arduino.
- Visit IFTTT Webhooks page
- Click the Documentation button
- You will see the Webhooks key as below
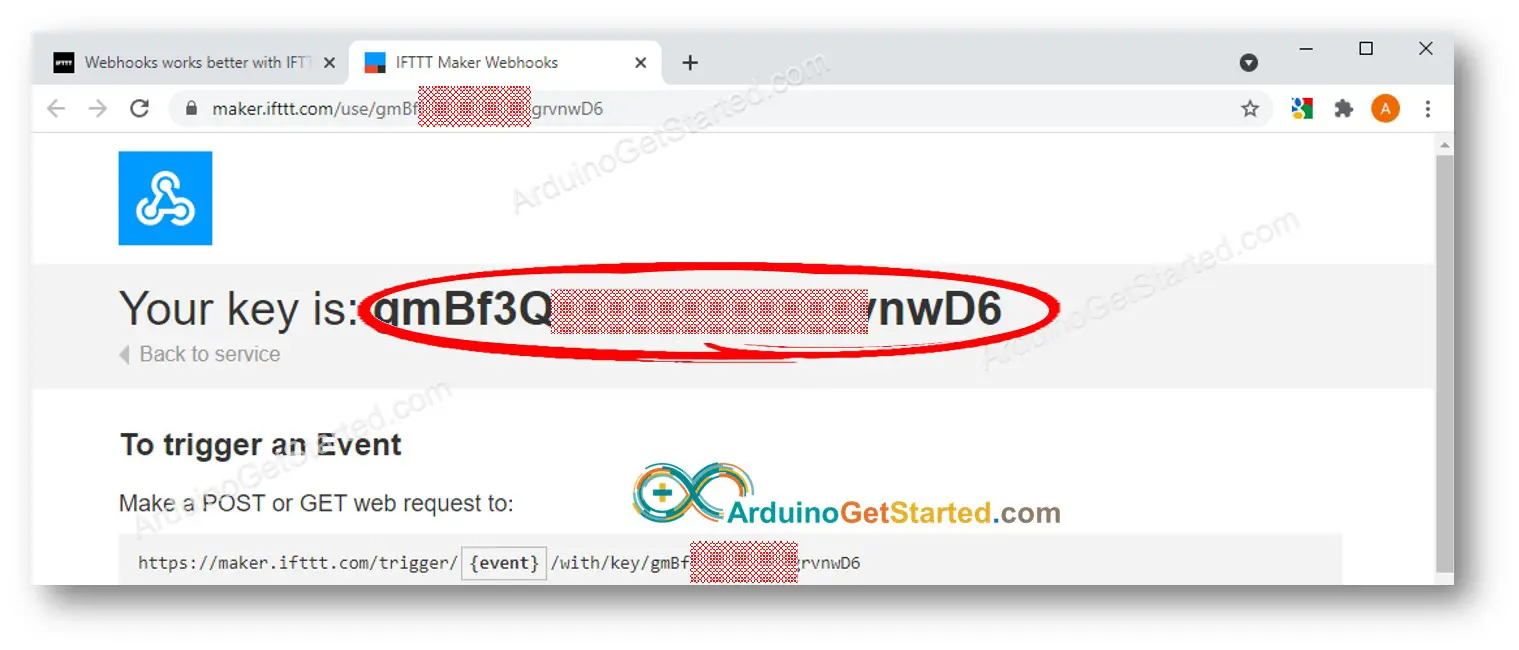
- Copy and wire down your Webhooks to use on Arduino code.
Now, We just need to write Arduino code that makes an HTTP request to the below URL:
※ NOTE THAT:
- In the URL, the send-email is the event name we used:
- If you already used this name for another Applet, you can give it any other name.
- If you use another name, please replace the send-email by your event name
- Webhooks key is generated by IFTTT. Please keep it secret. You can change it by regenerating it on the IFTTT website.
Before writing Arduino code, We can test the IFTTT Applet by doing:
- Open a web browser
- Copy the below link:
- Paste it on the address bar of the web browser
- Replace XXXXXXXXXXXXXXXXXXXXX with your Webhooks key.
- Press the enter key on your keyboard. You will see the browser display the message as below image.
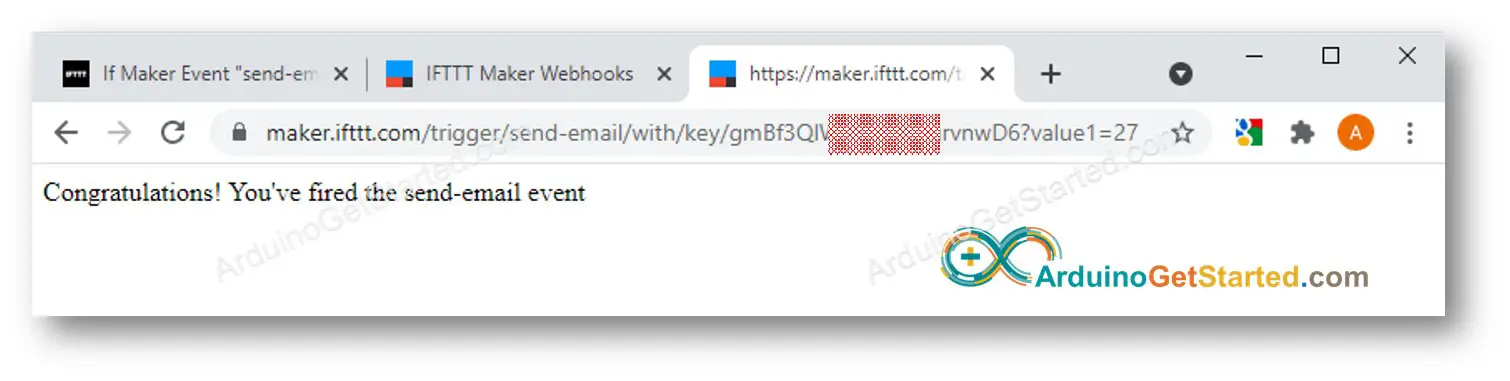
- And you will receive an email.
Arduino code
We can optionally include the sensor data in the Email content. The below code includes a supposed temperature value
Arduino IFTTT code for Arduino Uno R4 WiFi
Arduino IFTTT code for Arduino Uno/Mega with Ethernet Shield
※ NOTE THAT:
This code used the dynamic IP address (via DHCP). If you want to use the static IP address, See Arduino Ethernet Shield with static IP address
Quick Steps
- If using the Ethernet Shield, stack Ethernet Shield on Arduino Uno or Mega
- Connect Arduino to PC via USB cable
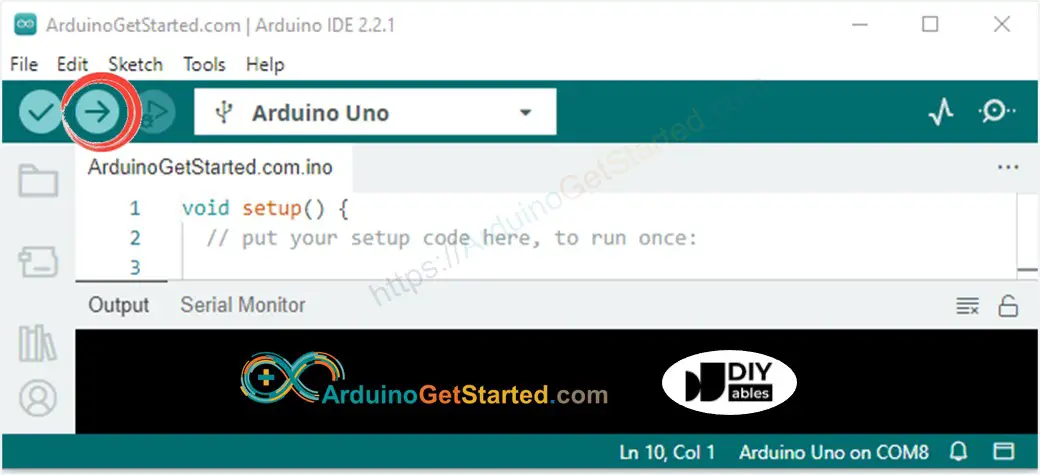
- Open Arduino IDE, select the right board and port
- Copy the above code and open with Arduino IDE
- Update your Webhooks key in the Arduino code
- Click Upload button on Arduino IDE to upload code to Arduino
- The result in Serial Monitor looks like below:
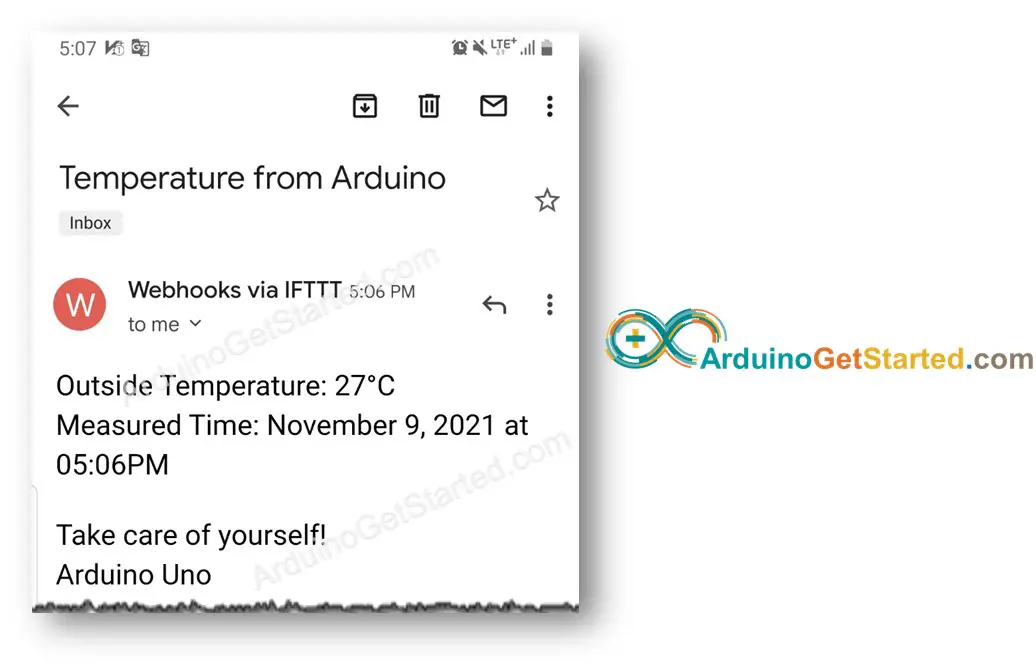
- You receives an email as below
Challenge Yourself
Based on the above code, make the following project:
- Send an email notification when the button is pressed
- Send an email notification when the door is open
- Send an email notification when the temperature is too hot ...