Arduino - DHT22
In this tutorial, we are going to learn:
- How to connect DHT22 sensor to Arduino
- How to connect DHT22 module to Arduino
- How to program Arduino to read temperature and humidity value from DHT22 sensor and module
Hardware Required
Or you can buy the following kits:
| 1 | × | DIYables STEM V3 Starter Kit (Arduino included) | |
| 1 | × | DIYables Sensor Kit (18 sensors/displays) |
Additionally, some links direct to products from our own brand, DIYables .
About DHT22 Temperature and Humidity Sensor
| DHT22 | |
|---|---|
| Temperature Range | -40°C to 80°CW |
| Temperature Accuracy | ± 0.5°C |
| Humidity Range | 0% to 100% |
| Humidity Accuracy | ± 2 to 5% |
| Reading Rate | 0.5Hz (once every 2 seconds) |
| Operating Voltage | 3 to 5V |
Pinout
DHT22 has two forms: sensor and module.
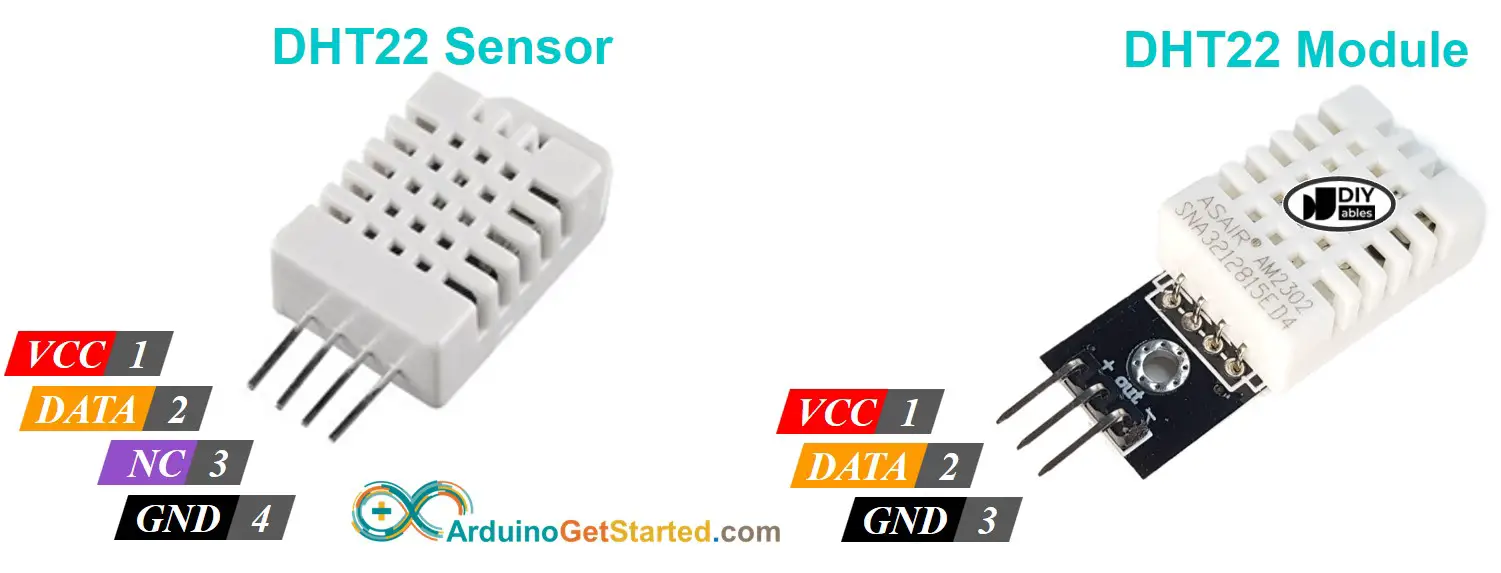
DHT22 sensor has four pins:
- GND pin: needs to be connected to GND (0V)
- VCC pin: needs to be connected to VCC (5V, or 3.3V)
- DATA pin: the pin is used to communicate between the sensor and Arduino
- NC pin: Not connected, we can ignore this pin
DHT22 module has three pins:
- GND pin: needs to be connected to GND (0V)
- VCC pin: needs to be connected to VCC (5V, or 3.3V)
- DATA pin: the pin is used to communicate between the sensor and Arduino
Some manufacturers provide DHT22 sensor in module form with three pins: GND, VCC and DATA pins (or alternatively: -, +, and OUT pins).
Wiring Diagram
In sensor form, A resistor from 5K to 10K Ohms is required to keep the data line high and in order to enable the communication between the DHT22 sensor and the Arduino
Arduino - DHT22 Sensor Wiring
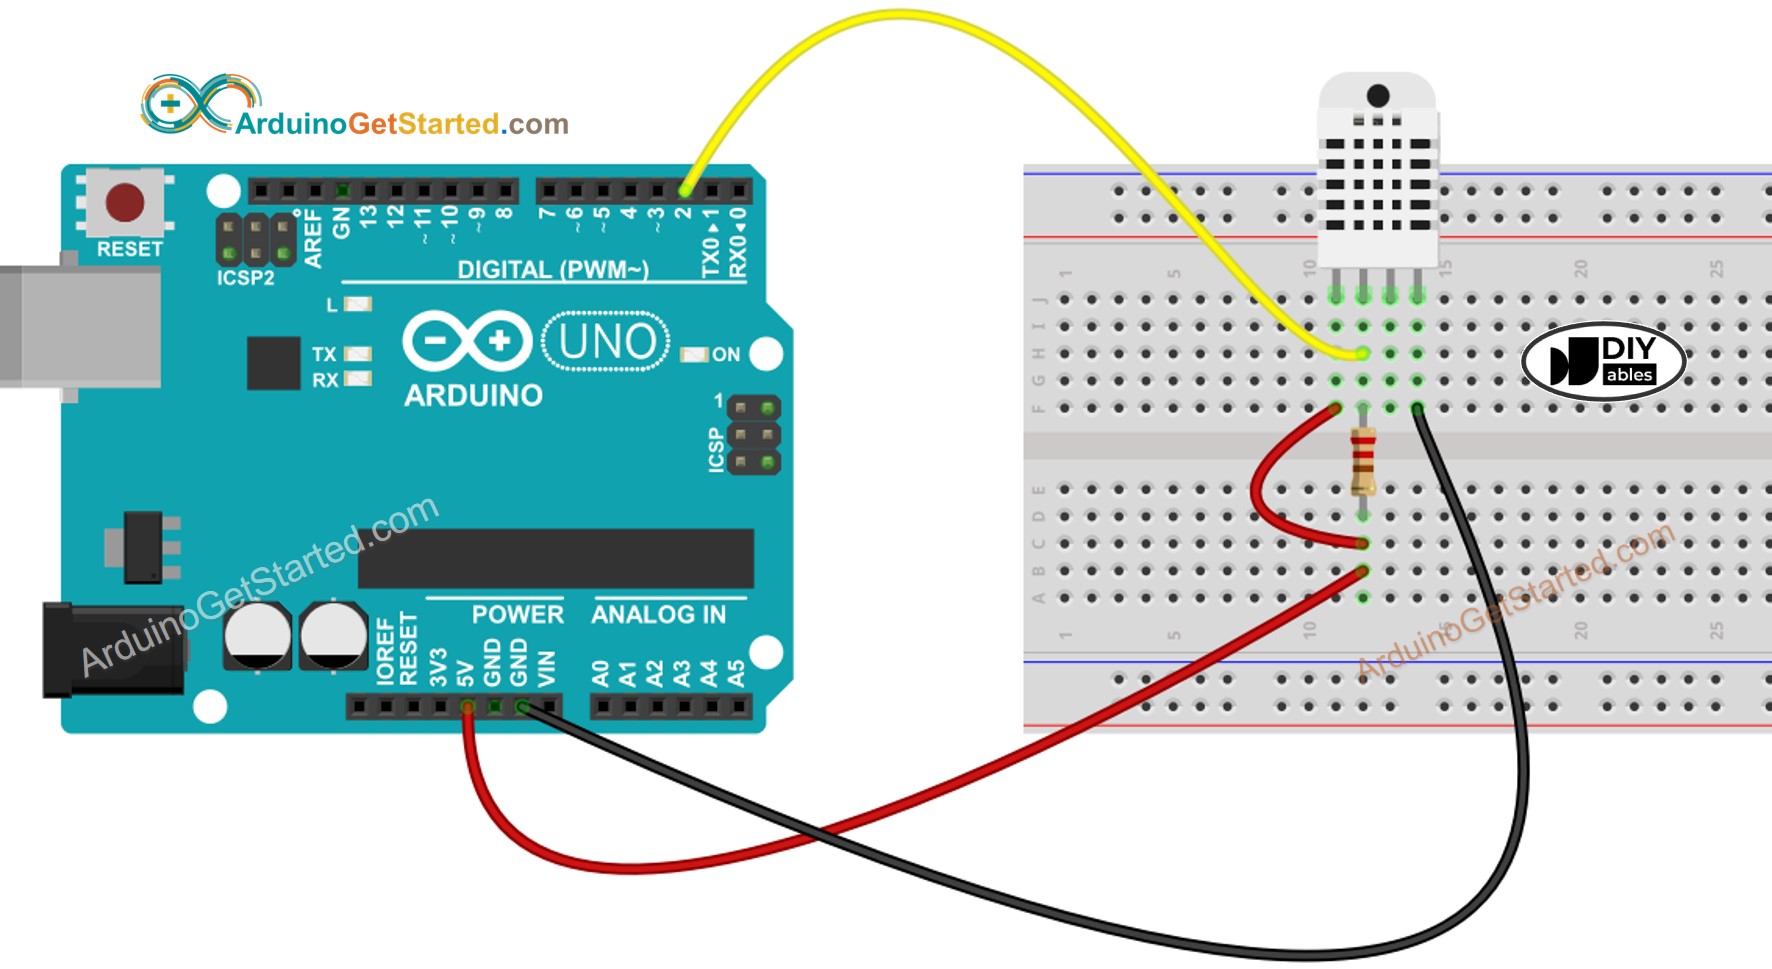
This image is created using Fritzing. Click to enlarge image
Arduino - DHT22 Module Wiring
Most of DHT22 sensor modules have a built-in resistor, so you don't need to add it. it saves us some wiring or soldering works.
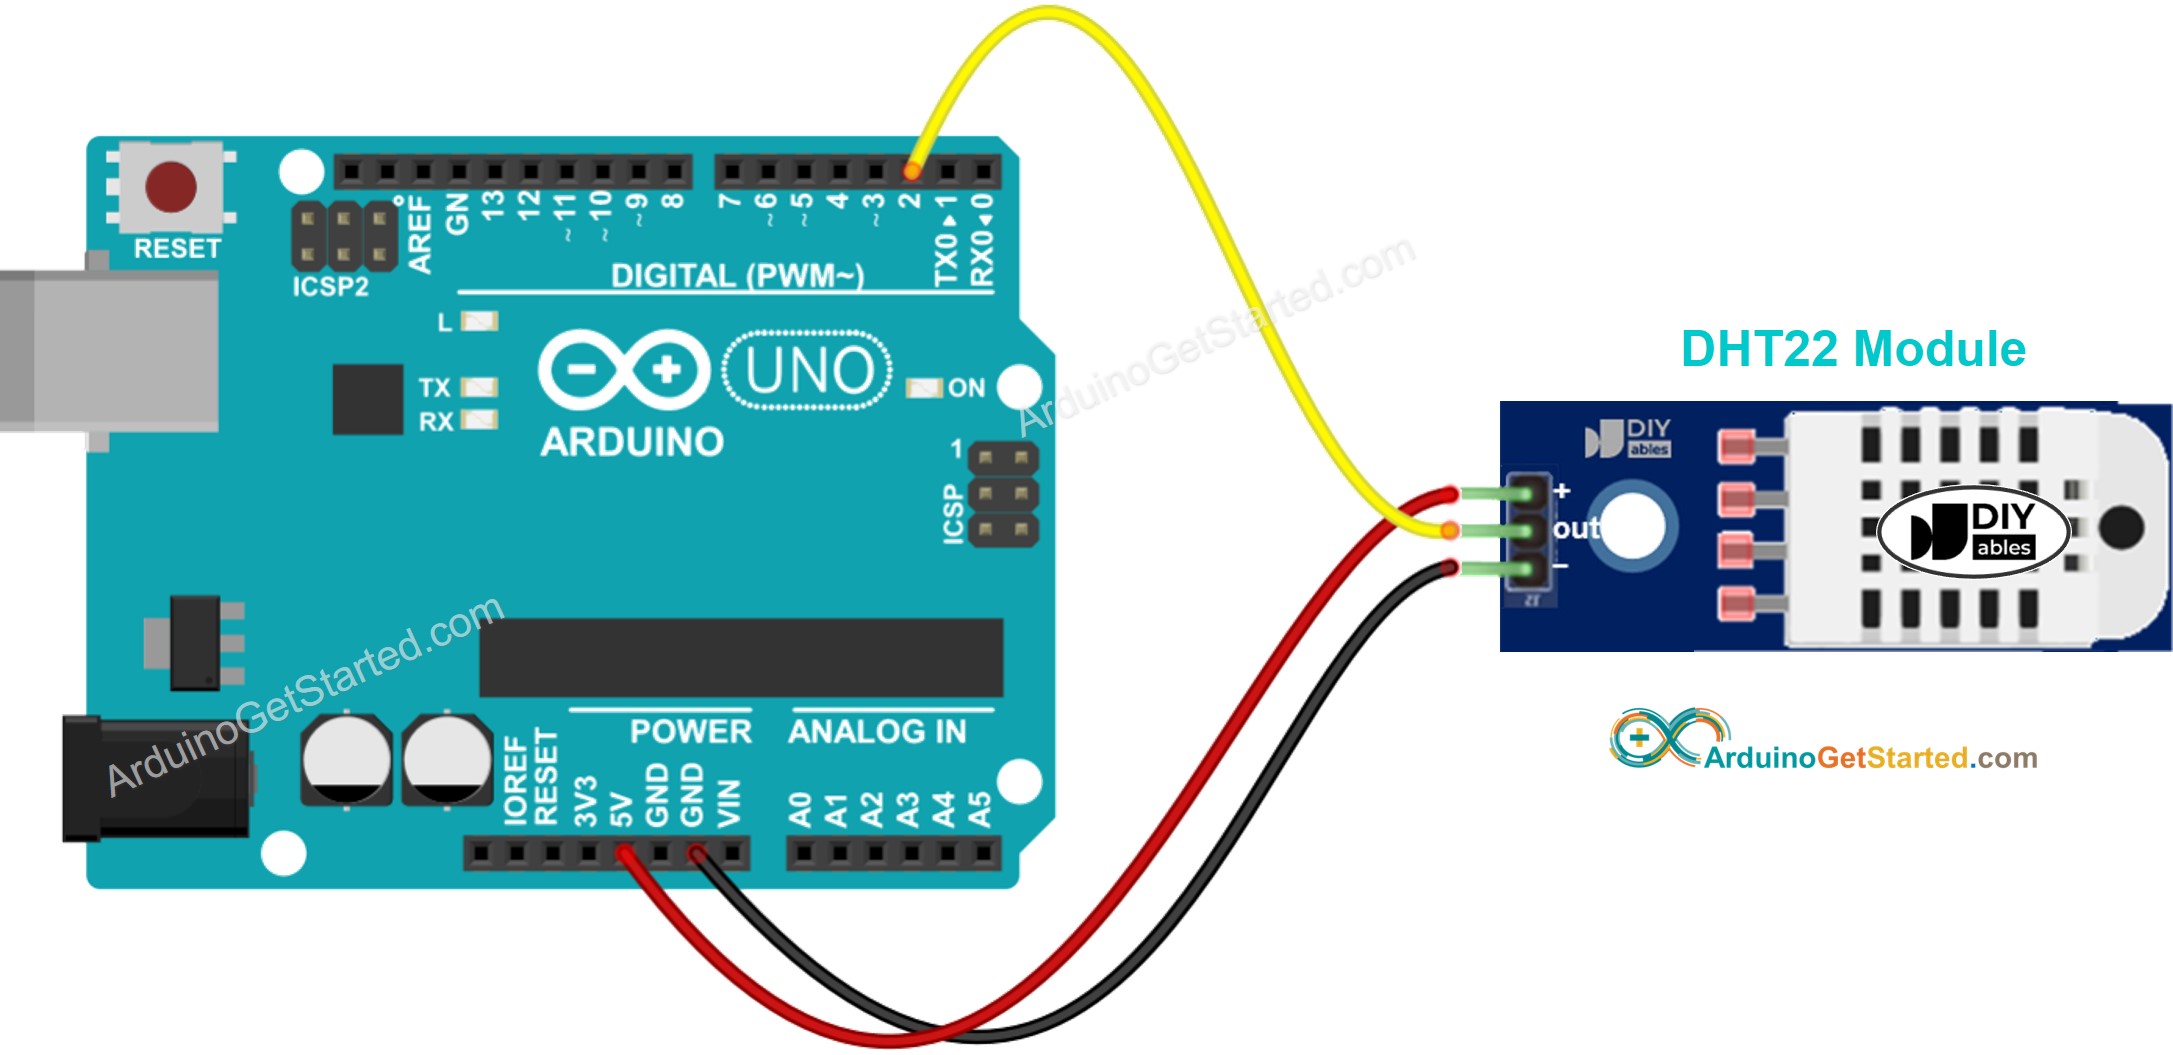
This image is created using Fritzing. Click to enlarge image
How To Program For DHT22 Temperature Sensor
Programming for both sensors is similar. There is only one line of code different.
- Include the library:
- Define the Arduino pin connected to DHT sensor:
- Declare DHT22 object
- Initialize the sensor:
- Read humidity:
- Read temperature in Celsius:
- Read temperature in Fahrenheit:
Arduino Code - DHT22
Quick Steps
- Connect Arduino to PC via USB cable
- Open Arduino IDE, select the right board and port
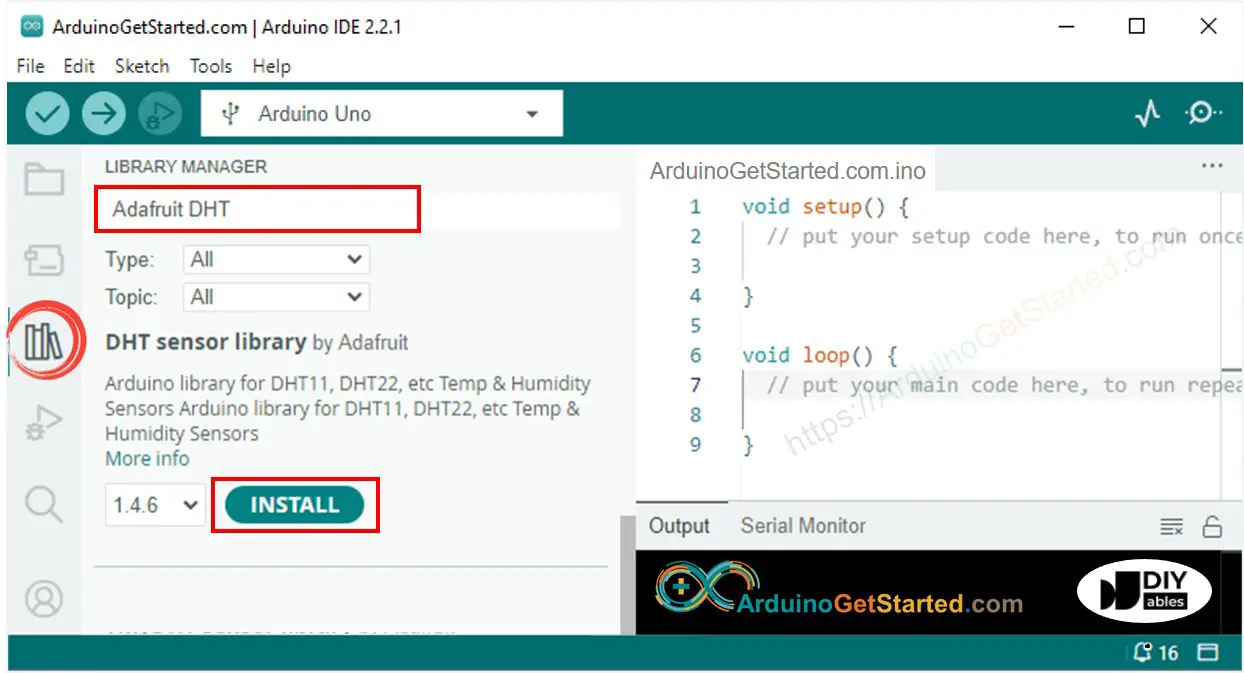
- Navigate to the Libraries icon on the left bar of the Arduino IDE.
- Search “DHT”, then find the DHT sensor library by Adafruit
- Click Install button to install the library.
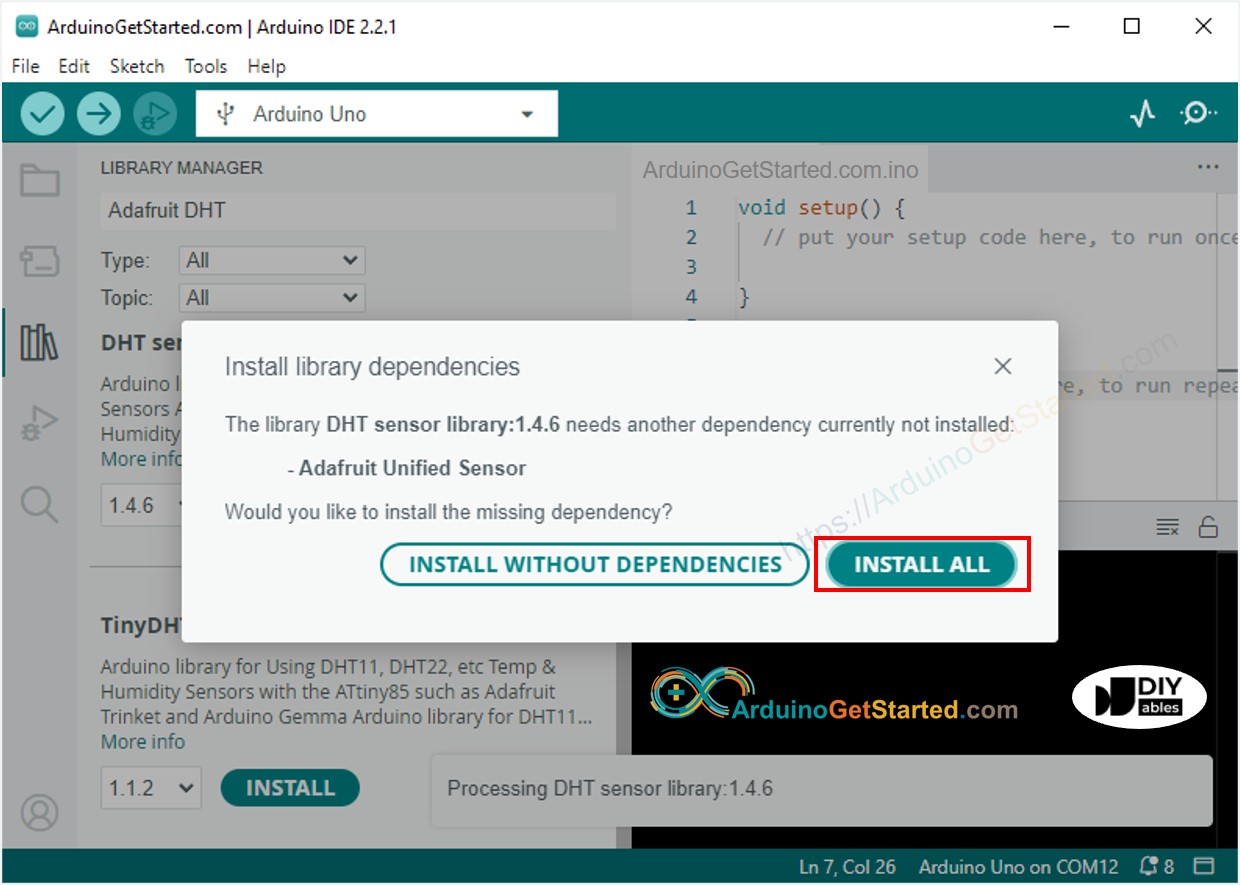
- You will be asked for intalling some other library dependencies
- Click Install All button to install all library dependencies.
- Copy the above code corresponding to the sensor you have and open with Arduino IDE
- Click Upload button on Arduino IDE to upload code to Arduino
- Make enviroment around sensor hotter or colder
- See the result on Serial Monitor.
Video Tutorial
We are considering to make the video tutorials. If you think the video tutorials are essential, please subscribe to our YouTube channel to give us motivation for making the videos.