Arduino Serial to WiFi Converter

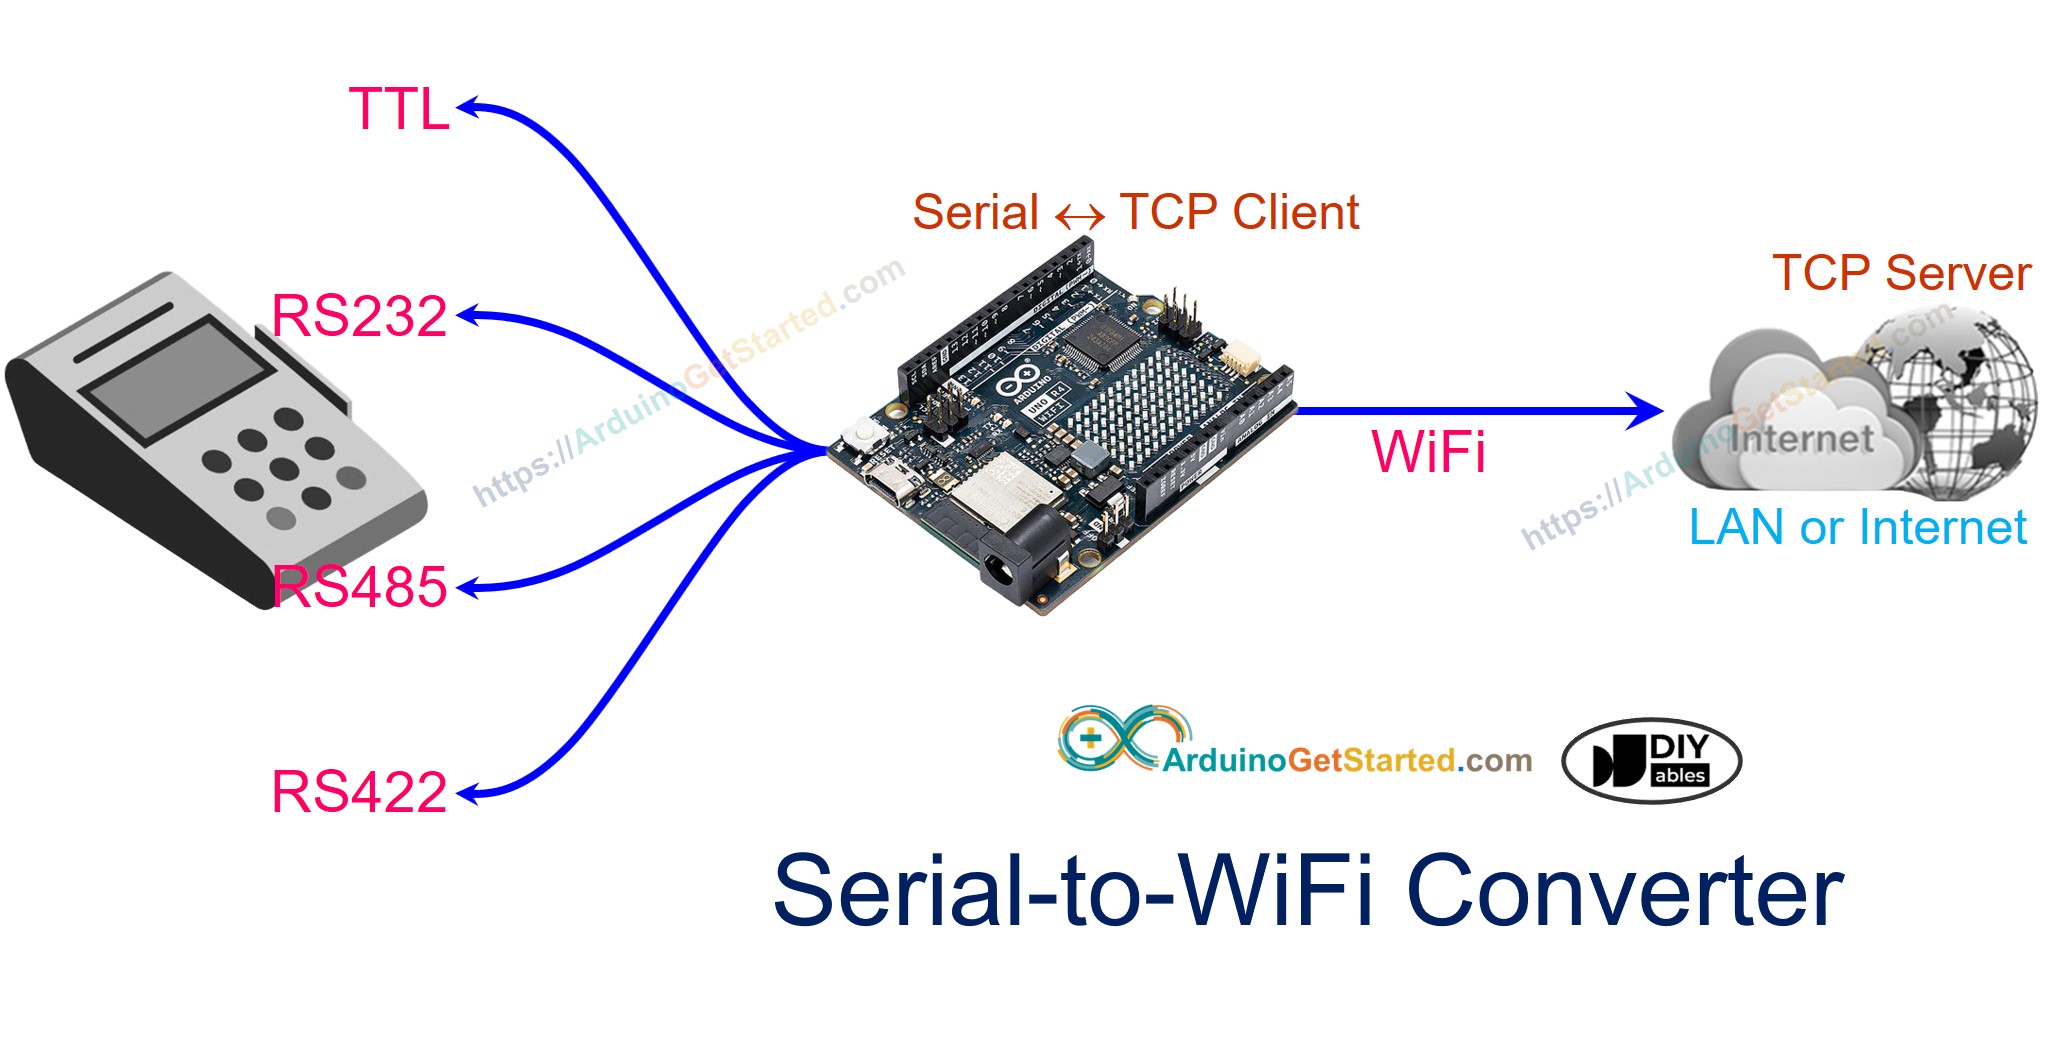
In this tutorial, we will learn how to use the Arduino Uno R4 WiFi to create a Serial to WiFi converter. The Arduino reads data from the Serial port and sends it to a TCP server located either on the same LAN network or remotely on the internet, and vice versa. Additionally, by connecting RS232, RS485, or RS422 modules to the Arduino, we can create RS232 to WiFi, RS485 to WiFi, and RS422 to WiFi converters.

Arduino RS232 to WiFi converter

In this tutorial, we will learn how to create a Serial to WiFi converter in general. For specific type of Serial interaface, we will learn in other tutorials below:

These steps will enable you to establish versatile communication bridges between serial devices and WiFi networks using Arduino.

Hardware Required

1×Arduino UNO R4 WiFi
1×USB Cable Type-C
1×(Optional) Jumper Wires
1×(Optional) 9V Power Adapter for Arduino
1×(Recommended) Screw Terminal Block Shield for Arduino Uno
1×(Optional) Transparent Acrylic Enclosure For Arduino Uno

Or you can buy the following sensor kits:

1×DIYables Sensor Kit (30 sensors/displays)
1×DIYables Sensor Kit (18 sensors/displays)
Please note: These are Amazon affiliate links. If you buy the components through these links, We will get a commission at no extra cost to you. We appreciate it.

How It Works

  • Arduino connects to a serial device via serial interface (TTL, RS232, RS485, or RS422)
  • Arduino works as a TCP client that connects to a TCP server (can be TCP server software on your PC or another Arduino TCP server)
  • Arduino reads data from the serial interface and sends it to the TCP server
  • Arduino reads data from the TCP connection and sends it to the serial interface

Arduino Code

/* * Created by ArduinoGetStarted.com * * This example code is in the public domain * * Tutorial page: https://arduinogetstarted.com/tutorials/arduino-serial-to-wifi-converter */ #include <WiFiS3.h> const char* WIFI_SSID = "YOUR_WIFI_SSID"; // CHANGE TO YOUR WIFI SSID const char* WIFI_PASSWORD = "YOUR_WIFI_PASSWORD"; // CHANGE TO YOUR WIFI PASSWORD const char* TCP_SERVER_ADDR = "192.168.0.26"; // CHANGE TO TCP SERVER'S IP ADDRESS const int TCP_SERVER_PORT = 1470; WiFiClient TCP_client; void setup() { Serial.begin(9600); Serial.println("Arduino: TCP CLIENT"); // check for the WiFi module: if (WiFi.status() == WL_NO_MODULE) { Serial.println("Communication with WiFi module failed!"); // don't continue while (true) ; } String fv = WiFi.firmwareVersion(); if (fv < WIFI_FIRMWARE_LATEST_VERSION) { Serial.println("Please upgrade the firmware"); } Serial.print("Attempting to connect to SSID: "); Serial.println(WIFI_SSID); // attempt to connect to WiFi network: while (WiFi.begin(WIFI_SSID, WIFI_PASSWORD) != WL_CONNECTED) { delay(10000); // wait 10 seconds for connection: } Serial.print("Connected to WiFi "); Serial.println(WIFI_SSID); // connect to TCP server if (TCP_client.connect(TCP_SERVER_ADDR, TCP_SERVER_PORT)) Serial.println("Connected to TCP server"); else Serial.println("Failed to connect to TCP server"); } void loop() { if (TCP_client.connected()) { // read data from TCP and send them to Serial interface if (TCP_client.available()) { char c = TCP_client.read(); Serial.write(c); } // read data from Serial interface and send them to TCP if (Serial.available()) { char c = Serial.read(); TCP_client.write(c); } } else { Serial.println("Connection is disconnected"); TCP_client.stop(); // reconnect to TCP server if (TCP_client.connect(TCP_SERVER_ADDR, TCP_SERVER_PORT)) { Serial.println("Reconnected to TCP server"); } else { Serial.println("Failed to reconnect to TCP server"); delay(1000); } } }

Testing

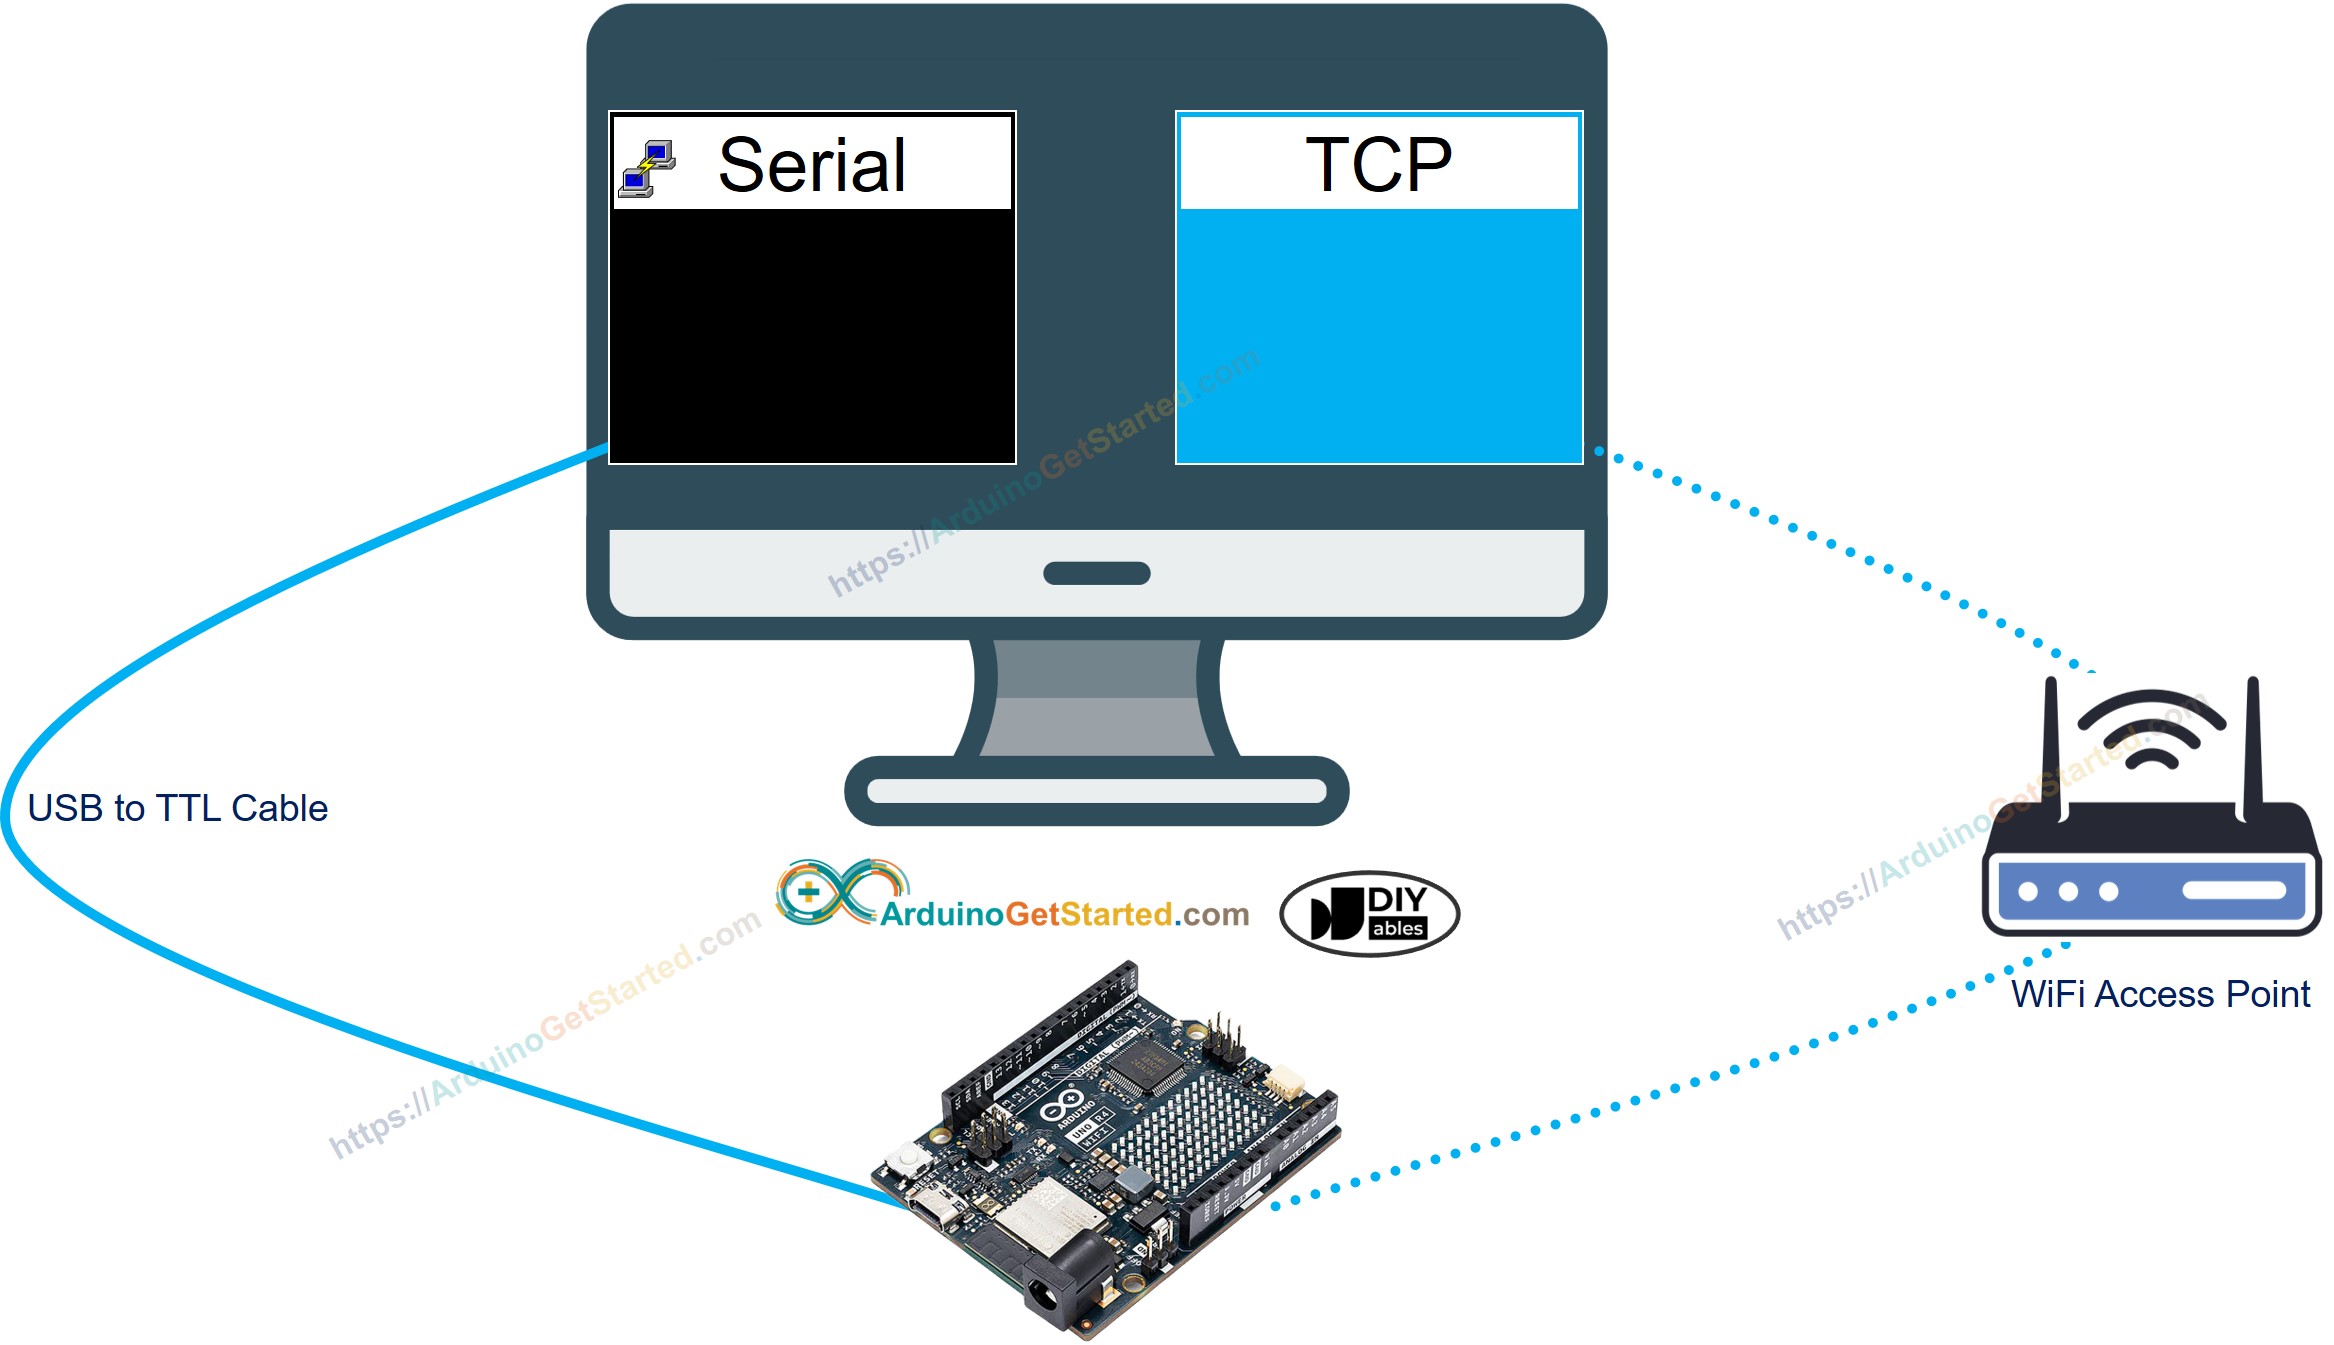
You can do a test by sending data in the following flows:

  • Serial Monitor (on your PC) → Serial → Arduino → WiFi → TCP Server Software (on your PC).
  • TCP Server Software (on your PC) → WiFi → Arduino → Serial → Serial Monitor (on your PC).
Arduino serial to PC communication

To do it, follow the below steps:

  • Connect Arduino to your PC via USB Type-C cable
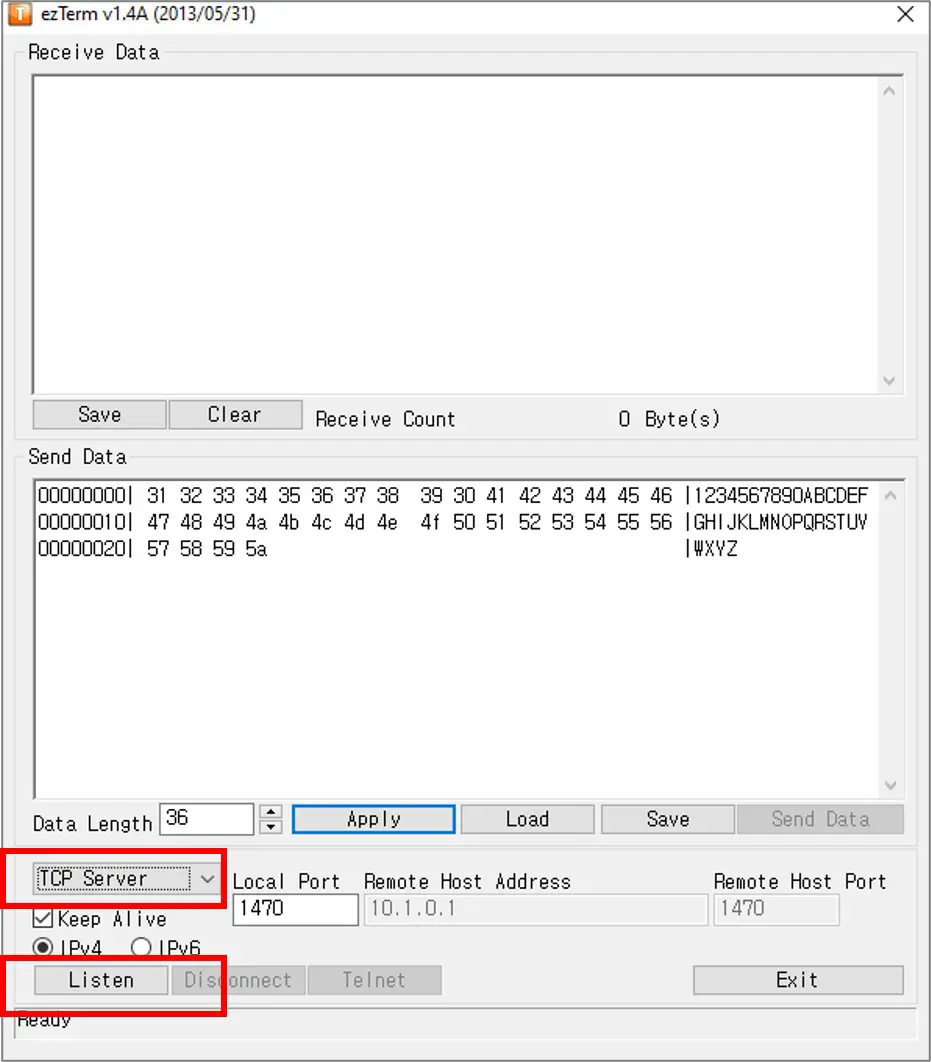
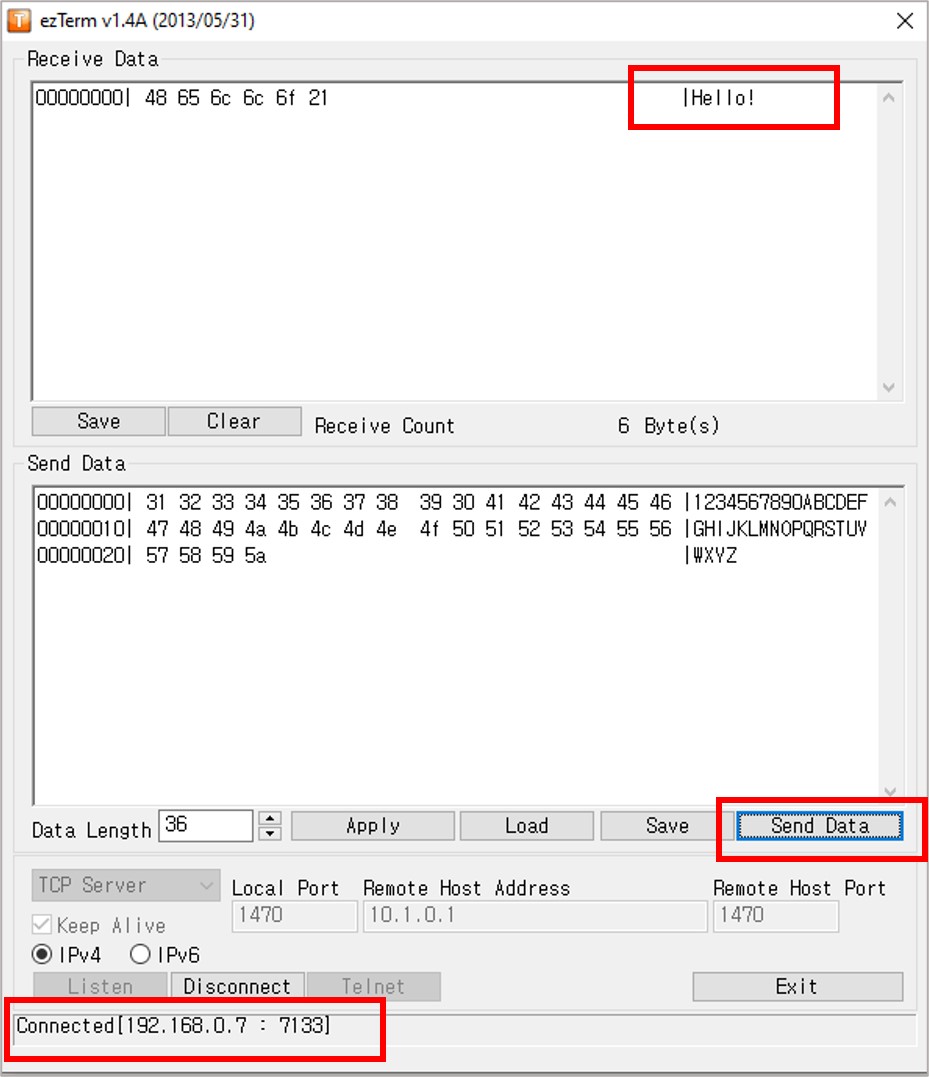
  • Install a TCP server software program like ezTerm
  • Open the Serial Monitor
  • Open the TCP server program and configure it as TCP Server, then click Listen button
ezTerm TCP Server
  • Open Command Prompt on your PC.
  • Find the IP address of your PC by running the below command:
ipconfig
  • The output looks like below:
Command Prompt
C:\WINDOWS\system32>ipconfig Windows IP Configuration Ethernet adapter: Subnet Mask . . . . . . . . . . . : 255.0.0.0 IPv4 Address. . . . . . . . . . . : 192.168.0.26 Subnet Mask . . . . . . . . . . . : 255.255.255.0 Default Gateway . . . . . . . . . :
  • Change the IP address of your TCP Server (Your PC) in the Arduino code. In the example above, it's indicated by 192.168.0.26.
  • Compile and upload the code to the Arduino board by clicking on the Upload button in the Arduino IDE.
  • Type some data in the Serial Monitor to send it to the Arduino through Serial.
  • If everything works correctly, you'll see the data on the TCP server software.
  • Type some data in the TCP server program to send it to the Arduino through TCP.
  • If successful, you'll see the data in the Serial Monitor.
Arduino Serial to TCP

If you want to use a comercial Serial-To-Ethernet converter, you can buy the following commericial products:

The Best Arduino Starter Kit

※ OUR MESSAGES