Arduino - Control Temperature
In this tutorial, we are going to control the room temperature to a comfortible range using a Arduino, DS18B20 temperature sensor, fan and heating elemen. When the temperature is too hot, turn on the cooling fan to ventilate. When the temperature is cold, turn off the cooling fan and turn on the heating element.
Hardware Required
Or you can buy the following kits:
| 1 | × | DIYables STEM V3 Starter Kit (Arduino included) | |
| 1 | × | DIYables Sensor Kit (30 sensors/displays) | |
| 1 | × | DIYables Sensor Kit (18 sensors/displays) |
Additionally, some links direct to products from our own brand, DIYables .
Buy Note: Many DS18B20 sensors on the market are low-quality. We highly recommend buying the sensor from the DIYables brand using the link above. We tested it, and it worked well.
About Room Temperature Control System
In short, Arduino will turn on the fan when the room is hot and turn on the heating element when the room is cold. The below is the detail of how a room temperature control system works by taking an example of controling the room temperature from 18°C to 26°C:
- Arduino reads the temperature from the temperature sensor
- If the temperature exceeds 26°C, Arduino turns on the fan and turns off the heating element
- If the temperature falls below 18°C, Arduino turns off the fan and turns on the heating element
The above process is repeated infinitely in the loop.
The fan works as a ventilator.
If you do not know about temperature sensor, heating element and fan (pinout, how it works, how to program ...), learn about them in the following tutorials:
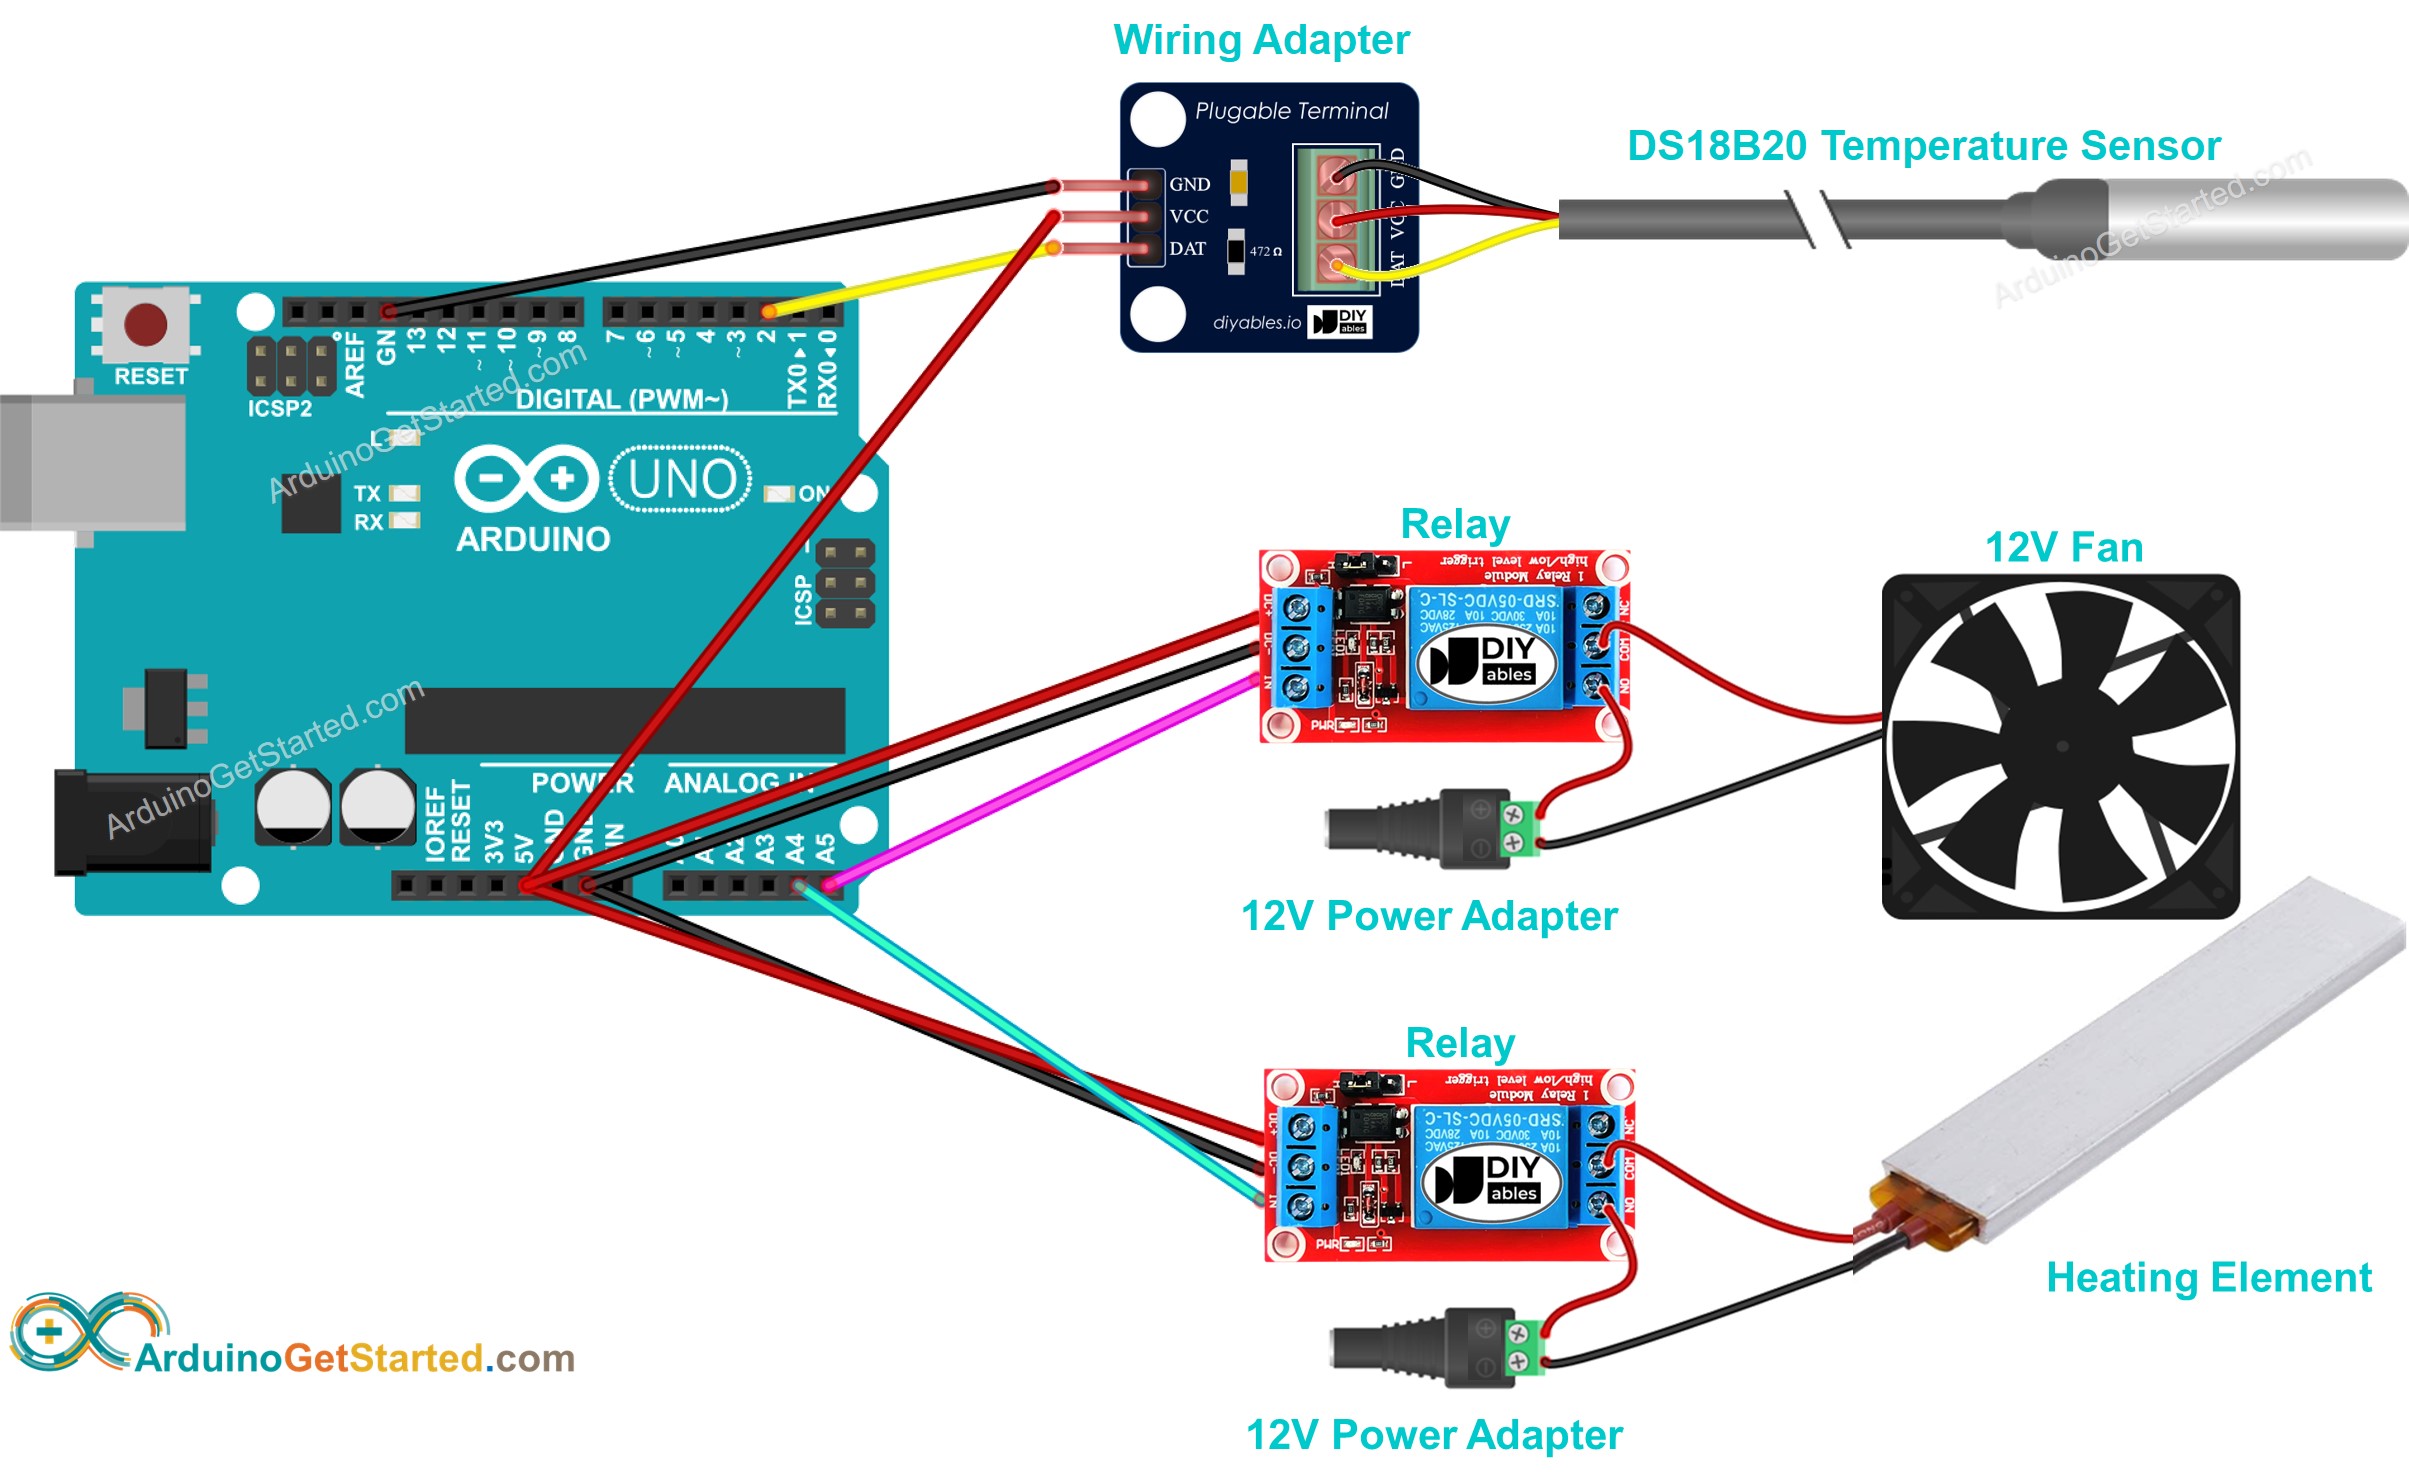
Wiring Diagram

This image is created using Fritzing. Click to enlarge image
Please note that, for the sake of simplicity, the above diagram shows two 12V DC power adapters, but in practice, you can use a single 12V DC power adapter for both the fan and heating element.
Arduino Code
In the above code, the Arduino turn on the fan when the temperature exceeds 25°C, and keep the fan on until the temperature is below 20°C
Quick Steps
- Connect Arduino to PC via USB cable
- Open Arduino IDE, select the right board and port
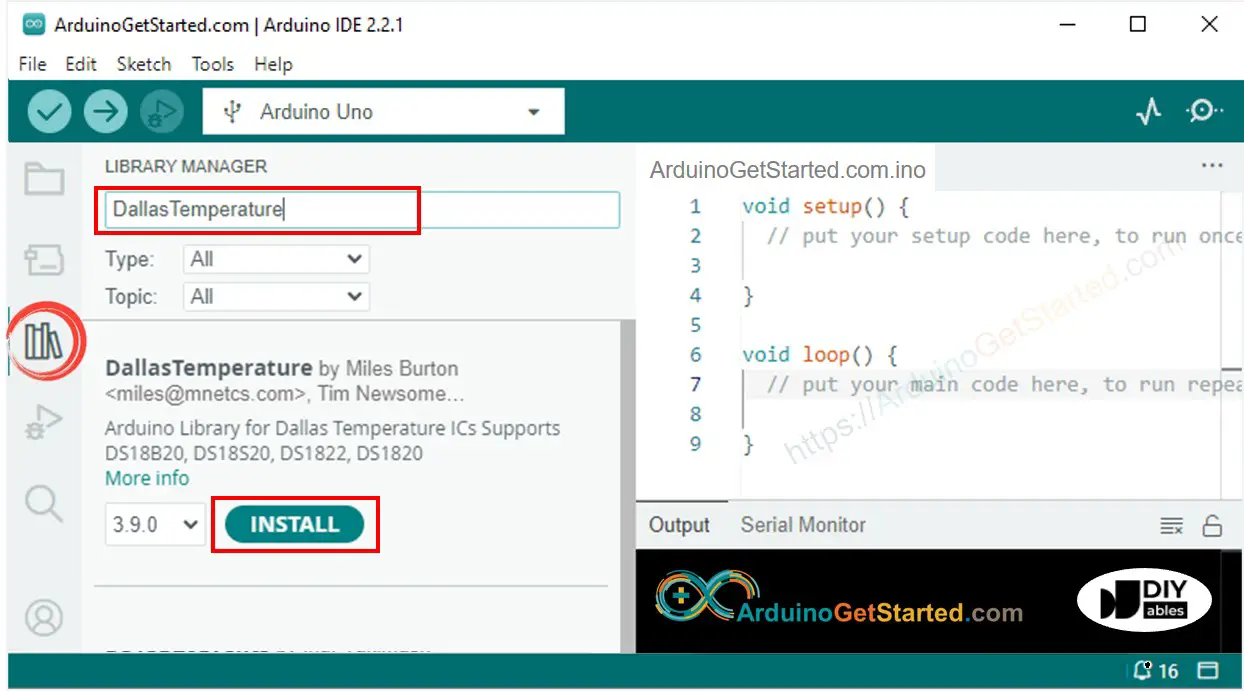
- Navigate to the Libraries icon on the left bar of the Arduino IDE.
- Search “DallasTemperature”, then find the DallasTemperature library by Miles Burton.
- Click Install button to install DallasTemperature library.

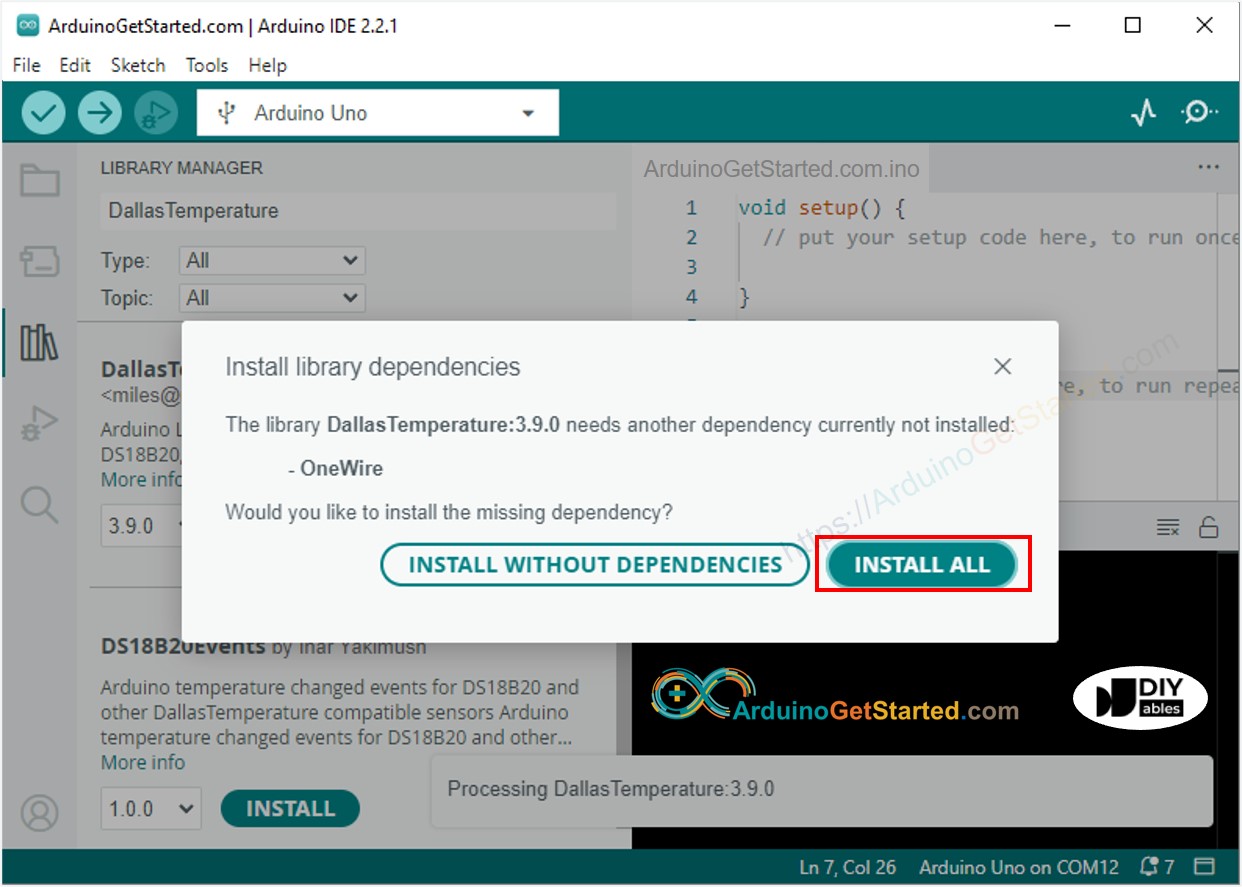
- You will be asked to install the library dependency
- Click Install All button to install OneWire library.

- Copy the above code and open with Arduino IDE
- Click Upload button on Arduino IDE to upload code to Arduino
- Make enviroment around sensor hotter or colder
- See the state of fan and heating element
Video Tutorial
We are considering to make the video tutorials. If you think the video tutorials are essential, please subscribe to our YouTube channel to give us motivation for making the videos.
