Arduino - LCD 20x4
In this Arduino LCD 20x4 I2C tutorial, we will learn how to connect an LCD 20x4 (Liquid Crystal Display) to the Arduino board via I2C Interface.
Hardware Required
Or you can buy the following kits:
| 1 | × | DIYables STEM V3 Starter Kit (Arduino included) | |
| 1 | × | DIYables Sensor Kit (30 sensors/displays) | |
| 1 | × | DIYables Sensor Kit (18 sensors/displays) |
Additionally, some links direct to products from our own brand, DIYables .
About LCD I2C 20x4
Pinout
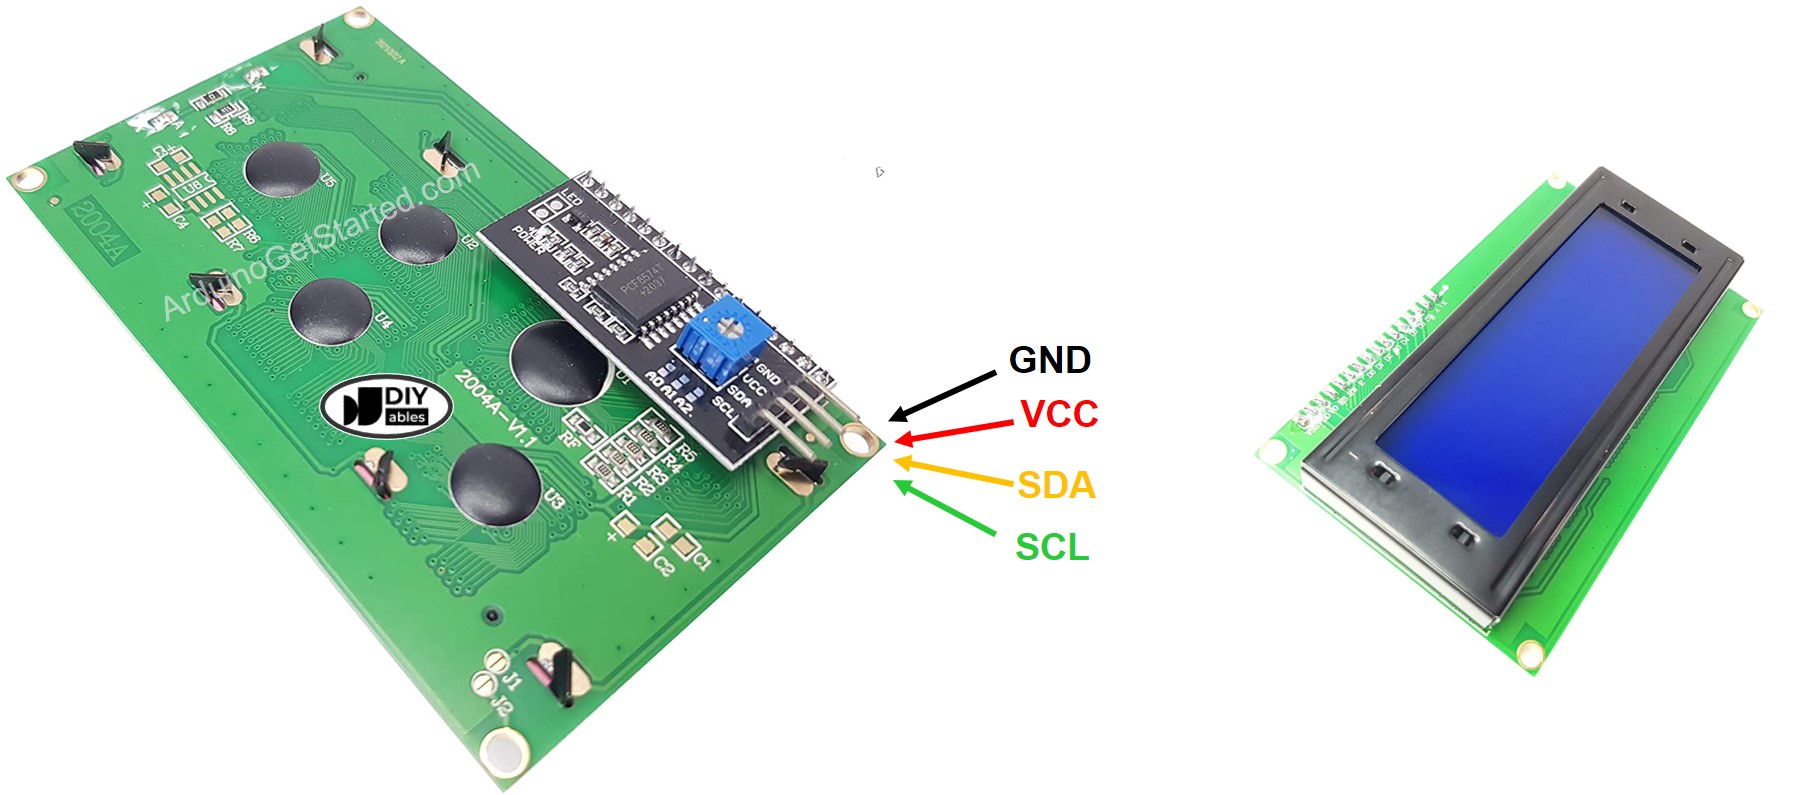
LCD 20x4 I2C uses I2C interface, so it has 4 pins:
- GND pin: needs to be connected to GND (0V).
- VCC pin: the power supply for the LCD, needs to be connected to VCC (5V).
- SDA pin: I2C data signal
- SCL pin: I2C clock signal
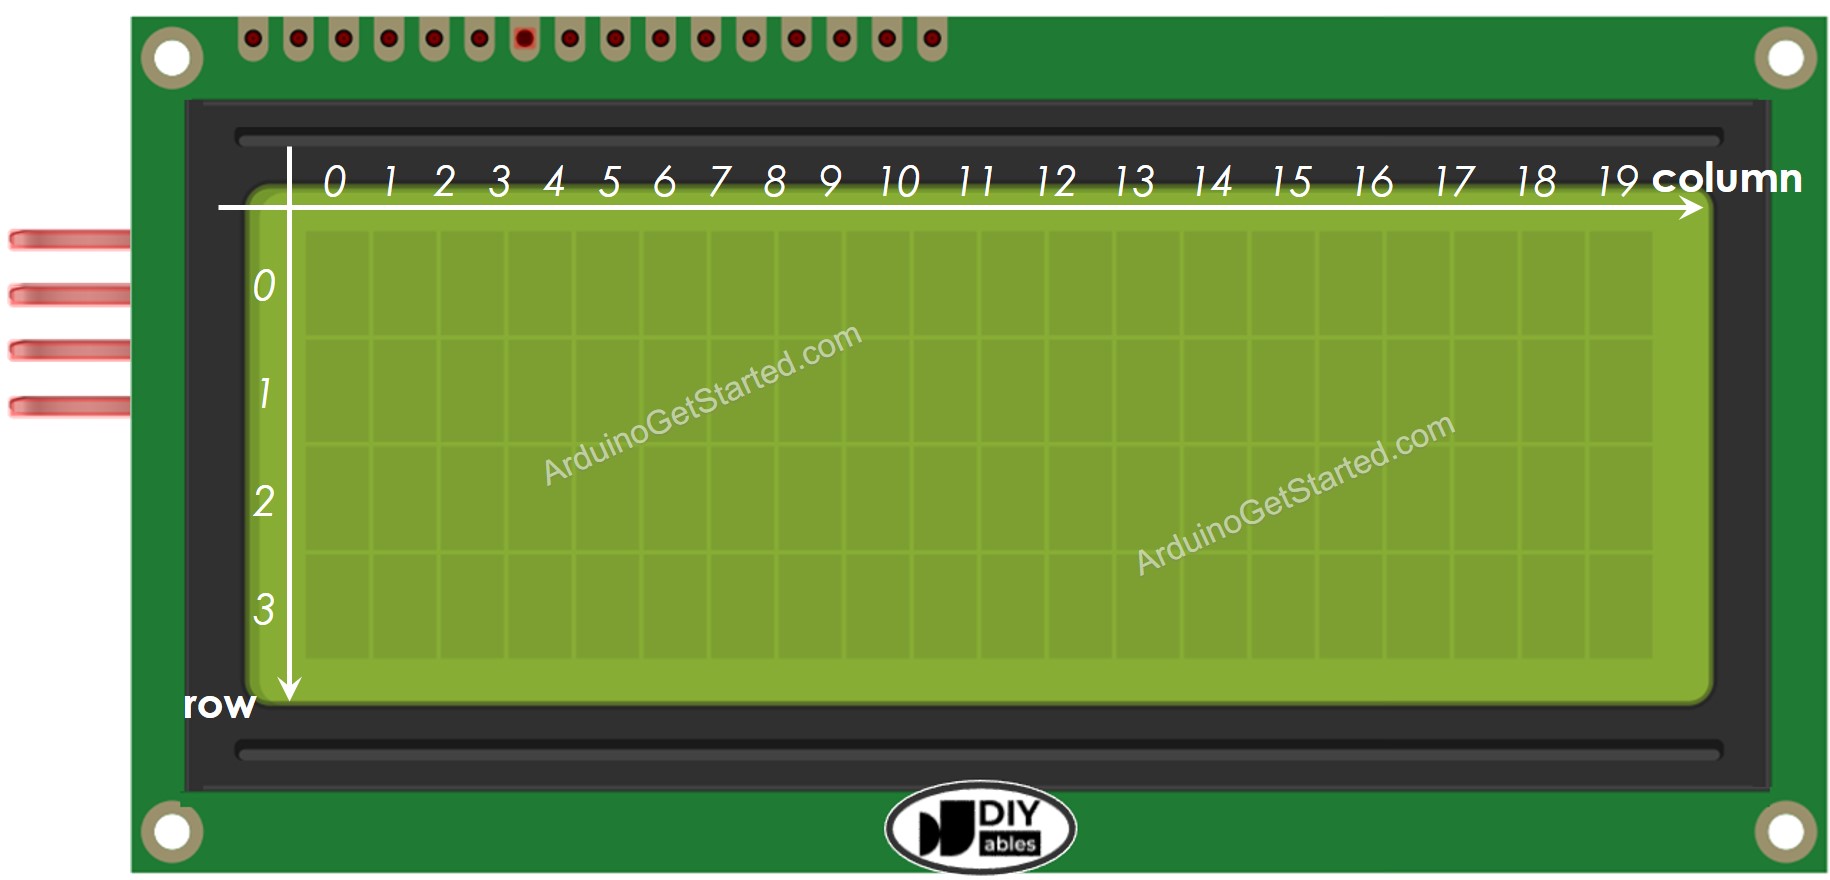
LCD Coordinate
LCD I2C 20x4 includes 20 columns and 4 rows. the conlums and rows are indexed from 0.
Wiring Diagram

This image is created using Fritzing. Click to enlarge image
| LCD I2C | Arduino Uno, Nano | Arduino Mega |
|---|---|---|
| Vin | 5V | 5V |
| GND | GND | GND |
| SDA | A4 | 20 |
| SCL | A5 | 21 |
How To Program For LCD I2C
Thanks to the LiquidCrystal_I2C library, the using LCD is a piece of cake.
- Include the library:
- Declare a LiquidCrystal_I2C object with I2C address, the number of columns, the number of rows:
- Initialize the LCD.
- Move cursor to the desired position (column_index, row_index)
- Print a message to the LCD.
※ NOTE THAT:
The I2C address of LCD can vary according to the manufacturers. In the code, we used 0x27 that is specified by DIYables manufacturer
Arduino Code
Quick Steps
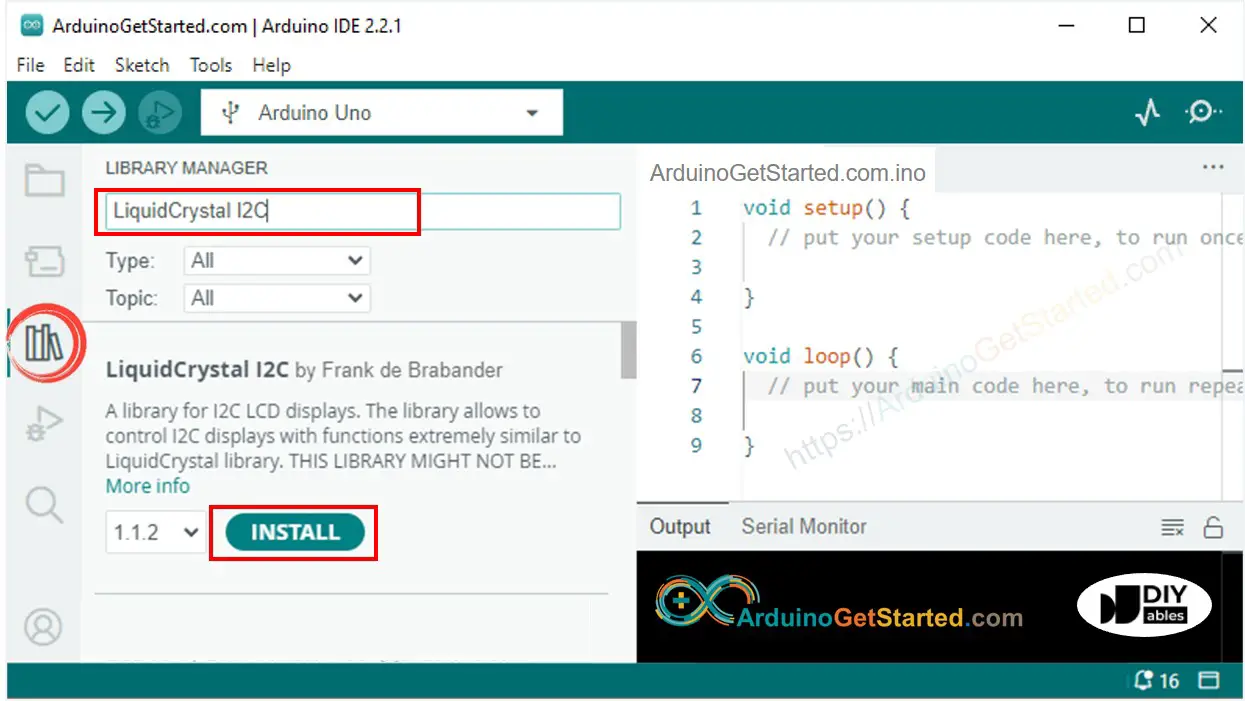
- Navigate to the Libraries icon on the left bar of the Arduino IDE.
- Search "LiquidCrystal I2C", then find the LiquidCrystal_I2C library by Frank de Brabander
- Click Install button to install LiquidCrystal_I2C library.
- Copy the above code and open with Arduino IDE
- Click Upload button on Arduino IDE to upload code to Arduino
- See the result on LCD
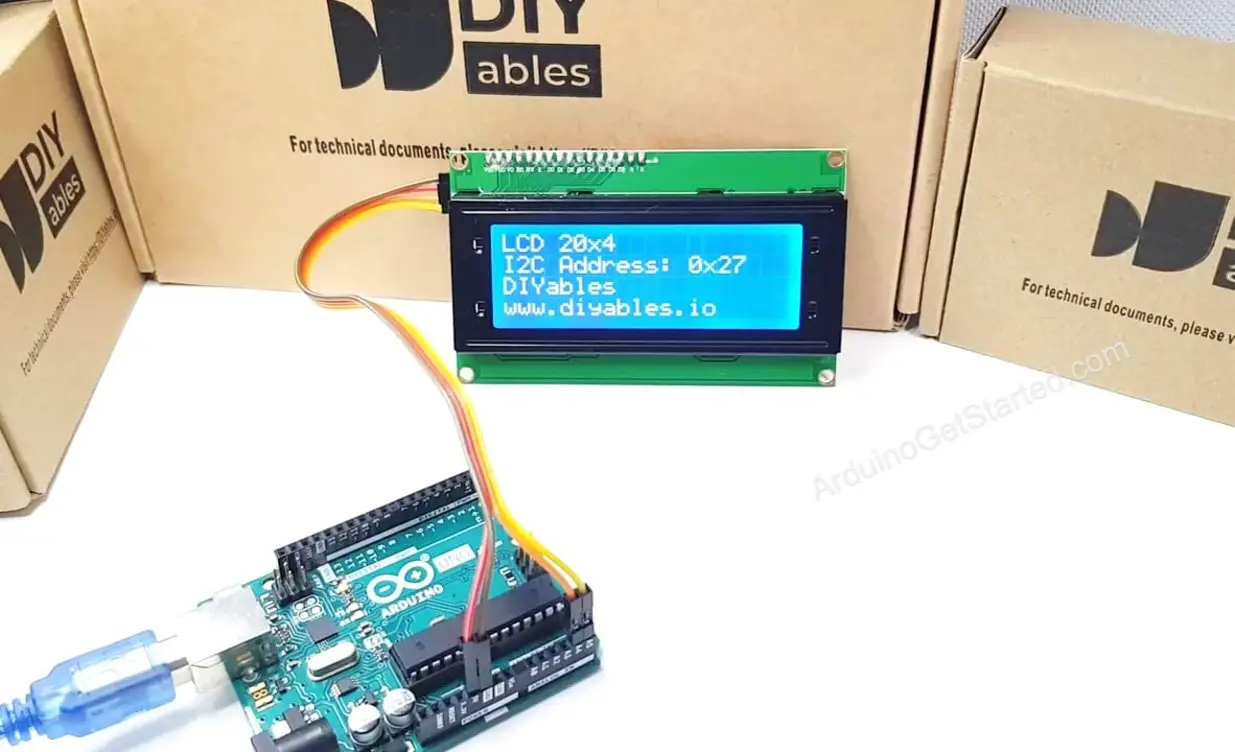
- Try modifying text and position
LCD I2C Selection Guide
There are various types of LCD I2C displays available on the market, differing mainly in background color and the I2C address selection option.
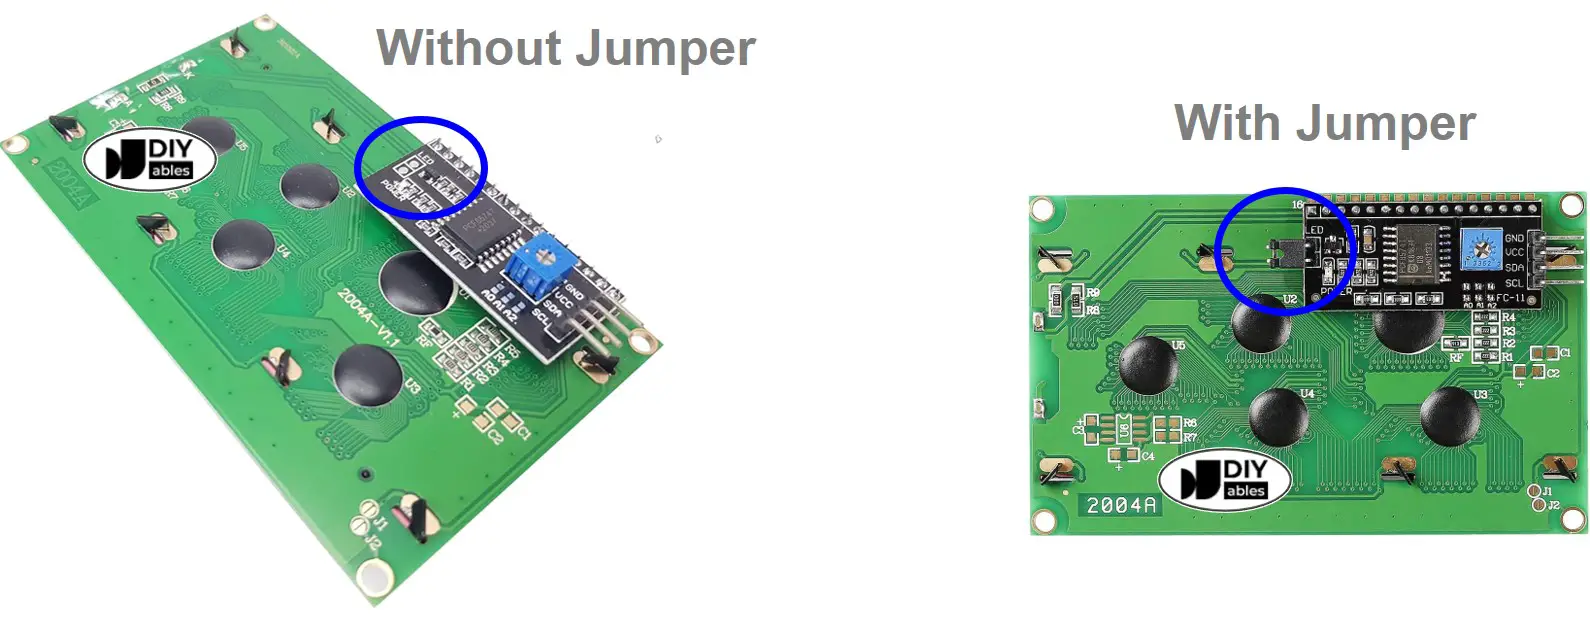
For Color Options: Typically, there are two background colors available: green and blue.
For I2C address selection option:
- With a jumper: This option allows switching between two I2C addresses, which is useful if you are using two LCDs simultaneously in the code. However, when your code uses only one LCD is used, it can cause confusion with I2C addresses. And it also takes up more space.
- Without a jumper: This configuration has a fixed I2C address, making it very convenient when your project involves using only one LCD display. Since most applications use a single LCD, this type is highly recommended.
Video Tutorial
We are considering to make the video tutorials. If you think the video tutorials are essential, please subscribe to our YouTube channel to give us motivation for making the videos.
