ezLED Library - Multiple LED Example
This tutorial shows how to use an example of ezLED library that controls multiple LEDs
Hardware Required
Disclosure: Some links in this section are Amazon affiliate links. If you make a purchase through these links, we may earn a commission at no extra cost to you.
Additionally, some links direct to products from our own brand, DIYables .
Additionally, some links direct to products from our own brand, DIYables .
About LED
- Refer to Arduino - Led Blink tutorial
About ezLED Library
- Refer to Arduino - ezLED Library Reference
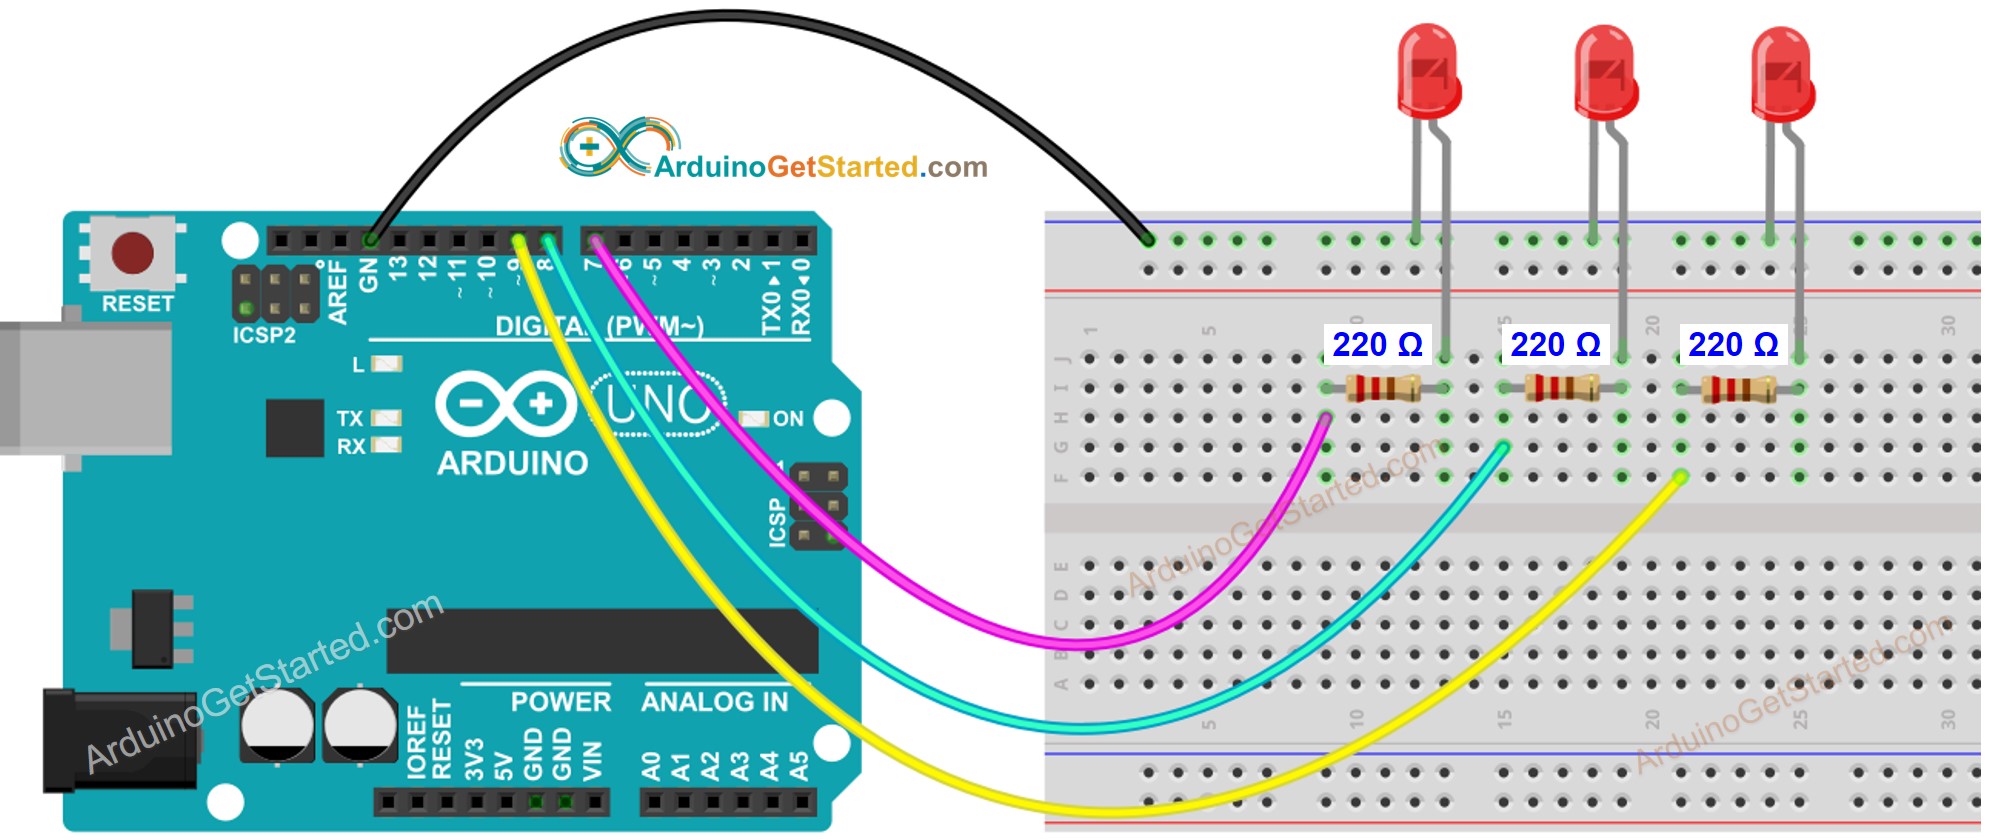
Wiring Diagram

This image is created using Fritzing. Click to enlarge image
Arduino Code
Quick Steps
- Install ezLED library. See How To
- Connect Arduino to PC via USB cable
- Open Arduino IDE, select the right board and port
- On Arduino IDE, Go to File Examples ezLED MultipleLED example
/*
Created by ArduinoGetStarted.com
This example code is in the public domain
Tutorial page: https://arduinogetstarted.com/library/led/example/arduino-multiple-led
This example blinks 3 LED:
+ with different blink time
+ blink one LED forever
+ blink one LED in 5 seconds
+ blink one LED in 10 times
+ without using delay() function. This is a non-blocking example
*/
#include <ezLED.h> // ezLED library
#define PIN_LED_1 7
#define PIN_LED_2 8
#define PIN_LED_3 9
ezLED led1(PIN_LED_1); // create ezLED object that attach to pin PIN_LED_1
ezLED led2(PIN_LED_2); // create ezLED object that attach to pin PIN_LED_2
ezLED led3(PIN_LED_3); // create ezLED object that attach to pin PIN_LED_3
void setup() {
Serial.begin(9600);
led1.blink(500, 500); // 500ms ON, 500ms OFF, blink immediately
led2.blinkInPeriod(100, 100, 5000); // 100ms ON, 100ms OFF, blink in 5 seconds, blink immediately
led3.blinkNumberOfTimes(250, 750, 10); // 250ms ON, 750ms OFF, repeat 10 times, blink immediately
}
void loop() {
led1.loop(); // MUST call the led1.loop() function in loop()
led2.loop(); // MUST call the led2.loop() function in loop()
led3.loop(); // MUST call the led3.loop() function in loop()
Serial.print("LED 1");
printState(led1.getState());
Serial.print("LED 2");
printState(led2.getState());
Serial.print("LED 3");
printState(led3.getState());
// DO SOMETHING HERE
}
void printState(int state) {
if (state == LED_DELAY)
Serial.println(" DELAYING");
else if (state == LED_BLINKING)
Serial.println(" BLINKING");
else if (state == LED_IDLE)
Serial.println(" BLINK ENDED");
}
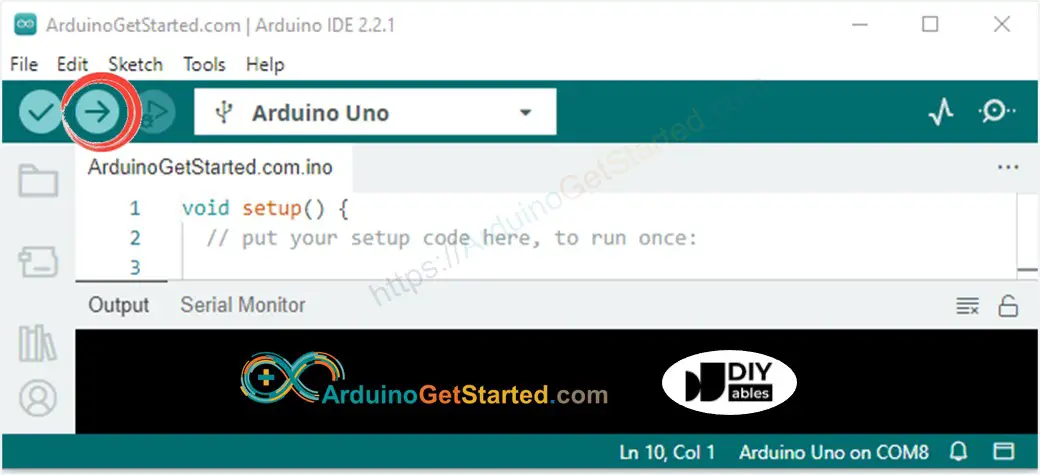
- Click Upload button on Arduino IDE to upload code to Arduino

- Open Serial Monitor to see result:
COM6
LED 1 BLINKING
LED 2 BLINKING
LED 3 BLINKING
LED 1 BLINKING
LED 2 BLINKING
LED 3 BLINKING
LED 1 BLINKING
LED 2 BLINK ENDED
LED 3 BLINKING
LED 1 BLINKING
LED 2 BLINK ENDED
LED 3 BLINKING
LED 1 BLINKING
LED 2 BLINK ENDED
LED 3 BLINKING
LED 1 BLINKING
LED 2 BLINK ENDED
LED 3 BLINKING
Autoscroll
Clear output
9600 baud
Newline
Code Explanation
Read the line-by-line explanation in comment lines of source code!
