Arduino - Serial Monitor
Hardware Required
Or you can buy the following kits:
| 1 | × | DIYables STEM V3 Starter Kit (Arduino included) | |
| 1 | × | DIYables Sensor Kit (30 sensors/displays) | |
| 1 | × | DIYables Sensor Kit (18 sensors/displays) |
Additionally, some links direct to products from our own brand, DIYables .
About Serial Monitor
Serial Monitor is one of the tools in Arduino IDE. It is used for two purposes:
- Arduino → PC: Receives data from Arduino and display data on screen. This is usually used for debugging and monitoring
- PC → Arduino: Sends data (command) from PC to Arduino.
Data is exchanged between Serial Monitor and Arduino via USB cable, which is also used to upload the code to Arduino. Therefore, To use Serial Monitor, we MUST connect Arduino and PC via this cable.
How To Use Serial Monitor
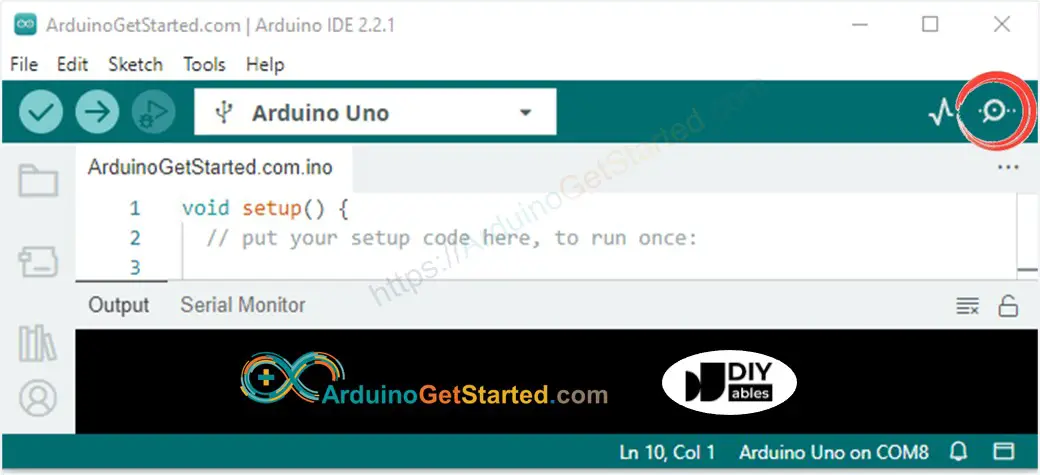
Open Serial Monitor
Click the Serial Monitor icon

Items on Serial Monitor
- Output console: display data received from Arduino.
- Autoscroll checkbox: option to select between automatically scroll and not scroll.
- Show timestamp checkbox: option to show timestamp prior to data displayed on Serial Monitor.
- Clear output button: clear all text on the output console.
- Baud rate selection: select communication speed (baud rate) between Arduino and PC. This value MUST be the same as the value used in Arduino code (in Serial.begin() function).
※ NOTE THAT:
When we select baud rate (even the value is not changed), Arduino is reset. Therefore, this is one way to reset Arduino.
- Textbox: user can type characters to send to Arduino
- Ending selection: select the ending characters appended to data sent to Arduino. Selection includes:
- No line ending: append nothing
- Newline: append newline (LF, or '\n') character
- Carriage return: append carriage return (CR, or '\r') character
- Both NL and CR: append both newline and carriage return (CRLF, or '\r\n') characters
- Send button: when the button is pressed, Serial Monitor sends data in textbox plus the ending characters to Arduino
Arduino To PC
To send data from Arduino to PC, we need to use the following Arduino code:
- Set baud rate and begin Serial port by using Serial.begin() function
- Send data to Serial Monitor using one of the following functions: Serial.print(), Serial.println(), Serial.write(). For example, send “Hello World!” to Serial Monitor
Example Use
In this example, we will send the “ArduinoGetStarted.com” from Arduino to Serial Monitor every second
Quick Steps
- Copy the above code and open with Arduino IDE
- Click Upload button on Arduino IDE to upload code to Arduino
- Open Serial Monitor
- Select baurate 9600
- See the output on Serial Monitor
- Try changing Serial.println() function to Serial.print() function
PC To Arduino
How to send data from PC to Aduino and read it on Arduino
You will type text on Serial Monitor and then click Send button.
Arduino reads data and process it. To read data, we need to use the following Arduino code:
- Set baud rate and begin Serial port
- Check whether data is available or not
- Read data from Serial port using one of the following functions: Serial.read(), Serial.readBytes(), Serial.readBytesUntil(), Serial.readString(), Serial.readStringUntil(). For example:
Example Use
In this example, we will send the commands from Serial Monitor to Arduino to turn on/off a built-in LED. The commands include:
- “ON”: turn on LED
- “OFF”: turn off LED
⇒ When sending a command, we will append a newline character ('\n') by selecting “newline” option on Serial Monitor. Arduino will read data until it meets the newline character. In this case, the newline character is called delimiter.
Quick Steps
- Copy the above code and open with Arduino IDE
- Click Upload button on Arduino IDE to upload code to Arduino
- Open Serial Monitor
- Select baurate 9600 and newline option
- Type “ON” or “OFF” and click Send button
- See the built-in LED's state on Arduino board. We will see LED's state is ON or OFF, respectively.
- We also see LED's state on Serial Monitor
- Try typing “ON” or “OFF” command some times.
Video Tutorial
We are considering to make the video tutorials. If you think the video tutorials are essential, please subscribe to our YouTube channel to give us motivation for making the videos.
