ezButton Library - Single Button All Example
Hardware Required
Disclosure: Some links in this section are Amazon affiliate links. If you make a purchase through these links, we may earn a commission at no extra cost to you.
Additionally, some links direct to products from our own brand, DIYables .
Additionally, some links direct to products from our own brand, DIYables .
Wiring Diagram
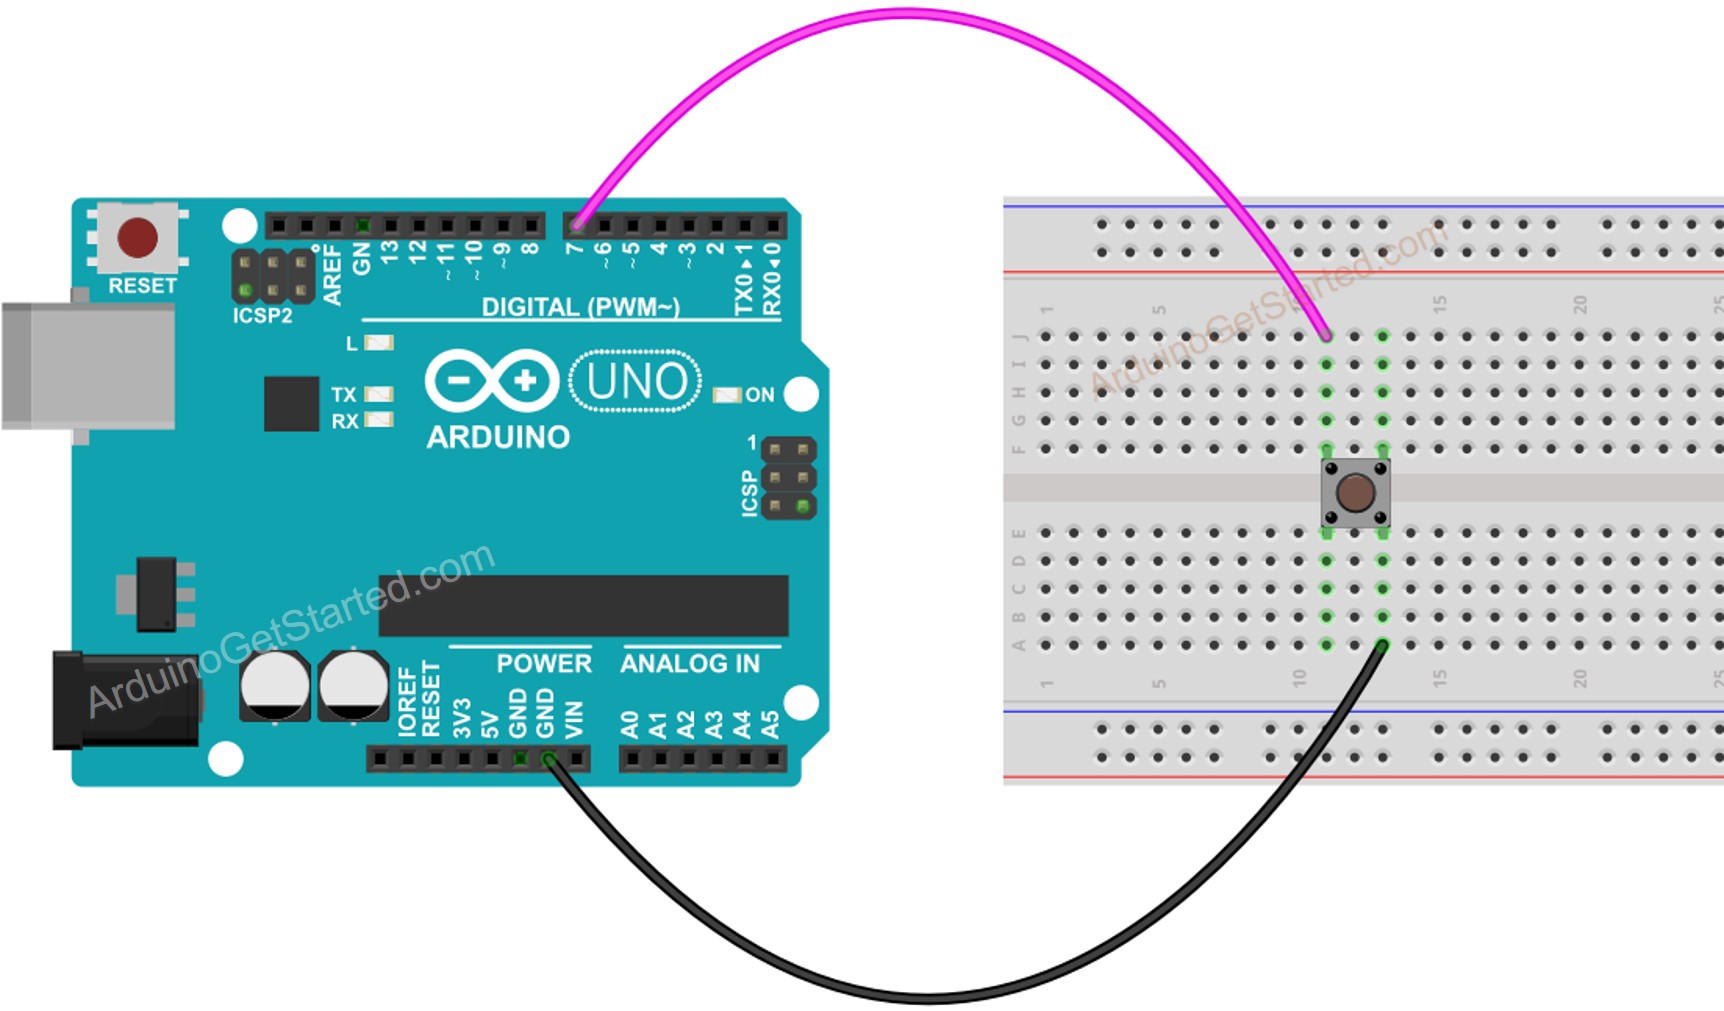
This image is created using Fritzing. Click to enlarge image
Arduino Code
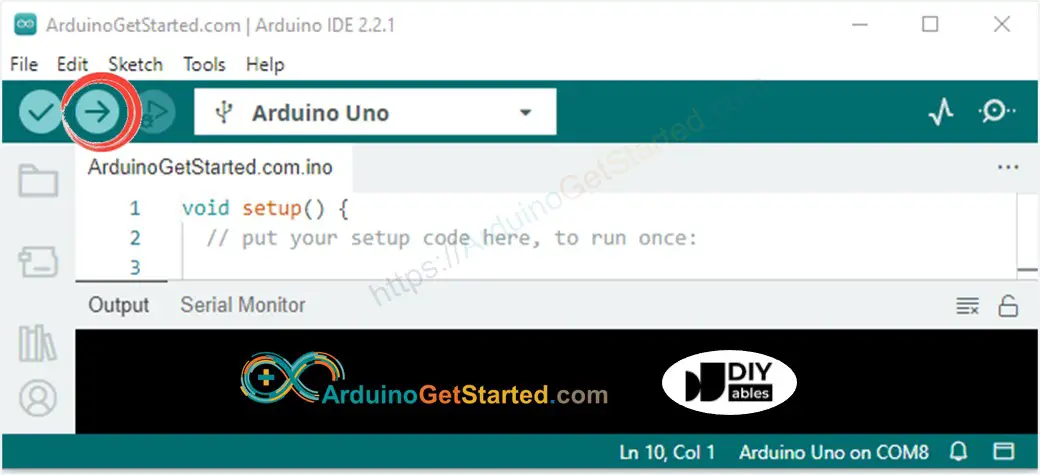
Quick Steps
- Install ezButton library. See How To
- Connect Arduino to PC via USB cable
- Open Arduino IDE, select the right board and port
- On Arduino IDE, Go to File Examples ezButton 04.SingleButtonAll example
/*
* Created by ArduinoGetStarted.com
*
* This example code is in the public domain
*
* Tutorial page: https://arduinogetstarted.com/tutorials/arduino-button-library
*
* This example:
* + uses debounce for a button.
* + reads state of a button
* + detects the pressed and released events of a button
*/
#include <ezButton.h>
ezButton button(7); // create ezButton object that attach to pin 7;
void setup() {
Serial.begin(9600);
button.setDebounceTime(50); // set debounce time to 50 milliseconds
}
void loop() {
button.loop(); // MUST call the loop() function first
int btnState = button.getState();
Serial.println(btnState);
if(button.isPressed())
Serial.println("The button is pressed");
if(button.isReleased())
Serial.println("The button is released");
}
- Click Upload button on Arduino IDE to upload code to Arduino
- Open Serial Monitor to see result:
8
Serial.println("Hello World!");
Message (Enter to send message to 'Arduino Uno' on 'COM15')
New Line
9600 baud
Code Explanation
Read the line-by-line explanation in comment lines of source code!