Arduino - Sound Sensor
The sound sensor is capable of detecting the presence of sound in the surrounding environment. It can be used to create sound-reactive projects, such as clap-activated lights or a sound-activated pet feeder.
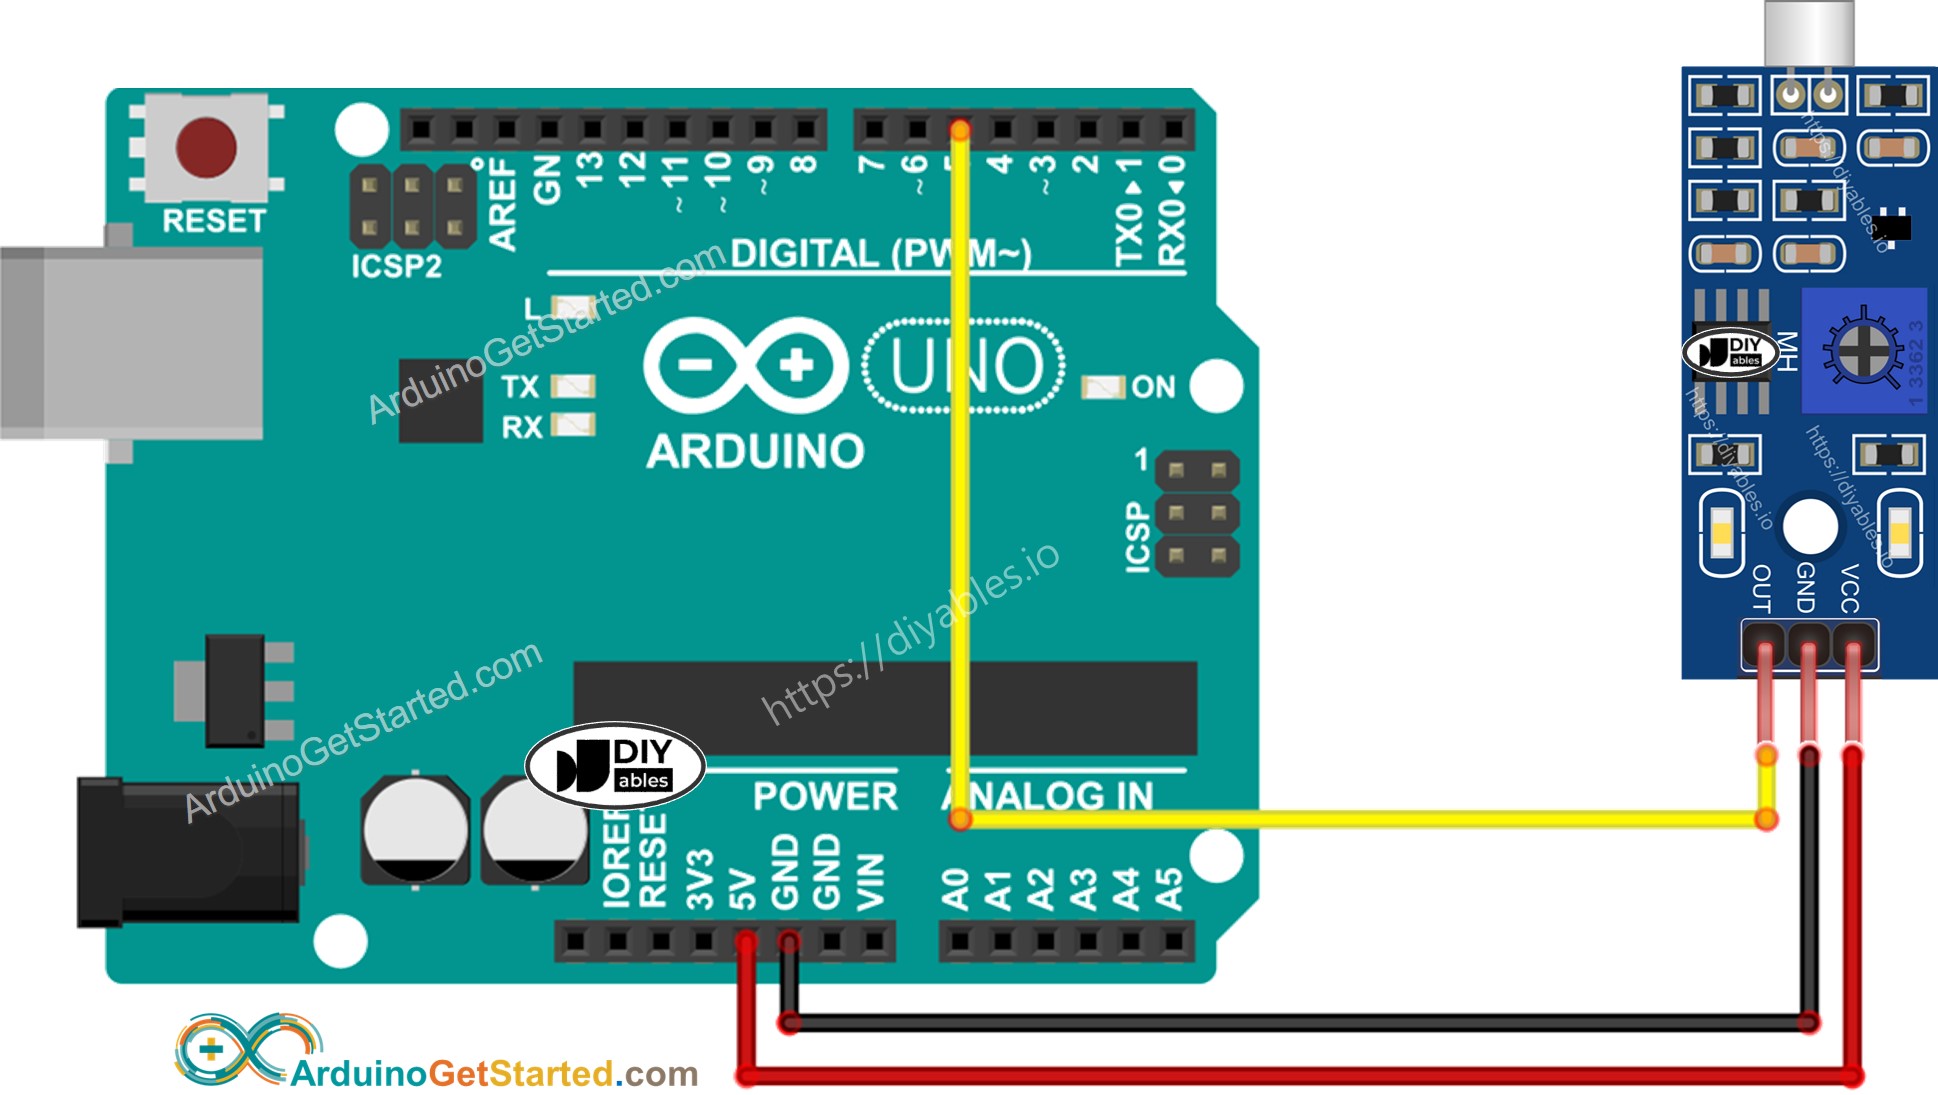
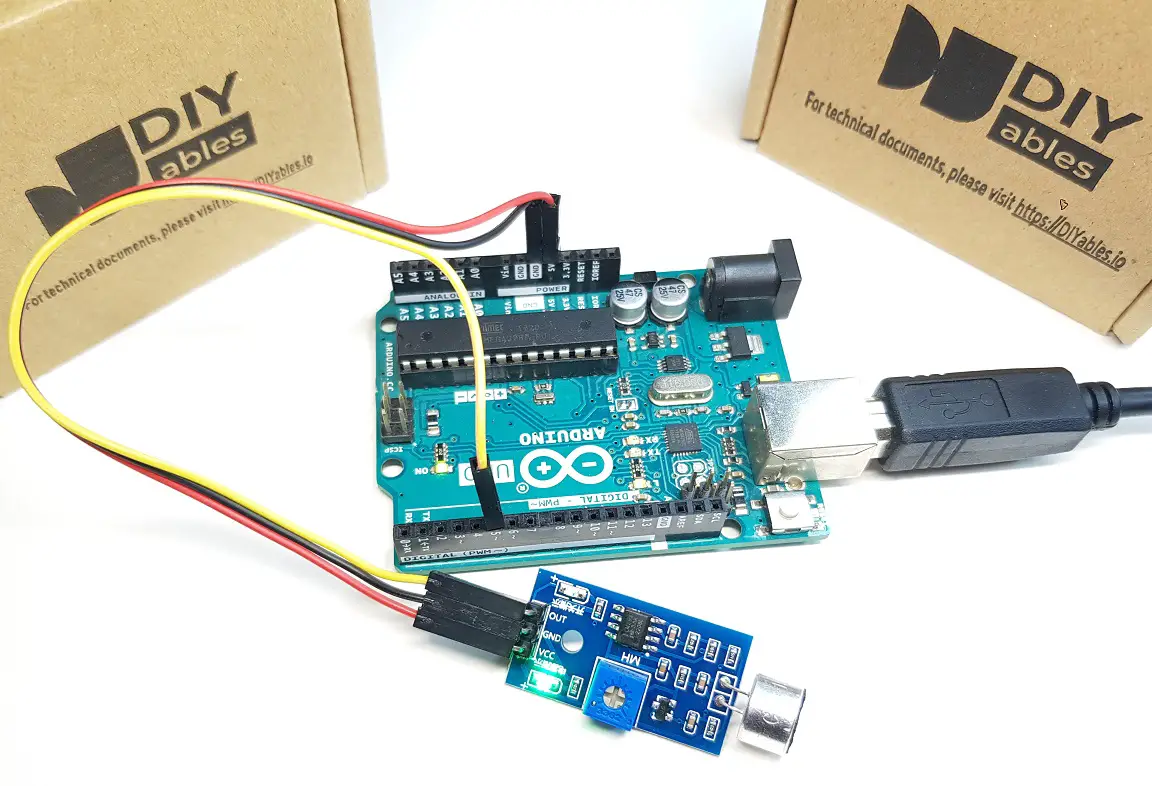
In this tutorial, we are going to learn how to use Arduino and sound sensor to detect the sound. In detail, we will learn:
- How to connect the sound sensor to Arduino
- How to program Arduino to detect the sound using the sound sensor
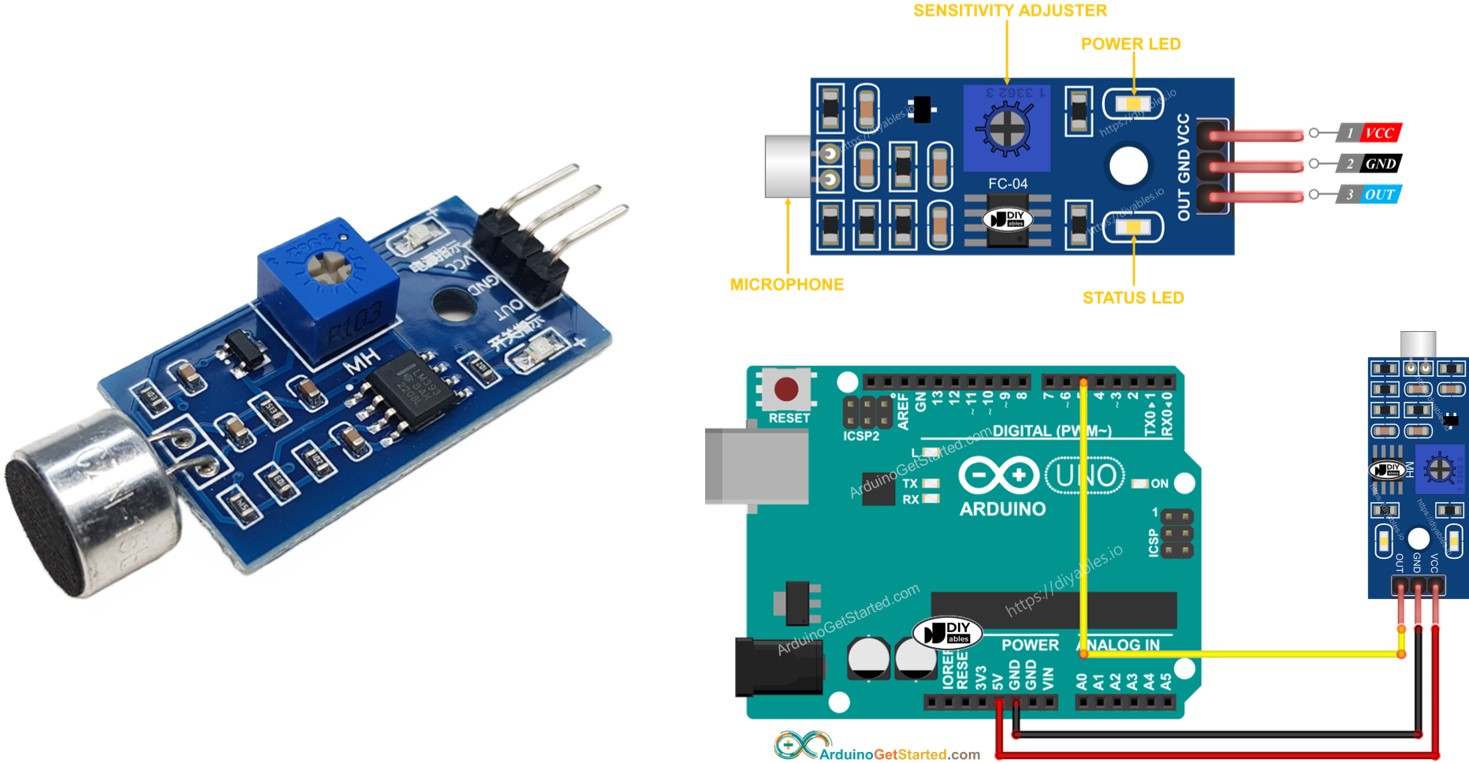
Afterward, you can tweak the code to make it activate an LED or a light (via a relay) when it detects sound, or even make a servo motor rotate.
Hardware Required
Or you can buy the following kits:
| 1 | × | DIYables STEM V3 Starter Kit (Arduino included) | |
| 1 | × | DIYables Sensor Kit (30 sensors/displays) | |
| 1 | × | DIYables Sensor Kit (18 sensors/displays) |
Additionally, some links direct to products from our own brand, DIYables .
About Sound Sensor
The sound sensor can be utilized to detect the presence of sound in the surrounding environment. There are two types of sound sensor module:
- Digital sound sensor module: outputs the digital signal value (ON/OFF)
- Analog sound sensor module: outputs both analog and digital signal value
The sensitivity of digital output can be addjusted by using a built-in potentiometer.
The Digital Sound Sensor Pinout
The digital sound sensor includes three pins:
- VCC pin: needs to be connected to VCC (3.3V to 5V)
- GND pin: needs to be connected to GND (0V)
- OUT pin: is an output pin: HIGH if quiet and LOW if sound is detected. This pin needs to be connected to Arduino's input pin.
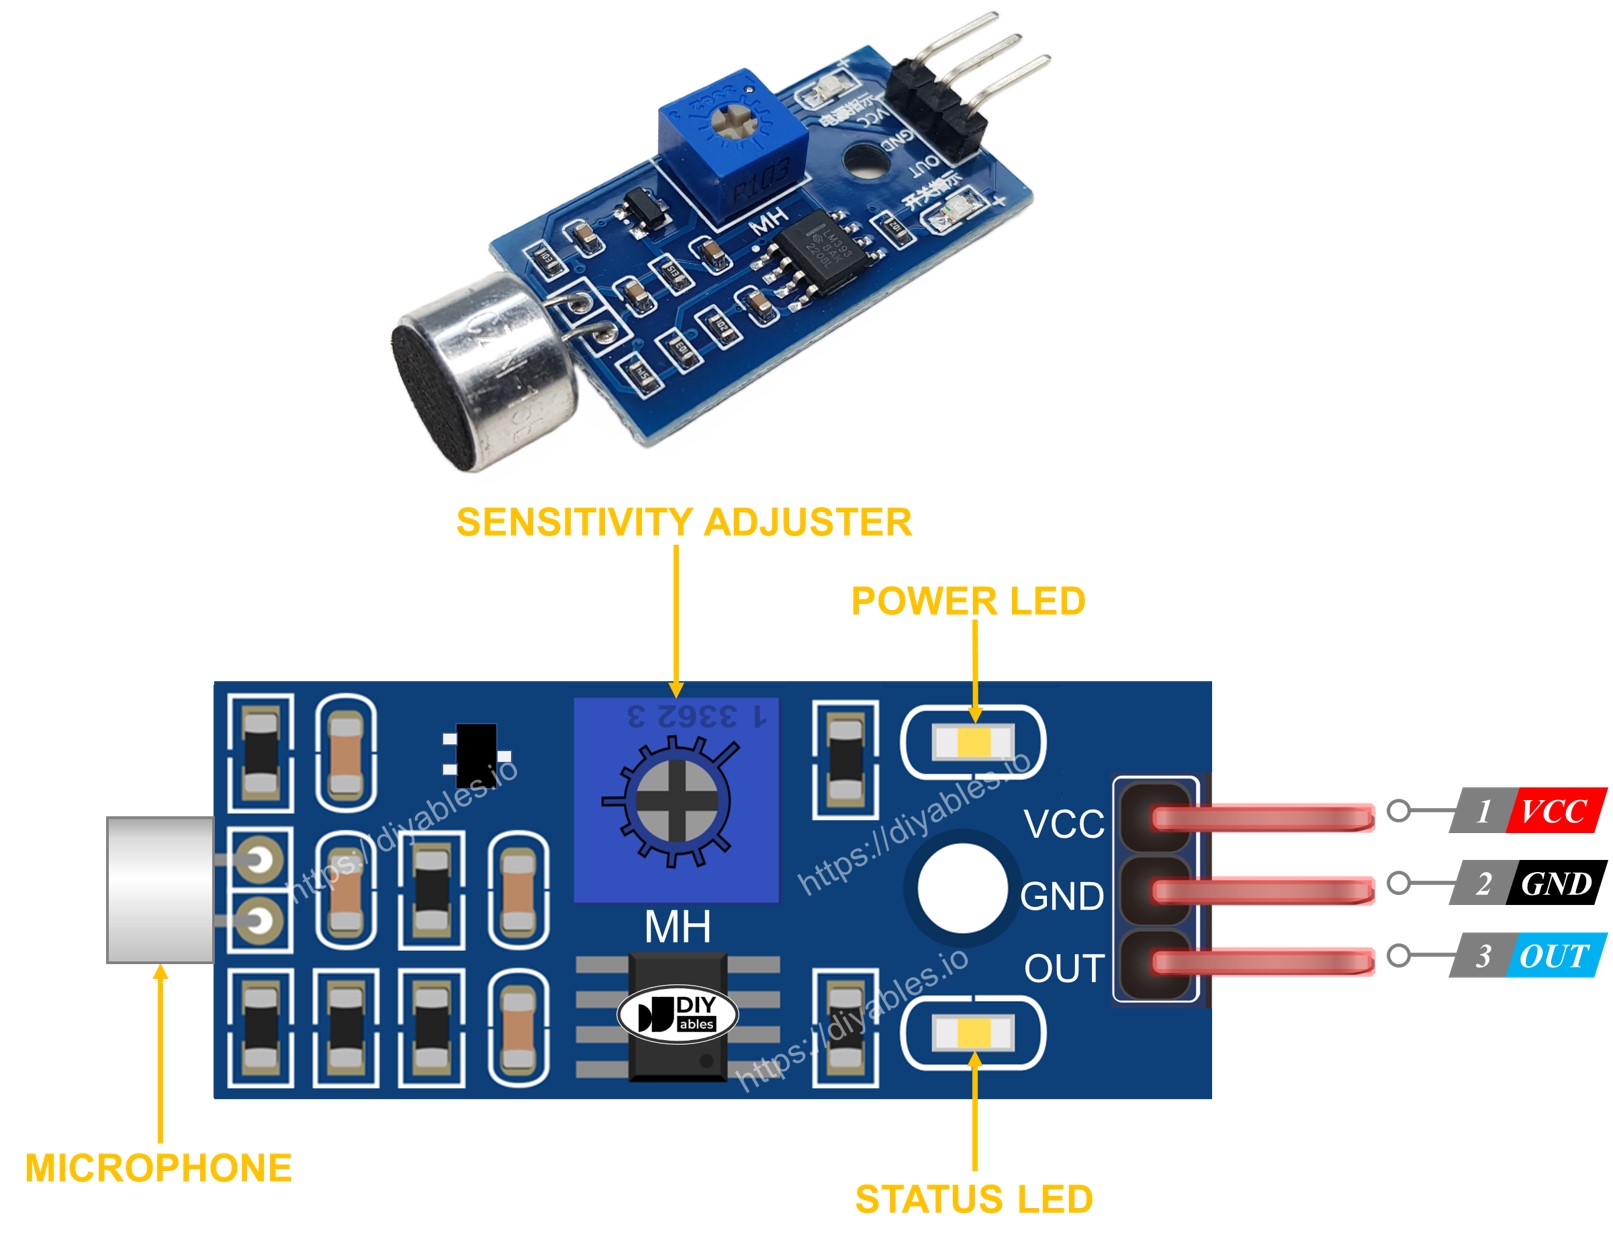
The sound sensor also has a built-in potentiometer, which can be used to addjust the sensitivity of the sensor. Further more, it has two LED indicators:
- One LED indicator for power
- One LED indicator for the sound state: on when sound is present, off when quiet
The Analog Sound Sensor Pinout
The analog sound sensor includes four pins:
- + pin: needs to be connected to 5V
- G pin: needs to be connected to GND (0V)
- DO pin: is a digital output pin: HIGH if quiet and LOW if sound is detected. This pin needs to be connected to Arduino's digital input pin.
- AO pin: is an analog output pin: outputs the analog value indicated sound level. This pin needs to be connected to Arduino's analog input pin.
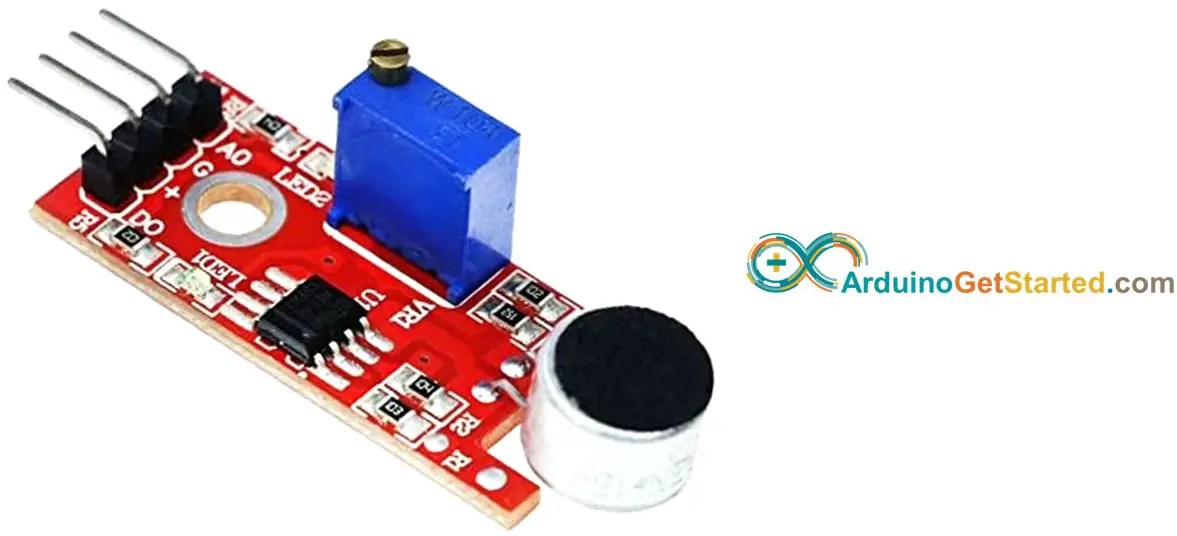
The analog sound sensor has a handy built-in potentiometer that lets you easily adjust its sensitivity for the digital output. Additionally, it comes with two LED indicators:
- One LED indicator shows the power status.
- Another LED indicator indicates the sound state, turning on when sound is detected and off when it's quiet.
How It Works
The module has a built-in potentiometer for setting the sound sensitivity.
- When the sound is detected, the output pin of the sensor is LOW
- When the sound is NOT detected, the output pin of the sensor is HIGH
How To Program For Sound Sensor
- Initializes the Arduino pin to the digital input mode by using pinMode() function. For example, pin 5
- Reads the state of the Arduino pin by using digitalRead() function.
Arduino Code - Detecting the sound
Quick Steps
- Copy the above code and open with Arduino IDE
- Click Upload button on Arduino IDE to upload code to Arduino
- Clap your hand in front of the sound sensor
- See the result on Serial Monitor.
Please keep in mind that if you notice the LED status remaining on constantly or off even when there is sound, you can adjust the potentiometer to fine-tune the sound sensitivity of the sensor.
Now we can customize the code to activate an LED or a light when sound is detected, or even make a servo motor rotate. You can find more information and step-by-step instructions in the tutorials provided at the end of this tutorial.
Troubleshooting
If the sound sensor is not working properly, try the following steps:
- Reduce vibrations: The sound sensor is also sensitive to mechanical vibrations and wind noise. Mounting the sound sensor on a solid surface can help minimize these vibrations.
- Consider the sensing range: Keep in mind that this sound sensor has a short sensing range, around 10 inches. To obtain accurate readings, you will need to make a noise closer to the sound sensor.
- Check the power supply: Ensure that the power supply is clean, as the sound sensor is sensitive to power supply noise due to being an analog circuit.
Video Tutorial
We are considering to make the video tutorials. If you think the video tutorials are essential, please subscribe to our YouTube channel to give us motivation for making the videos.

