Arduino - TCP Client
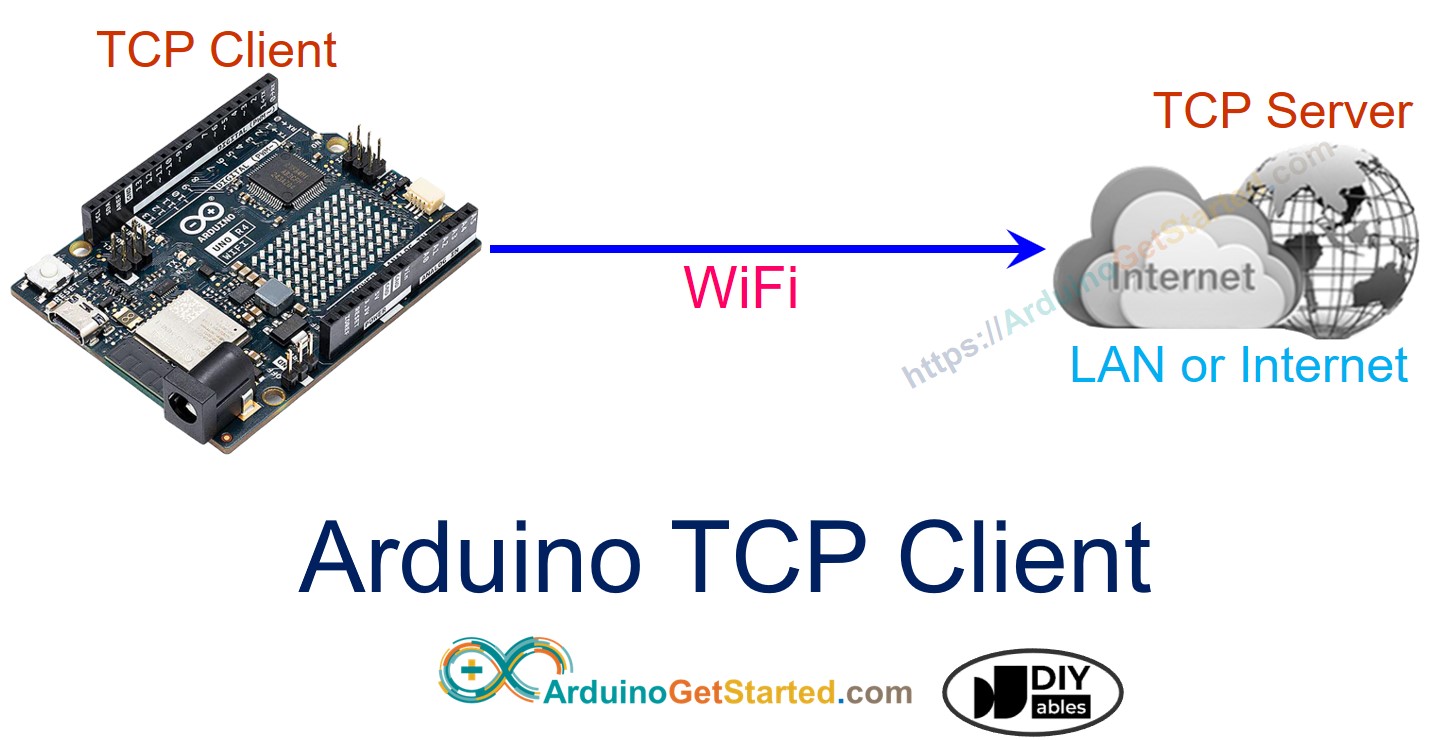
In this tutorial, we will learn how to program the Arduino Uno R4 WiFi as a TCP Client and exchange data with TCP Server..

Hardware Required
Or you can buy the following kits:
| 1 | × | DIYables STEM V4 IoT Starter Kit (Arduino included) | |
| 1 | × | DIYables Sensor Kit (30 sensors/displays) | |
| 1 | × | DIYables Sensor Kit (18 sensors/displays) |
Disclosure: Some links in this section are Amazon affiliate links. If you make a purchase through these links, we may earn a commission at no extra cost to you.
Additionally, some links direct to products from our own brand, DIYables .
Additionally, some links direct to products from our own brand, DIYables .
Arduino Code
/*
* Created by ArduinoGetStarted.com
*
* This example code is in the public domain
*
* Tutorial page: https://arduinogetstarted.com/tutorials/arduino-tcp-client
*/
#include <WiFiS3.h>
const char* WIFI_SSID = "YOUR_WIFI_SSID"; // CHANGE TO YOUR WIFI SSID
const char* WIFI_PASSWORD = "YOUR_WIFI_PASSWORD"; // CHANGE TO YOUR WIFI PASSWORD
const char* TCP_SERVER_ADDR = "192.168.0.26"; // CHANGE TO TCP SERVER'S IP ADDRESS
const int TCP_SERVER_PORT = 1470;
WiFiClient TCP_client;
void setup() {
Serial.begin(9600);
Serial.println("Arduino: TCP CLIENT");
// check for the WiFi module:
if (WiFi.status() == WL_NO_MODULE) {
Serial.println("Communication with WiFi module failed!");
// don't continue
while (true)
;
}
String fv = WiFi.firmwareVersion();
if (fv < WIFI_FIRMWARE_LATEST_VERSION) {
Serial.println("Please upgrade the firmware");
}
Serial.print("Attempting to connect to SSID: ");
Serial.println(WIFI_SSID);
// attempt to connect to WiFi network:
while (WiFi.begin(WIFI_SSID, WIFI_PASSWORD) != WL_CONNECTED) {
delay(10000); // wait 10 seconds for connection:
}
Serial.print("Connected to WiFi ");
Serial.println(WIFI_SSID);
// connect to TCP server
if (TCP_client.connect(TCP_SERVER_ADDR, TCP_SERVER_PORT)) {
Serial.println("Connected to TCP server");
TCP_client.write("Hello!"); // send to TCP Server
TCP_client.flush();
} else {
Serial.println("Failed to connect to TCP server");
}
}
void loop() {
// Read data from server and print them to Serial
if (TCP_client.available()) {
char c = TCP_client.read();
Serial.print(c);
}
if (!TCP_client.connected()) {
Serial.println("Connection is disconnected");
TCP_client.stop();
// reconnect to TCP server
if (TCP_client.connect(TCP_SERVER_ADDR, TCP_SERVER_PORT)) {
Serial.println("Reconnected to TCP server");
TCP_client.write("Hello!"); // send to TCP Server
TCP_client.flush();
} else {
Serial.println("Failed to reconnect to TCP server");
delay(1000);
}
}
}
Quick Step
To do it, follow the below steps:
- Connect Arduino to your PC via USB Type-C cable
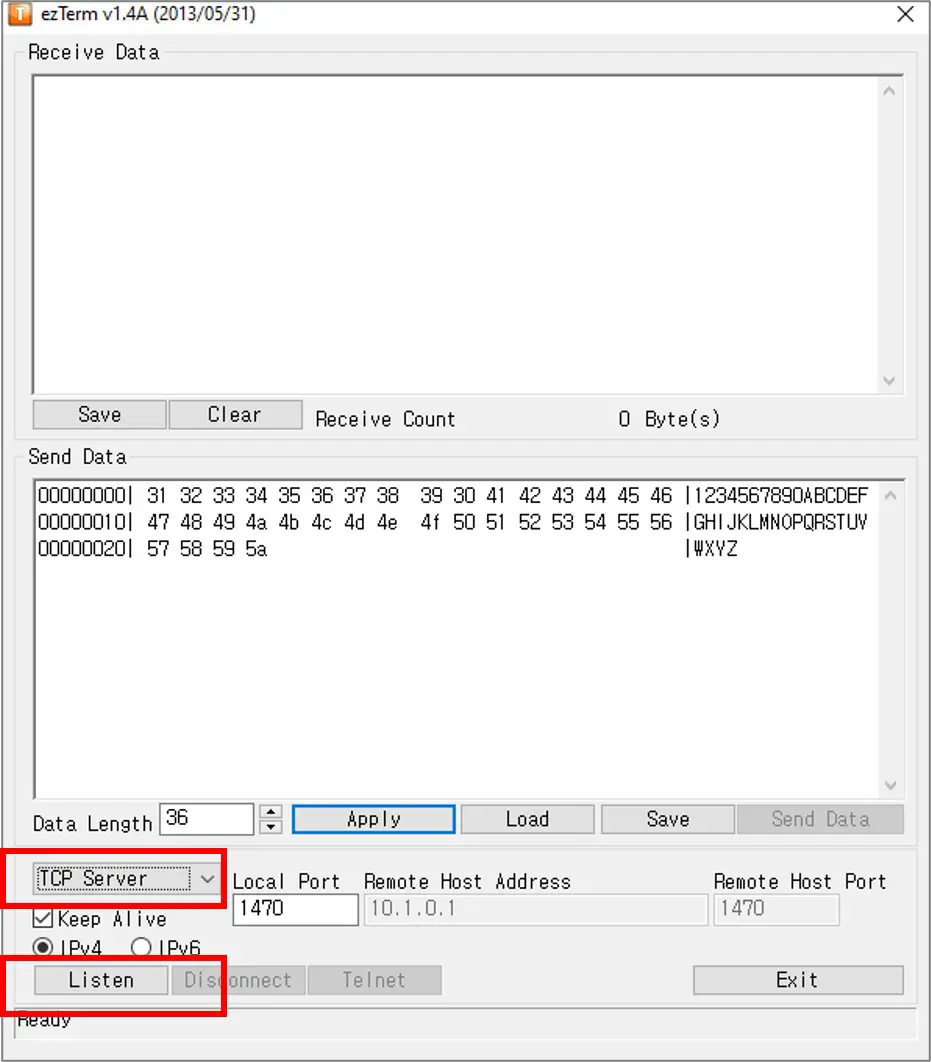
- Install a TCP server software program like ezTerm
- Open the TCP server program and configure it as TCP Server, then click Listen button

- Open Command Prompt on your PC.
- Find the IP address of your PC by running the below command:
ipconfig
- The output looks like below:
Command Prompt
C:\WINDOWS\system32>ipconfig
Windows IP Configuration
Ethernet adapter:
Subnet Mask . . . . . . . . . . . : 255.0.0.0
IPv4 Address. . . . . . . . . . . : 192.168.0.26
Subnet Mask . . . . . . . . . . . : 255.255.255.0
Default Gateway . . . . . . . . . :
- Change the IP address of your TCP Server (Your PC) in the Arduino code. In the example above, it's indicated by 192.168.0.26.
- Compile and upload the code to the Arduino board by clicking on the Upload button in the Arduino IDE.
- Open the Serial Monitor
- You will see the below on Serial Monitor
COM6
Connected to WiFi YOUR_WIFI_SSID
Connected to TCP server
Autoscroll
Clear output
9600 baud
Newline
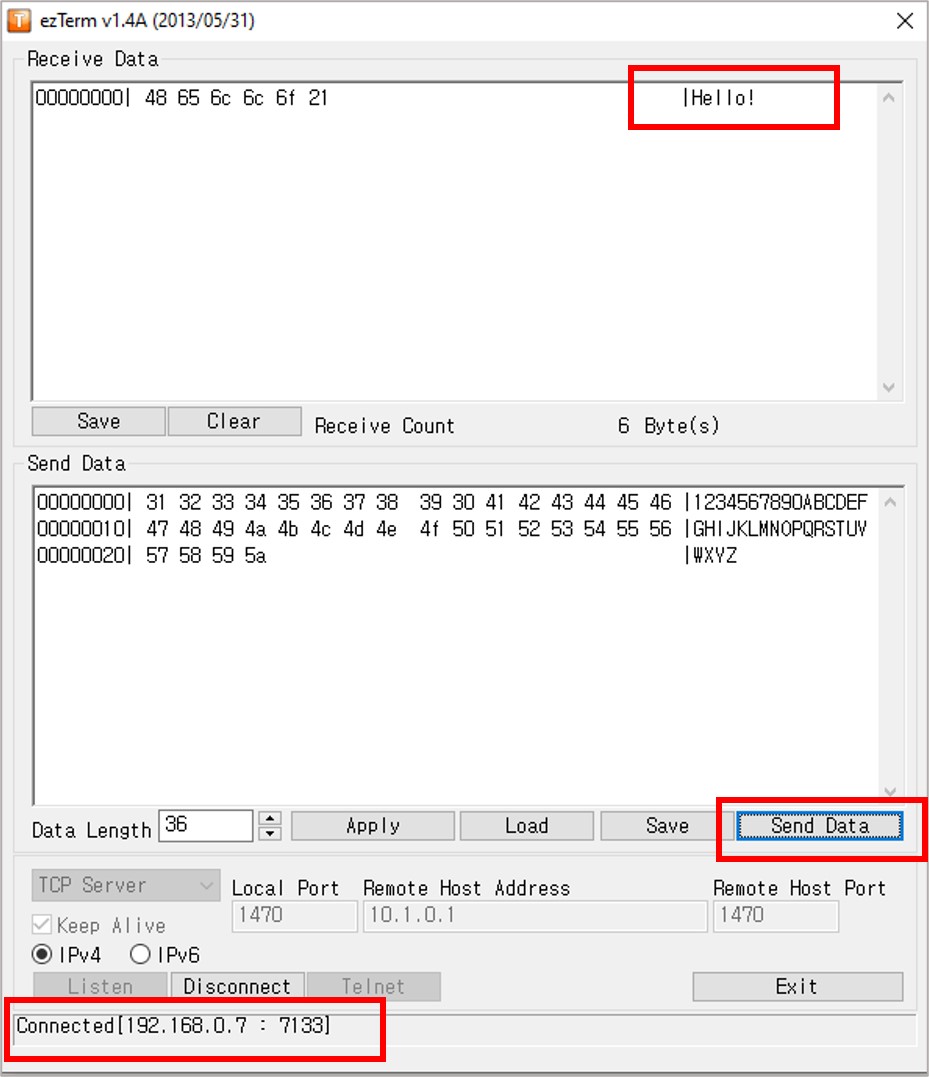
- After connecting to TCP server, Arduino will send a "Hello!" to TCP server, and you'll see this text on the TCP server software.

- Type some data in the TCP server program to send it to the Arduino through TCP.
- If successful, you'll see the data in the Serial Monitor.
COM6
Connected to WiFi YOUR_WIFI_SSID
Connected to TCP server
1234567890ABCDEFGHIJKLMNOPQRSTUVWXYZ
Autoscroll
Clear output
9600 baud
Newline
