Arduino - Temperature Sensor - OLED

In this tutorial, we are going to learn how to program Arduino to read the temperature from DS18B20 one wire sensor and display it on an OLED.

Hardware Required

1×Arduino UNO or Genuino UNO
1×USB 2.0 cable type A/B
1×SSD1306 I2C OLED Display 128x64
1×DS18B20 Temperature Sensor (WITH Adapter)
1×DS18B20 Temperature Sensor (WITHOUT Adapter)
1×Breadboard
1×Jumper Wires
1×(Optional) 9V Power Adapter for Arduino
1×(Recommended) Screw Terminal Block Shield for Arduino Uno
1×(Optional) Transparent Acrylic Enclosure For Arduino Uno

Or you can buy the following sensor kit:

1×DIYables Sensor Kit 30 types, 69 units
Please note: These are Amazon affiliate links. If you buy the components through these links, We will get a commission at no extra cost to you. We appreciate it.

Buy Note: Many DS18B20 sensors on the market are low-quality. We highly recommend buying the sensor from the DIYables brand using the link above. We tested it, and it worked well.

About OLED and DS18B20 Temperature Sensor

If you do not know about OLED and DS18B20 Temperature Sensor (pinout, how it works, how to program ...), learn about them in the following tutorials:

Wiring Diagram

Arduino DS18B20 Temperature Sensor OLED Wiring Diagram

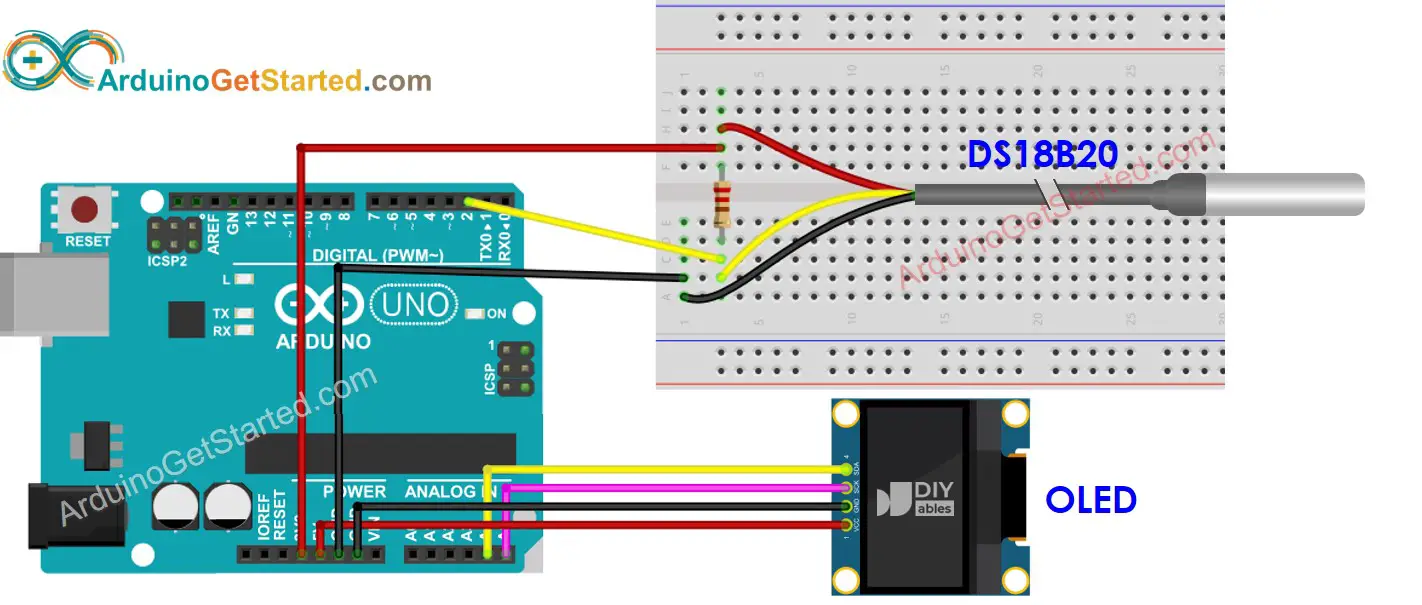
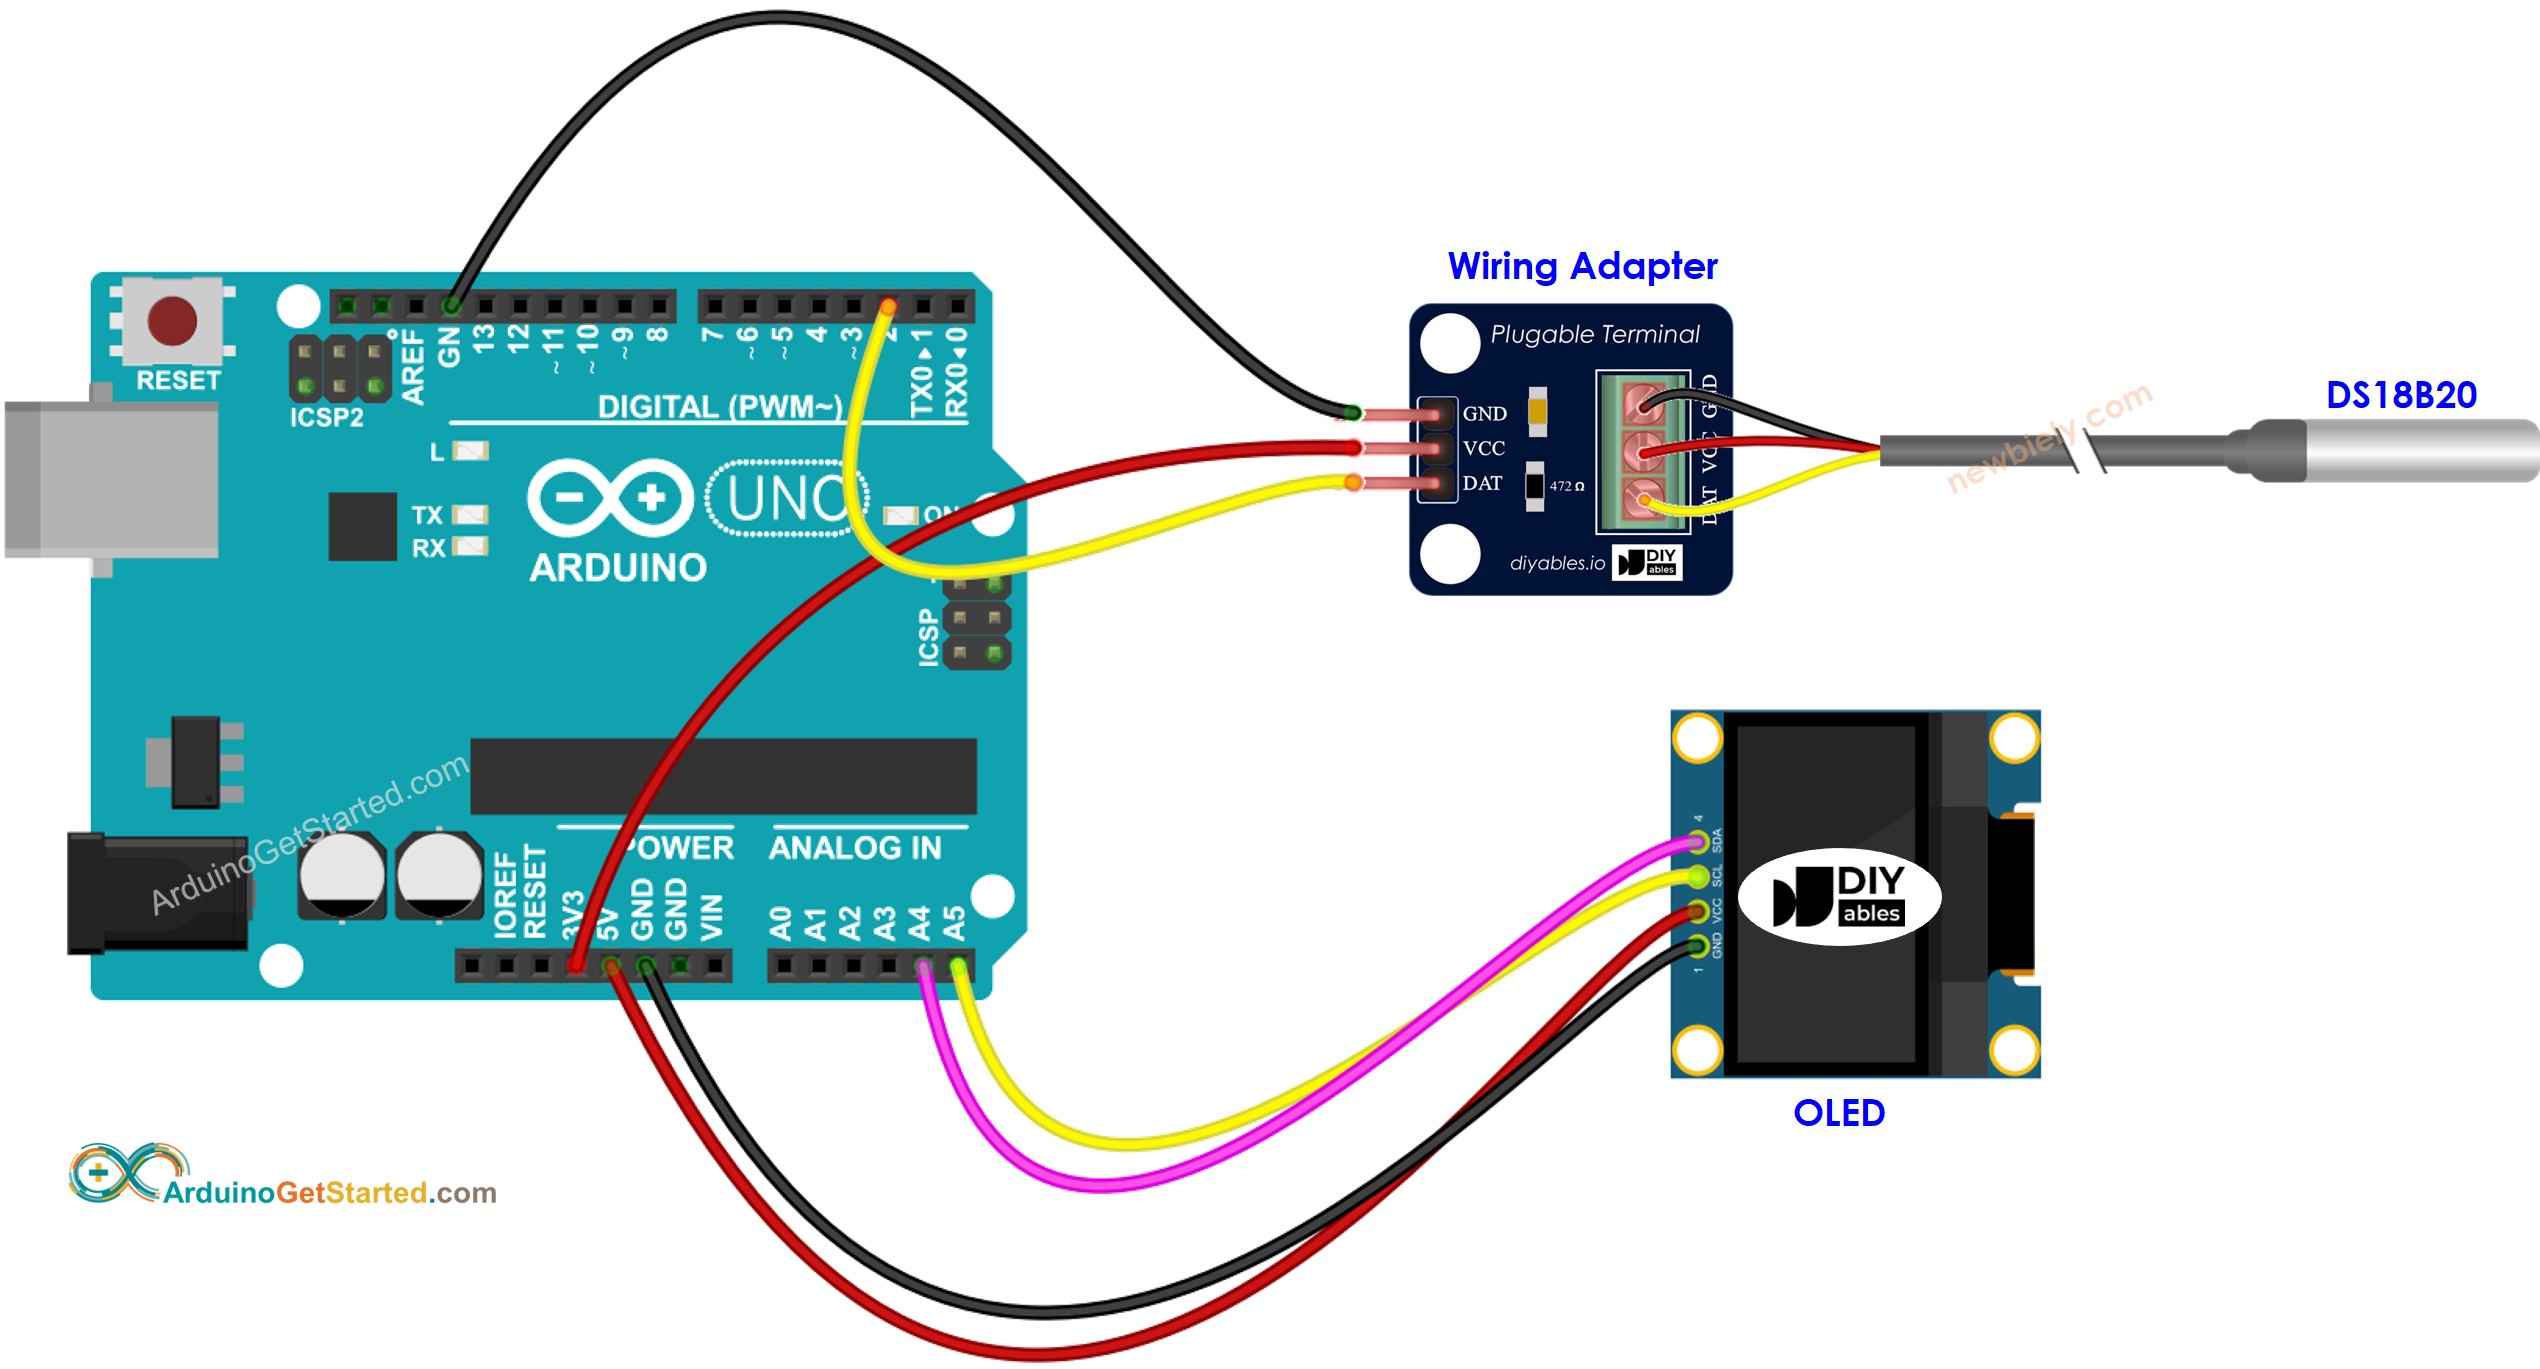
This image is created using Fritzing. Click to enlarge image

We suggest purchasing a DS18B20 sensor that comes with a wiring adapter for easy connection. The adapter has a built-in resistor, eliminating the need for a separate one in the wiring.

Arduino Code - Temperature from DS18B20 Temperature Sensor and display it on OLED

/* * Created by ArduinoGetStarted.com * * This example code is in the public domain * * Tutorial page: https://arduinogetstarted.com/tutorials/arduino-temperature-sensor-oled */ #include <Wire.h> #include <Adafruit_GFX.h> #include <Adafruit_SSD1306.h> #include <OneWire.h> #include <DallasTemperature.h> #define SCREEN_WIDTH 128 // OLED display width, in pixels #define SCREEN_HEIGHT 64 // OLED display height, in pixels #define SENSOR_PIN 2 // Arduino pin connected to DS18B20 sensor's DQ pin Adafruit_SSD1306 oled(SCREEN_WIDTH, SCREEN_HEIGHT, &Wire, -1); // create SSD1306 display object connected to I2C OneWire oneWire(SENSOR_PIN); // setup a oneWire instance DallasTemperature tempSensor(&oneWire); // pass oneWire to DallasTemperature library String tempString; void setup() { Serial.begin(9600); // initialize OLED display with address 0x3C for 128x64 if (!oled.begin(SSD1306_SWITCHCAPVCC, 0x3C)) { Serial.println(F("SSD1306 allocation failed")); while (true); } delay(2000); // wait for initializing oled.clearDisplay(); // clear display oled.setTextSize(2); // text size oled.setTextColor(WHITE); // text color oled.setCursor(0, 10); // position to display tempSensor.begin(); // initialize the sensor tempString.reserve(10); // to avoid fragmenting memory when using String } void loop() { tempSensor.requestTemperatures(); // send the command to get temperatures float tempCelsius = tempSensor.getTempCByIndex(0); // read temperature in Celsius tempString = String(tempCelsius, 2); // two decimal places tempString += "°C"; Serial.println(tempString); // print the temperature in Celsius to Serial Monitor oledDisplayCenter(tempString); } void oledDisplayCenter(String text) { int16_t x1; int16_t y1; uint16_t width; uint16_t height; oled.getTextBounds(text, 0, 0, &x1, &y1, &width, &height); // display on horizontal and vertical center oled.clearDisplay(); // clear display oled.setCursor((SCREEN_WIDTH - width) / 2, (SCREEN_HEIGHT - height) / 2); oled.println(text); // text to display oled.display(); }

Quick Steps

  • Open Arduino IDE on your PC.
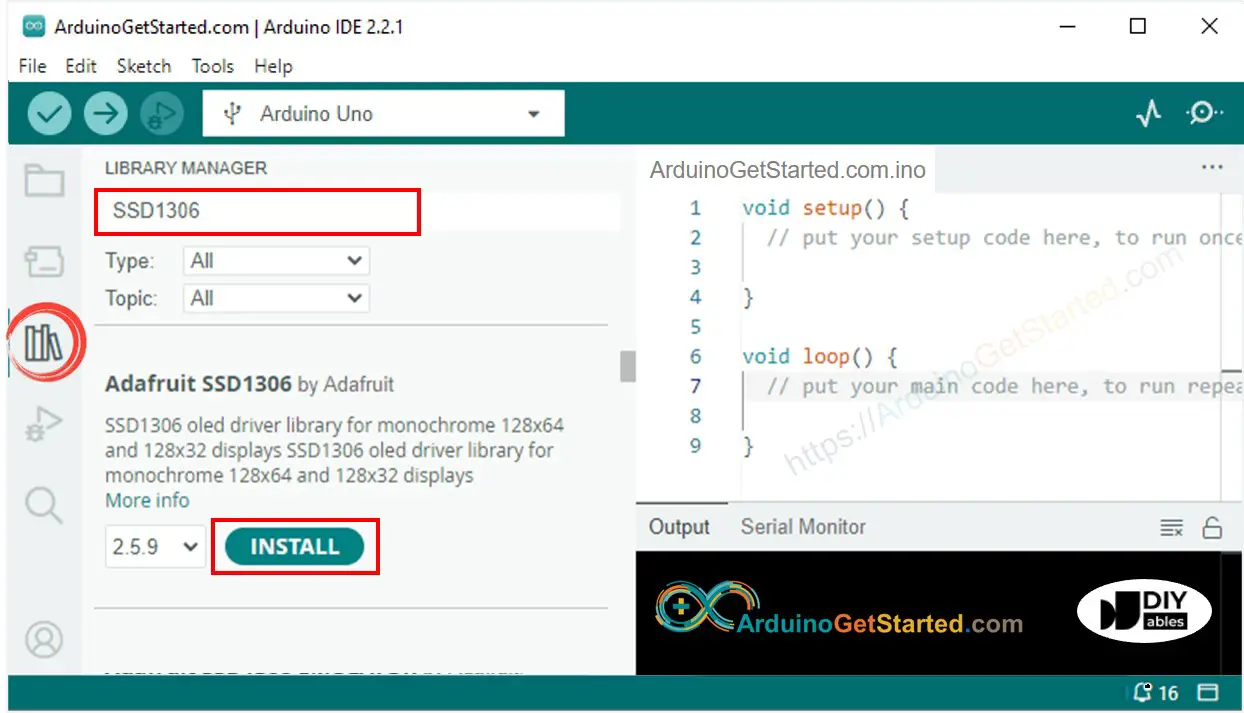
  • Navigate to the Libraries icon on the left bar of the Arduino IDE.
  • Search “SSD1306”, then find the SSD1306 library by Adafruit
  • Click Install button to install the library.
Arduino OLED library
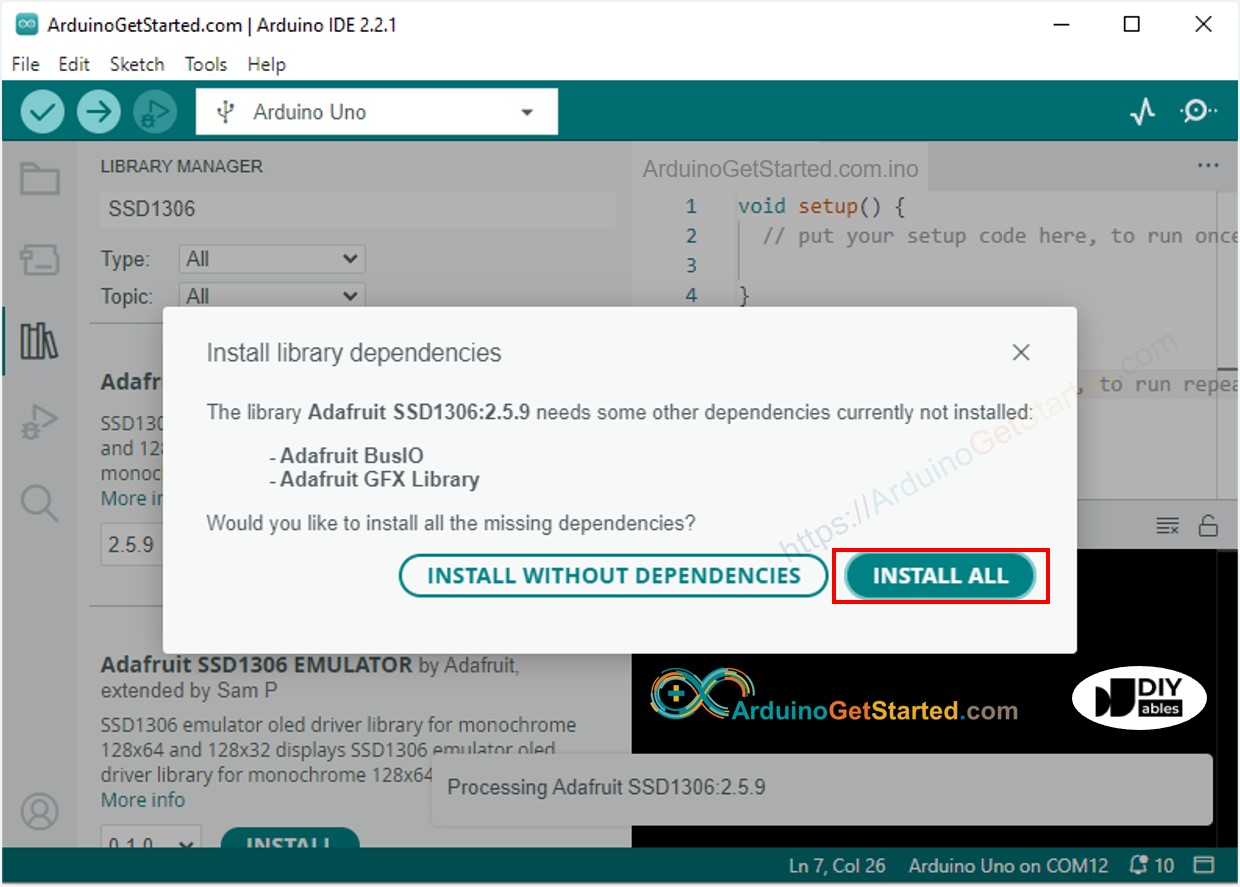
  • You will be asked for intalling some other library dependencies
  • Click Install All button to install all library dependencies.
Arduino Adafruit GFX sensor library
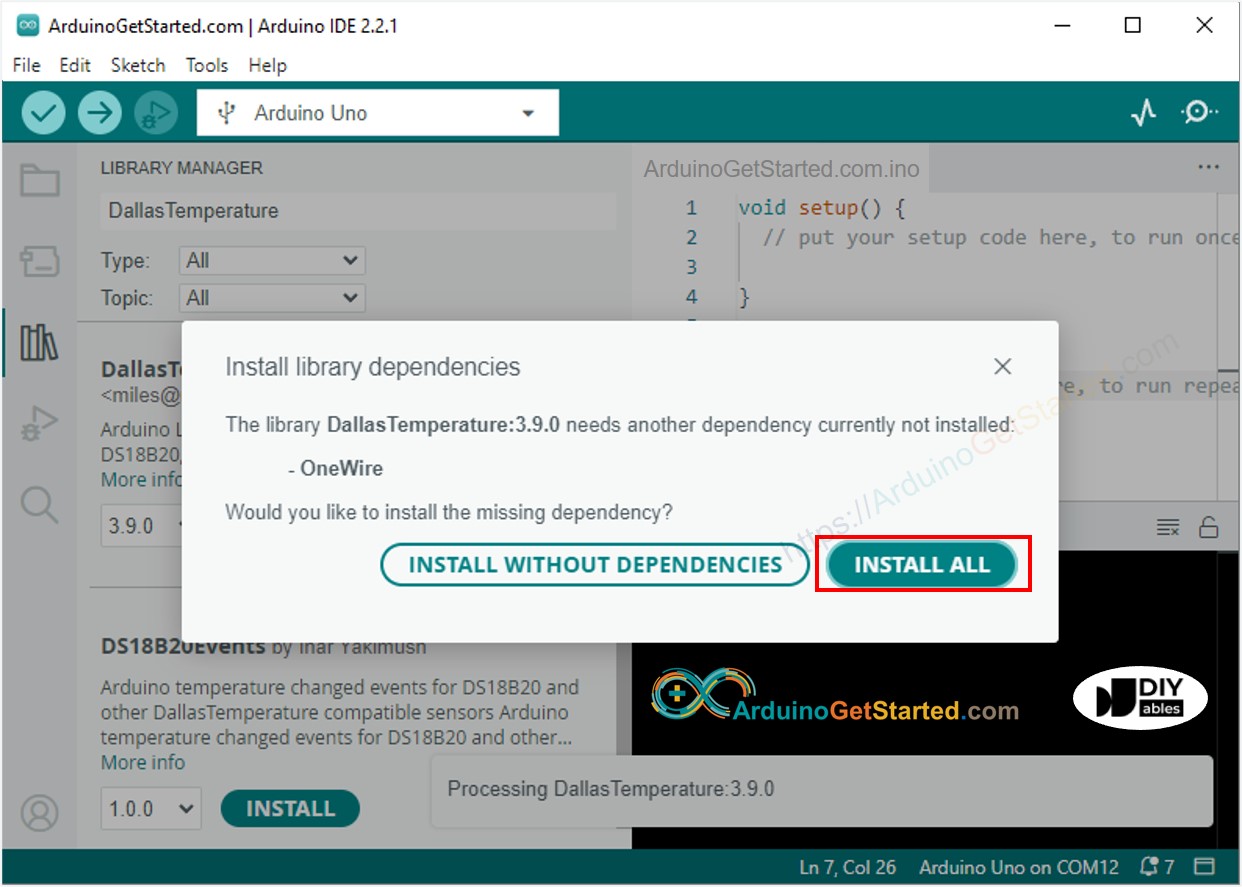
  • Search “DallasTemperature”, then find the DallasTemperature library by Miles Burton.
  • Click Install button to install DallasTemperature library.
Arduino Dallas Temperature library
  • You will be asked to install the library dependency
  • Click Install All button to install OneWire library.
Arduino onewire library
  • Copy the above code and open with Arduino IDE
  • Click Upload button on Arduino IDE to upload code to Arduino
  • Put the sensor on hot and cold water, or grasp the sensor by your hand
  • See the result on OLED

※ NOTE THAT:

The about code automatically horizontal and vertical center aligns the text on OLED display

Video Tutorial

We are considering to make the video tutorials. If you think the video tutorials are essential, please subscribe to our YouTube channel to give us motivation for making the videos.

The Best Arduino Starter Kit

※ OUR MESSAGES