Arduino - Display Temperature from LM35 Sensor on LCD
In this tutorial, we are going to learn how to read the temperature from LM35 sensor and display it on an LCD 16x2 I2C.
Hardware Required
Or you can buy the following kits:
| 1 | × | DIYables STEM V3 Starter Kit (Arduino included) | |
| 1 | × | DIYables Sensor Kit (18 sensors/displays) |
Additionally, some links direct to products from our own brand, DIYables .
Buy Note: Another option is to create the LCD I2C display by pairing LCD 1602 Display and PCF8574 I2C Adapter Module.
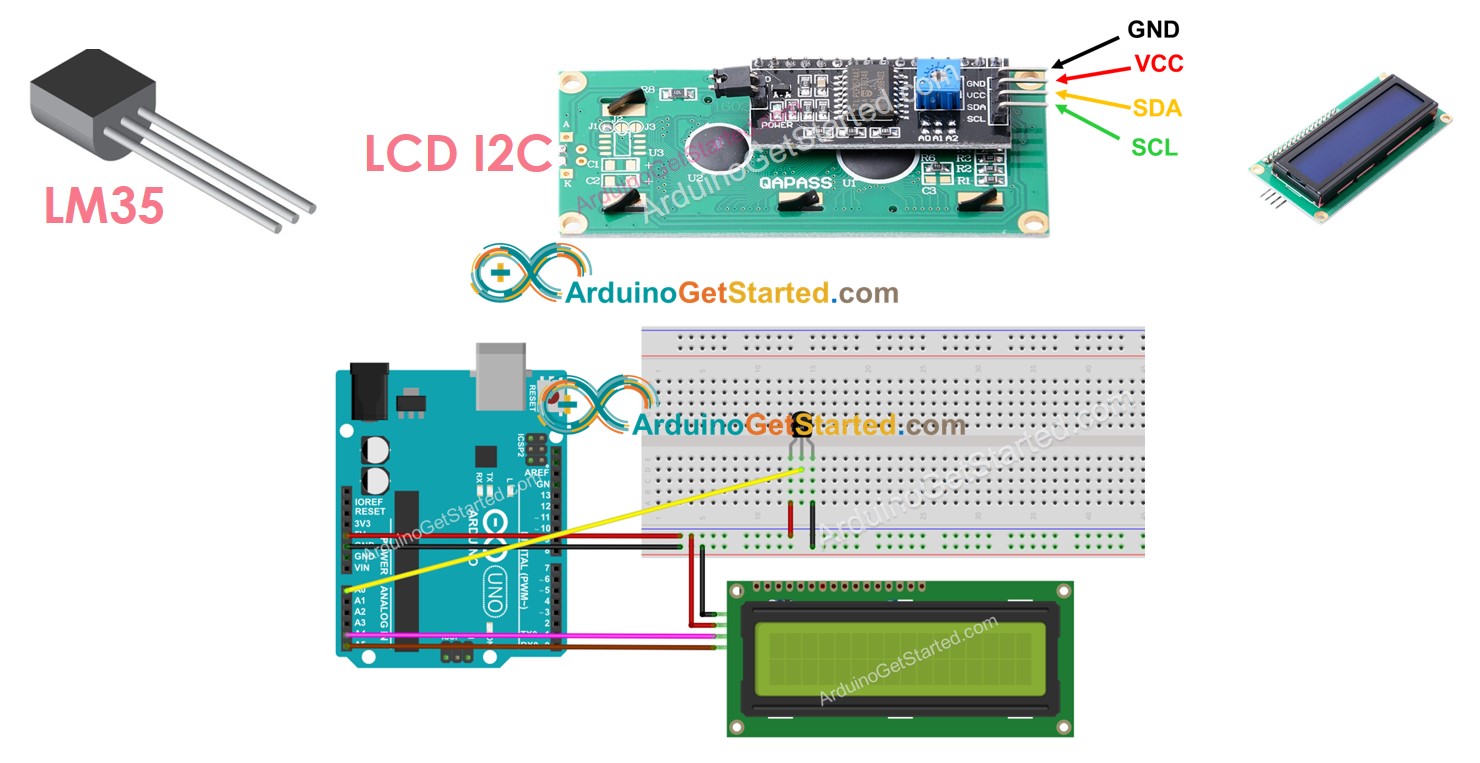
About LM35 Temperature Sensor and LCD I2C
If you do not know about LM35 Temperature Sensor and LCD I2C (pinout, how it works, how to program ...), learn about them in the following tutorials:
- Arduino - LCD I2C tutorial
- Arduino - LM35 Temperature Sensor tutorial
Wiring Diagram
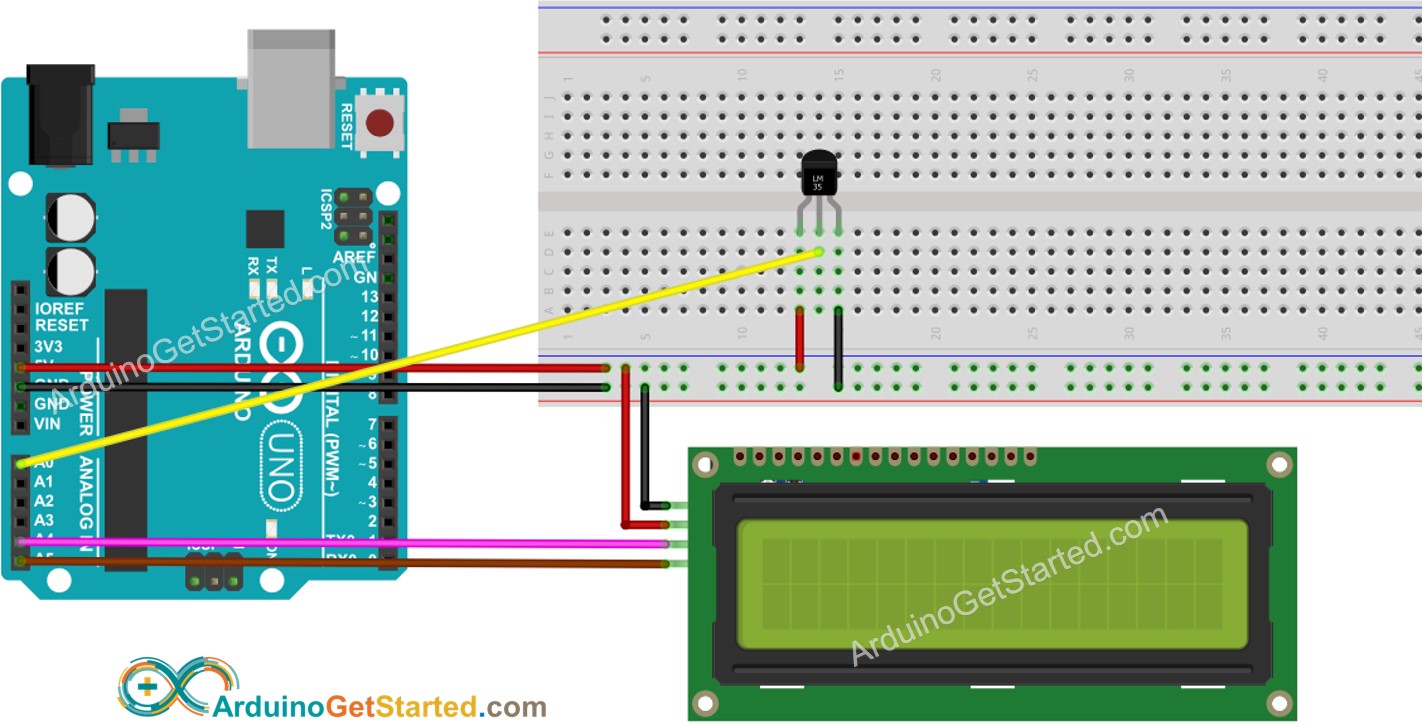
This image is created using Fritzing. Click to enlarge image
Arduino Code - LM35 Temperature Sensor - LCD I2C
Quick Steps
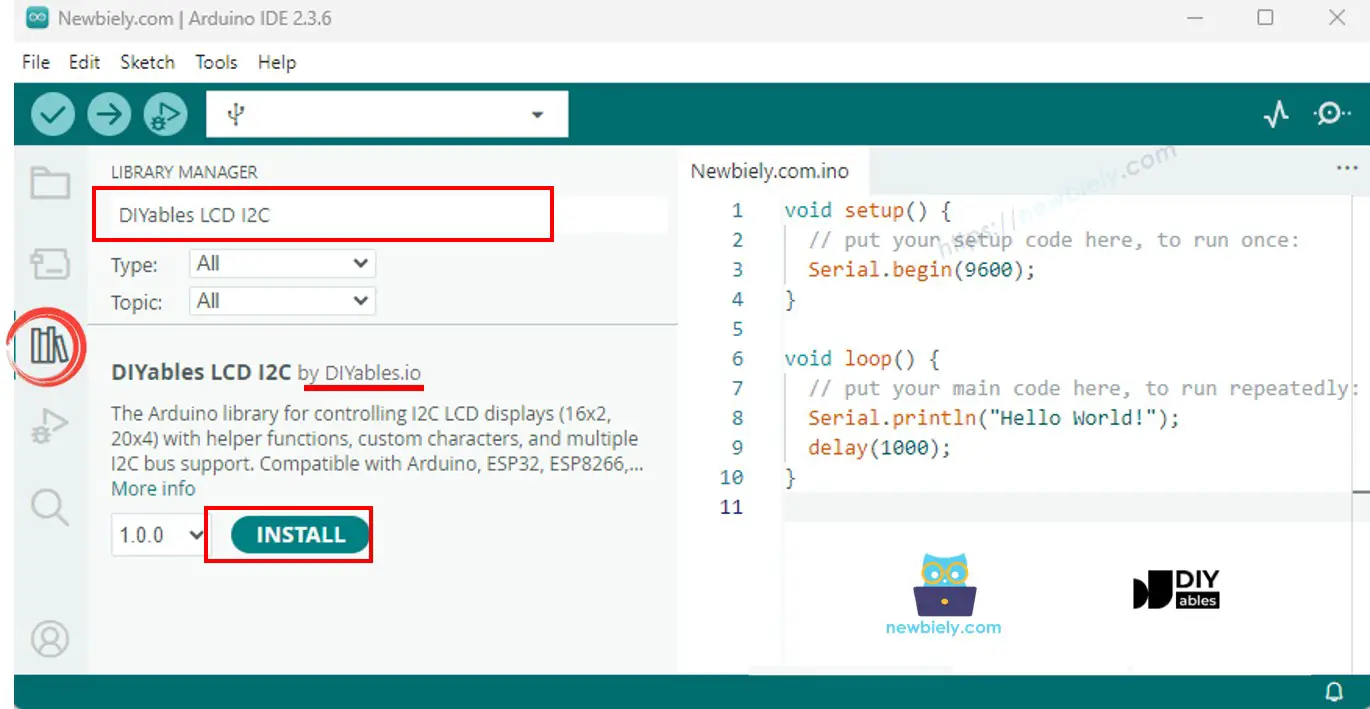
- Open Arduino IDE on your PC.
- Navigate to the Libraries icon on the left bar of the Arduino IDE.
- Search “DIYables LCD I2C”, then find the DIYables_LCD_I2C library by DIYables
- Click Install button to install DIYables_LCD_I2C library.
- Copy the above code and open with Arduino IDE
- Click Upload button on Arduino IDE to upload code to Arduino
- Put the sensor on hot and cold water, or grasp the sensor by your hand
- See the result on LCD and Serial Monitor
※ NOTE THAT:
The I2C address of LCD can vary according to the manufacturers. In the code, we used 0x27 that is specified by DIYables manufacturer
Video Tutorial
We are considering to make the video tutorials. If you think the video tutorials are essential, please subscribe to our YouTube channel to give us motivation for making the videos.