Arduino - Button Control Electromagnetic Lock
In this tutorial, we are going to learn how to use Arduino and button to control the electromagnetic lock. When the button is pressed, Arduino deactivates the electromagnetic lock to unlock the door for a certain time (e.g. 10 seconds). After that, it Arduino activates the electromagnetic lock to lock the door.
We will learn by two steps from easy to difficult:
Or you can buy the following kits:
Disclosure: Some links in this section are Amazon affiliate links. If you make a purchase through these links, we may earn a commission at no extra cost to you.
Additionally, some links direct to products from our own brand,
DIYables .
If you do not know about electromagnetic lock and button (pinout, how it works, how to program ...), learn about them in the following tutorials:
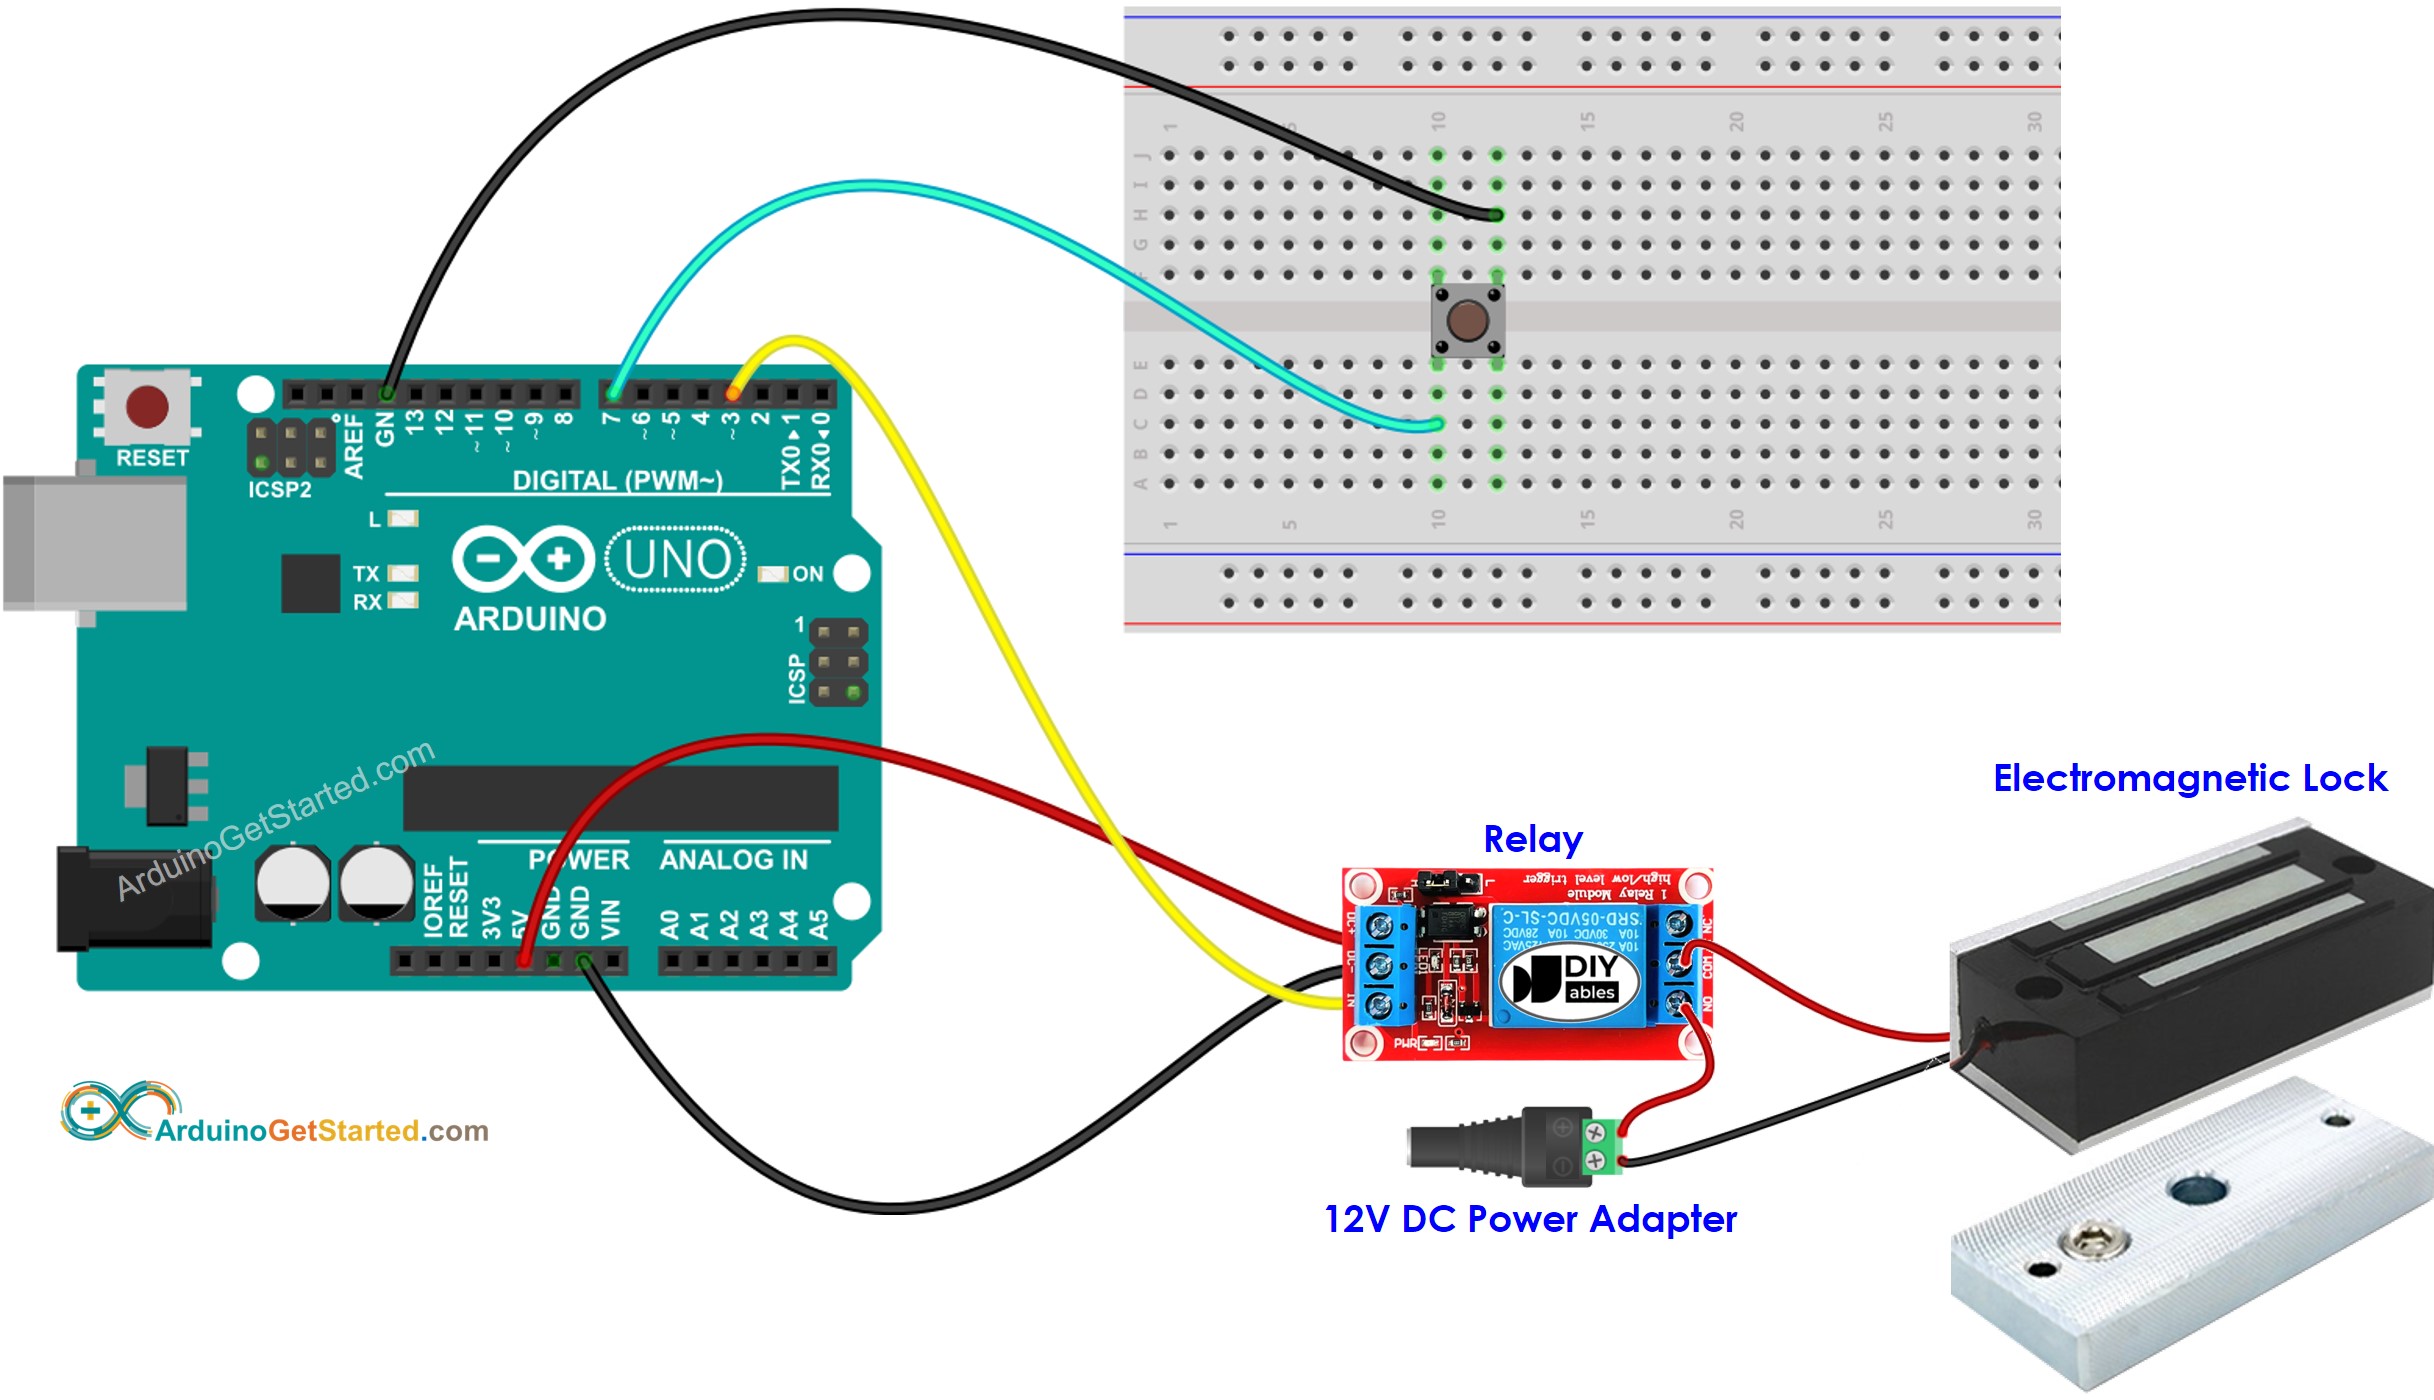
This image is created using Fritzing. Click to enlarge image
const int BUTTON_PIN = 7;
const int RELAY_PIN = 3;
int lastButtonState;
int currentButtonState;
void setup() {
Serial.begin(9600);
pinMode(BUTTON_PIN, INPUT_PULLUP);
pinMode(RELAY_PIN, OUTPUT);
digitalWrite(RELAY_PIN, HIGH);
currentButtonState = digitalRead(BUTTON_PIN);
}
void loop() {
lastButtonState = currentButtonState;
currentButtonState = digitalRead(BUTTON_PIN);
if(lastButtonState == HIGH && currentButtonState == LOW) {
Serial.println("The button is pressed");
digitalWrite(RELAY_PIN, LOW);
delay(10000);
digitalWrite(RELAY_PIN, HIGH);
}
}
Connect Arduino to PC via USB cable
Open Arduino IDE, select the right board and port
Copy the above code and open with Arduino IDE
Click Upload button on Arduino IDE to upload code to Arduino
Put the armature plate close to electromagnet.
Press button one time.
See the attraction between armature plate and electromagnet during 10 seconds.
Read the line-by-line explanation in comment lines of code!
※ NOTE THAT:
In practice, the above code does not work correctly sometimes. To make it always work correctly, we need to debounce for the button. Debouncing for the button is not easy for beginners. Fortunately, thanks to the ezButton library, We can do it easily.
Why do we need debouncing? ⇒ see Arduino - Button Debounce tutorial
#include <ezButton.h>
const int BUTTON_PIN = 7;
const int RELAY_PIN = 3;
ezButton button(BUTTON_PIN);
void setup() {
Serial.begin(9600);
pinMode(RELAY_PIN, OUTPUT);
button.setDebounceTime(50);
digitalWrite(RELAY_PIN, HIGH);
}
void loop() {
button.loop();
if(button.isPressed()) {
Serial.println("The button is pressed");
digitalWrite(RELAY_PIN, LOW);
delay(10000);
digitalWrite(RELAY_PIN, HIGH);
}
}
Install ezButton library. See
How To
Copy the above code and open with Arduino IDE
Click Upload button on Arduino IDE to upload code to Arduino
Put the armature plate close to electromagnet.
Press button one time.
See the attraction between armature plate and electromagnet during 10 seconds.
※ NOTE THAT:
In the above code, we used the delay function. Therefore, we do not need to debouncing for button. However, We still provide the code with debouncing just in case you want to do more tasks without using delay function. See How to use millis() instead of delay()
We are considering to make the video tutorials. If you think the video tutorials are essential, please subscribe to our YouTube channel to give us motivation for making the videos.
※ OUR MESSAGES
You can share the link of this tutorial anywhere. Howerver, please do not copy the content to share on other websites. We took a lot of time and effort to create the content of this tutorial, please respect our work!