Arduino - MP3 Player
In this tutorial, we will learn how to make a MP3 player using Arduino, MP3 player module, Micro SD Card, and speaker. The MP3 files (music, or recorded audio) are stored in the micro SD Card. Then, Arduino can control the MP3 player module to read a selected song from SD Car, convert it to audio signal, snd send the signal to the speaker. In detail, we will learn:
- How it works
- How to connect speaker, MP3 player modules to Arduino
- How to program Arduino to play a song stored in the micro SD Card
- How to add the play/pause/next/previous buttons
Then, you can modify the code to add a potentiometer or rotatry encoder to change the volume.
Hardware Required
Or you can buy the following kits:
| 1 | × | DIYables STEM V3 Starter Kit (Arduino included) | |
| 1 | × | DIYables Sensor Kit (18 sensors/displays) |
Additionally, some links direct to products from our own brand, DIYables .
About Serial MP3 Player Module and Speaker
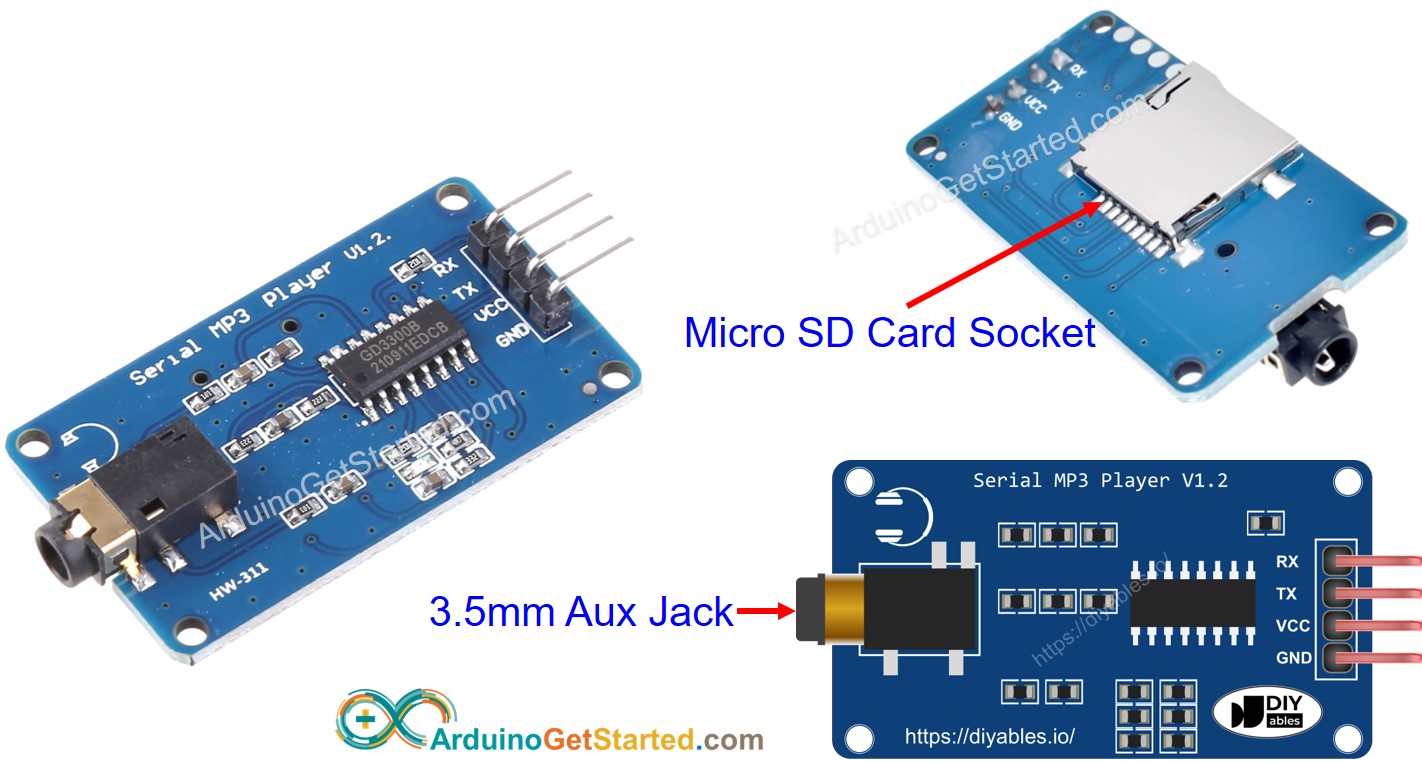
Serial MP3 Player Module Pinout
A serial MP3 player module has three interfaces:
- The interface to Arduino includes 4 pins:
- RX pin: data pin, needs to be connected a TX pin of Arduino (Hardware or Software Serial)
- TX pin: data pin, needs to be connected a RX pin of Arduino (Hardware or Software Serial)
- VCC pin: power pin, needs to be connected to VCC (5V)
- GND pin: power pin, needs to be connected to GND (0V)
- The interface to the speaker is a 3.5mm Aux output female jack.
- The interface to the Micro SD Card is a Micro SD Card Socket in the back of the module.
Speaker Pinout
A speaker usually has two interfaces:
- Audio signal interface: it is 3.5mm Aux male connector that connects to the MP3 player module
- Poweer interface: it can be USB, 5V power adapter or any other power interface
How It Works
What we need to prepare:
- Pre-store a list of songs or recorded audio that we want to play to micro SD Card.
- Insert the micro SD Card to the MP3 player module
- Connect the MP3 player module to Arduino
- Connect the speaker to the MP3 player module to a
- Connect the speaker to a power source.
Each MP3 file stored on Micro SD Card will have an index. The index is the order of stored song, start from 0.
Then we can program Arduino to send command to the MP3 player module. It supports the following commands:
- Play
- Pause
- Play Next
- Play Previous
- Change volume
When the MP3 player module, it reads the MP3 file from the micro SD Card, converts the MP3 files to audio signal and outputs the audio signal to the speaker via the 3.5mm Aux interface.
Wiring Diagram
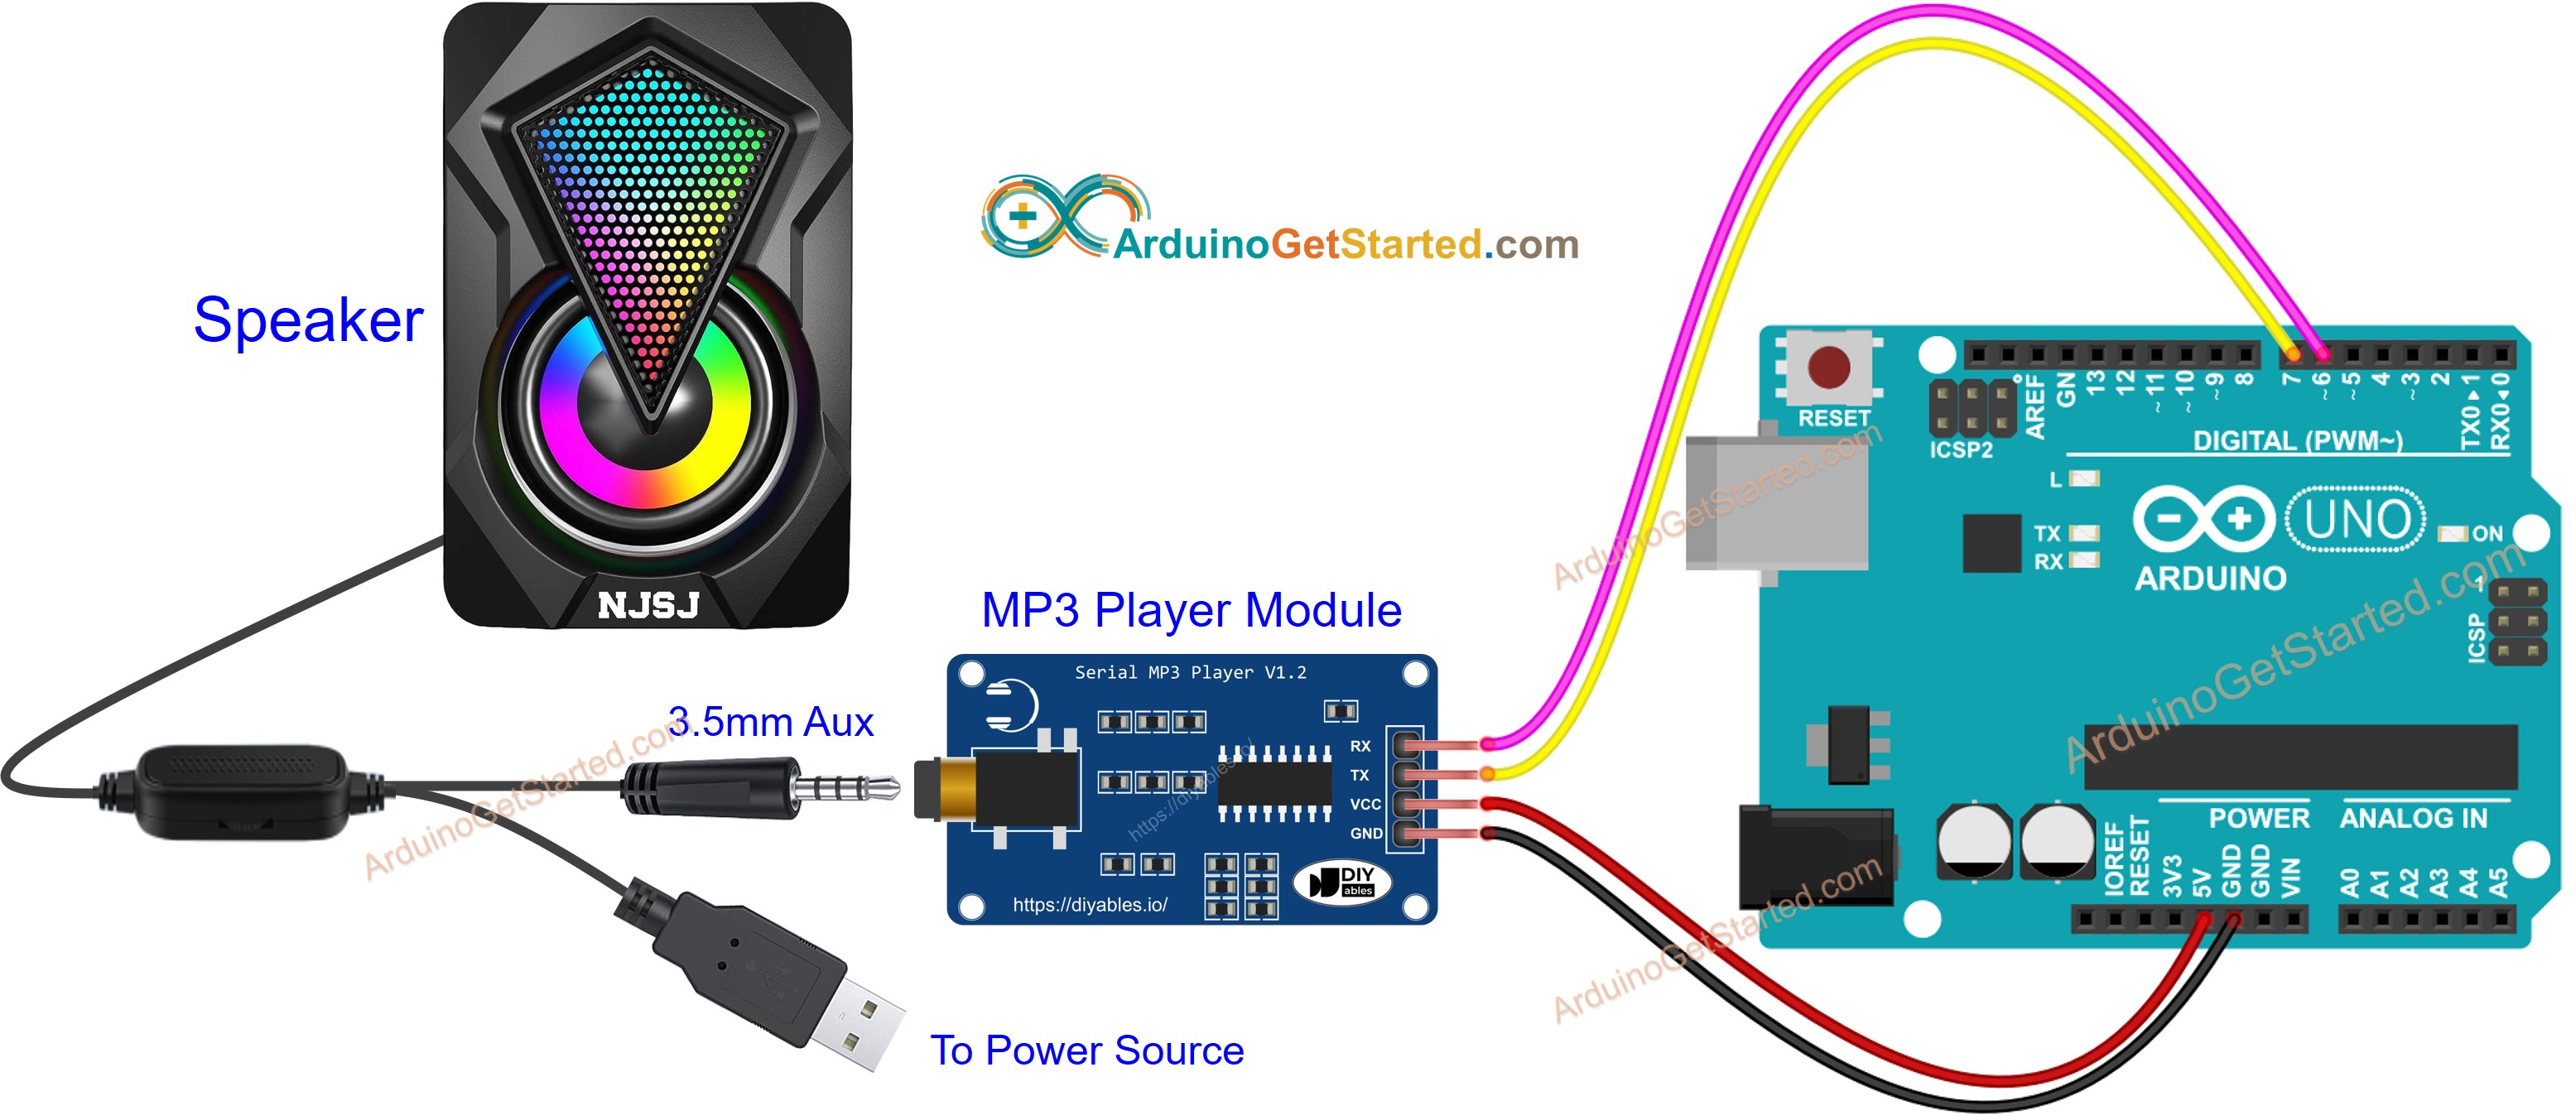
This image is created using Fritzing. Click to enlarge image
Arduino Code - Play Music
The below code plays the first song stored on the Micro SD Card.
Quick Steps
- Follow the instructions on the How It Works
- Copy the above code and open with Arduino IDE
- Click Upload button on Arduino IDE to upload code to Arduino
- Enjoy the music
Arduino Code - Play Music with control buttons
The below code is an upgrade of the previous code. It adds foyr buttons to let you interact with MP3 player.
The wiring diagram for the above code:
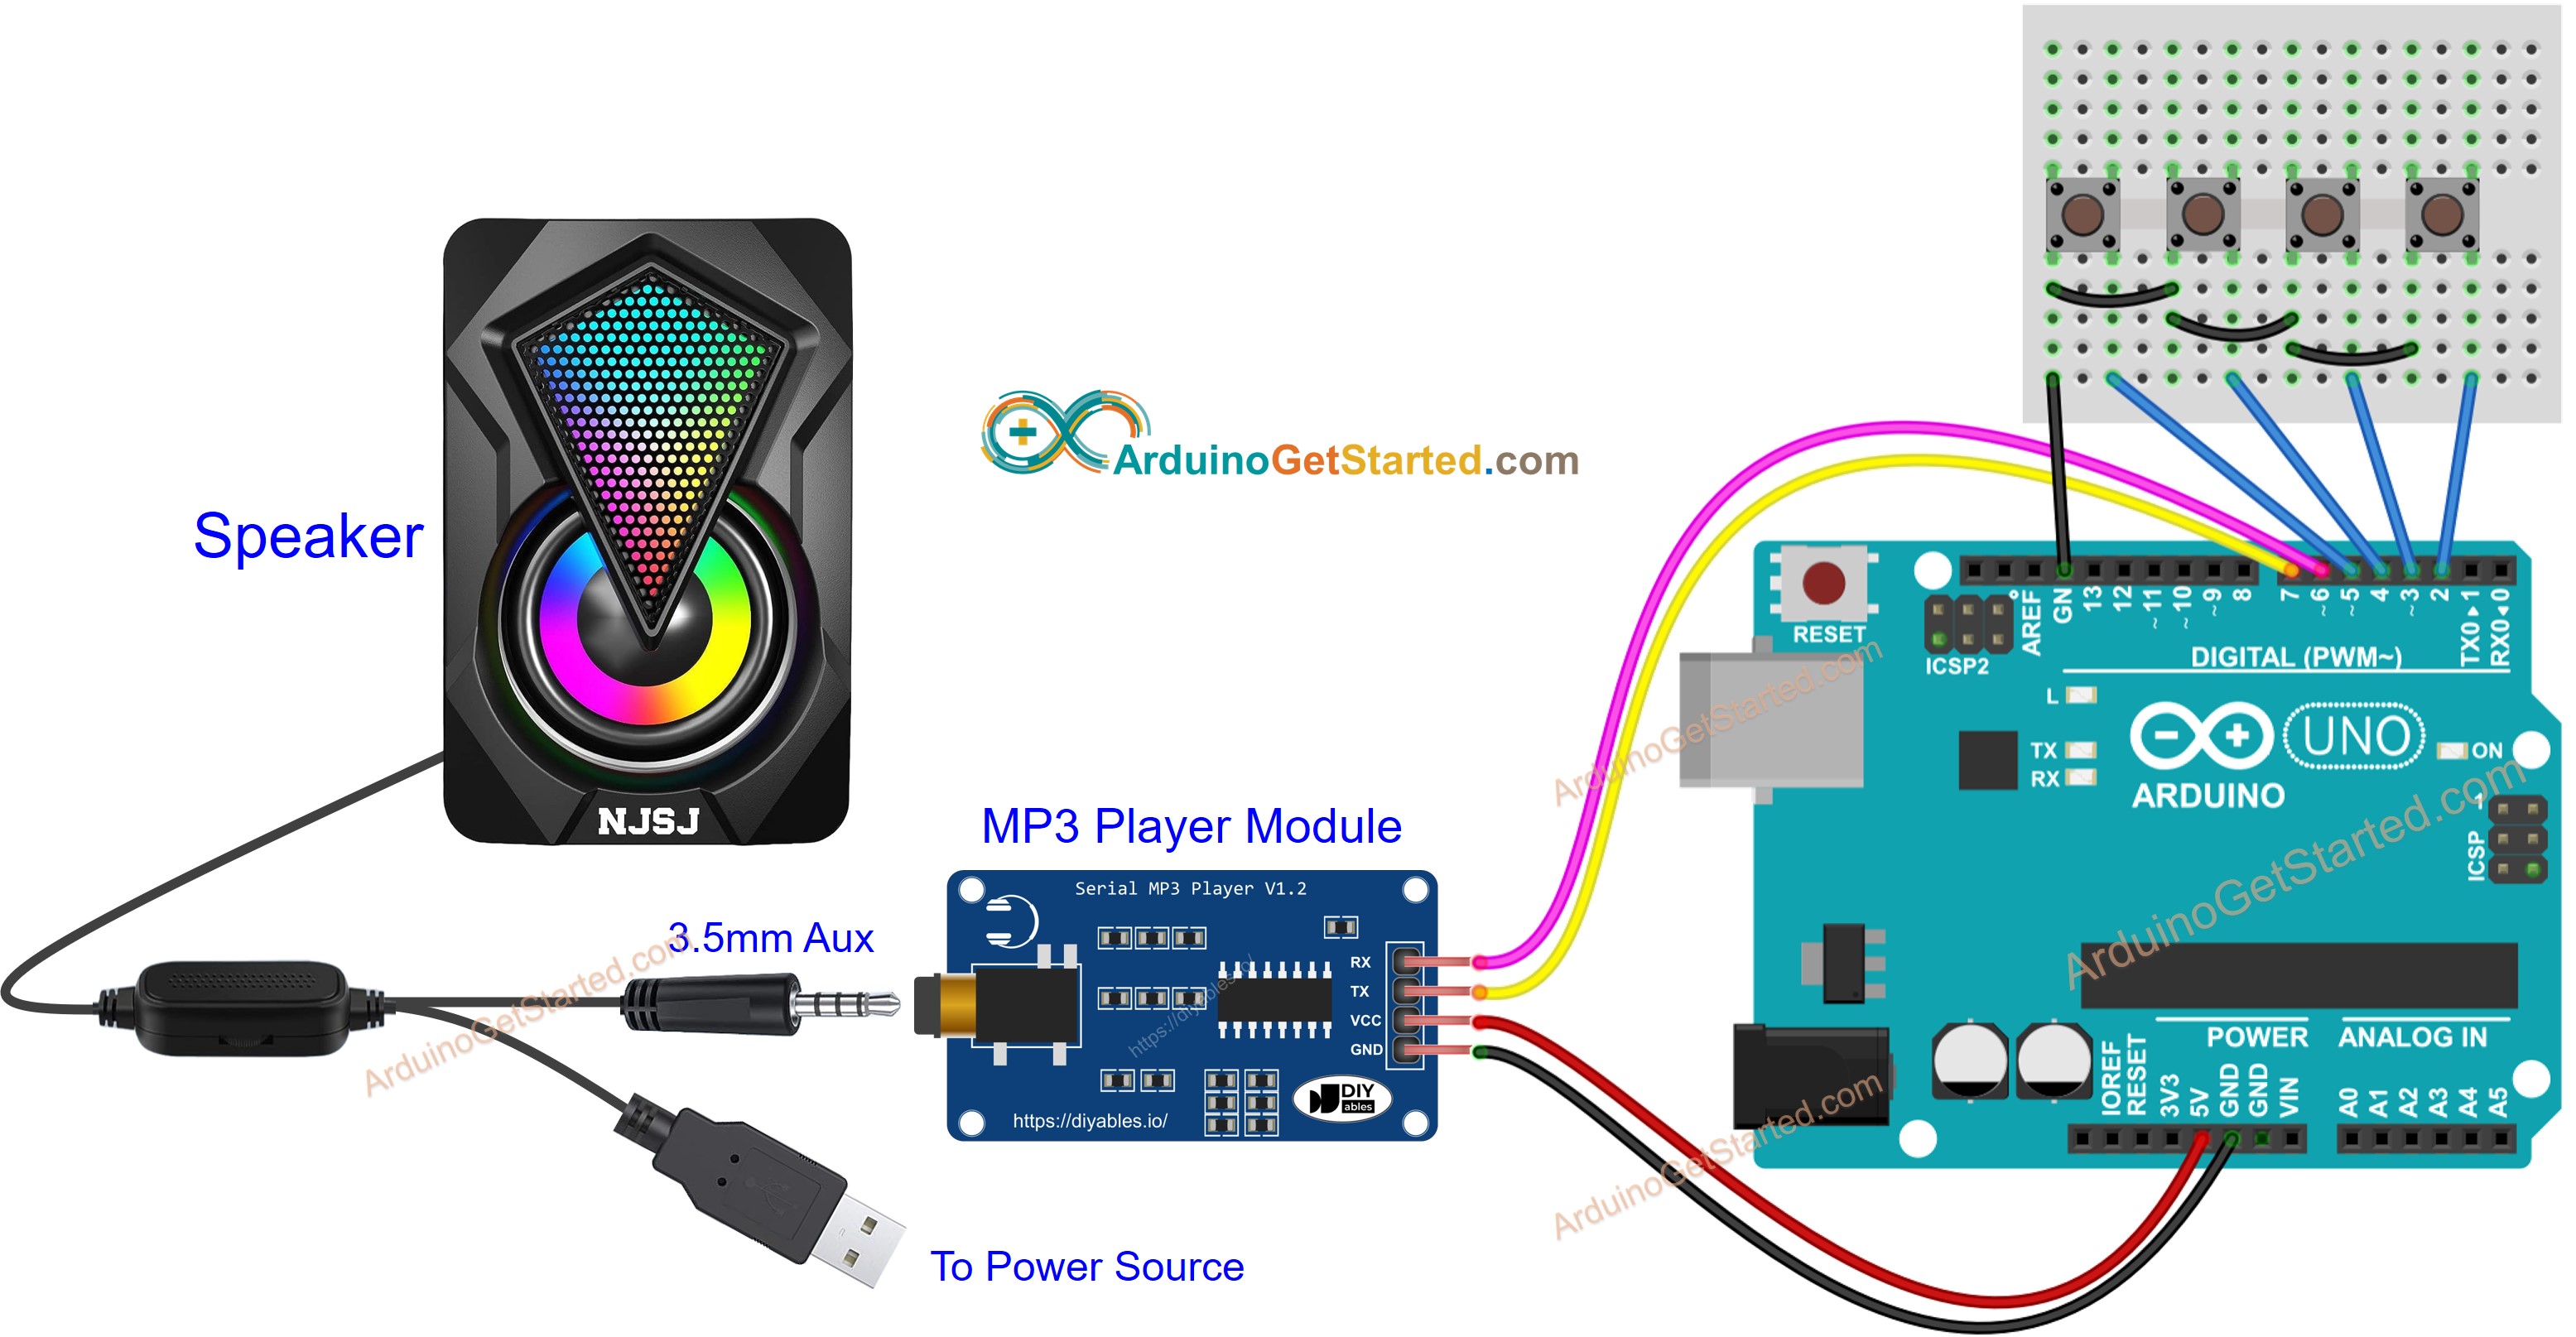
This image is created using Fritzing. Click to enlarge image
Now, you can modify the projects to add more functions, for example:
- Add a potentiometer to control the volume, see Arduino Potentiometer tutorial
- Add an IR remote controller, see Arduino IR Remote Controller tutorial
- Add a RFID reader and card to make RFID MP3 player, see Arduino RFID tutorial
Video Tutorial
We are considering to make the video tutorials. If you think the video tutorials are essential, please subscribe to our YouTube channel to give us motivation for making the videos.