Arduino RS422 to WiFi
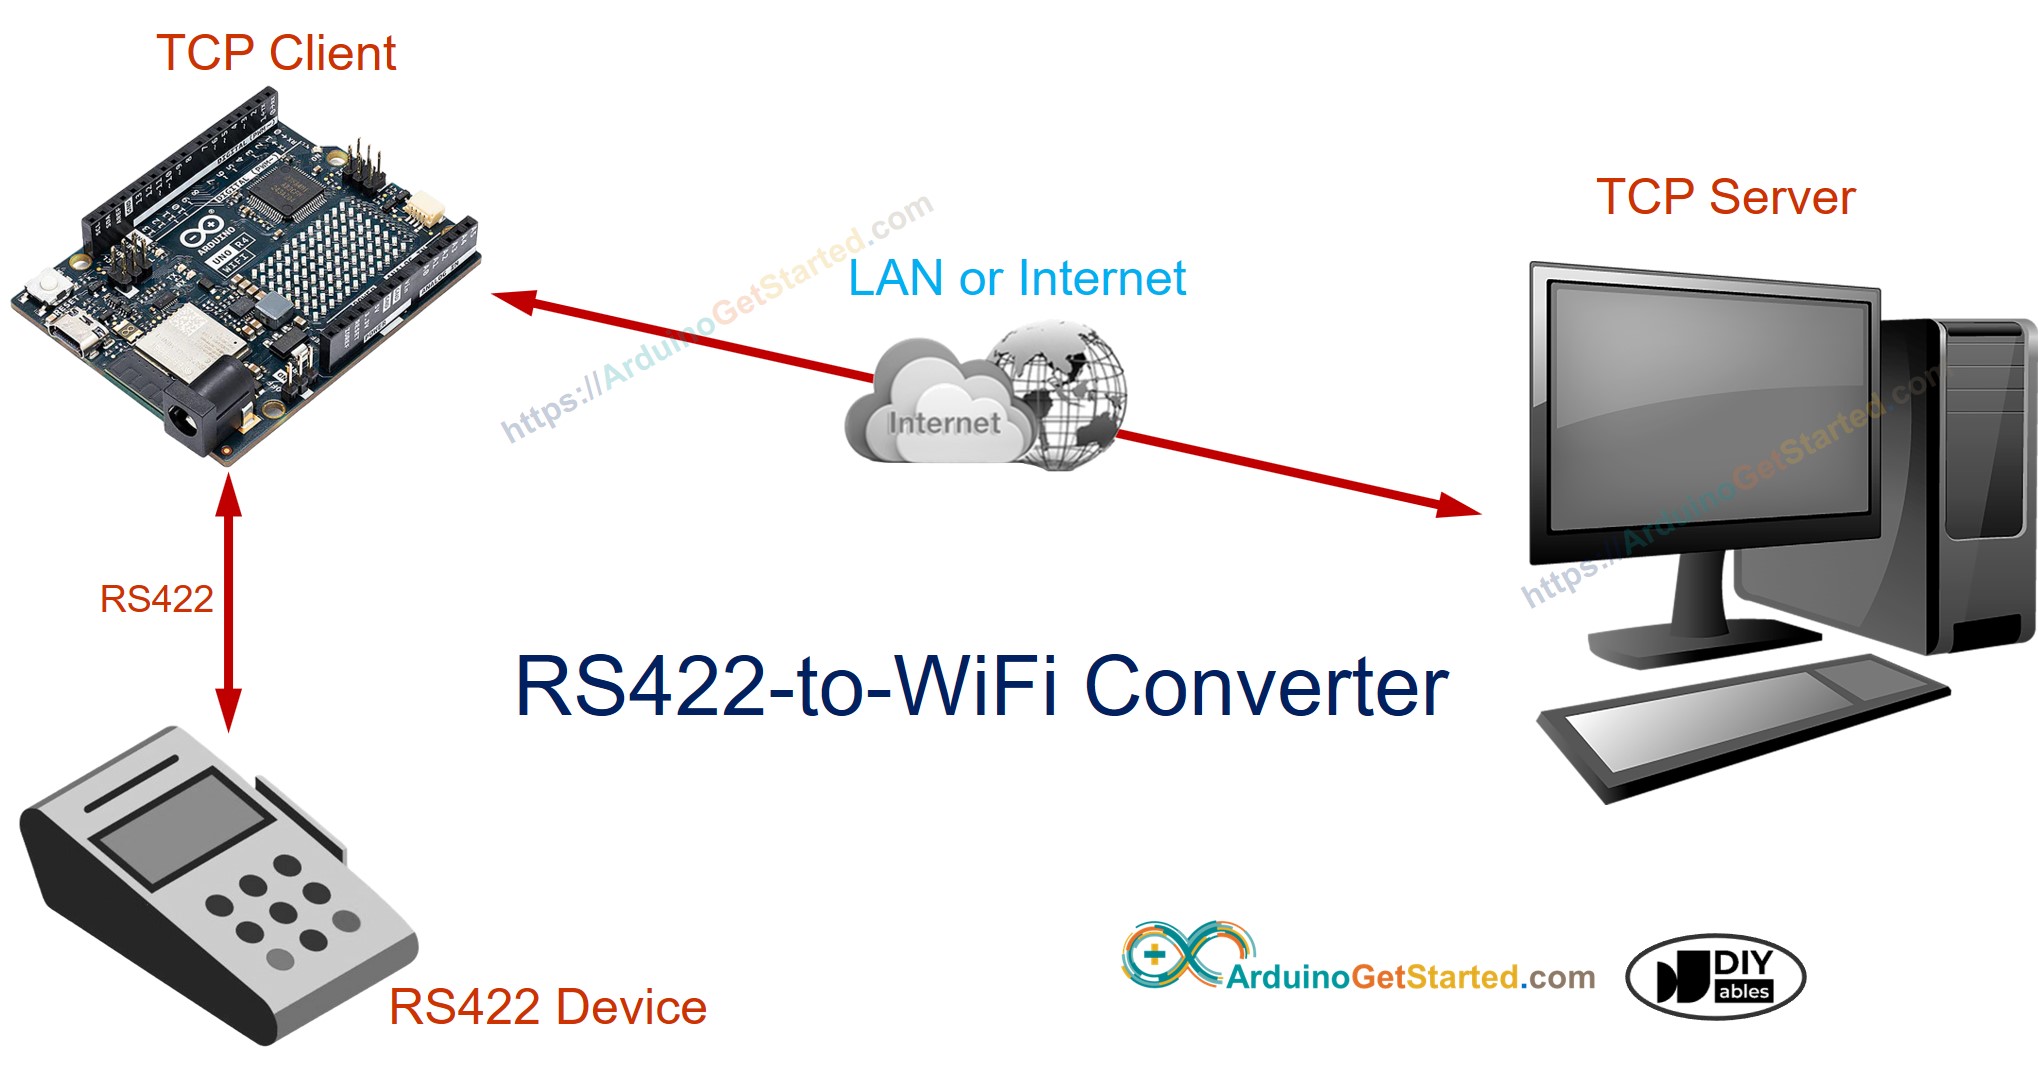
In this guide, we'll explore using the Arduino Uno R4 WiFi to build a Serial RS422 to WiFi converter. With this setup, the Arduino will read data from a serial RS422 interface and transmit it to a TCP server, either within the same local area network (LAN) or remotely over the internet. It can also receive data from the TCP server and send it back via the serial RS422 interface.
These steps will enable you to establish versatile communication bridges between serial RS-422 devices and TCP/IP server using Arduino.

Hardware Required
Or you can buy the following kits:
| 1 | × | DIYables STEM V4 IoT Starter Kit (Arduino included) | |
| 1 | × | DIYables Sensor Kit (30 sensors/displays) | |
| 1 | × | DIYables Sensor Kit (18 sensors/displays) |
Additionally, some links direct to products from our own brand, DIYables .
About RS422 and TCP
If you do not know about how to use RS422 and TCP communication with Arduino, learn about them in the following tutorials:
- Arduino - RS422 tutorial
- Arduino - TCP Client tutorial
How RS422 to WiFi converter Works
- Arduino connects to a serial device via serial RS422 interface
- Arduino works as a TCP client that connects to a TCP server (can be a TCP server software on your PC or another Arduino programmed as a TCP server)
- Arduino reads data from the serial RS422 interface and sends it to the TCP server
- Arduino reads data from the TCP connection and sends it to the serial RS422 interface
Wiring Diagram
- Wiring diagram if using hardware serial

This image is created using Fritzing. Click to enlarge image
- Wiring diagram if using software serial

This image is created using Fritzing. Click to enlarge image
Arduino Code for Hardware Serial
Arduino Code for Software Serial
Testing
You can do a test by sending data in the following flows:
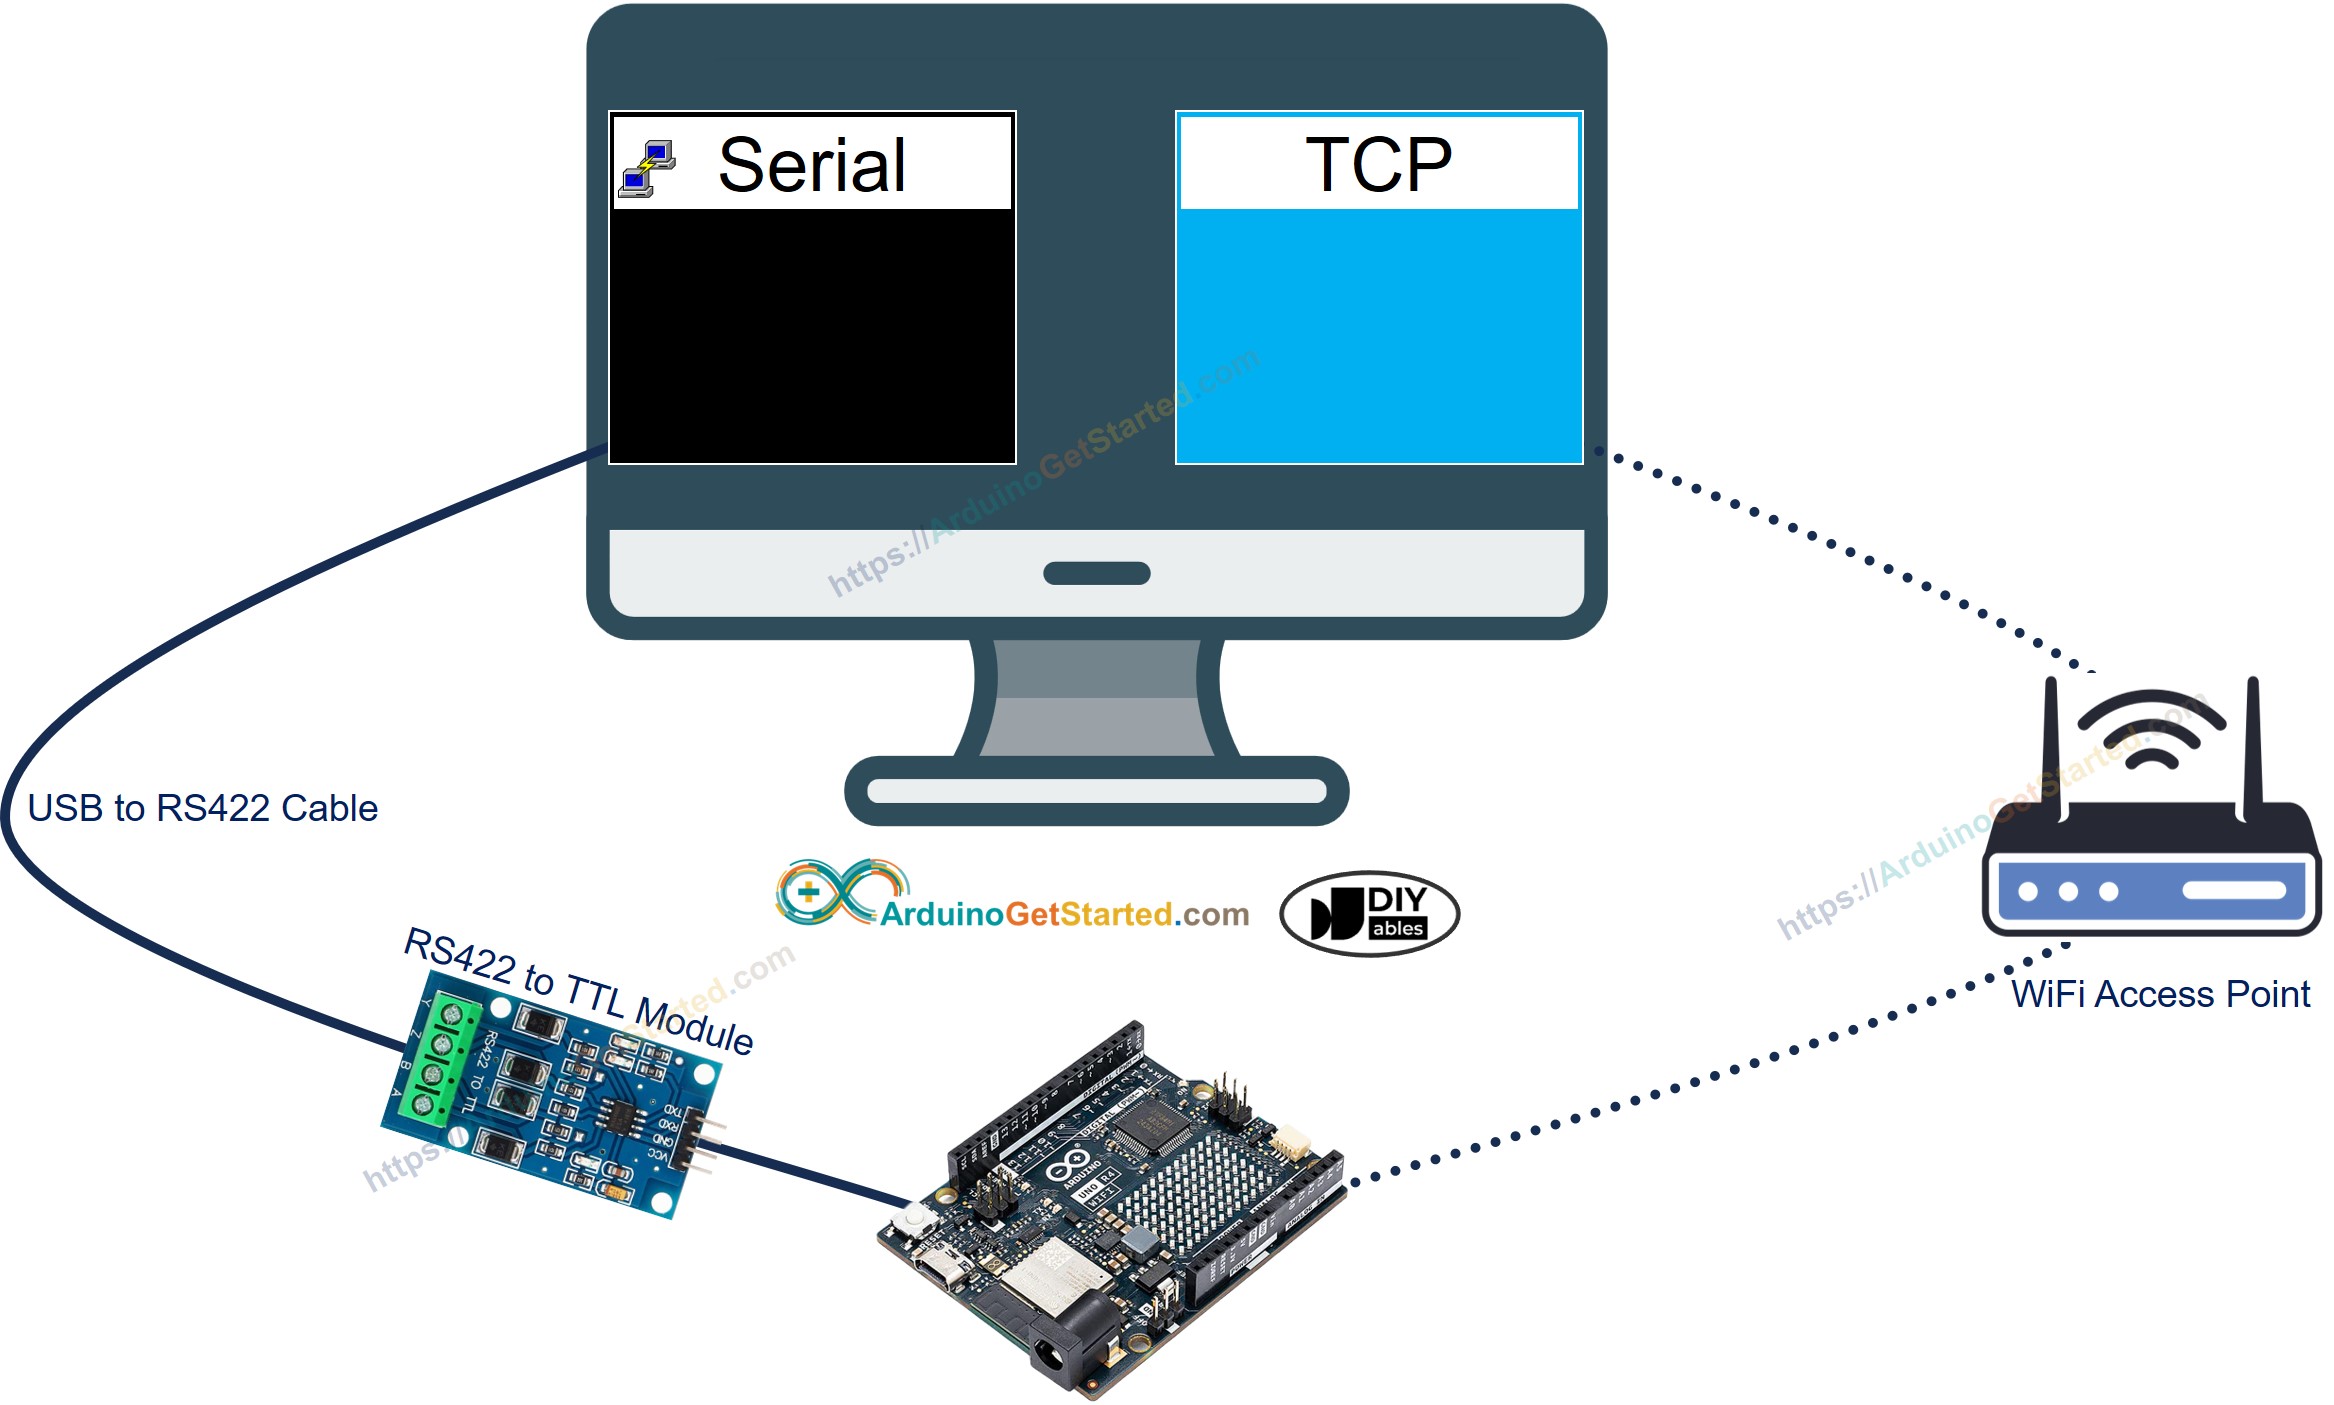
- Serial Software (on your PC) → RS-422 → Arduino → WiFi → TCP Server Software (on your PC).
- TCP Server Software (on your PC) → WiFi → Arduino → RS-422 → Serial Software (on your PC).

To do it, follow the below steps:
- If this is the first time you use Arduino Uno R4, see how to setup environment for Arduino Uno R4 on Arduino IDE.
- Connect Arduino Uno R4 WiFi to your PC by using TTL-to-RS422 module and RS422-to-USB cable as above wiring diagram
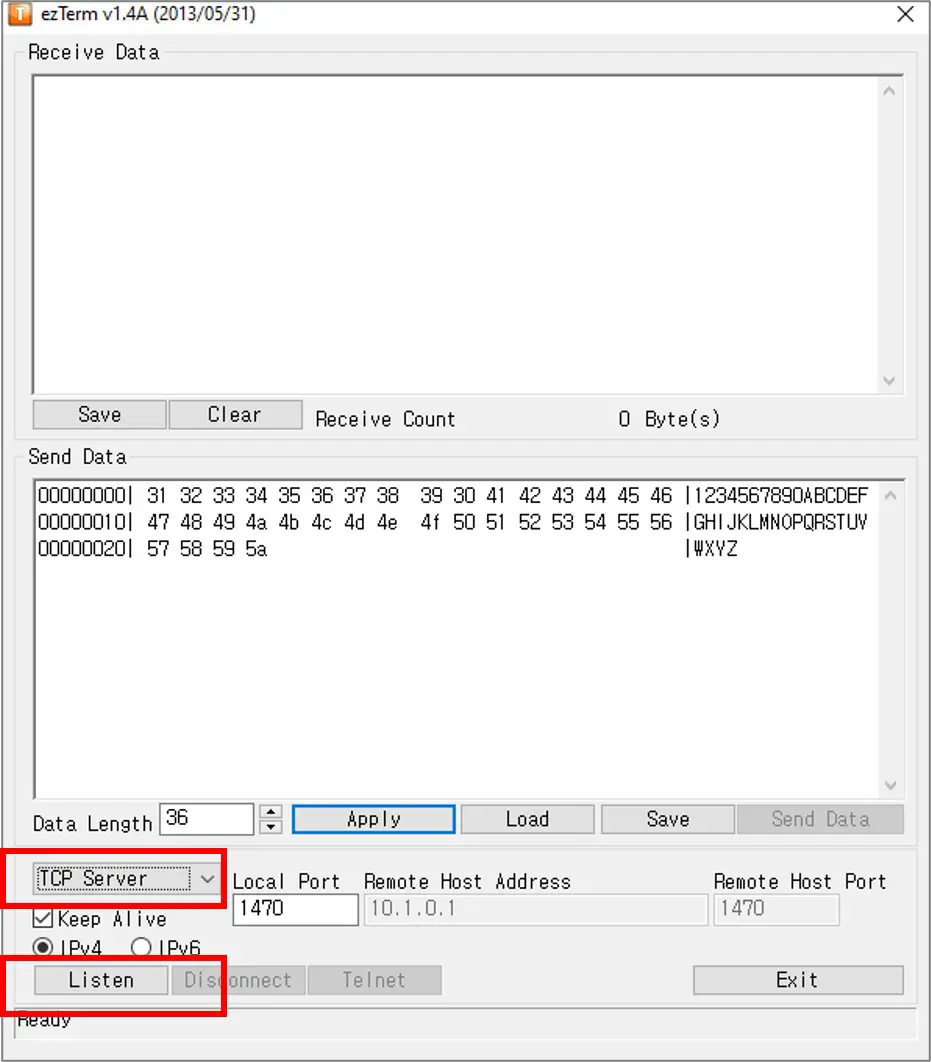
- Install a TCP server software program like ezTerm
- Open the Serial program and configure the Serial parameters (COM port, baurate...)
- Open the TCP server program and configure it as TCP Server, then click Listen button

- Open Command Prompt on your PC.
- Find the IP address of your PC by running the below command:
- The output looks like below:
- Update the IP address of TCP Server (Your PC) in the Arduino code. In the above example: 192.168.0.26
- Compile and upload code to Arduino board by clicking Upload button on Arduino IDE
- Type some data from the Serial program to send it to Arduino via Serial.
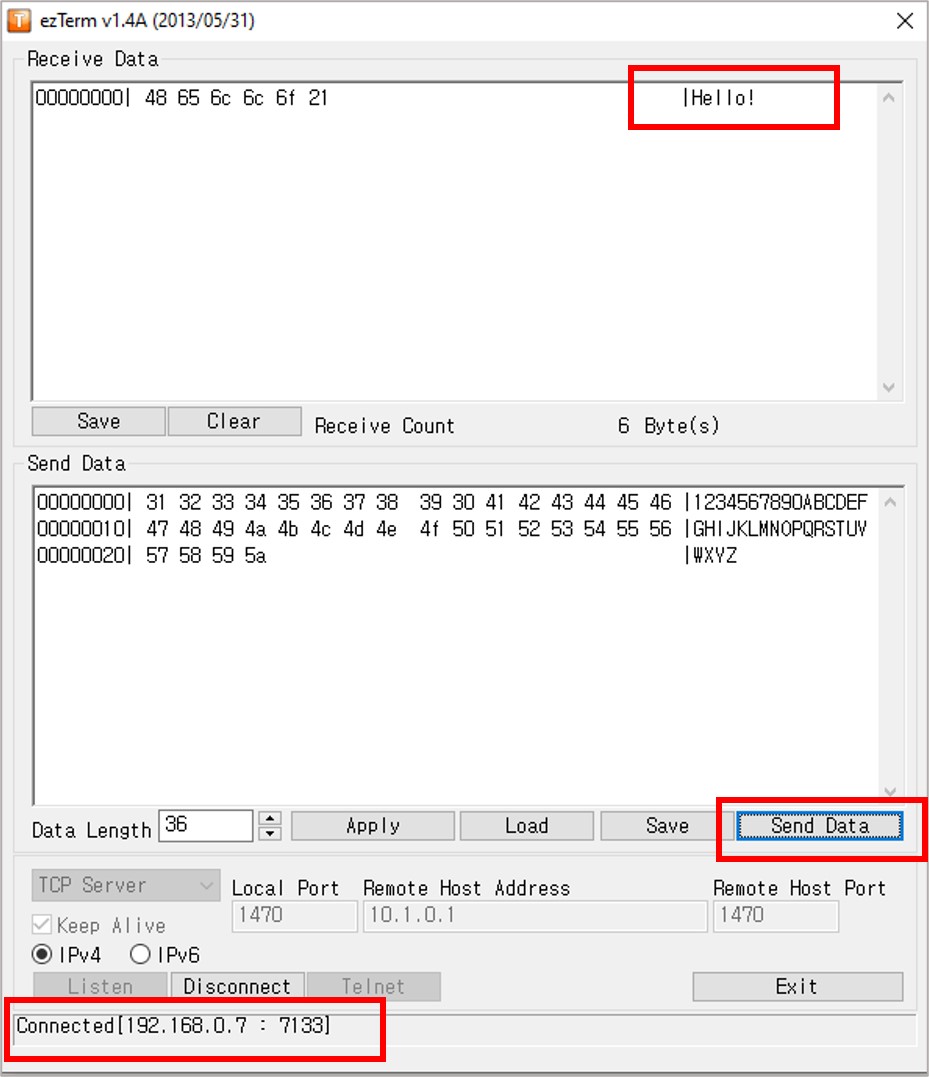
- If successful, you will see the echo data on the TCP server software.
- Type some data from the TCP server program to send it to Arduino via TCP.
- If successful, you will see the echo data on the Serial program.

If you want to use a comercial RS422-To-Ethernet converter, you can buy CSE-H55N2 Serial To Ethernet Converter
Video Tutorial
We are considering to make the video tutorials. If you think the video tutorials are essential, please subscribe to our YouTube channel to give us motivation for making the videos.
