This tutorial teaches you how to program an Arduino to make use multiple buttons simultaneously without using the delay() function. The tutorial provides code in two ways:
Arduino multiple buttons with debounce
Arduino multiple buttons with debounce using arrays.
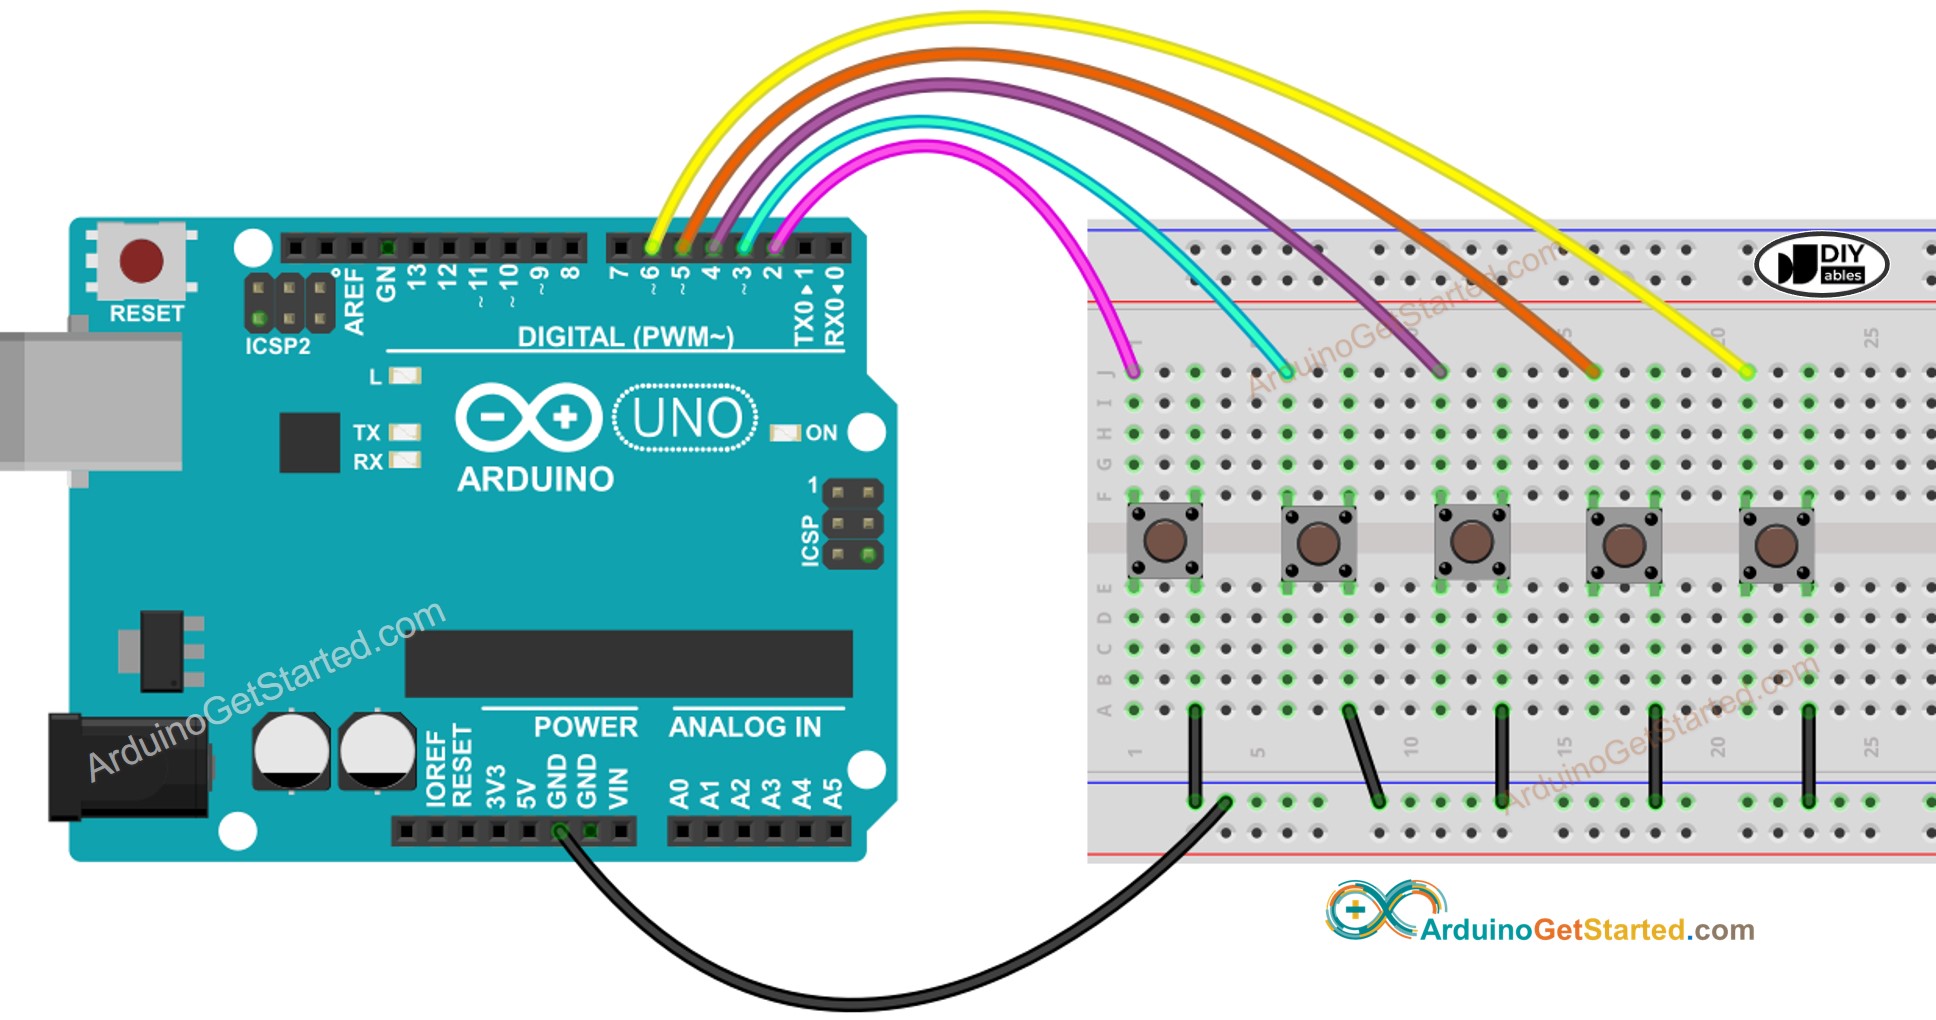
We will use five buttons as examples. You can easily modify it to adapt for two buttons, four buttons, or even more.
Disclosure: Some links in this section are Amazon affiliate links. If you make a purchase through these links, we may earn a commission at no extra cost to you. Additionally, some links direct to products from our own brand, DIYables .
About Button
We have a detailed button tutorial including hardware pinout, working principle, Arduino wiring, and code instructions. Learn more here:
Applications needing to detect state changes (pressed/released)
Thankfully, the ezButton library streamlines this process by internally managing debounce and button events. This relieves users from the task of managing timestamps and variables when utilizing the library. Additionally, employing an array of buttons can enhance code clarity and brevity.
/* * Created by ArduinoGetStarted.com * * This example code is in the public domain * * Tutorial page: https://arduinogetstarted.com/tutorials/arduino-multiple-button */#include <ezButton.h>#define BUTTON_NUM 5 // the number of buttons#define BUTTON_PIN_1 2 // The Arduino pin connected to the button 1#define BUTTON_PIN_2 3 // The Arduino pin connected to the button 2#define BUTTON_PIN_3 4 // The Arduino pin connected to the button 3#define BUTTON_PIN_4 5 // The Arduino pin connected to the button 4#define BUTTON_PIN_5 6 // The Arduino pin connected to the button 5ezButtonbutton1(BUTTON_PIN_1); // create ezButton object for button 1ezButtonbutton2(BUTTON_PIN_2); // create ezButton object for button 2ezButtonbutton3(BUTTON_PIN_3); // create ezButton object for button 3ezButton button4(BUTTON_PIN_4); // create ezButton object for button 4ezButton button5(BUTTON_PIN_5); // create ezButton object for button 5voidsetup() {Serial.begin(9600);button1.setDebounceTime(100); // set debounce time to 100 millisecondsbutton2.setDebounceTime(100); // set debounce time to 100 millisecondsbutton3.setDebounceTime(100); // set debounce time to 100 milliseconds button4.setDebounceTime(100); // set debounce time to 100 milliseconds button5.setDebounceTime(100); // set debounce time to 100 milliseconds}voidloop() {button1.loop(); // MUST call the loop() function firstbutton2.loop(); // MUST call the loop() function firstbutton3.loop(); // MUST call the loop() function first button4.loop(); // MUST call the loop() function first button5.loop(); // MUST call the loop() function first// get button state after debounceint button1_state = button1.getState(); // the state after debounceint button2_state = button2.getState(); // the state after debounceint button3_state = button3.getState(); // the state after debounceint button4_state = button4.getState(); // the state after debounceint button5_state = button5.getState(); // the state after debounce/* Serial.print("The button 1 state: "); Serial.println(button1_state); Serial.print("The button 2 state: "); Serial.println(button2_state); Serial.print("The button 3 state: "); Serial.println(button3_state); Serial.print("The button 4 state: "); Serial.println(button4_state); Serial.print("The button 5 state: "); Serial.println(button5_state); */if (button1.isPressed())Serial.println("The button 1 is pressed");if (button1.isReleased())Serial.println("The button 1 is released");if (button2.isPressed())Serial.println("The button 2 is pressed");if (button2.isReleased())Serial.println("The button 2 is released");if (button3.isPressed())Serial.println("The button 3 is pressed");if (button3.isReleased())Serial.println("The button 3 is released");if (button4.isPressed())Serial.println("The button 4 is pressed");if (button4.isReleased())Serial.println("The button 4 is released");if (button5.isPressed())Serial.println("The button 5 is pressed");if (button5.isReleased())Serial.println("The button 5 is released");}
Quick Steps
Do the wiring as above image.
Connect the Arduino board to your PC via a USB cable
Open Arduino IDE on your PC.
Select the right Arduino board (e.g. Arduino Uno) and COM port.
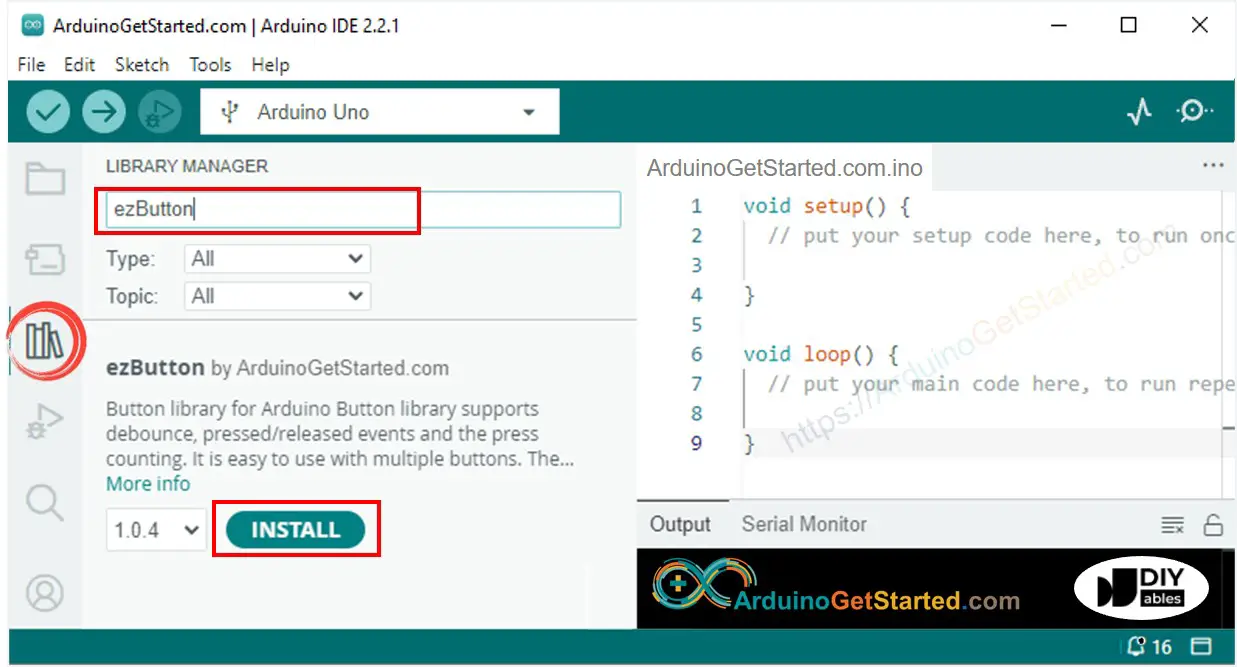
Click to the Libraries icon on the left bar of the Arduino IDE.
Search “ezButton”, then find the button library by ArduinoGetStarted
Click Install button to install ezButton library.
Copy the above code and paste it to Arduino IDE.
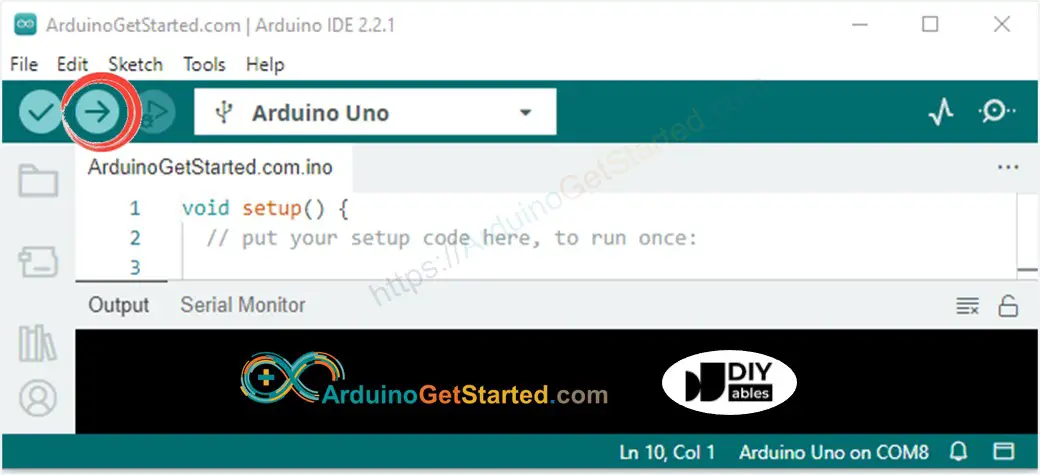
Compile and upload code to Arduino board by clicking Upload button on Arduino IDE
Open Serial Monitor on Arduino IDE
Press and release the button one by one
Newbiely | Arduino IDE 2.3.8
──
☐
✕
File
Edit
Sketch
Tools
Help
Arduino Uno
Newbiely.ino
···
8Serial.println("Hello World!");
Output
Serial Monitor
Message (Enter to send message to 'Arduino Uno' on 'COM15')
New Line
9600 baud
The button 1 is pressed
The button 1 is released
The button 2 is pressed
The button 2 is released
The button 3 is pressed
The button 3 is released
The button 4 is pressed
The button 4 is released
The button 5 is pressed
The button 5 is released
Ln 11, Col 1
Arduino Uno on COM15
2
Arduino Code - Multiple Buttons using array
We can improve the code above by employing an array of buttons. The following code utilizes this array to handle button objects.
/* * Created by ArduinoGetStarted.com * * This example code is in the public domain * * Tutorial page: https://arduinogetstarted.com/tutorials/arduino-multiple-button */#include <ezButton.h>#define BUTTON_NUM 5 // the number of buttons#define BUTTON_PIN_1 2 // The Arduino pin connected to the button 1#define BUTTON_PIN_2 3 // The Arduino pin connected to the button 2#define BUTTON_PIN_3 4 // The Arduino pin connected to the button 3#define BUTTON_PIN_4 5 // The Arduino pin connected to the button 4#define BUTTON_PIN_5 6 // The Arduino pin connected to the button 5ezButtonbuttonArray[] = {ezButton(BUTTON_PIN_1),ezButton(BUTTON_PIN_2),ezButton(BUTTON_PIN_3),ezButton(BUTTON_PIN_4),ezButton(BUTTON_PIN_5)};voidsetup() {Serial.begin(9600);for (byte i = 0; i < BUTTON_NUM; i++) {buttonArray[i].setDebounceTime(100); // set debounce time to 100 milliseconds }}voidloop() {for (byte i = 0; i < BUTTON_NUM; i++) buttonArray[i].loop(); // MUST call the loop() function firstfor (byte i = 0; i < BUTTON_NUM; i++) {// get button state after debounceint button_state = buttonArray[i].getState(); // the state after debounce/* Serial.print("The button "); Serial.print(i + 1); Serial.print(": "); Serial.println(button_state); */if (buttonArray[i].isPressed()) {Serial.print("The button ");Serial.print(i + 1);Serial.println(" is pressed"); }if (buttonArray[i].isReleased()) {Serial.print("The button ");Serial.print(i + 1);Serial.println(" is released"); } }}
Video Tutorial
We are considering to make the video tutorials. If you think the video tutorials are essential, please subscribe to our YouTube channel to give us motivation for making the videos.
You can share the link of this tutorial anywhere. Howerver, please do not copy the content to share on other websites. We took a lot of time and effort to create the content of this tutorial, please respect our work!